I have been using the 5D Mark II a bit more since my last update, so I thought I'd post some more thoughts on it. I've also been using a Nikon G to EOS adapter with my Tokina 10-17mm/3.5-4.5 fisheye lens.
Canon 5D Mark II use notes
In my initial report, I said I didn't know how to quickly set exposure compensation. By reading the manual (ugh!) I found out how to do this now. The power switch has three positions, off, on, and a line that points to the rear dial. By setting it to the line, the rear dial can be used for setting exposure compensation.
I don't know if setting the power switch to the line has any other effects. The manual didn't mention anything.
There is a quiet shutter mode (actually two modes), but they only seem to work in Liveview.
Non TTL speedlights (non Canon units) work when taking a photo using Liveview. This is an improvement from my 450D.
You need to set Liveview shooting to stills only otherwise auto iso is used for all liveview stills (as well as video). See this thread for more info: POTN: 5d mark ii automatically adjusting iso in live view.
If you want the camera to use the set aperture when recording a video, you need to set the Liveview screen setting to Movie display. Otherwise it will automatically adjust the aperture, even if you are in Aperture priority or Manual mode.
The Shutter speed range in video is limited to a slowest shutter speed of 1/30s.
Nikon G to Canon EOS lens adapter
The Nikon adapter I bought was the Nikon G AF-S AI F Lens to Canon EOS EF Mount Adapter 600D 550D 1100D 60D 7D 5D
from eBay seller phoebe-g. The cost was £16. They sell both a chipped and unchipped adapter.
The chipped adapter is not programmable though, and they do not offer a version with a programmable chip. So I bought the unchipped adapter, and then a separate EMF programmable dandelion chip: EMF AF Confirm Chip For M42 AI CY To Canon EOS Adapter
from ebay seller cam.plus.
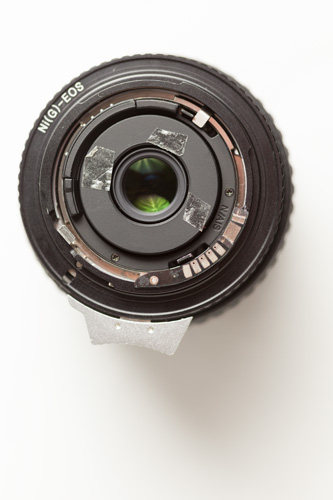
Unfortunately the chip and adapter have no guide as to where the chip should be placed, so it is a case of trial and error. When placed correctly, there is only a small amount of surface between the chip and the adapter. A lot of the chip pokes out over the inside edge of the adapter. So gluing it in place securely is difficult.
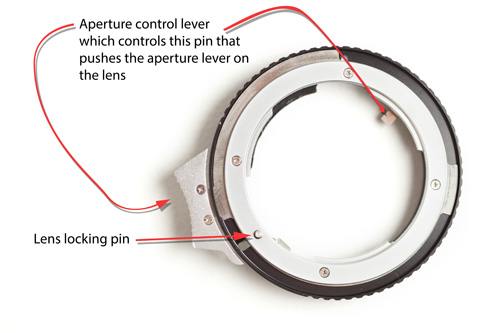
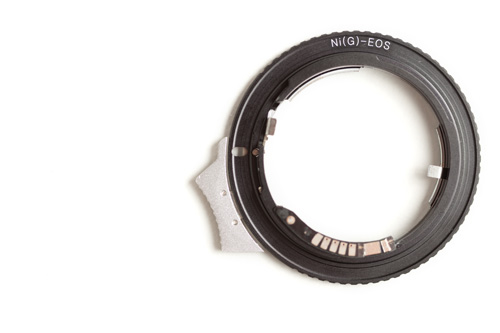
The image below shows the lens release switch for releasing the Nikon Lens. It is a hinged switch, so pushing down on the tab pulls up the lens locking pin on the lens side. With the switch held down you can then to rotate the adapter off the lens.
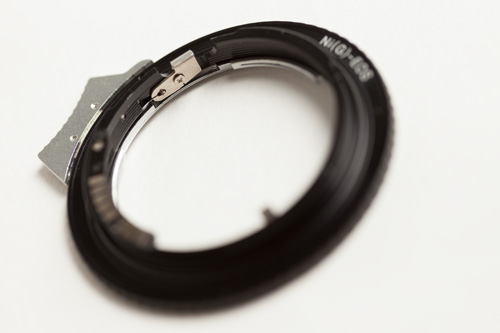
The adapter is a tight fit on my Nikon lenses (so tight at first I thought it didn't fit). Most Nikon G lenses have a rubber gasket on the rear that acts as weather sealing. This needs to be removed for the adapter to fit these lenses.
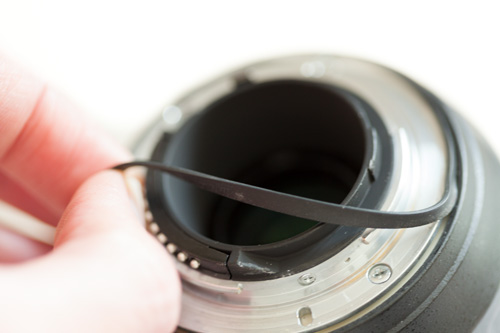
For my 70-300mm VR lens, I just pulled the rubber ring out with my fingers. Apparently you should be able to push it back into its groove with some tweezers (or similar thin instrument), so the removal isn't permanent.
Using the Tokina 10-17mm/3.5-4.5 fisheye lens on the 5D Mark II with the Nikon G to Canon EOS adapter
Something that will be permanent though, is the removal of the lens hood from my Tokina fisheye lens. I haven't done this yet, but removal of the lens hood should make the lens much more useful.
At the moment I get vignetting in the corners with the lens set to 17mm, and at 10mm quite a bit of the image is taken up by the lens hood. Searching the internet, quite a few people have done this, and I didn't note anyone saying that lens flare was any worse with the hood removed.
If you are thinking of buying the Tokina fisheye new, Tokina now sell a version of the lens that comes with no lens hood. I suspect they noticed that enough people were shaving their lenses that it was worthwhile to provide a "pre-shaved" version.
I have done some basic testing with the Tokina fisheye (with hood still intact), to determine the best focus and aperture setting to use. By this, I mean the settings that provide the greatest depth of field from near to far.
Unfortunately the Nikon adapter doesn't have very good markings for the aperture settings, and the lever movement from wide open to fully closed isn't very big.
For outdoors I found that setting the focus on the right half of the infinity symbol seems best.
For indoors, I found that setting the focus between (at the overlap of) the infinity and 0.4 markings seems better. This is for where nothing is more than a few metres away and you have items within a metre or so of the camera (normal sized rooms).
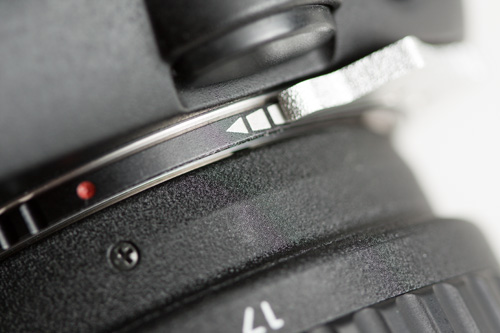
On the adapter, setting the aperture to the top of 2nd block just below the triangle / arrow seems to be best. I think this is probably about f/10.
As I said earlier, I get vignetting in the corners with the lens at 17mm, and this can cause blending problems when stitching panoramas. I do want to shave the lens, but am rather hesitant about putting hacksaw to metal.
On my Nodal Ninja 3 pano head, the 5D Mark II needs to be set a bit further back than the D200. This causes an issue as the 5DM2 is too far back to swing the upper arm down for the zenith shot. You need to loosen the camera and move it up a bit, swing the arm down, then move the camera back down into the correct position.
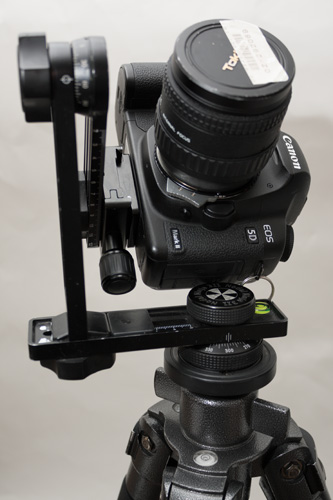
This could get quite annoying if you are doing lots of panoramas, or want to work quickly. Of course, with a larger pano head or a ring type head, this wouldn't be a problem.
Notes on manual focusing with the 5D Mark II and EG-S focusing screen
Regarding manual focusing with the 5DM2 and the EG-S screen, I am still finding it very tricky to focus accurately. But then again, I have not been practising a lot with it either.
Although the EG-S focusing screen is meant for f/2.8 and faster lenses, I had no problem seeing through the viewfinder with my f/5.6 Nikon 70-300mm lens. Certainly the view is darker, but during the daytime I think it's fine brightness wise.
That's all for this post. I hope to do a test comparing DoF and diffraction on the 450D (APS-C) versus the 5D Mk II (FF) for macro to see if full frame offers any advantage. My guess is that it doesn't. I also hope to do a follow up post on using rear mounted gelatin / acetate filters for IR work with the IS pro. So I will post those once I've done the tests and written up the results.

Leave a Reply