What are Dodging and Burning?
Dodging is the process of making an area brighter, while Burning is the process of making an area darker.
In the days of Film you would do your Dodging and Burning when developing the print, either by masking off the area you wanted to lighten by using a Dodging tool, or by Masking off all of the image except the area you wanted to darken (Burn). You would shake the Dodging tool or Burn mask slightly to prevent a harsh edge around the area you wanted to dodge or burn.
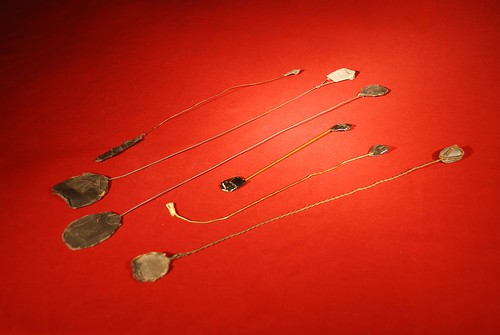
Dodging tools by TTA, on Flickr
Because you couldn't see the results of your dodging and burning until the paper was developed in the chemical bath, dodging and burning was a rather inexact process, and could require multiple prints to be developed until you got the correct timing that each area needed to be dodged or burned for.
Luckily, with Digital photography the Dodging and Burning process is much easier. Photoshop comes with a Dodge tool and a Burn tool, but these require you work with them on the actual image layer, rather than a separate layer. So if you come back to your image later and decide you don't like the Dodging and Burning you did, there's no way to change it.
Below I explain an alternative to the Dodge and Burn tools in Photoshop, which allows you to work non-destructively (on a separate layer to the original image), and also a solution for Nikon Capture NX, which doesn't have its own Dodge and Burn tools.
Non Destructive Dodge and Burn in Photoshop
In Photoshop, open the image, then create a new layer and set the blending mode to 'Overlay'.

Now you can paint on this new layer using black paint to burn an area (make it darker) or white paint to dodge an area (make it brighter). You'll get the best results if you use a soft edged brush, to smooth the transition between the area of the image that you're dodging and burning, and the rest of the image. You should also use a low opacity brush (or control the brush opacity with a Wacom tablet), and make multiple strokes to slowly build up the Dodge/Burn effect.

Non Destructive Dodge and Burn in Capture NX 1
Capture NX 1 doesn't contain Dodge and Burn tools, but that doesn't mean you can't do dodging and burning in Capture NX. I'm not sure if Capture NX2 contains dodge/burn tools, but if it doesn't, then this technique should apply equally to Capture NX2 as well.
The technique is similar to the Photoshop method for Non Destructive Dodging and Burning, except in Capture NX you can't paint with different colours (or shades of grey to be more accurate), so what you need to do is to create 2 layers - one for Dodging, and the other for Burning.
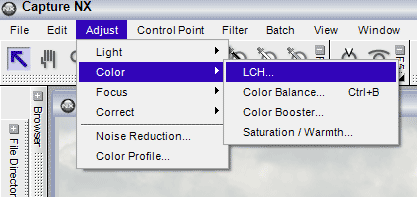
From the top Menu in Capture NX choose 'Adjust', then 'Color', then 'LCH...'
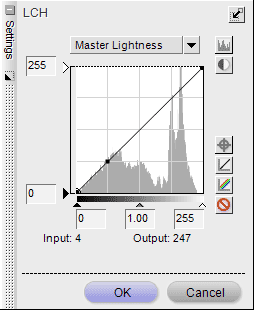
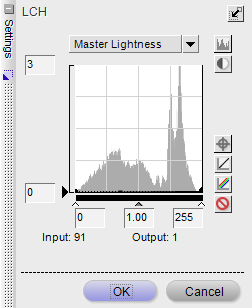
The LCH Curve dialog should look something like this.
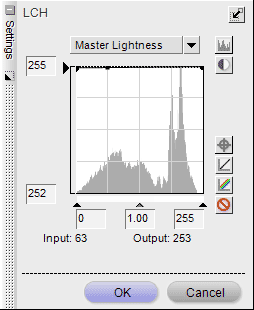
Grab the black arrow to the bottom left corner of the curve, and drag it up to the top so it looks like this.
Press 'OK'.
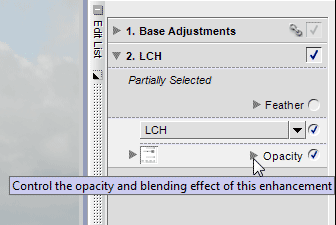
On the 'Edit List' palette, click the arrow next to 'Opacity' for the LCH layer you just created.
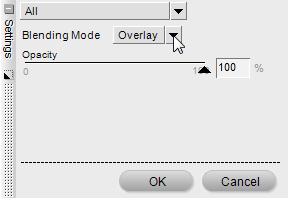
On the Settings palette that opens up, change the Blending Mode to Overlay, then press 'OK'.
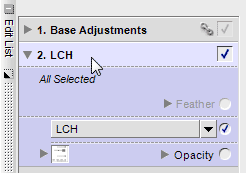
In the Edit list palette, click on the LCH layer to make it selected.

On the toolbar click the plus brush.
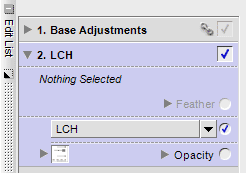
The text indicating the selection that the LCH layer is affecting should change from 'All Selected' to 'Nothing Selected'.
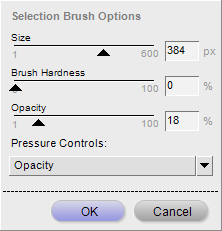
You can now proceed to paint in the brightness (Dodge the image) where needed. Again, as per the Photoshop method, you will need to use a low opacity brush or a Wacom tablet to control the opacity of the brush. To change the brush opacity in Capture NX, just right-click when you are using the brush.
For burning the image, repeat the process above, except that instead of pulling the black arrow at the bottom left of the LCH curve to the top, pull the white arrow from the top left of the LCH curve down to the bottom.
You don't have to use an LCH adjustment in Capture NX for dodging and burning, any type of layer where you can make it into a pure (or almost pure) white or black colour (e.g. a Colorize filter), and then set the blending mode to overlay will work. I find that I like the way the LCH adjustment looks best though, it seems to give a boost to color saturation as well, and leave areas looking more contrasty where the Dodge and Burn is applied.
Dodging and Burning Examples
Flickr has a good selection of images showing Dodging and Burning being put to good effect.

I personally do Levels and Curves in “multiply” for burning and “screen” mode for dodging.
If the effect is not strong enough, I copy and paste the adjustment and then fine tune the opacity of the layer.