In this post I'll be comparing a number of different IR cut filters to allow you to take 'normal' visible light photos and video on a full spectrum converted camera.
The camera I'm testing these on is the Canon R5. It's important to note that different camera manufacturers use different sensor glass stacks, and they optimise their output based on those stacks. So what is the best solution to make a full spectrum converted Canon camera give images like an unconverted one will not necessarily be the best solution to make a full spectrum converted Sony camera give images like an unconverted one, for example.
So the results I'll show here are only really applicable to the Canon R5, though I'd imagine most Canon cameras will use similar sensor glass stacks.
If you'd prefer a video version of the comparison, you can find that here: Taking normal photos with a full spectrum converted camera - IR Cut Filters compared.
Filters being compared
I'm including the glass thickness of each filter in the information below. Most of the Chinese filters tested are available in different thicknesses, the thicker the glass (assuming the same type of glass), the stronger the effect of the filter.
Please note that while I'm including links to some of the filters on AliExpress (and some of these are affiliate links), that does not mean that I recommend or endorse these sellers. The seller Tangsinuo, who I bought quite a few of these filters from, does also sell on Etsy, and possibly other marketplaces, but AliExpress is the cheapest I've found.
The other thing to note is that quite a few of the filters I'm testing are 49mm size, and I've rehoused the glass from the filter in a slim filter ring, or shaved down the filter ring it came in to turn it into a slim filter. So the photos below don't necessarily reflect exactly what you'll receive when you purchase the filter new.
- TSN575 2mm thick
-
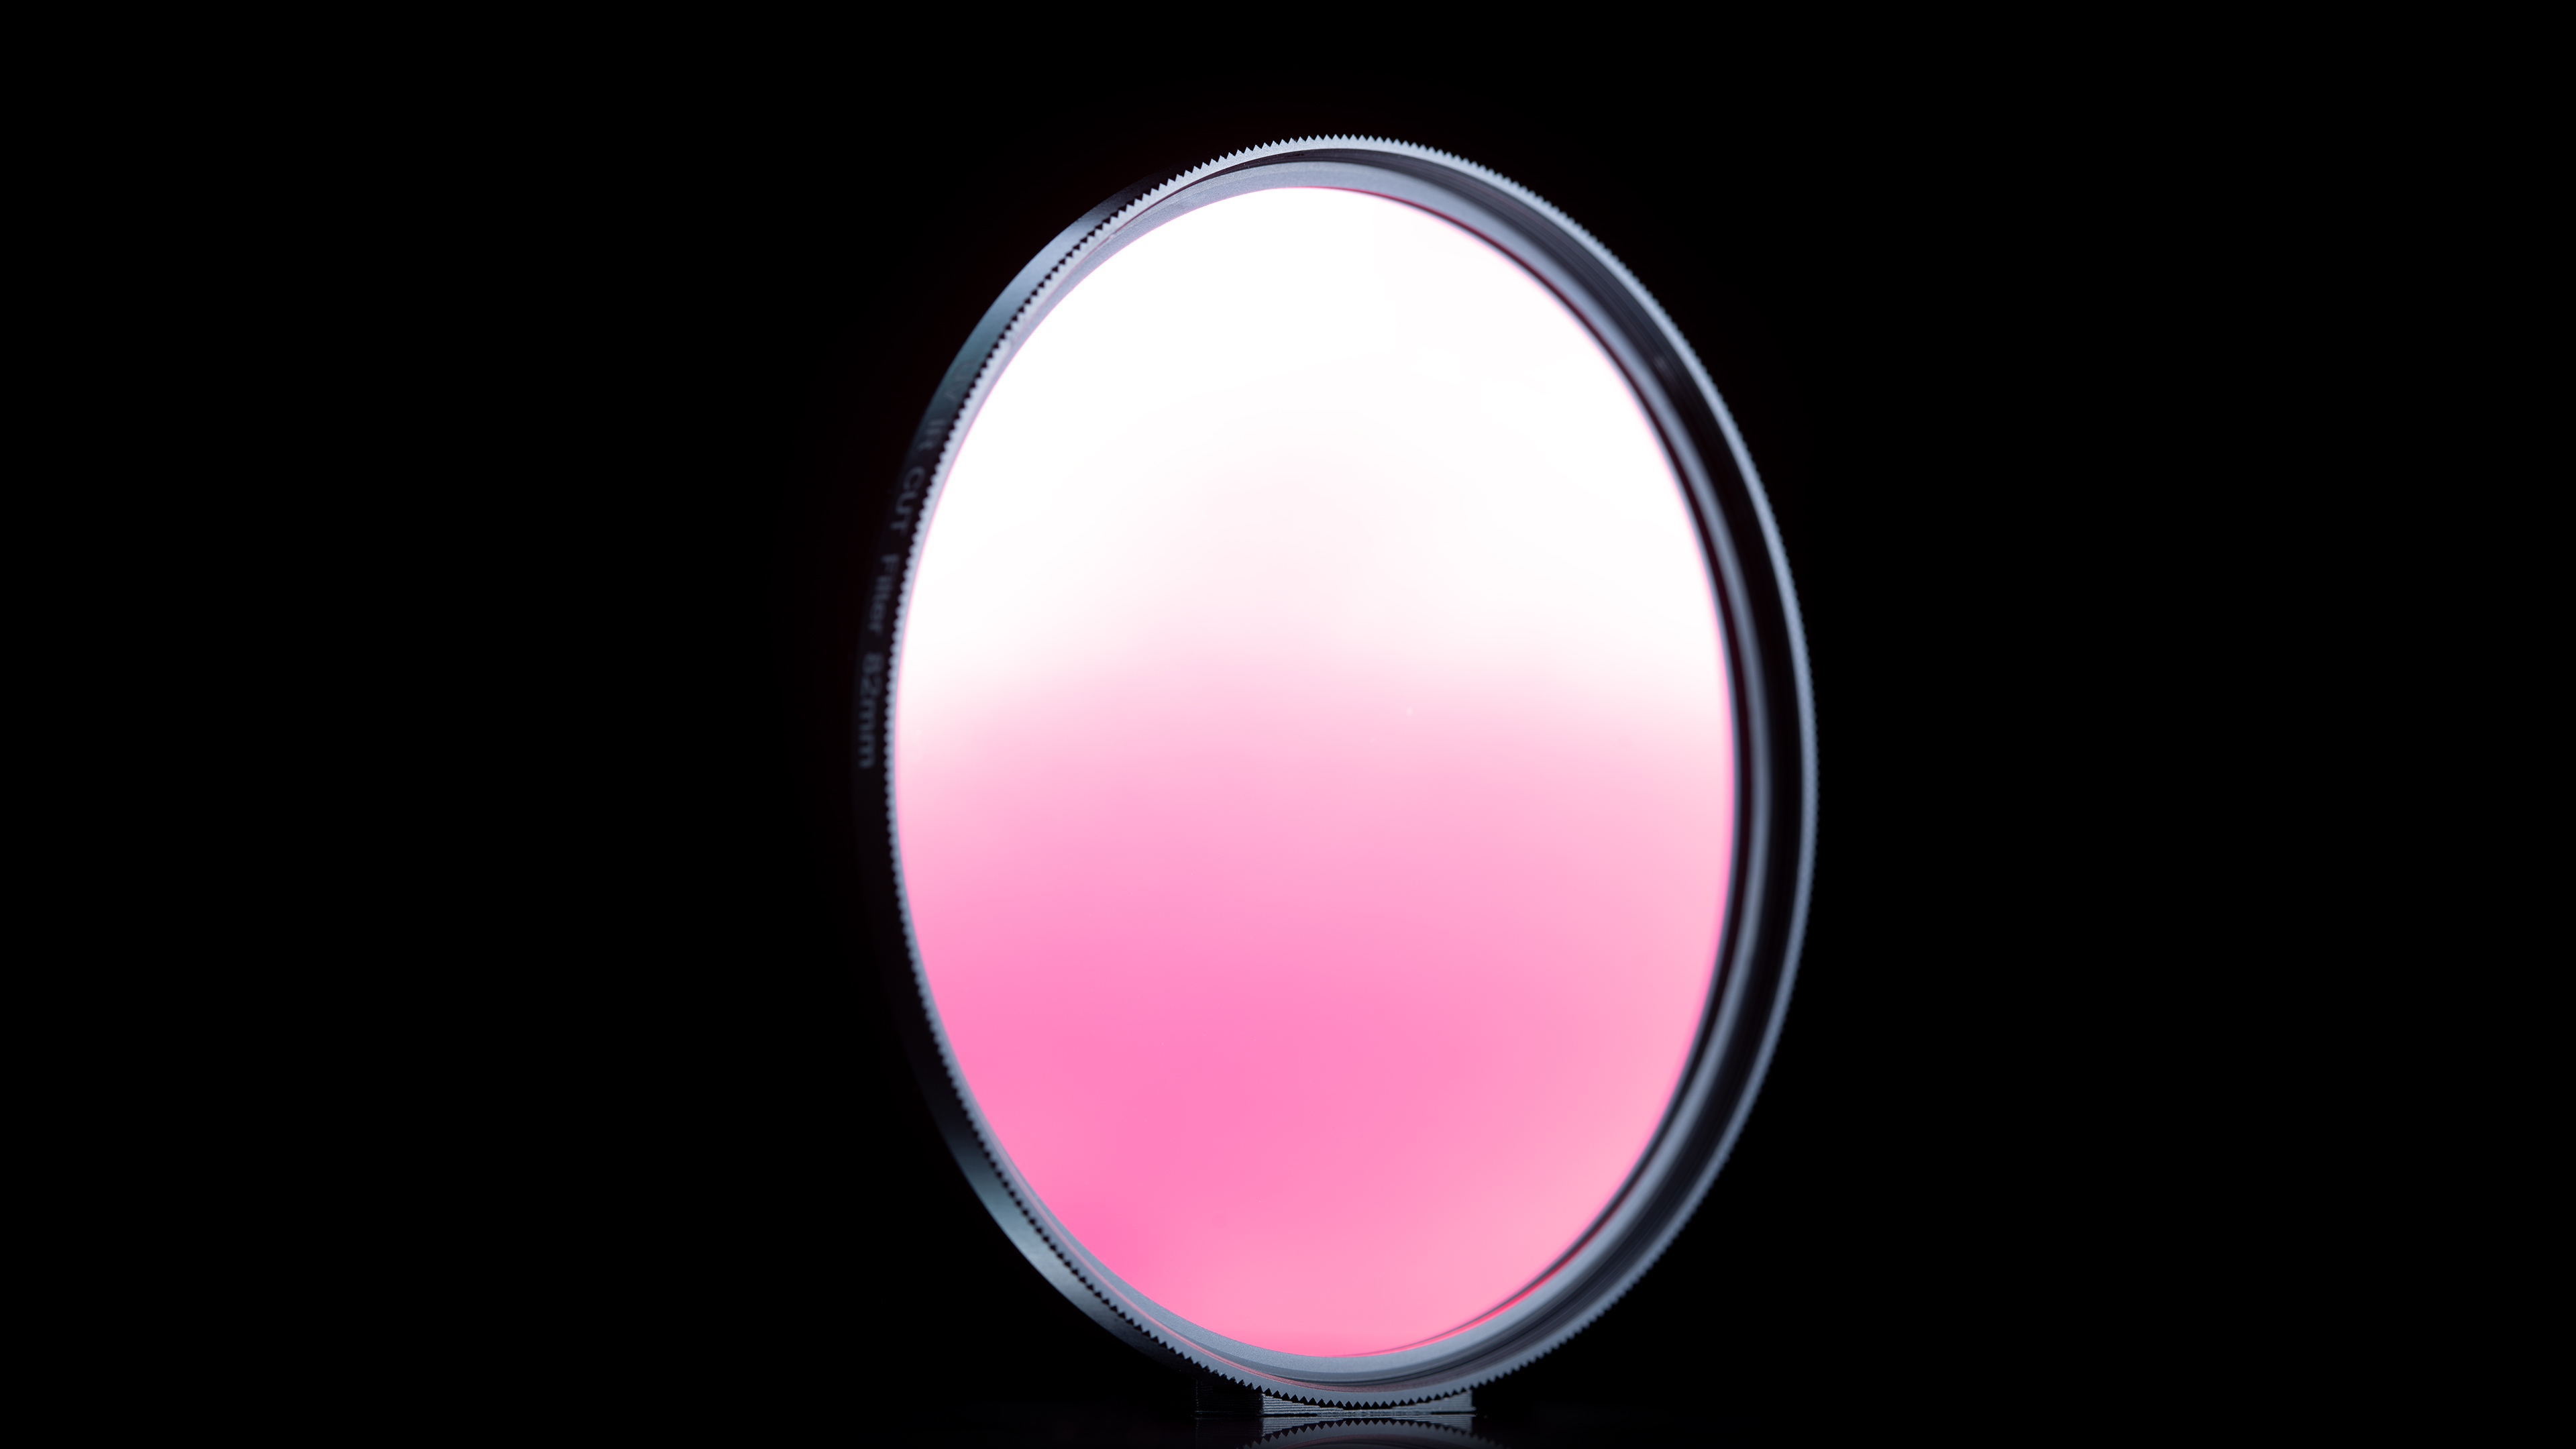
- Fotga UVIR cut 0.75mm thick
-
82mm:
49mm: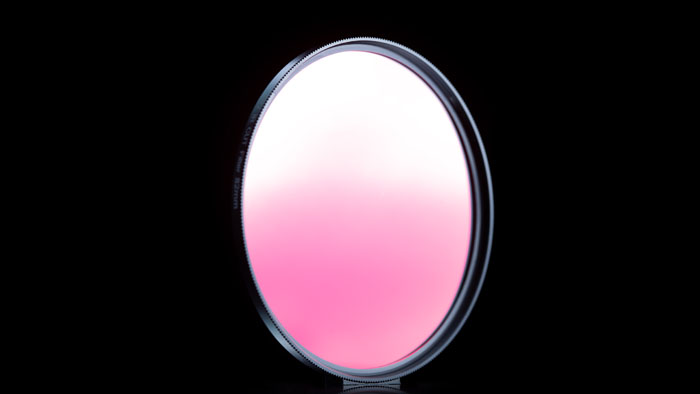

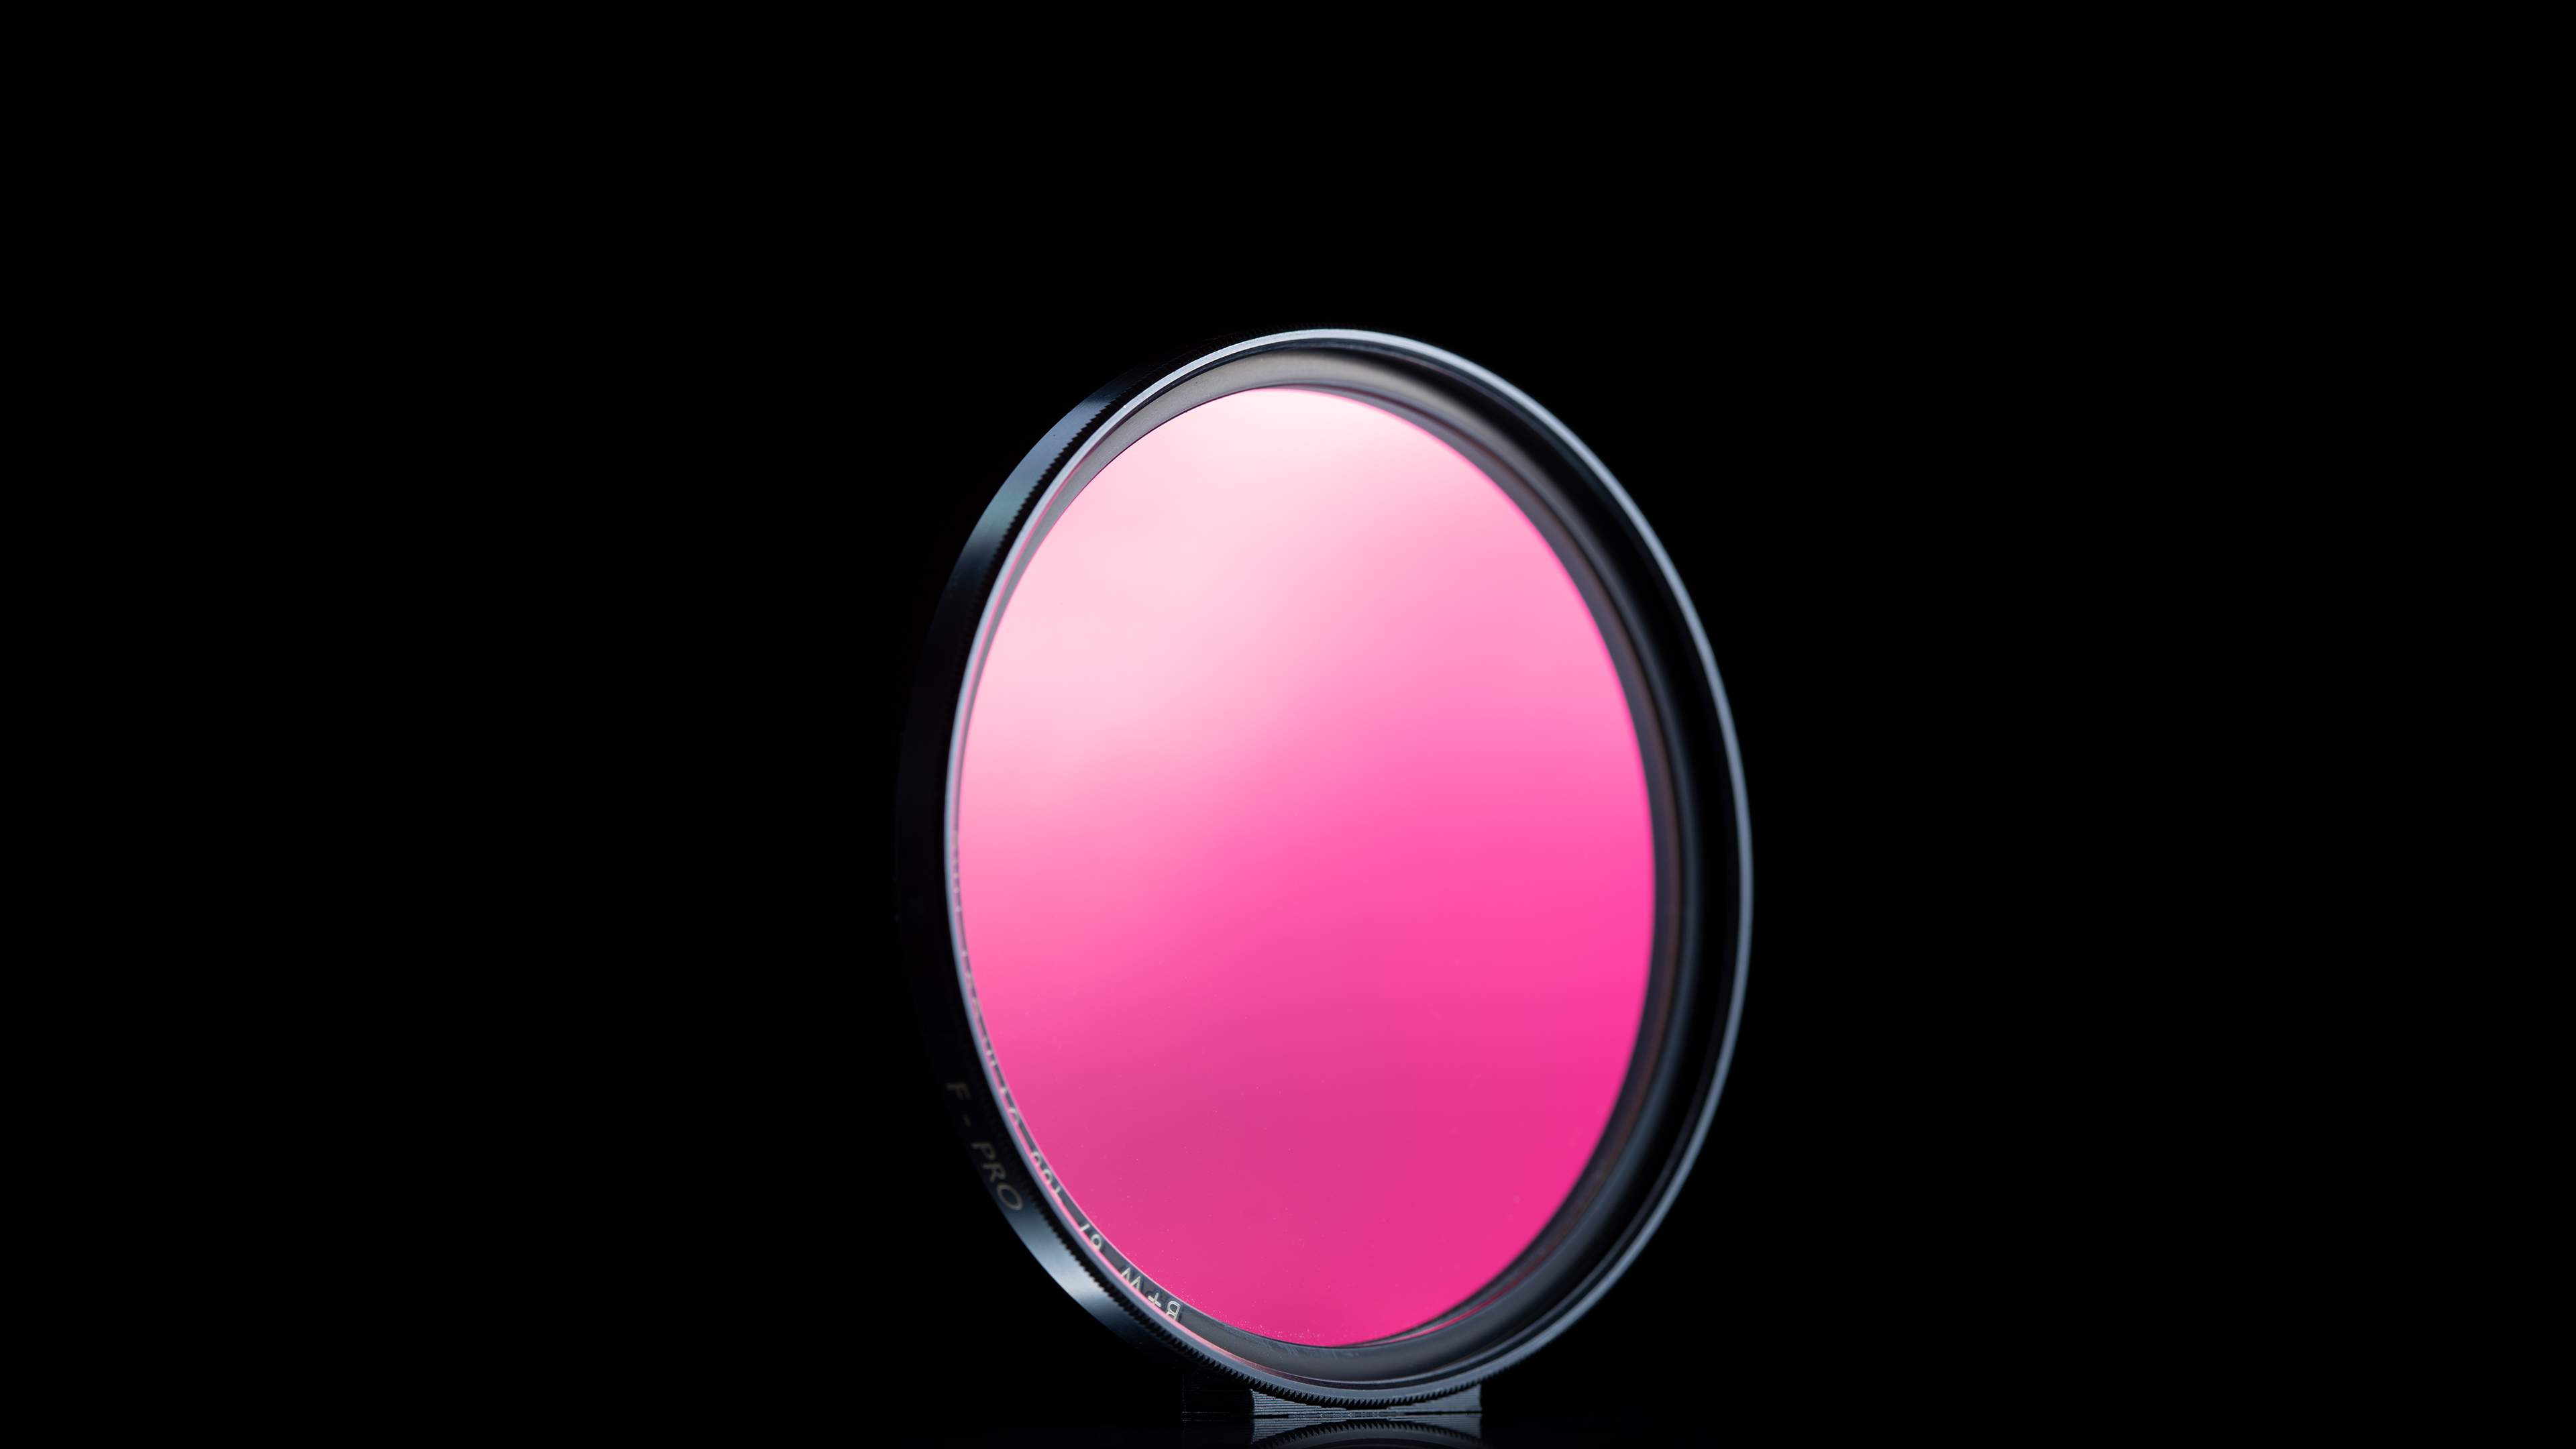
- B+W 486 UVIR cut 2.2mm thick
-

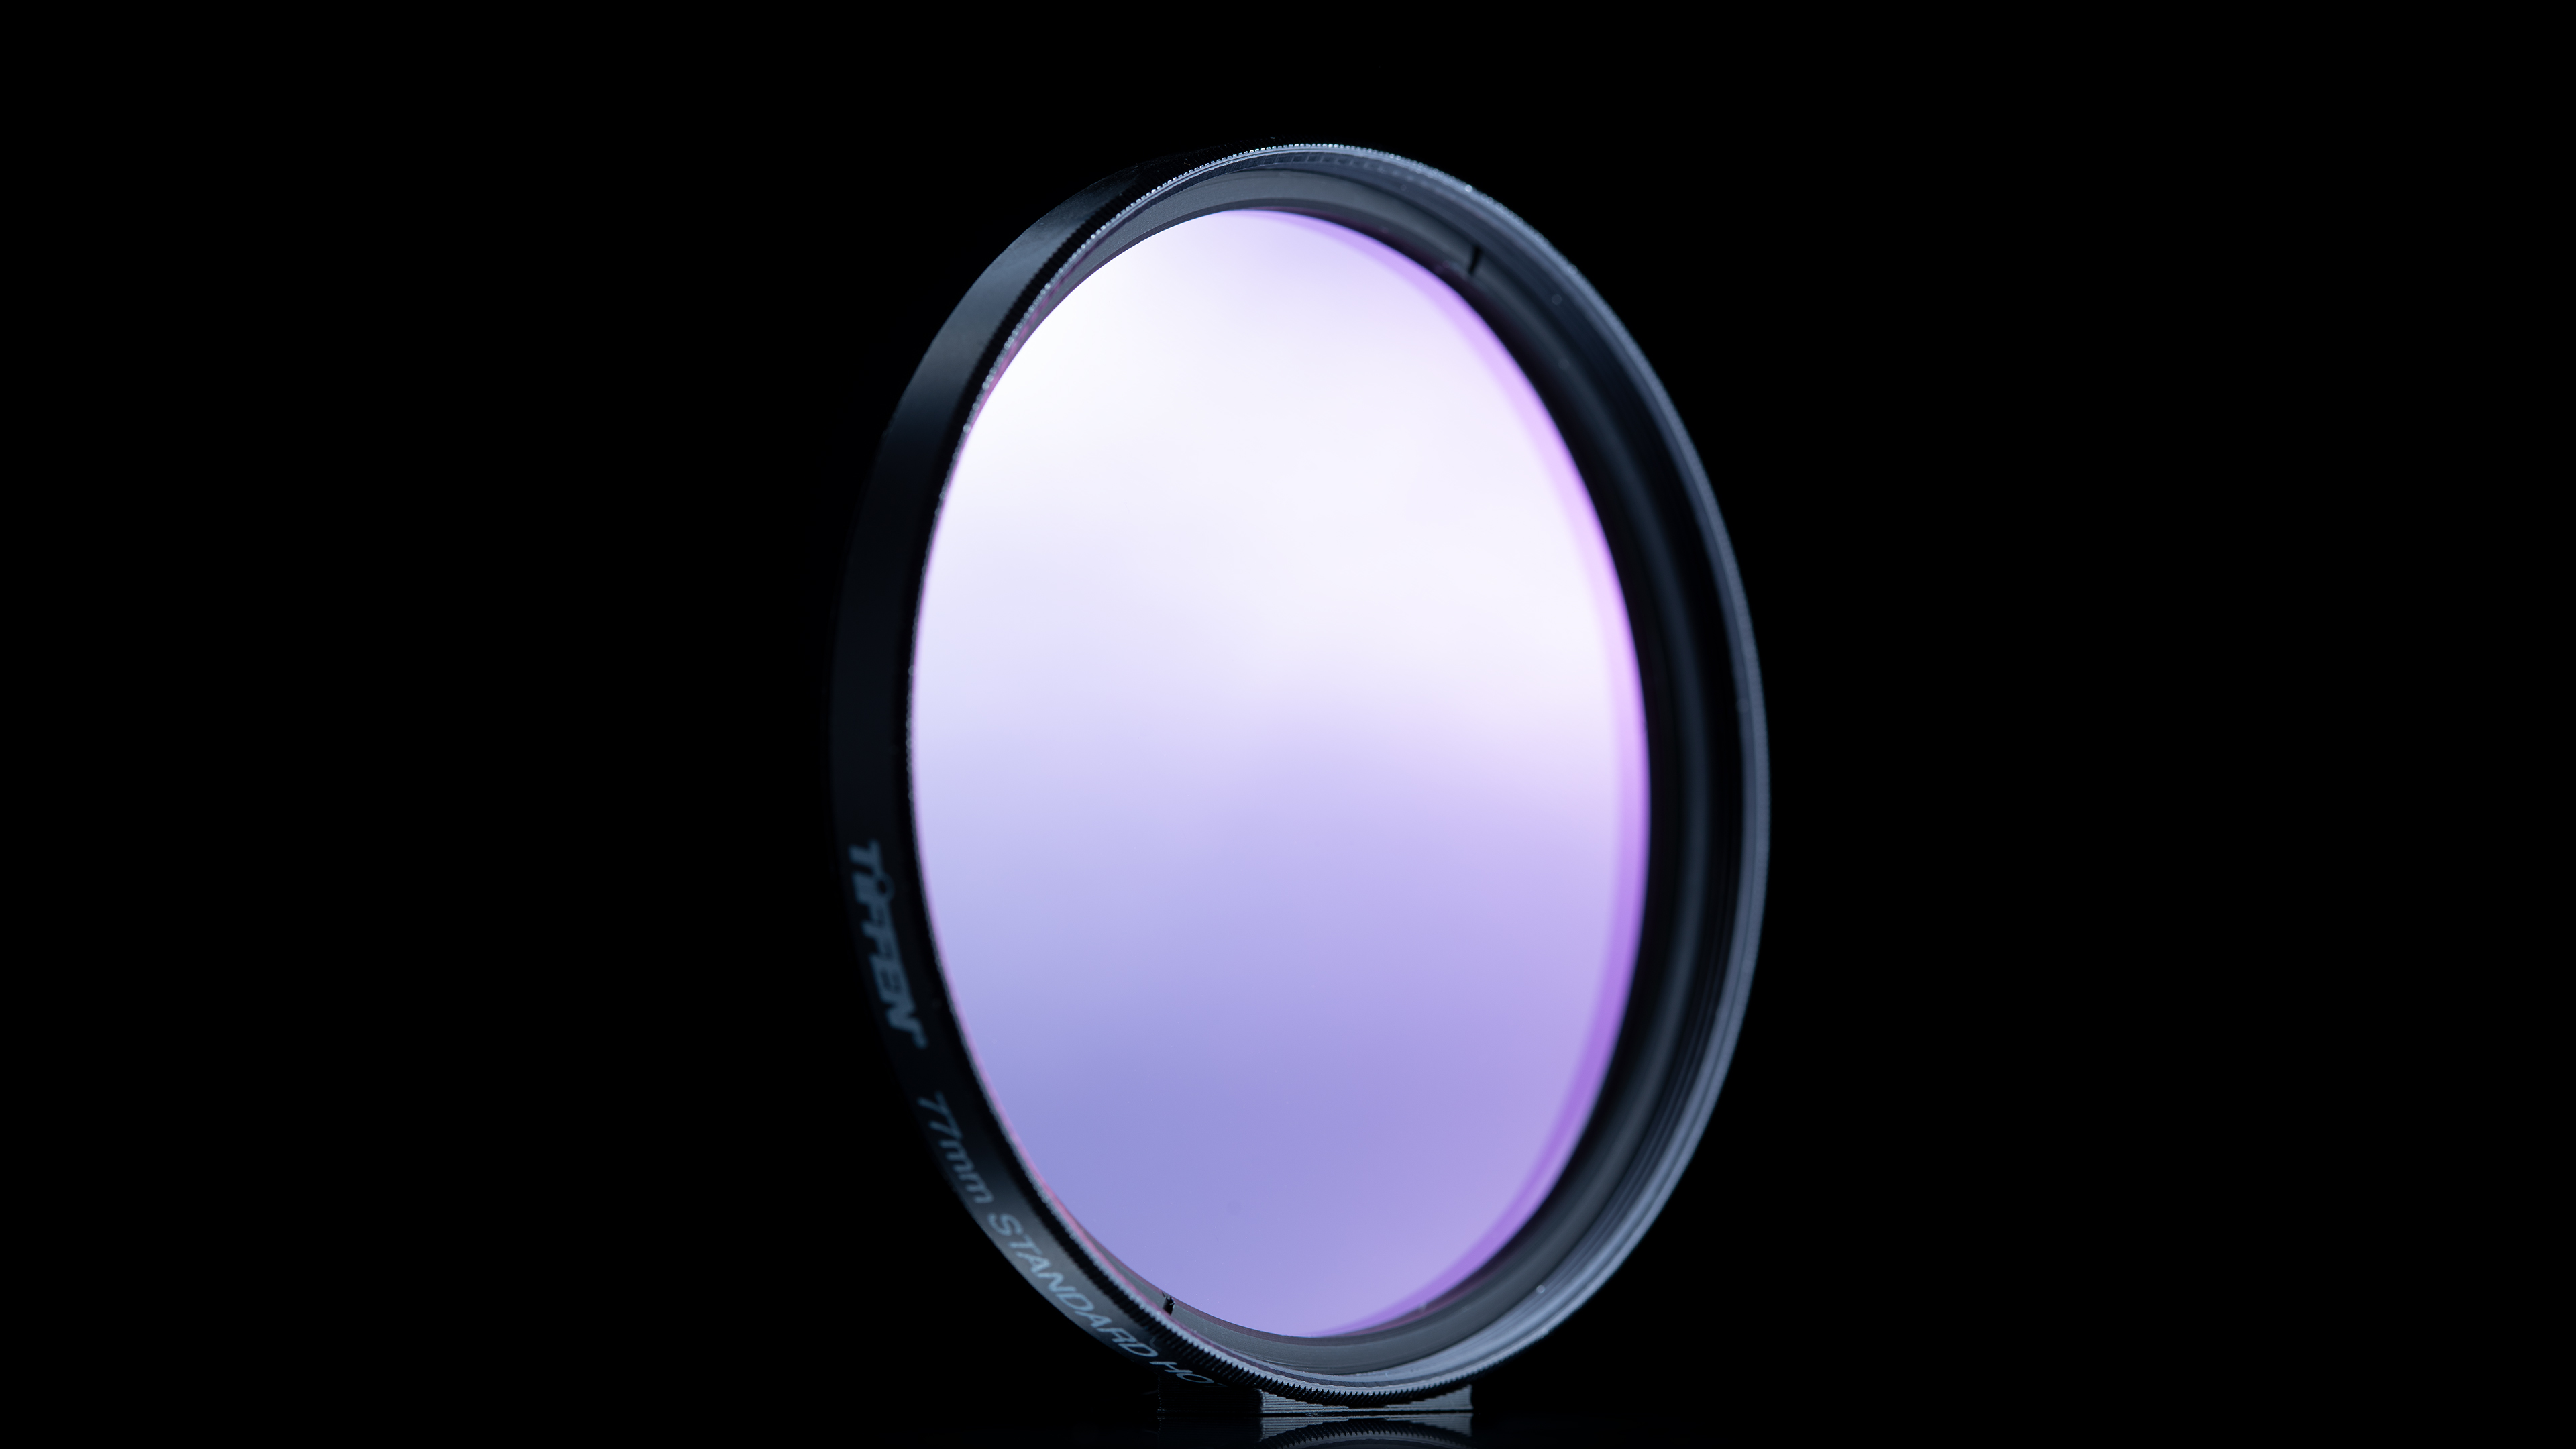
- Tiffen Standard Hot Mirror 2.4mm thick
-
- QB39 (BG39) 1mm thick
-

- QB40 (BG40) 1.5mm thick
-
- QB26 (BG18) 2mm thick
-
- Tangsinuo BCF 1.2mm thick
-
- Tangsinuo ICF 2mm thick
-

- QB21 (BG38) 2mm thick
-
- QB21 (BG38) 3mm thick
-

- Colour test
- Green vignetting on wide-angles test
- Flare test
- I had to contact the seller on AliExpress to get a 3mm thick version.
- Unconverted Sony A74 as an example of what the image 'should' look like
- No filter / Full spectrum


A couple of IR cut filters I have but did not include in this test are the Tiffen T1 IR cut and the SLR Magic Image Enhancer Pro. I've previously tested both of these and they seem to just be designed for unconverted cameras that have a slightly IR leaky sensor filter stack, like some of the earlier Blackmagic cameras. They don't cut enough IR to be useful for visible light photography with a full spectrum camera.
Colour comparison
We'll start off with the main test, comparing colour.
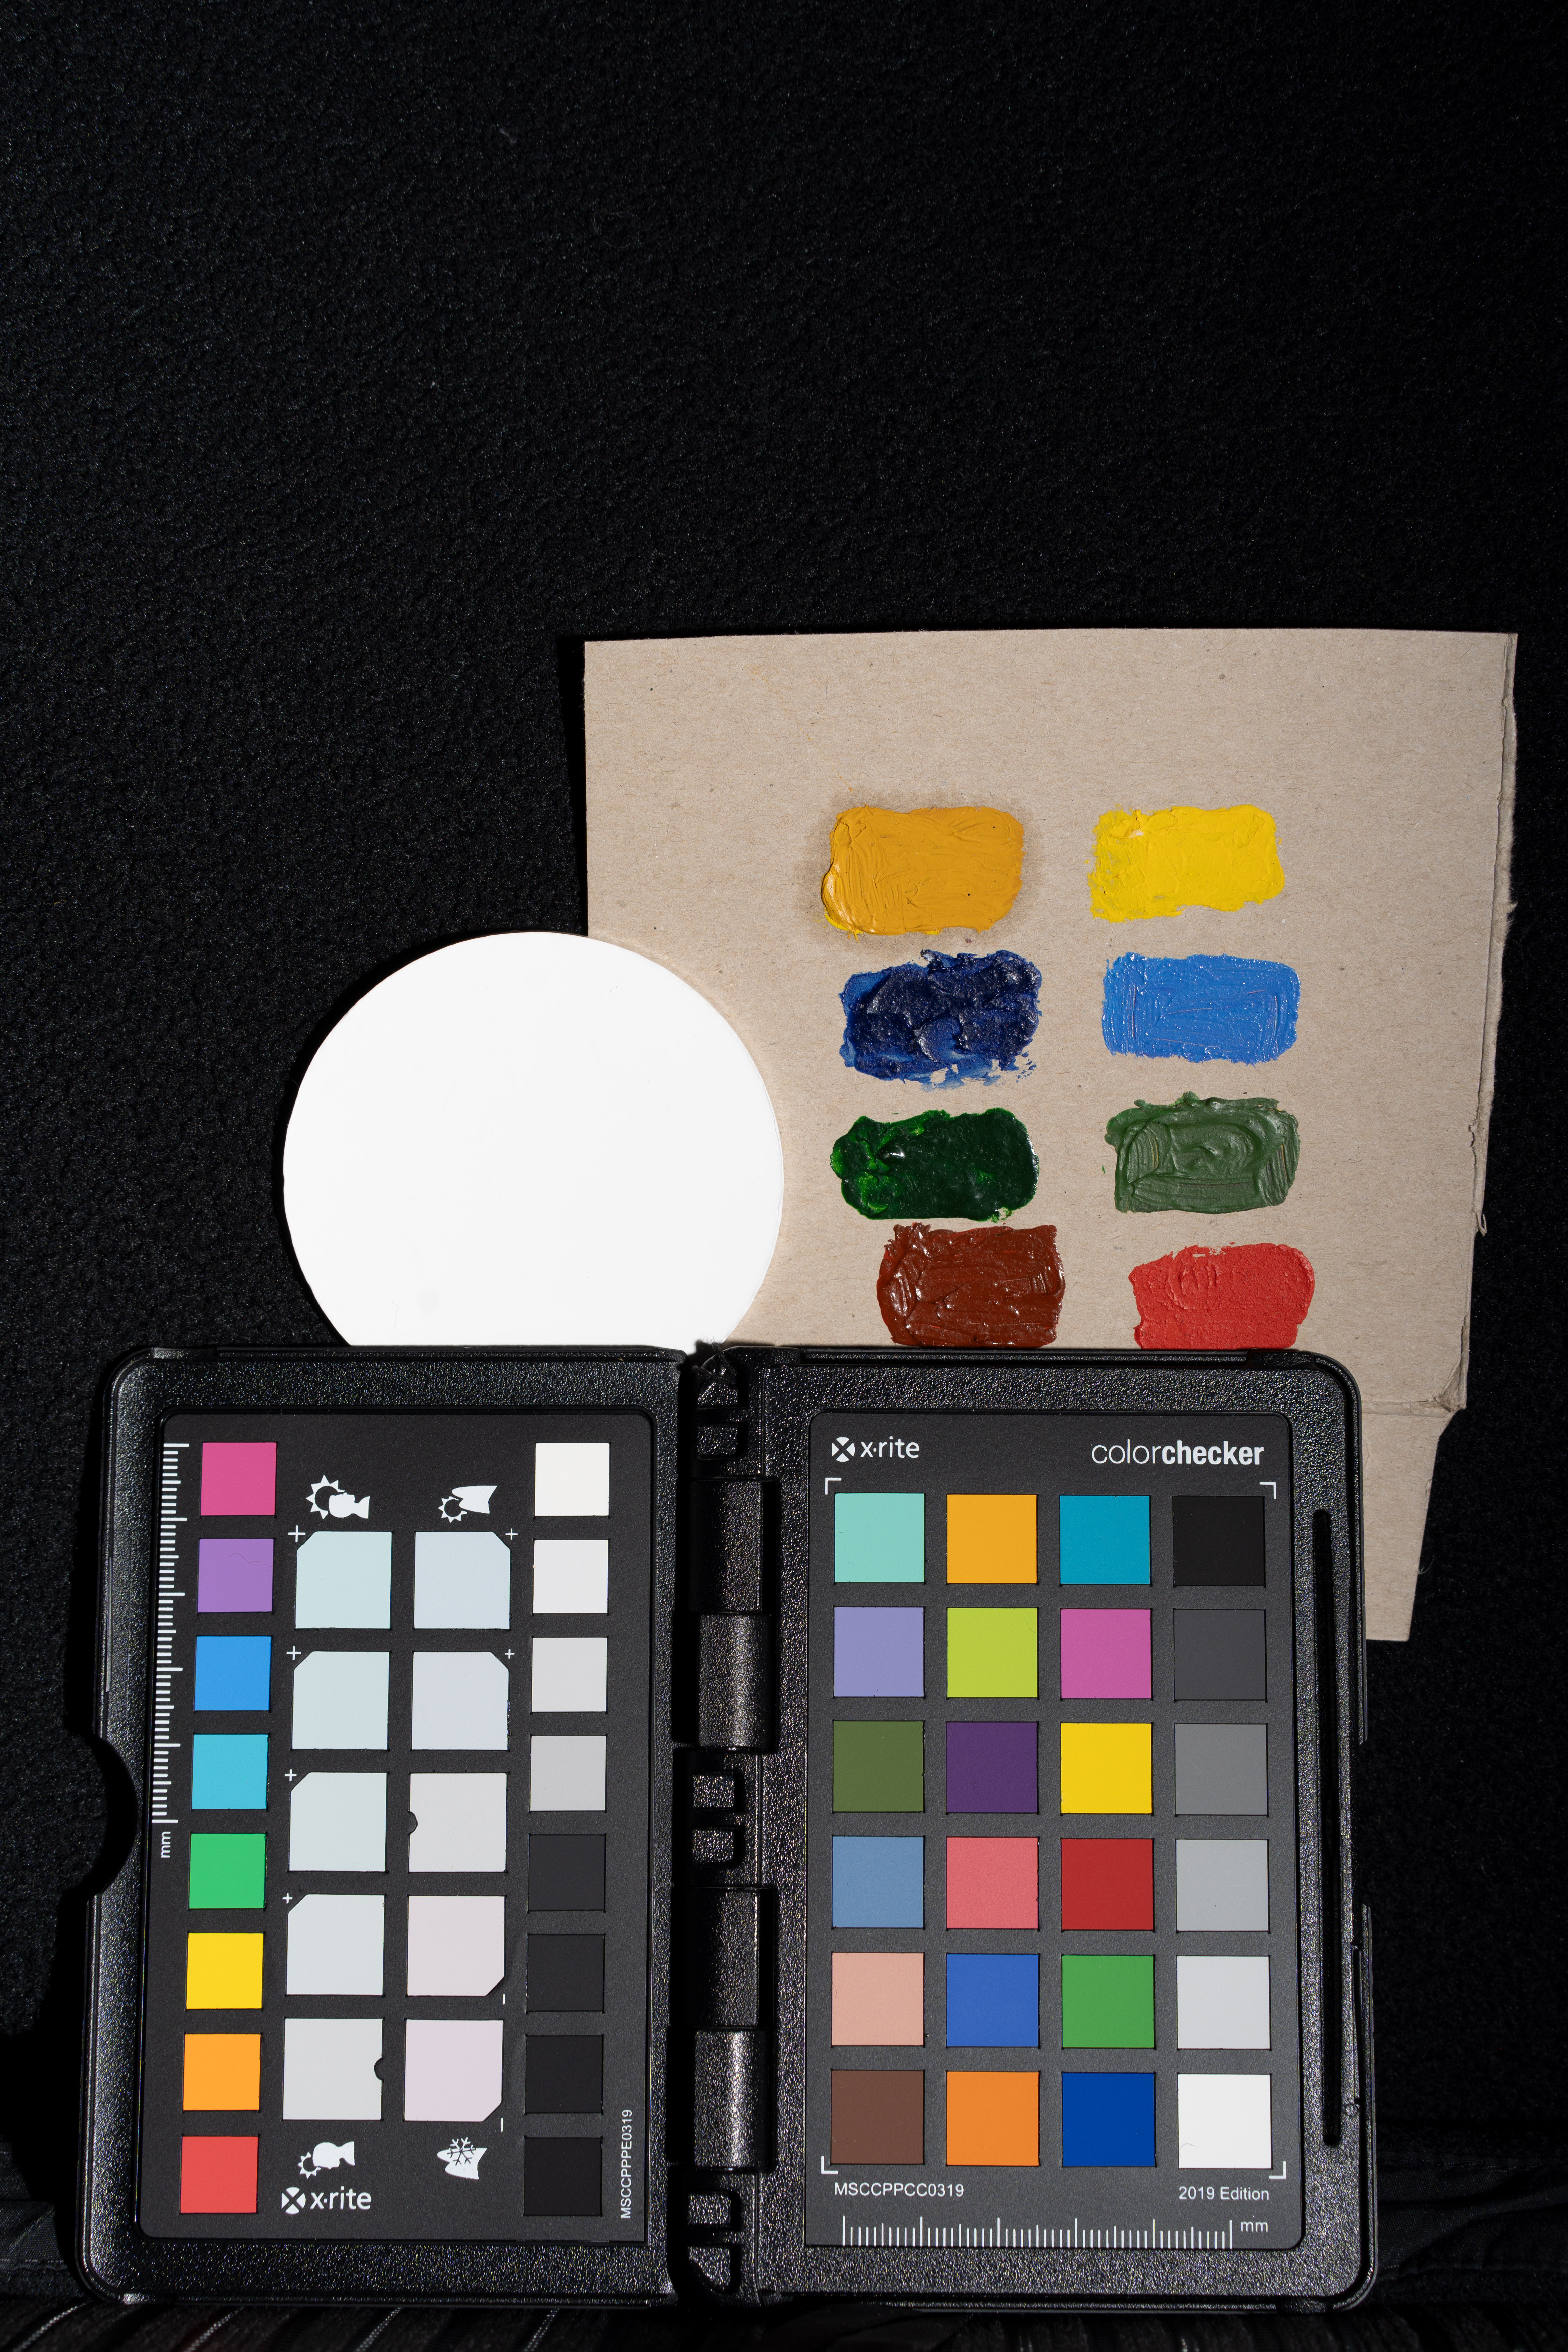
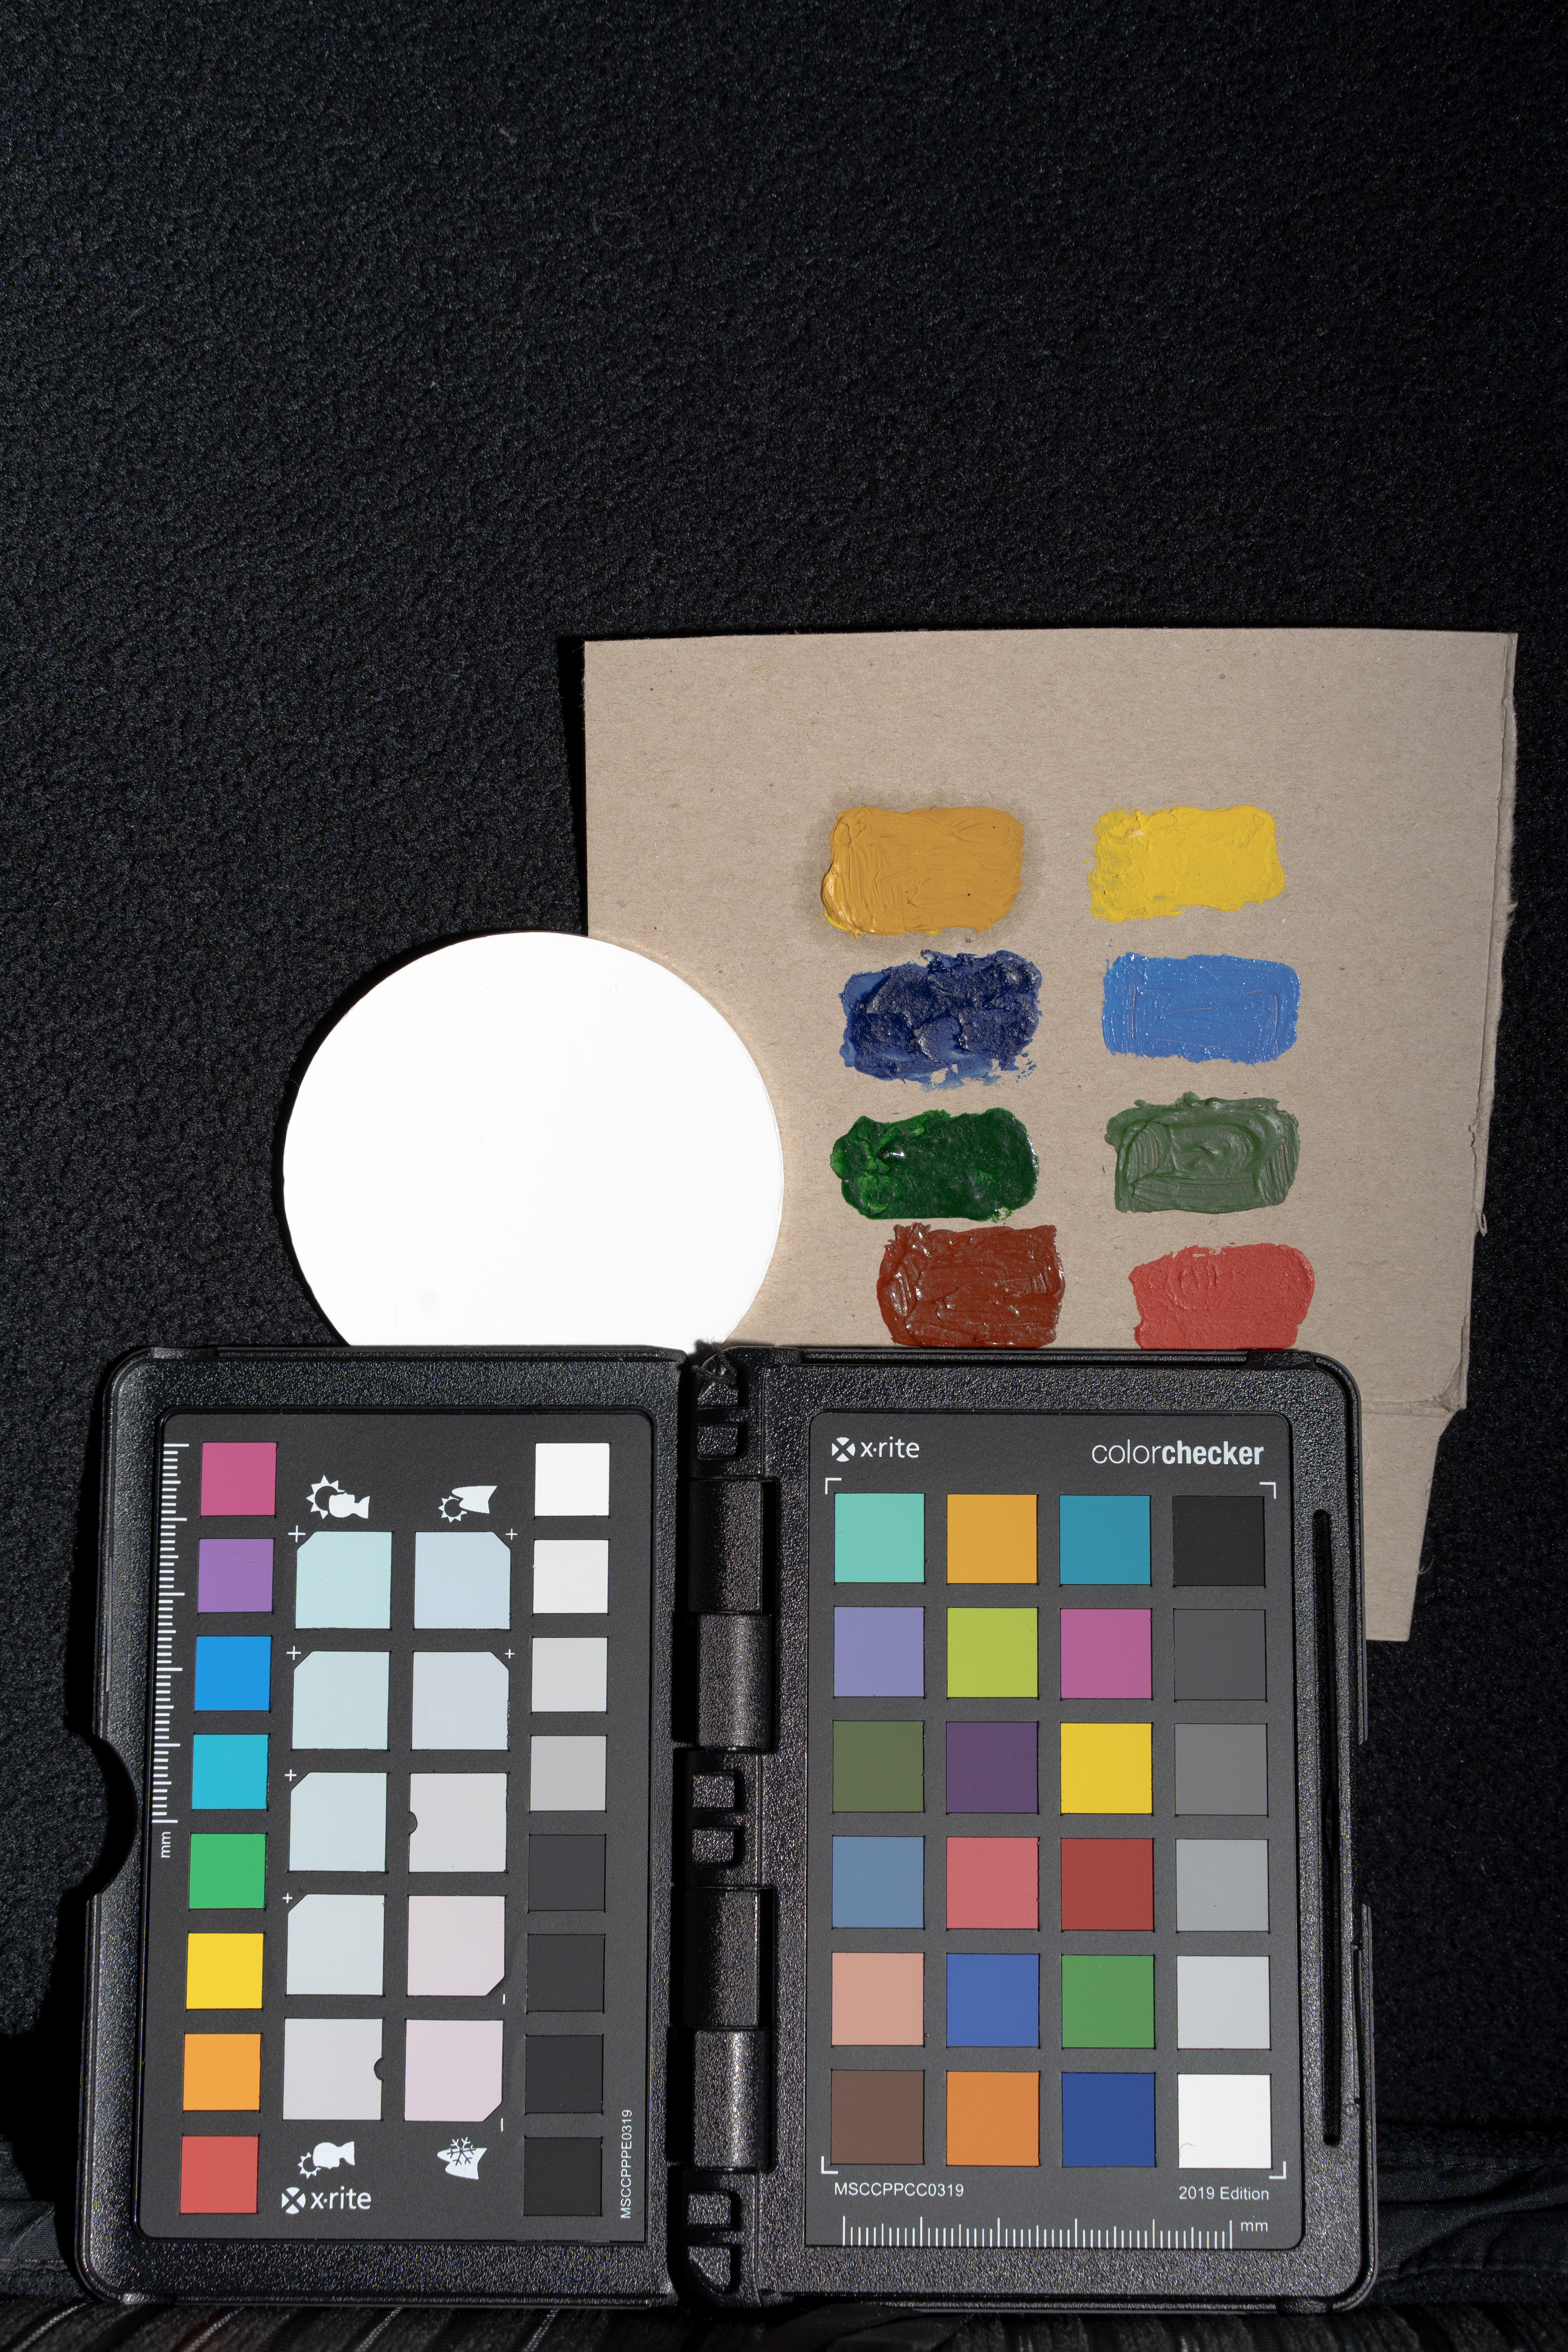
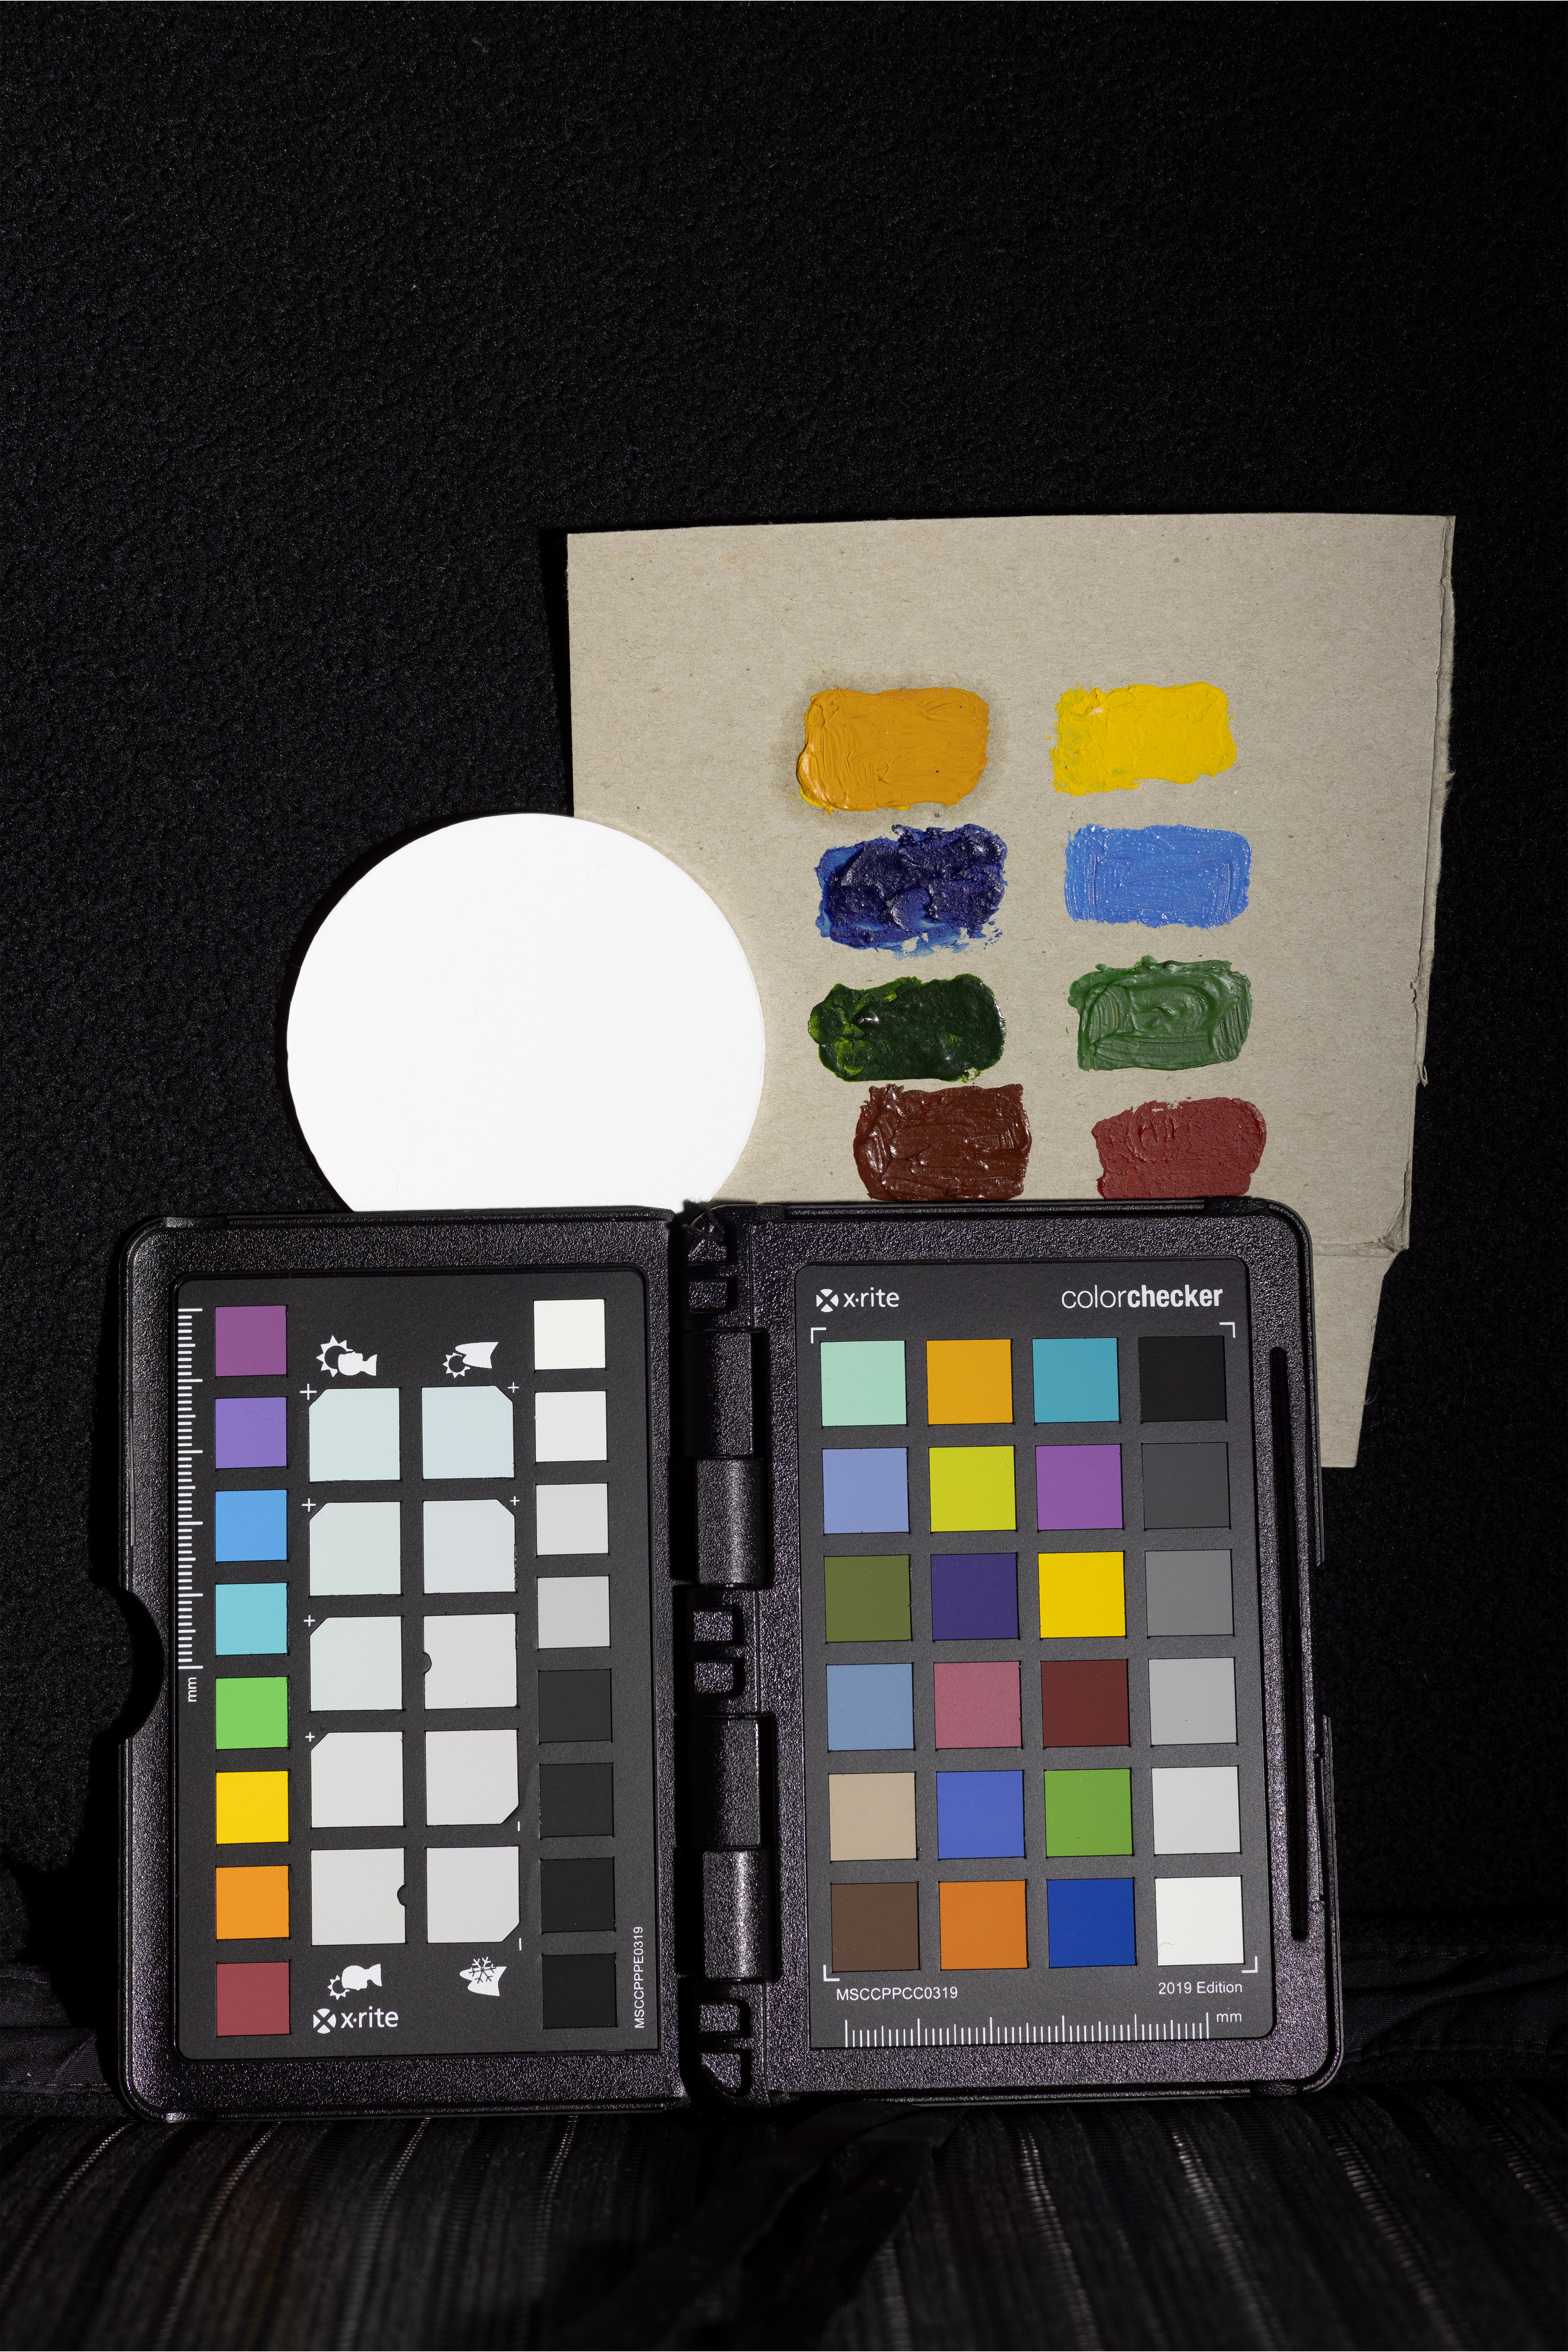
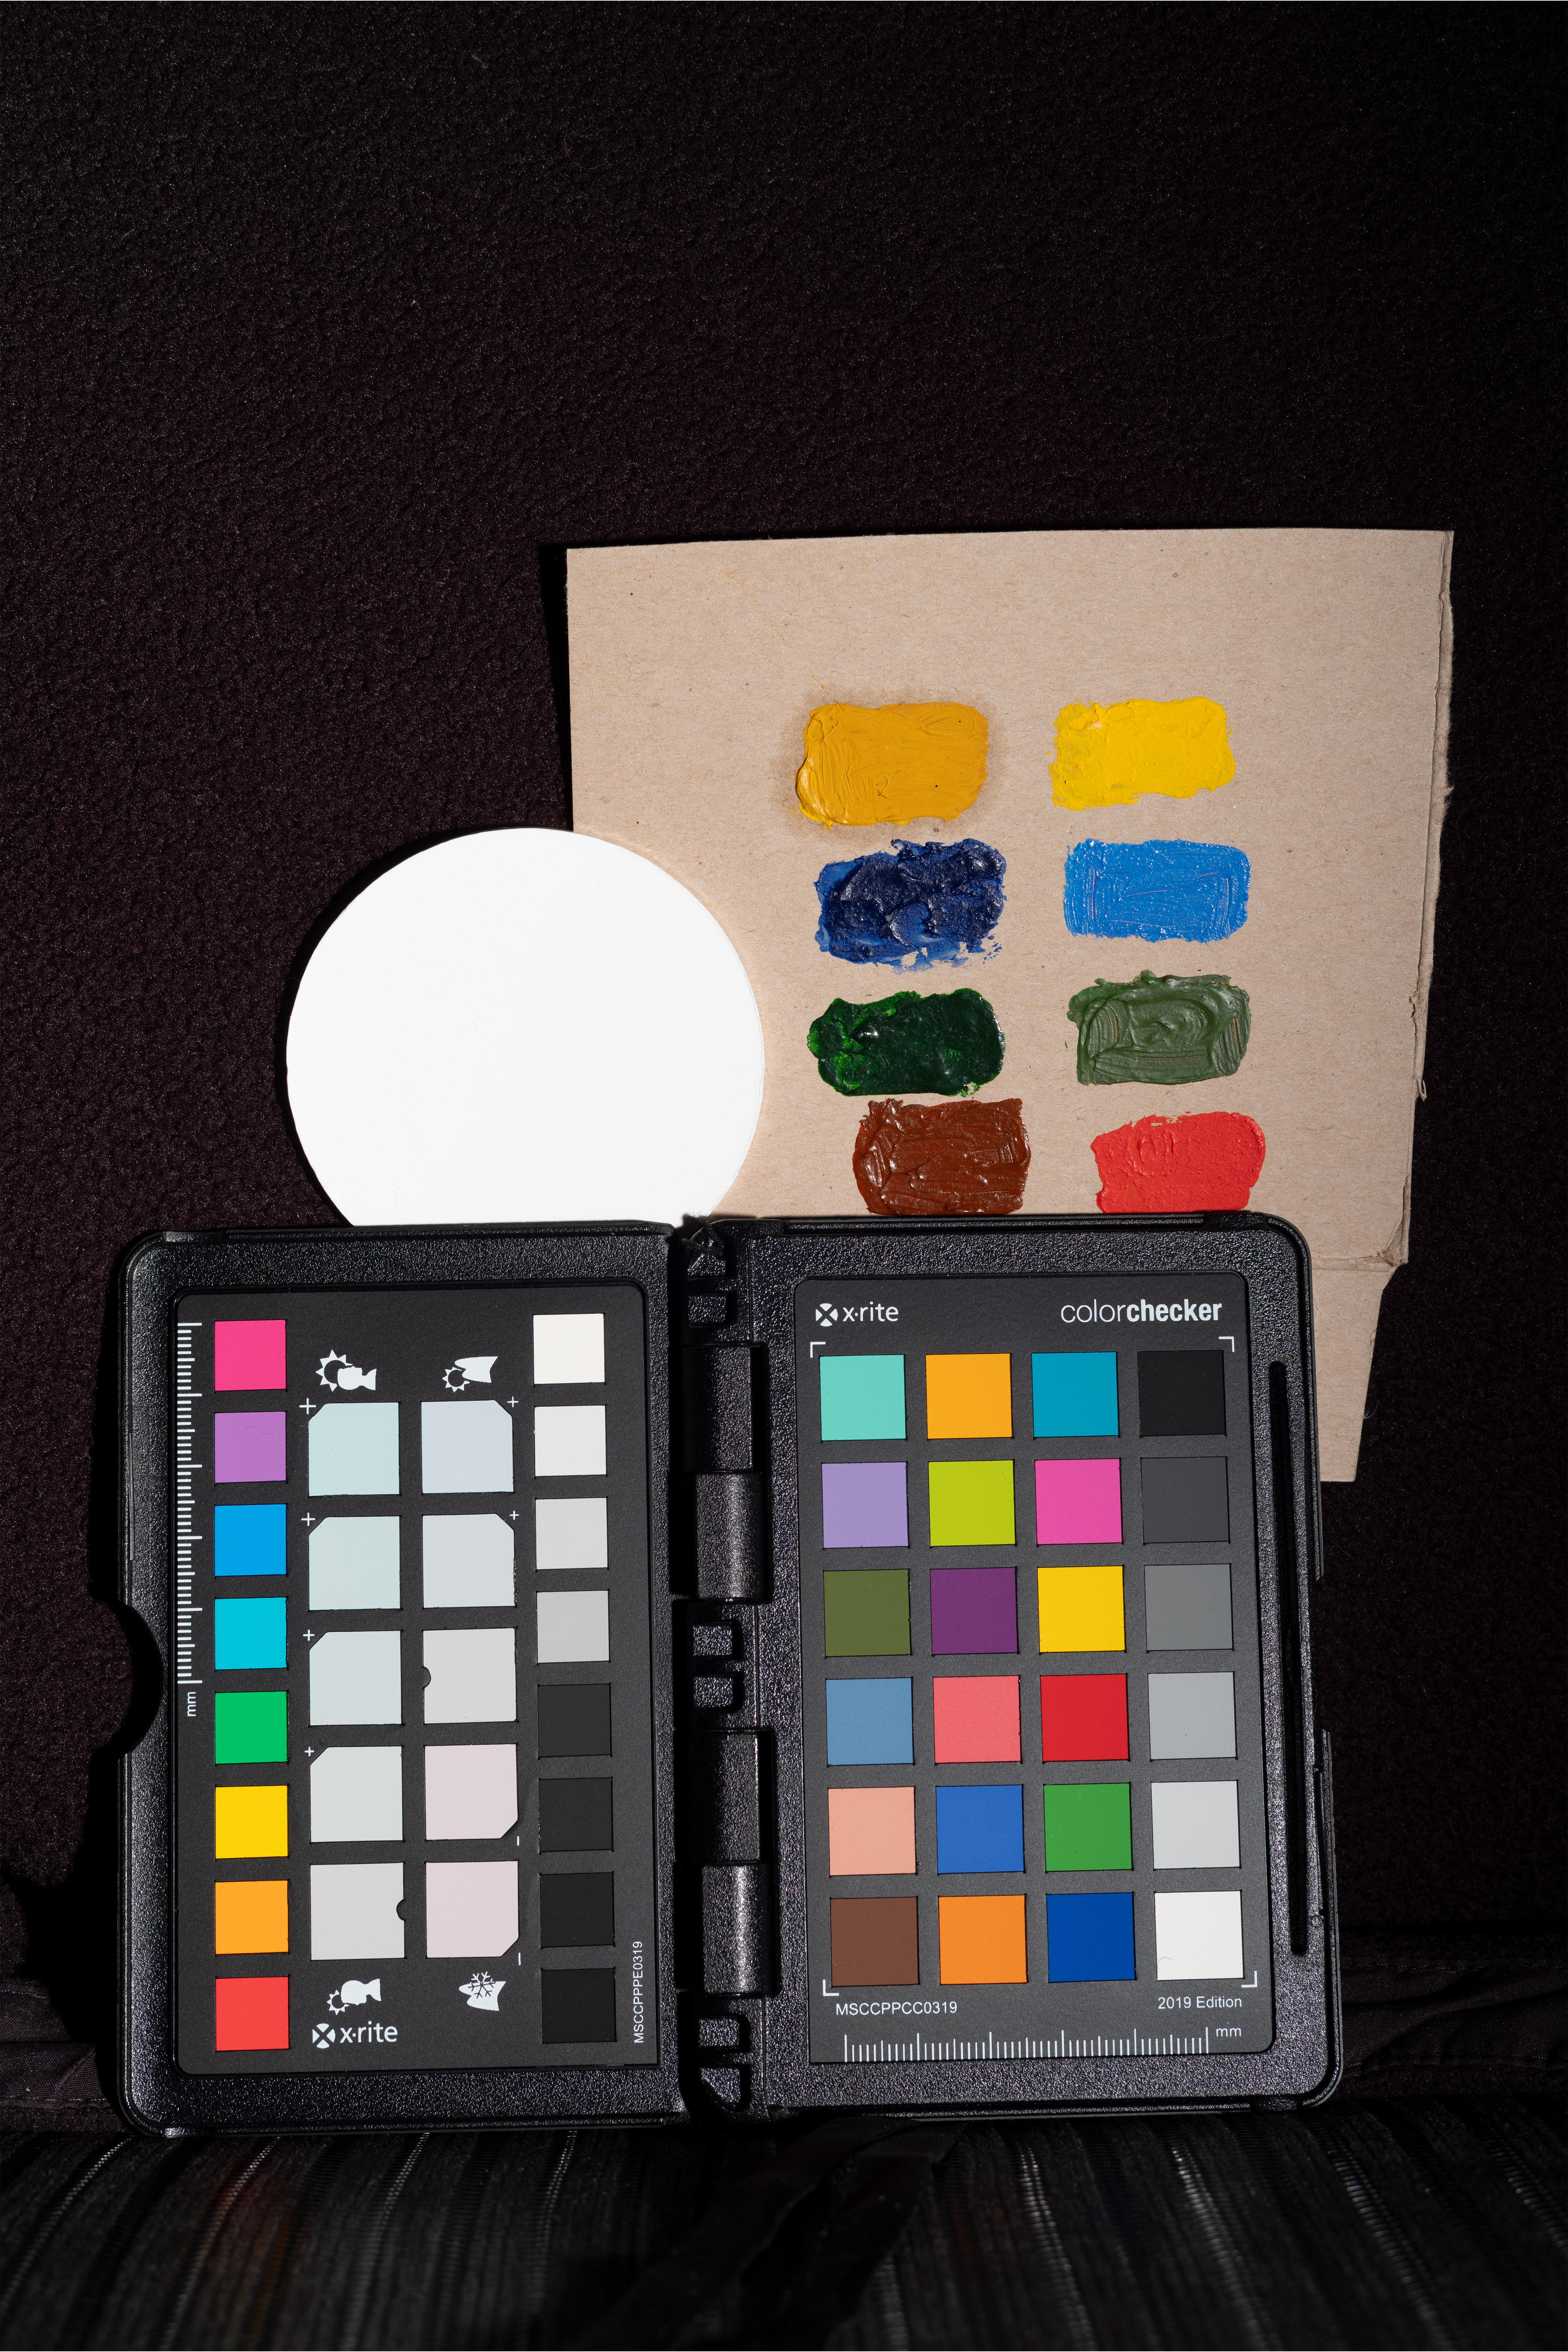
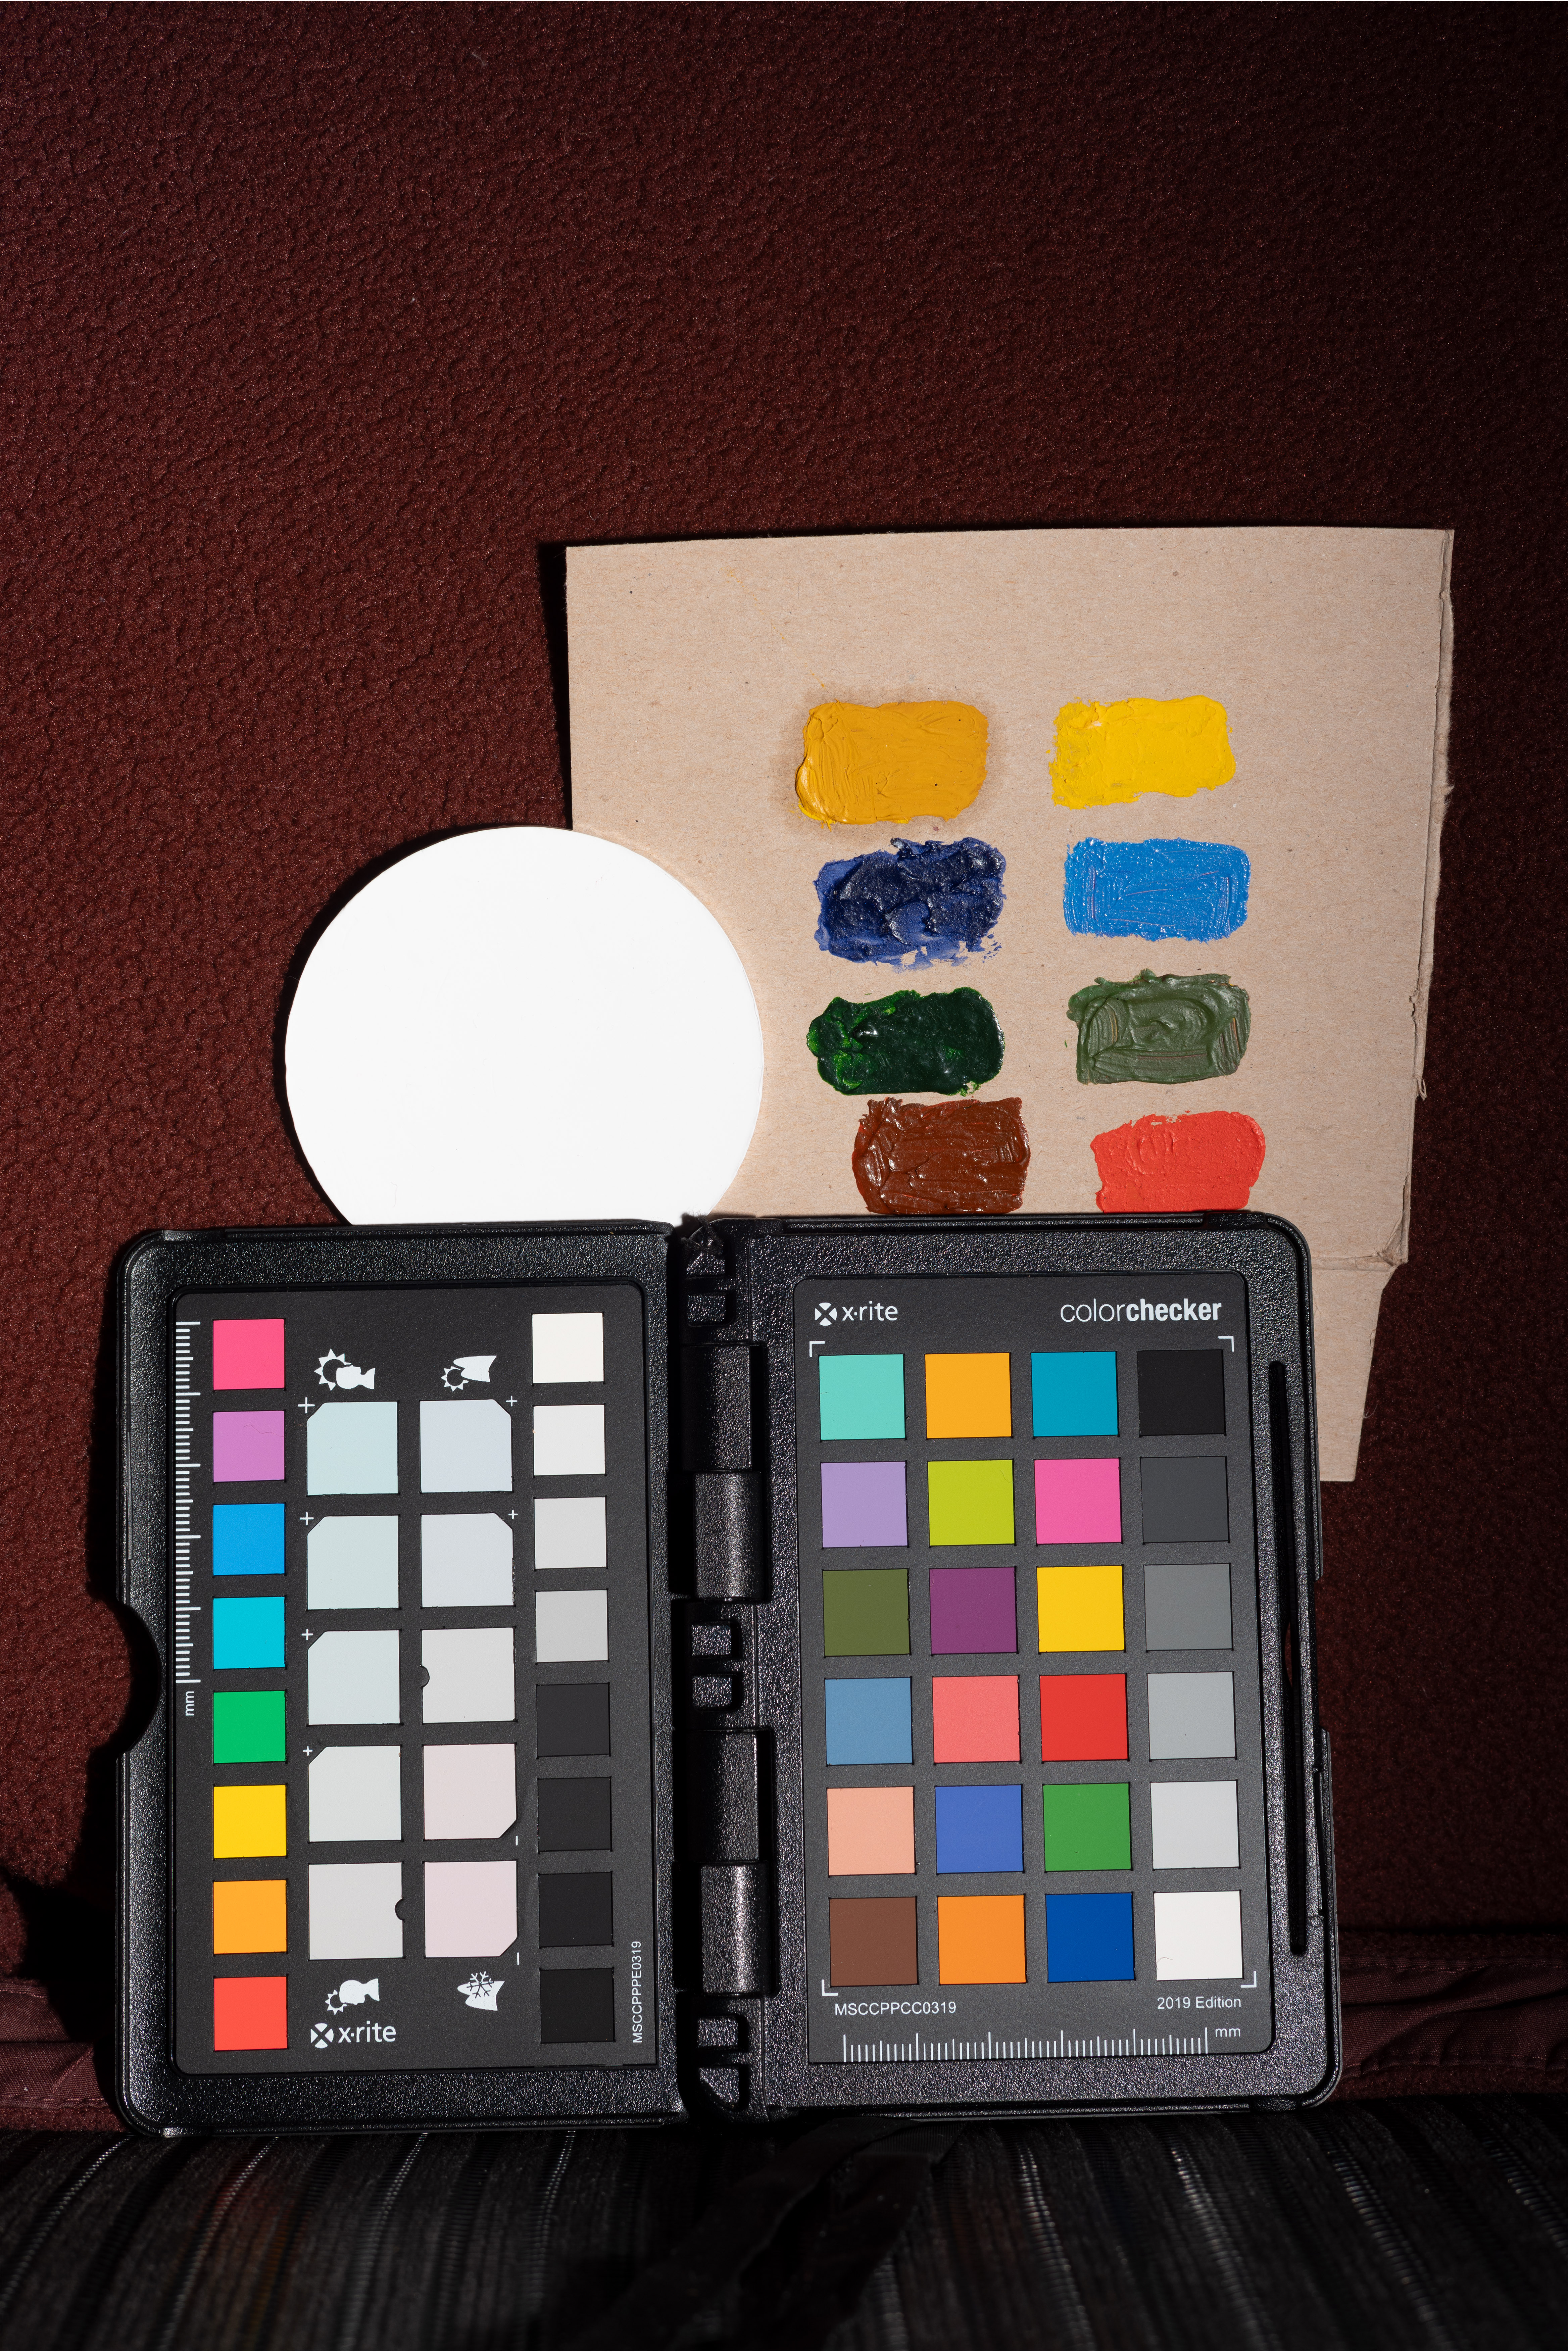
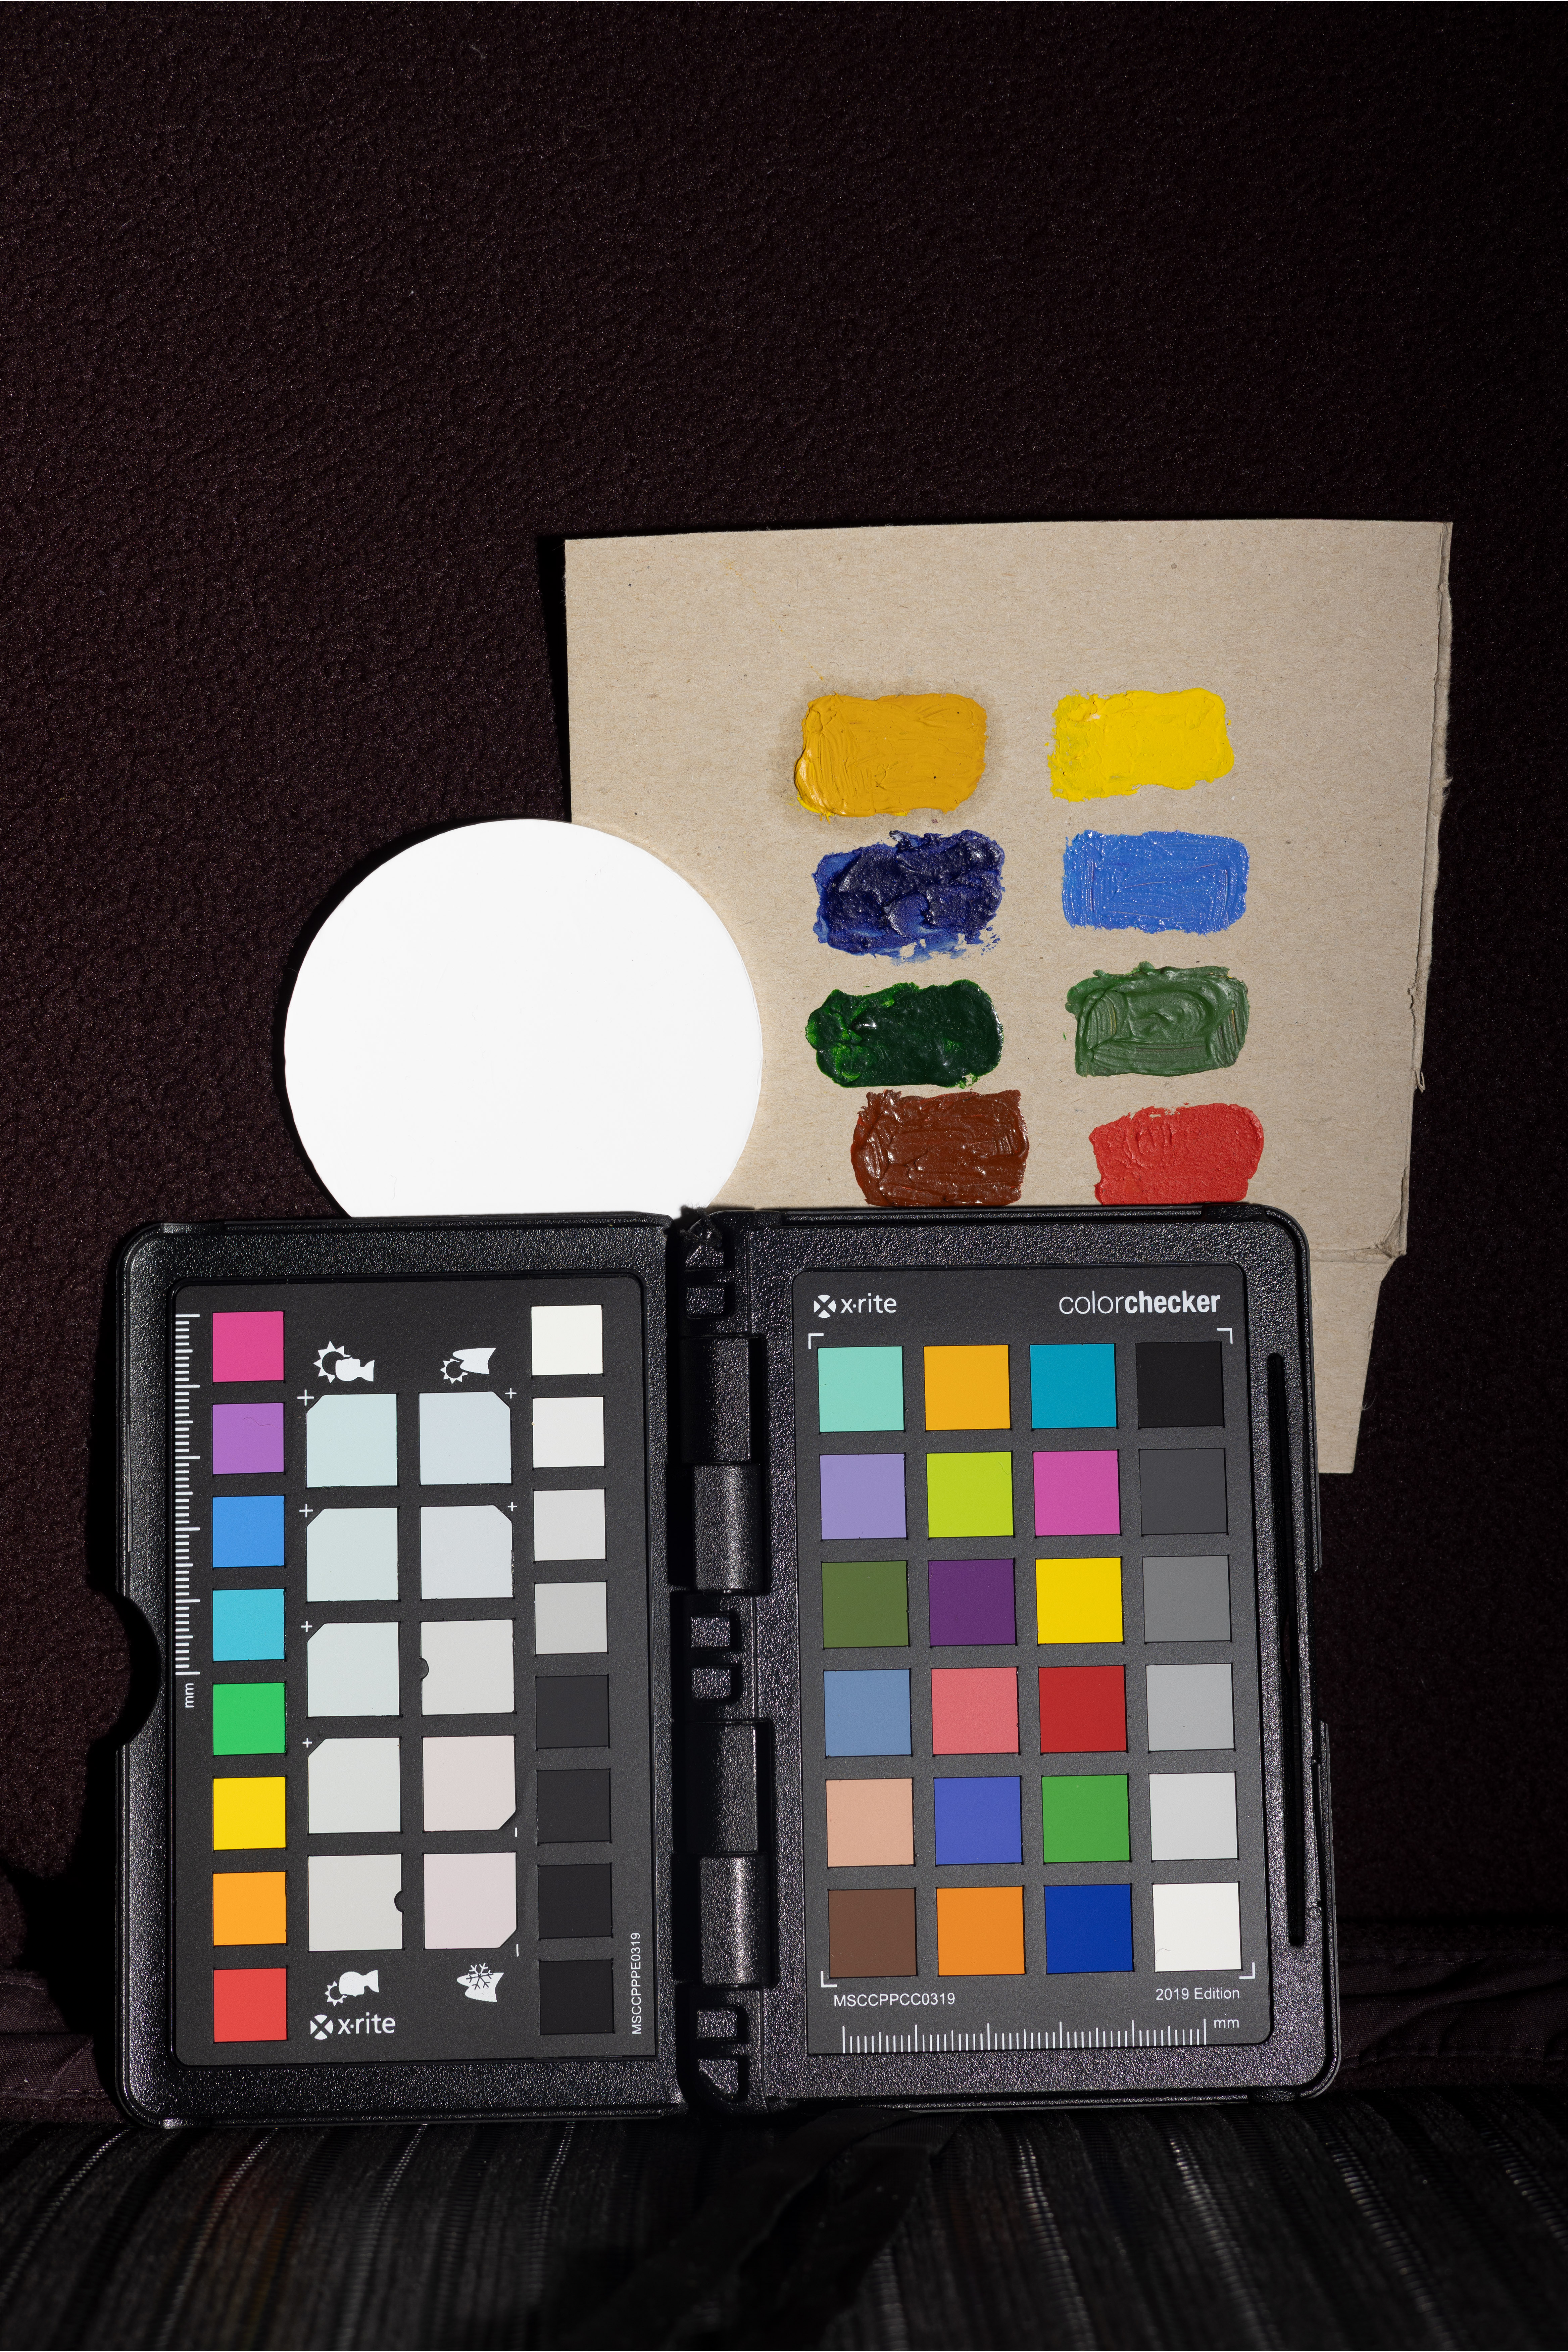
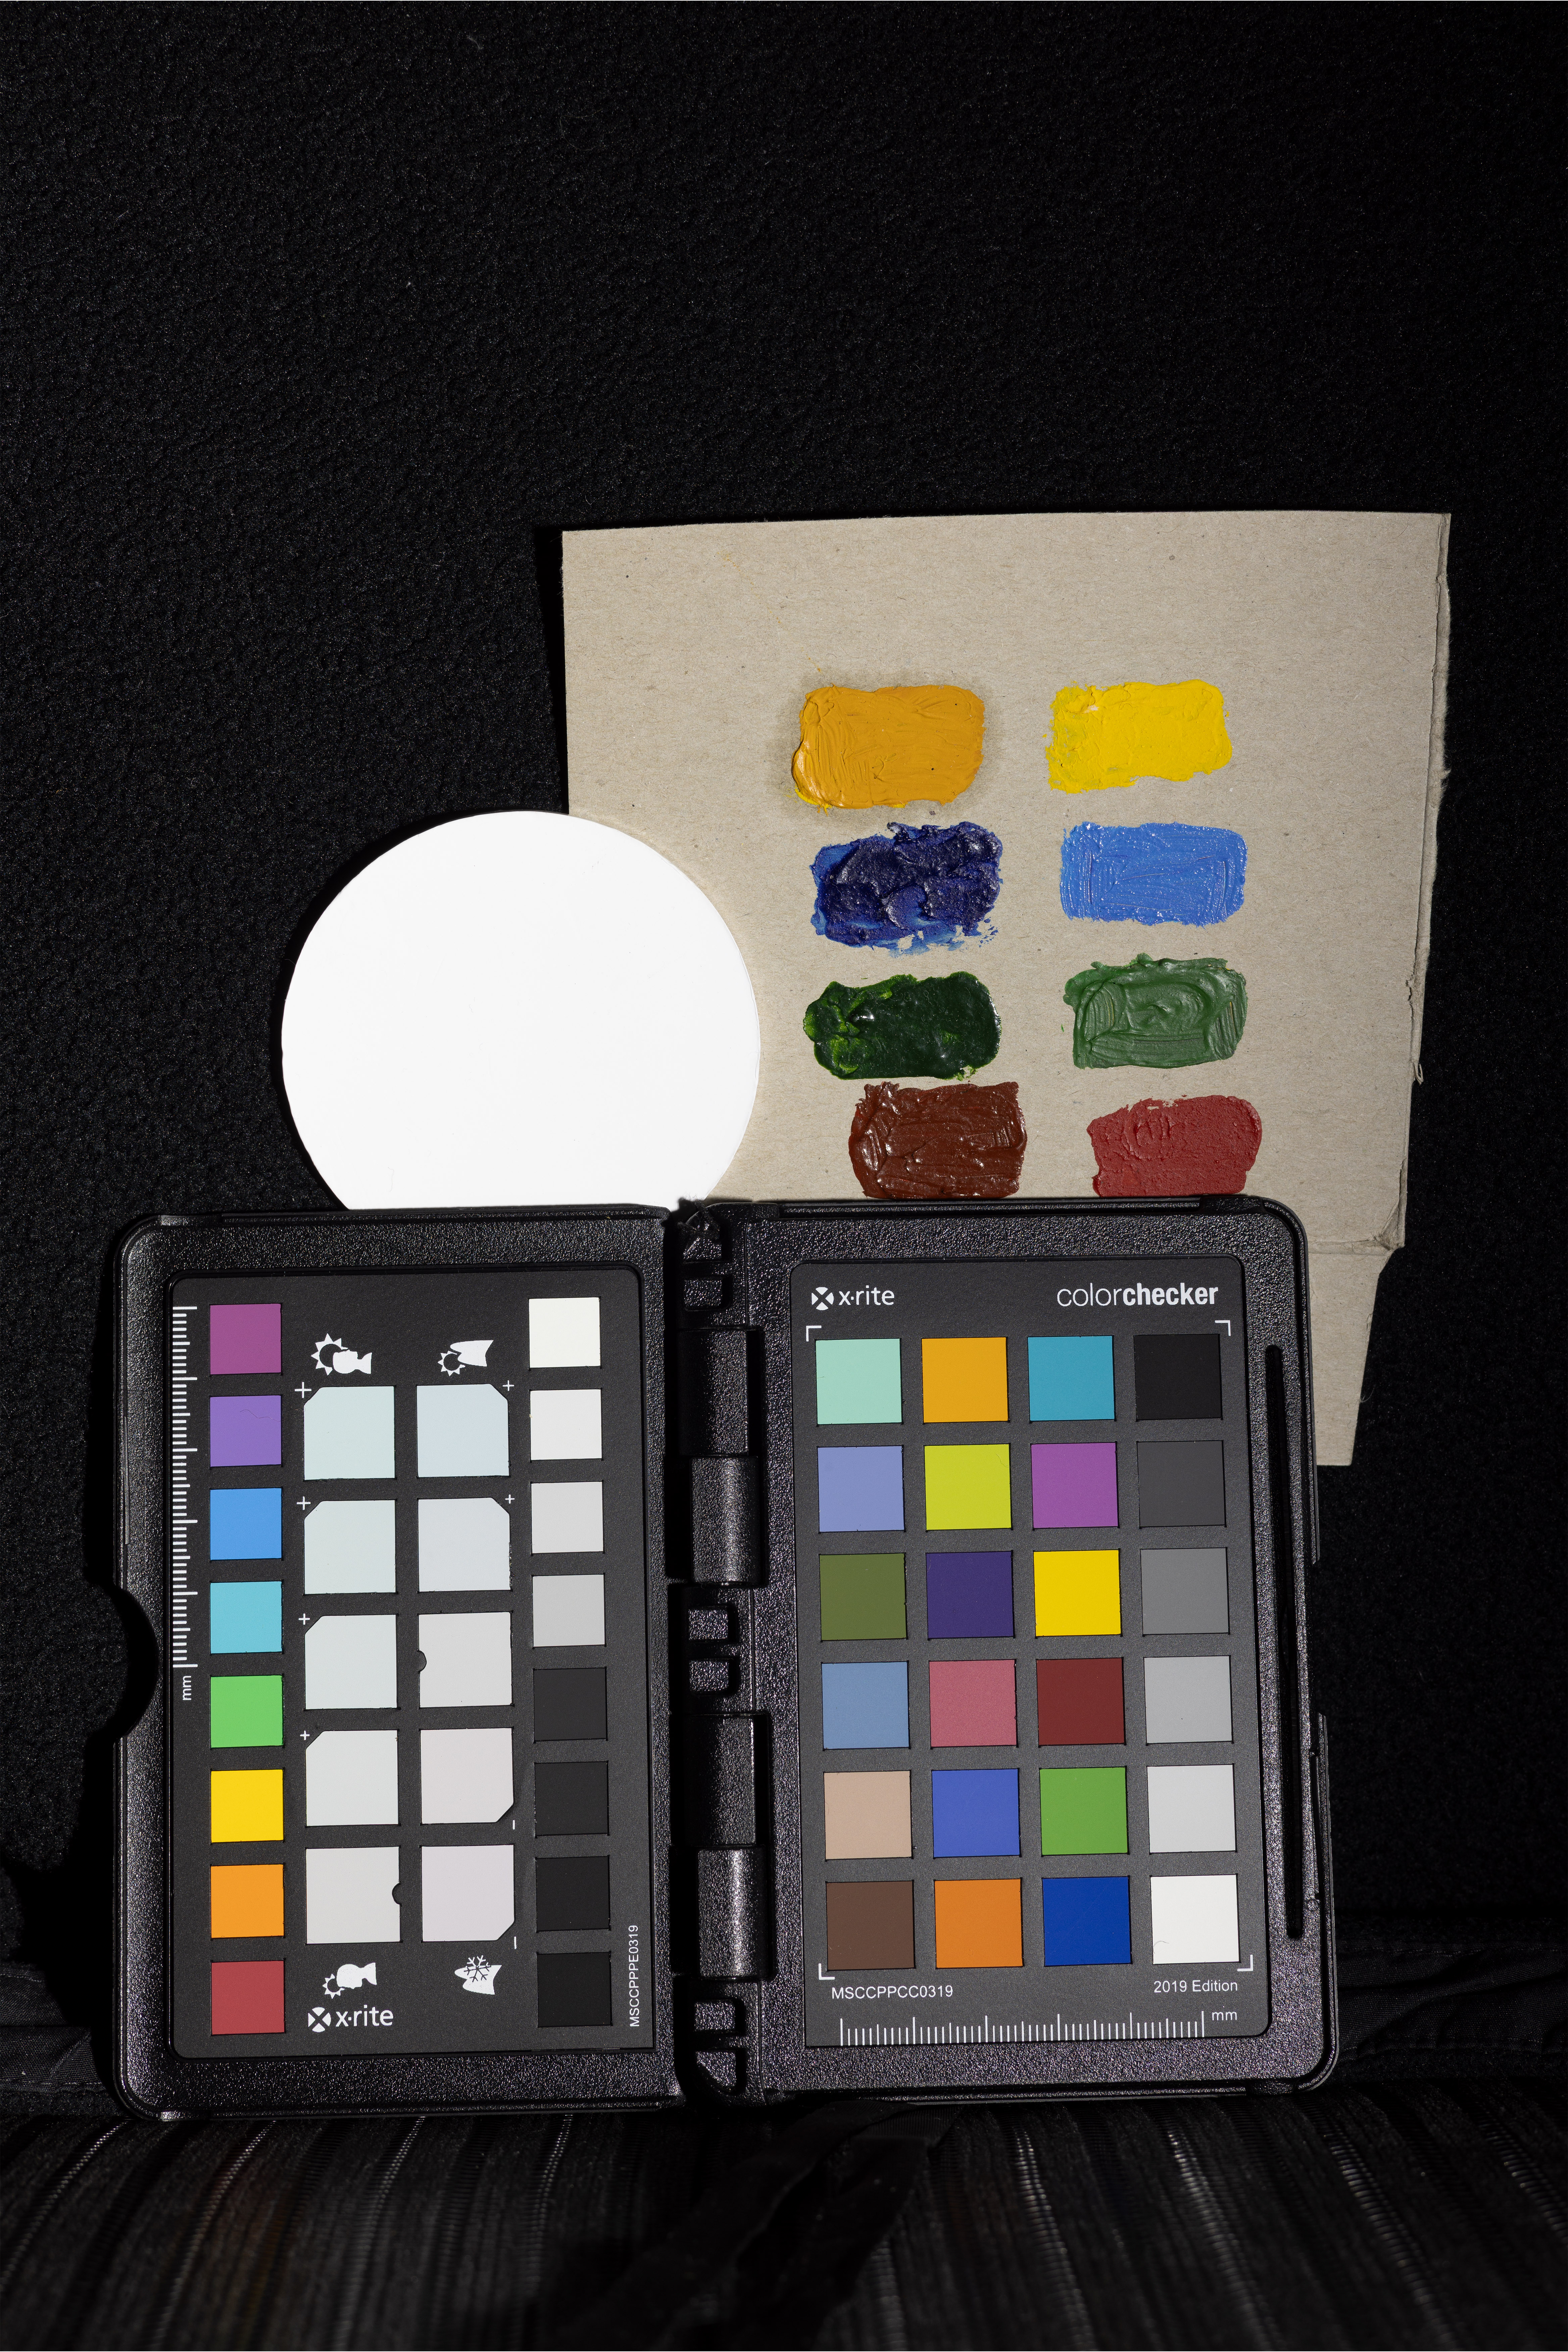
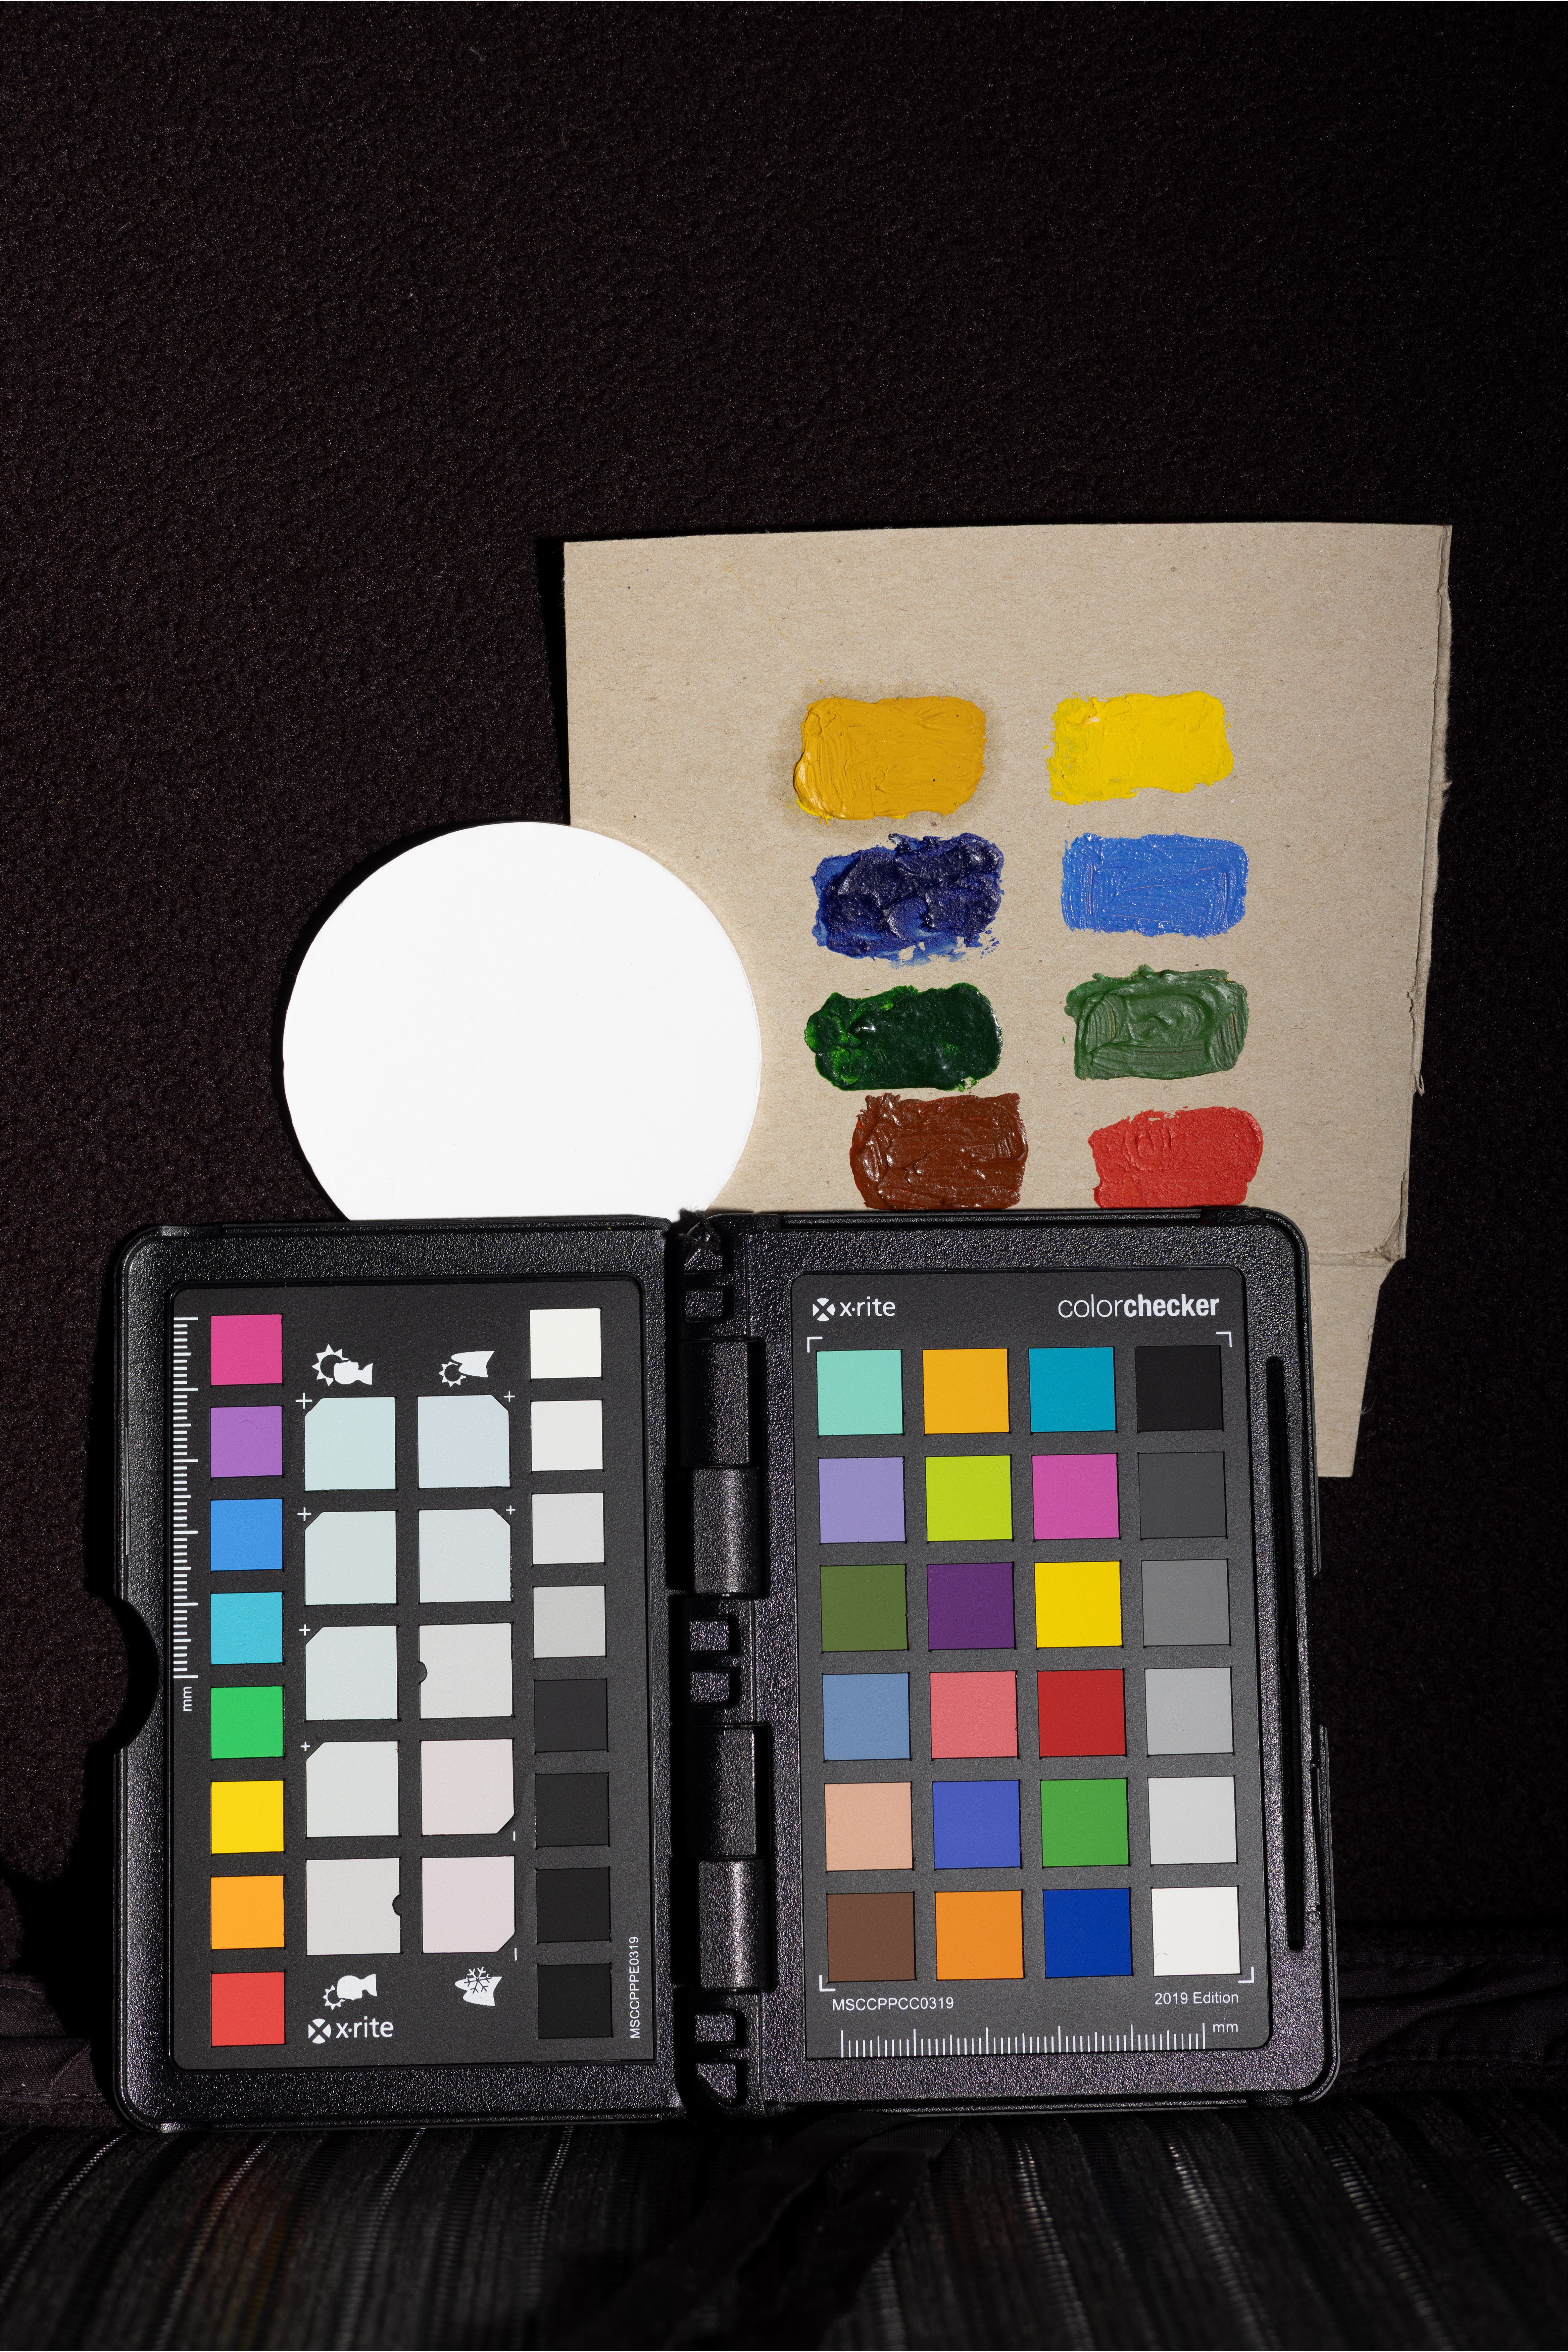
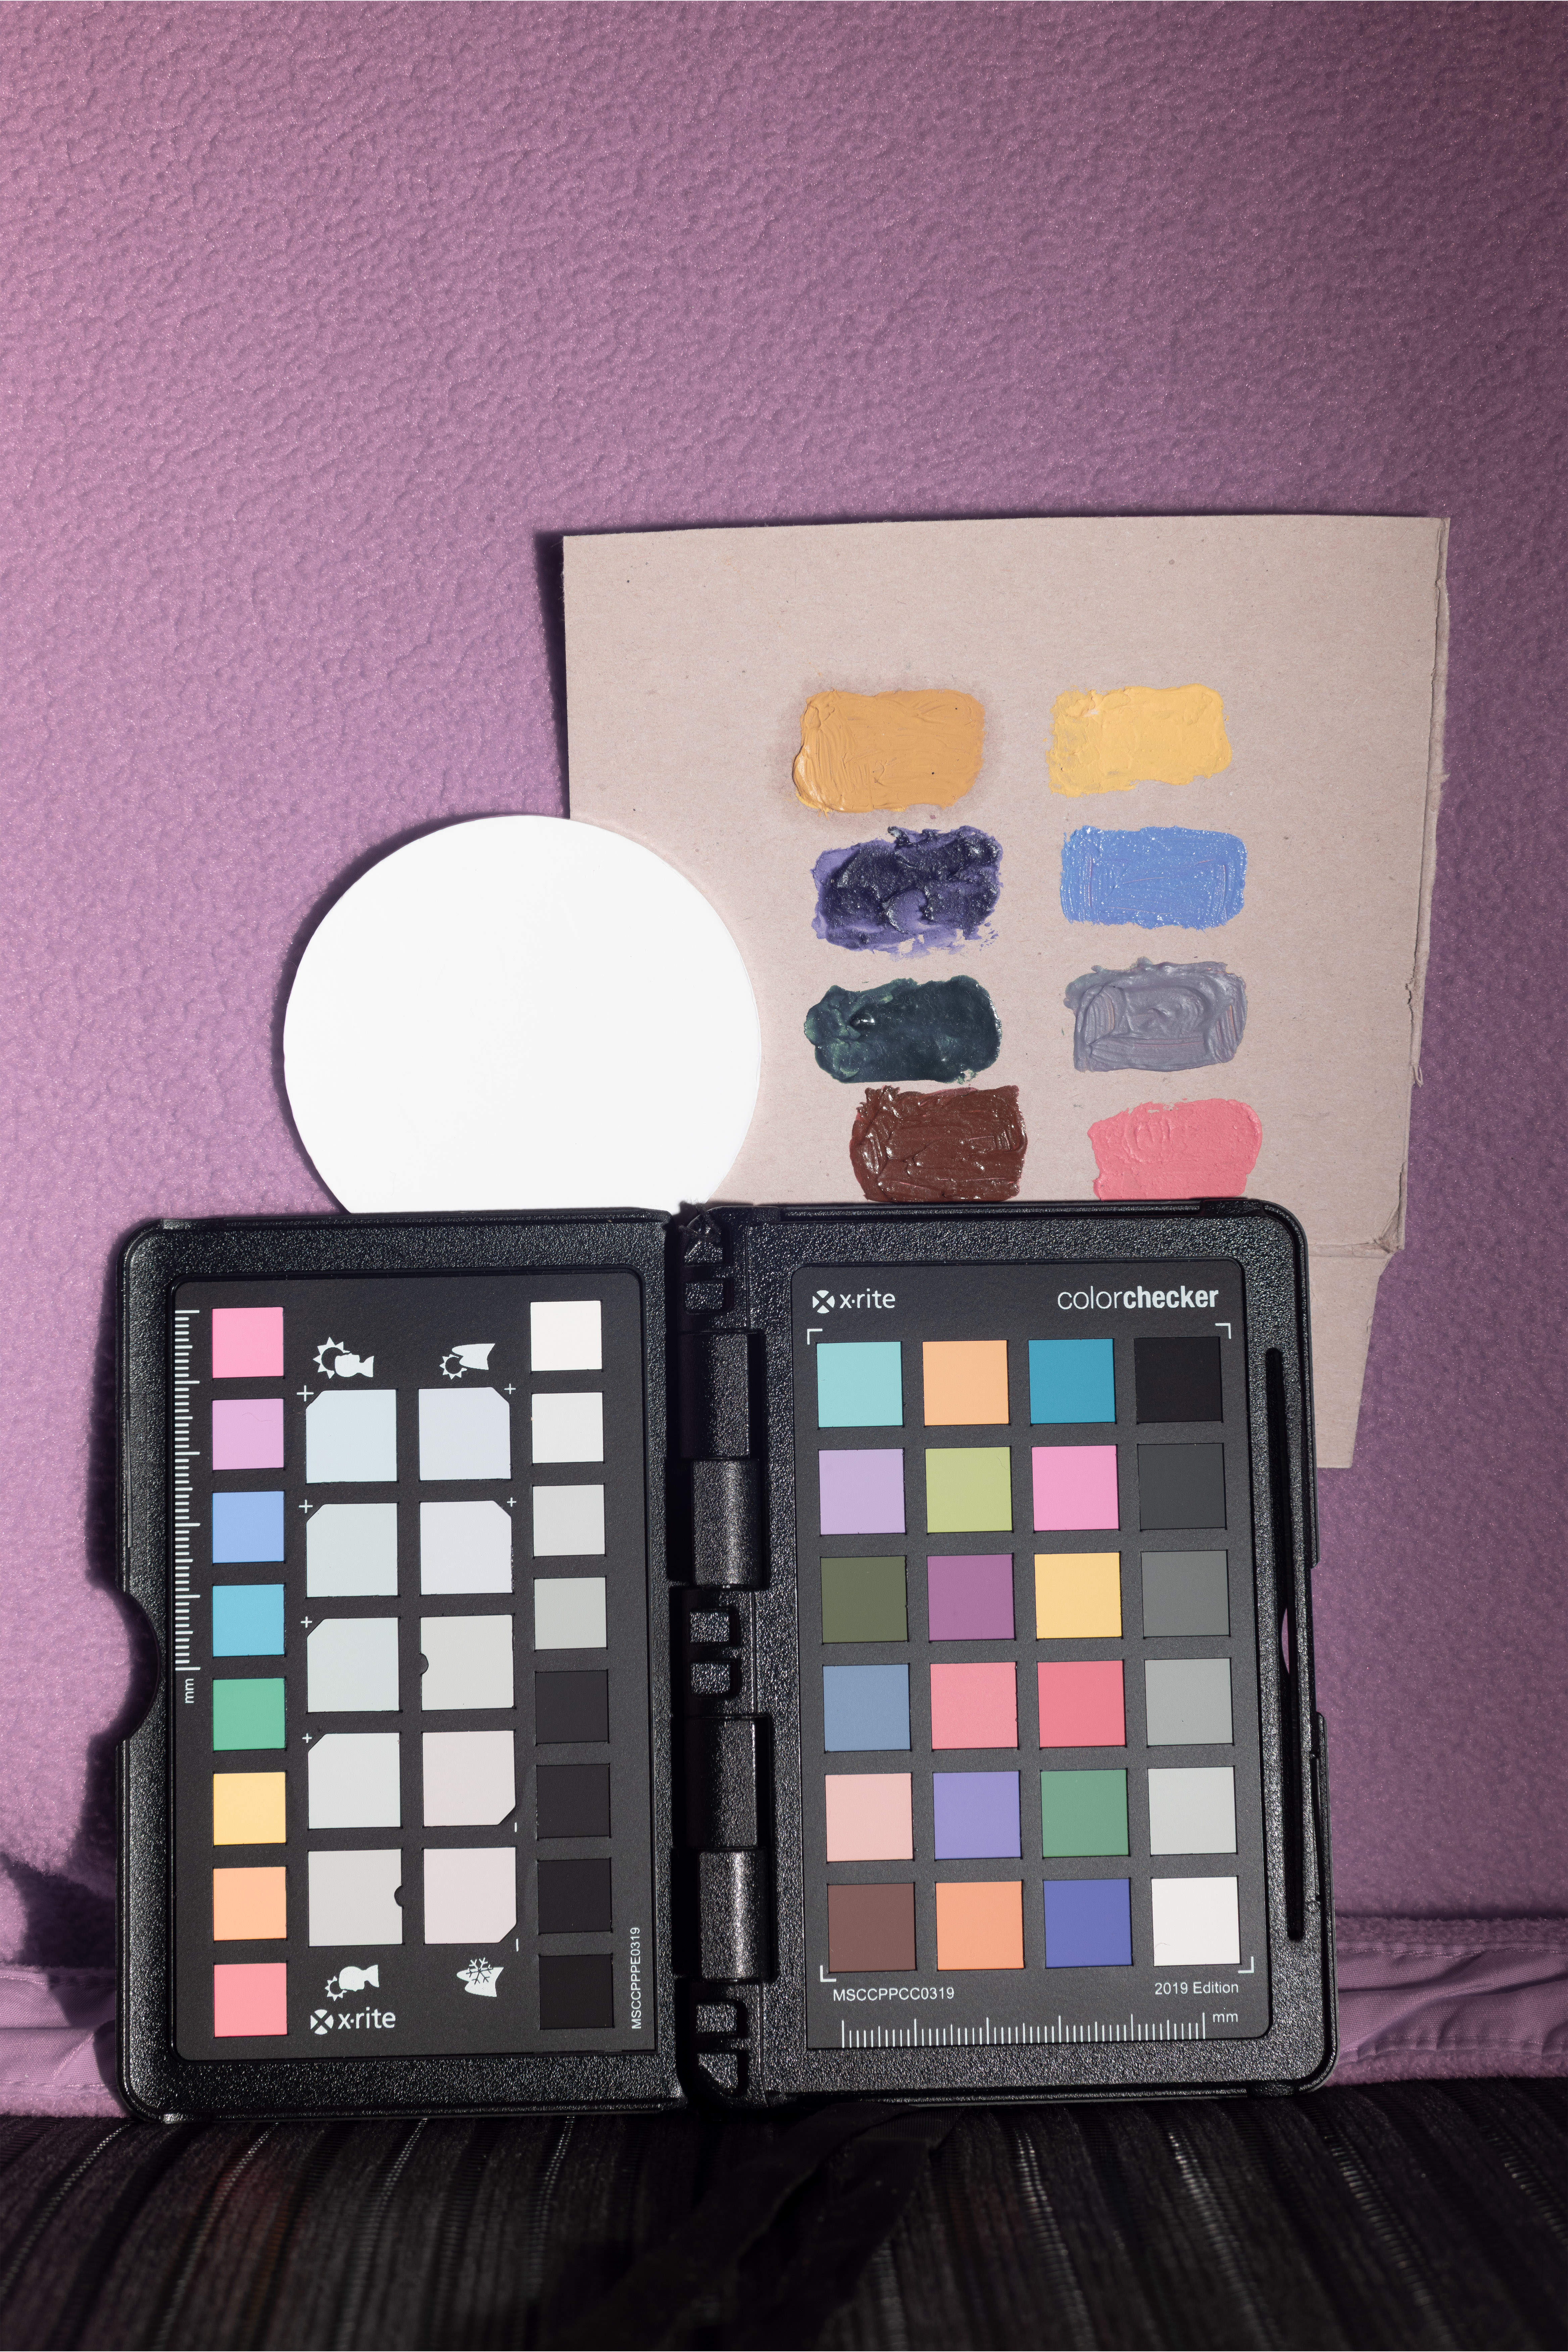
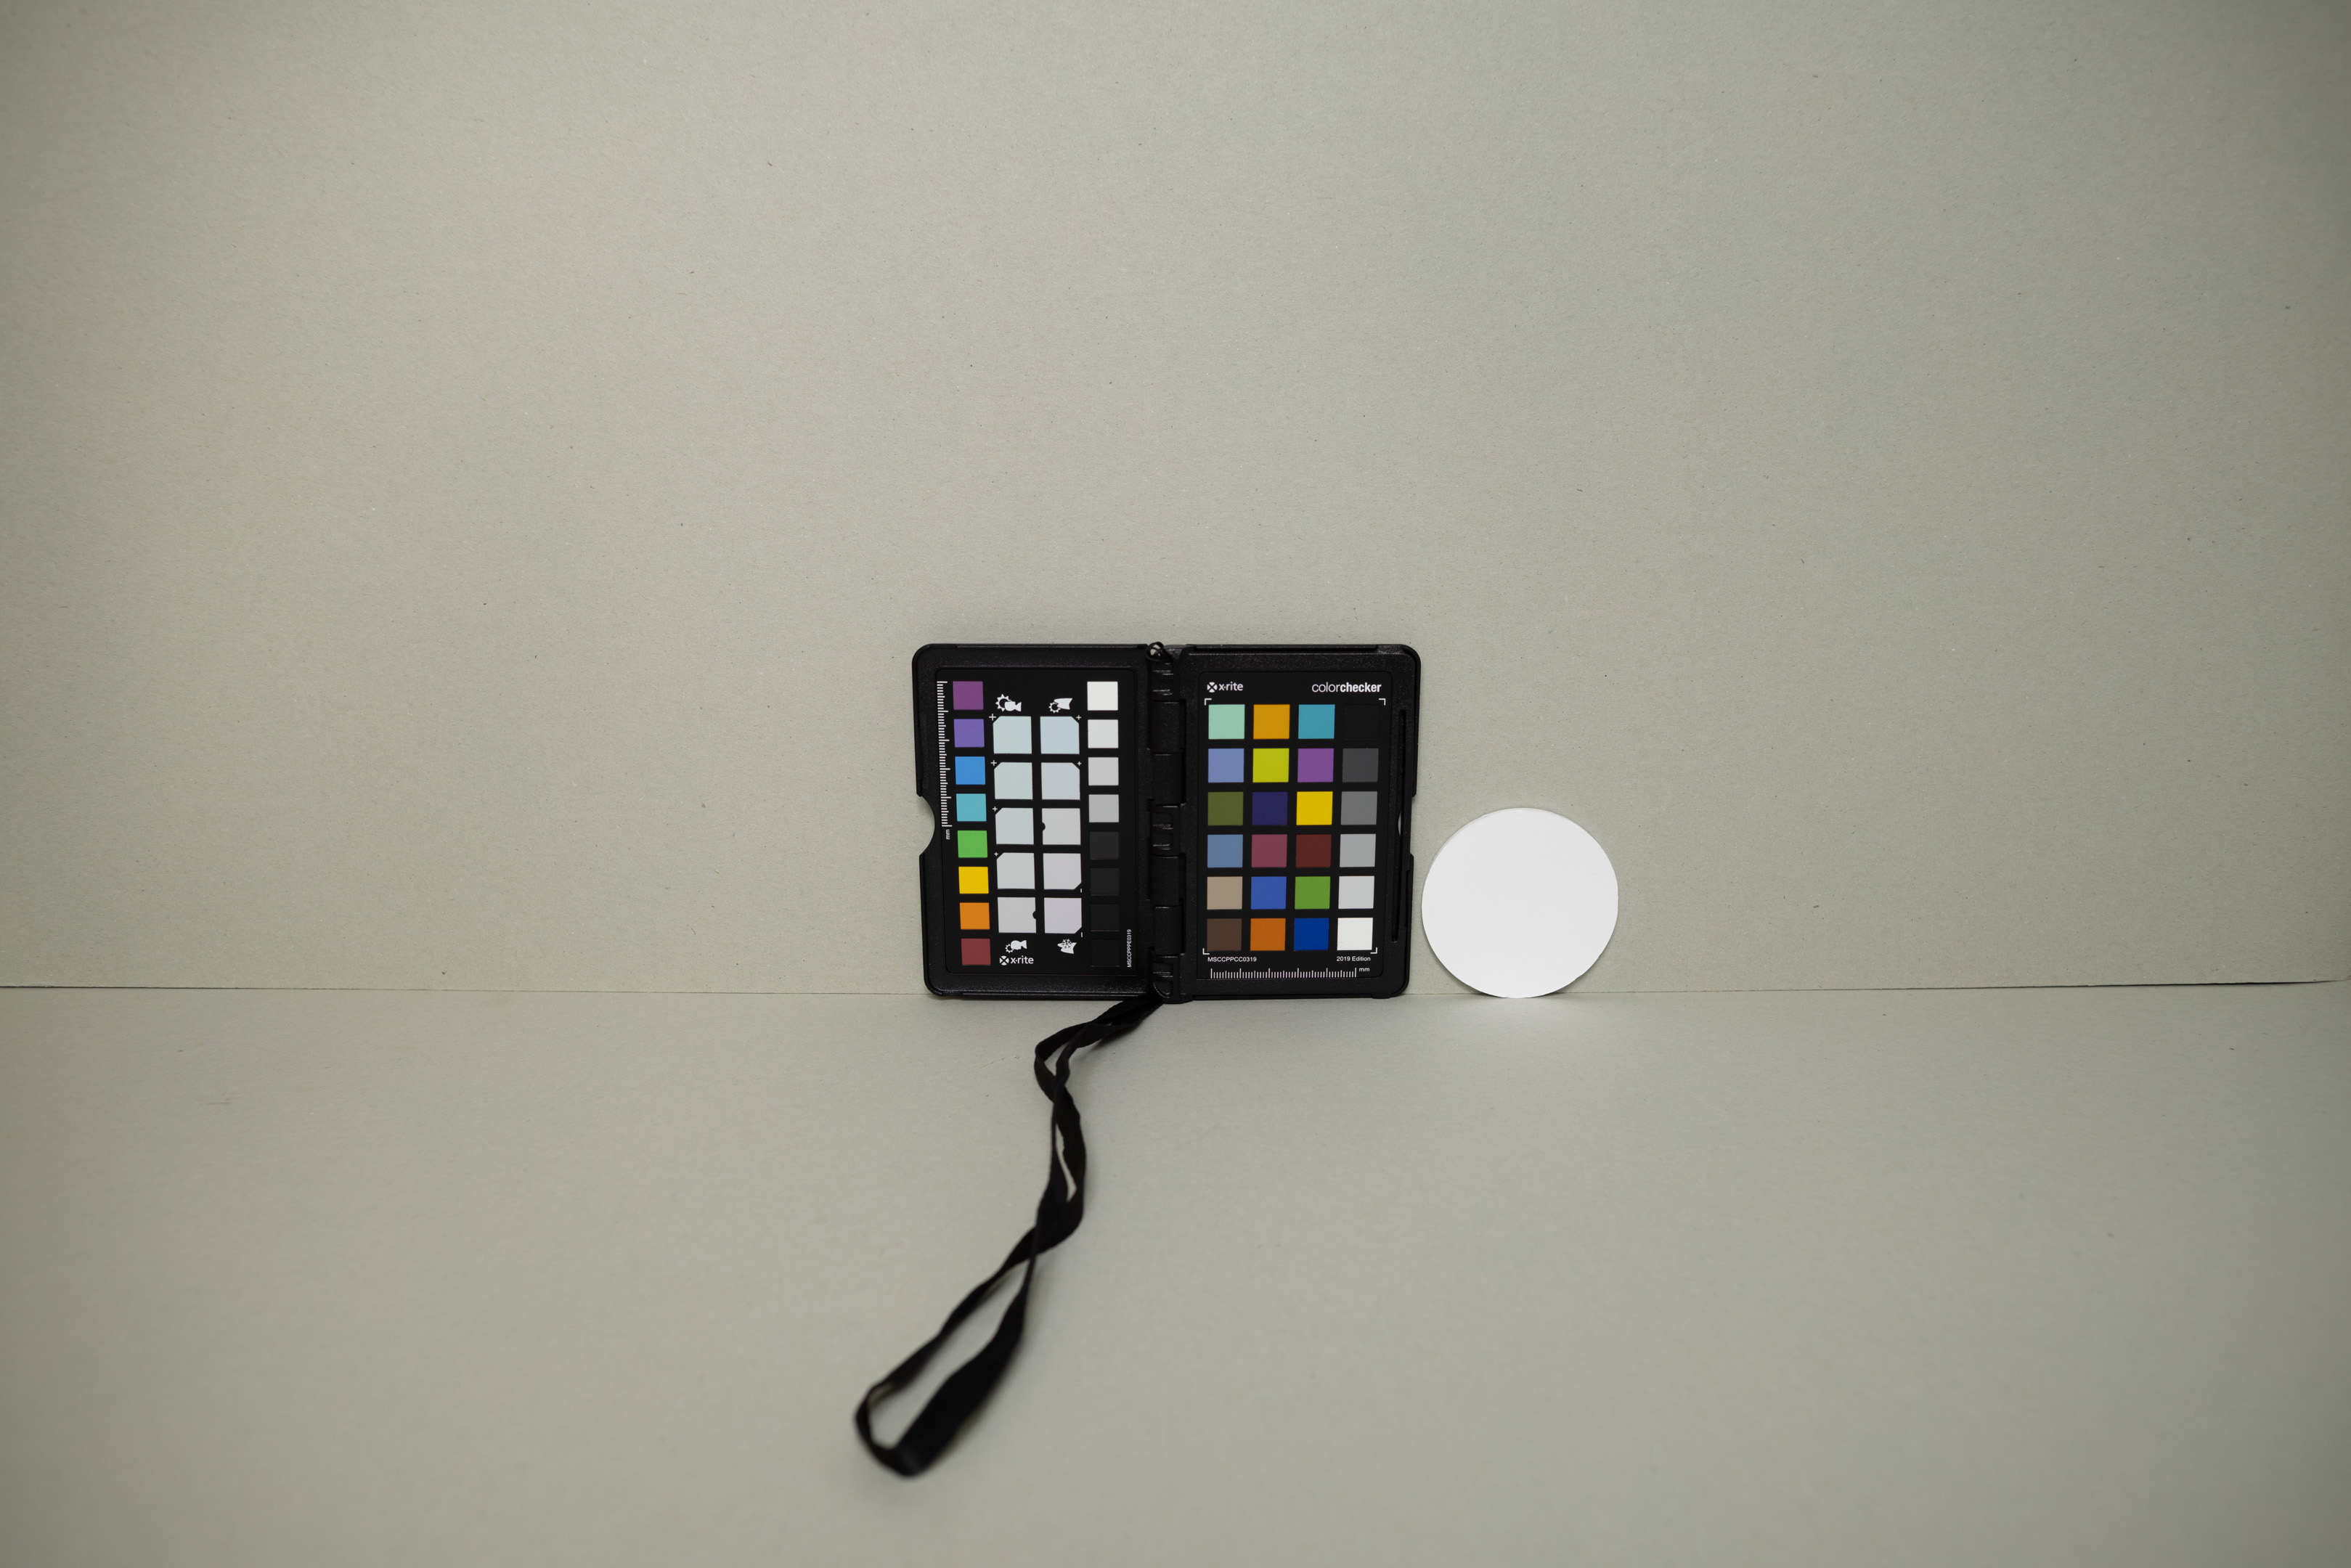
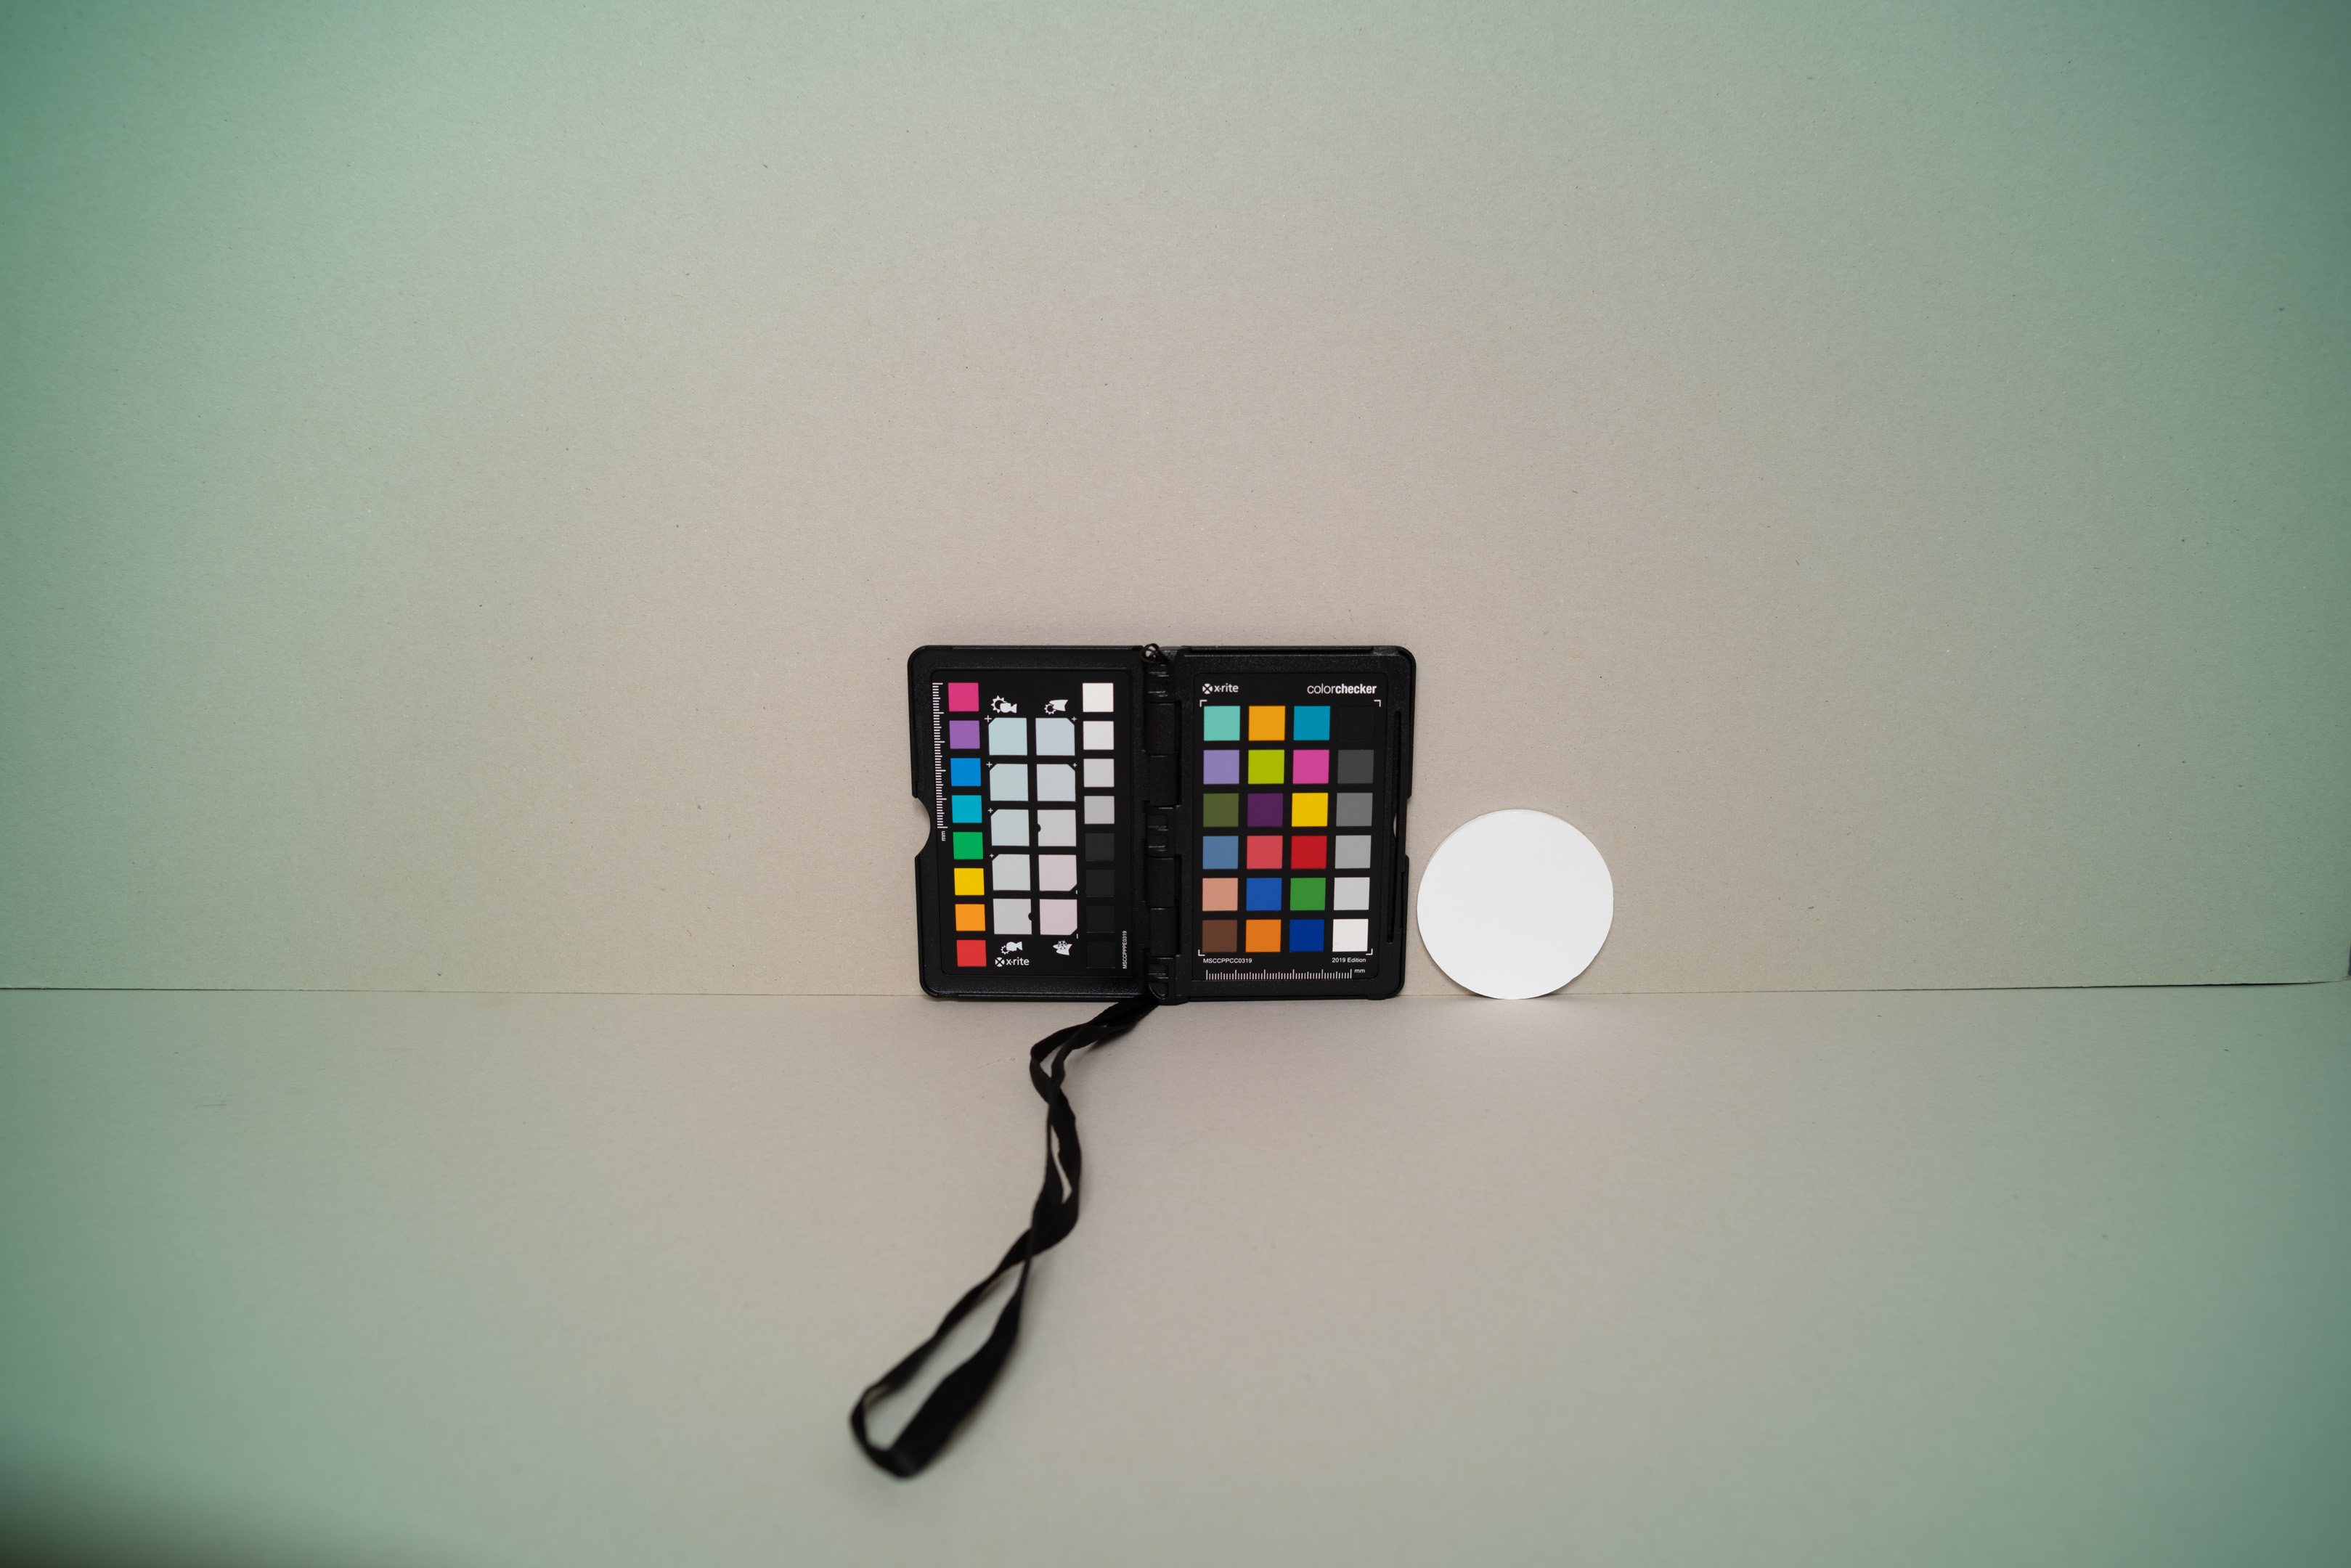
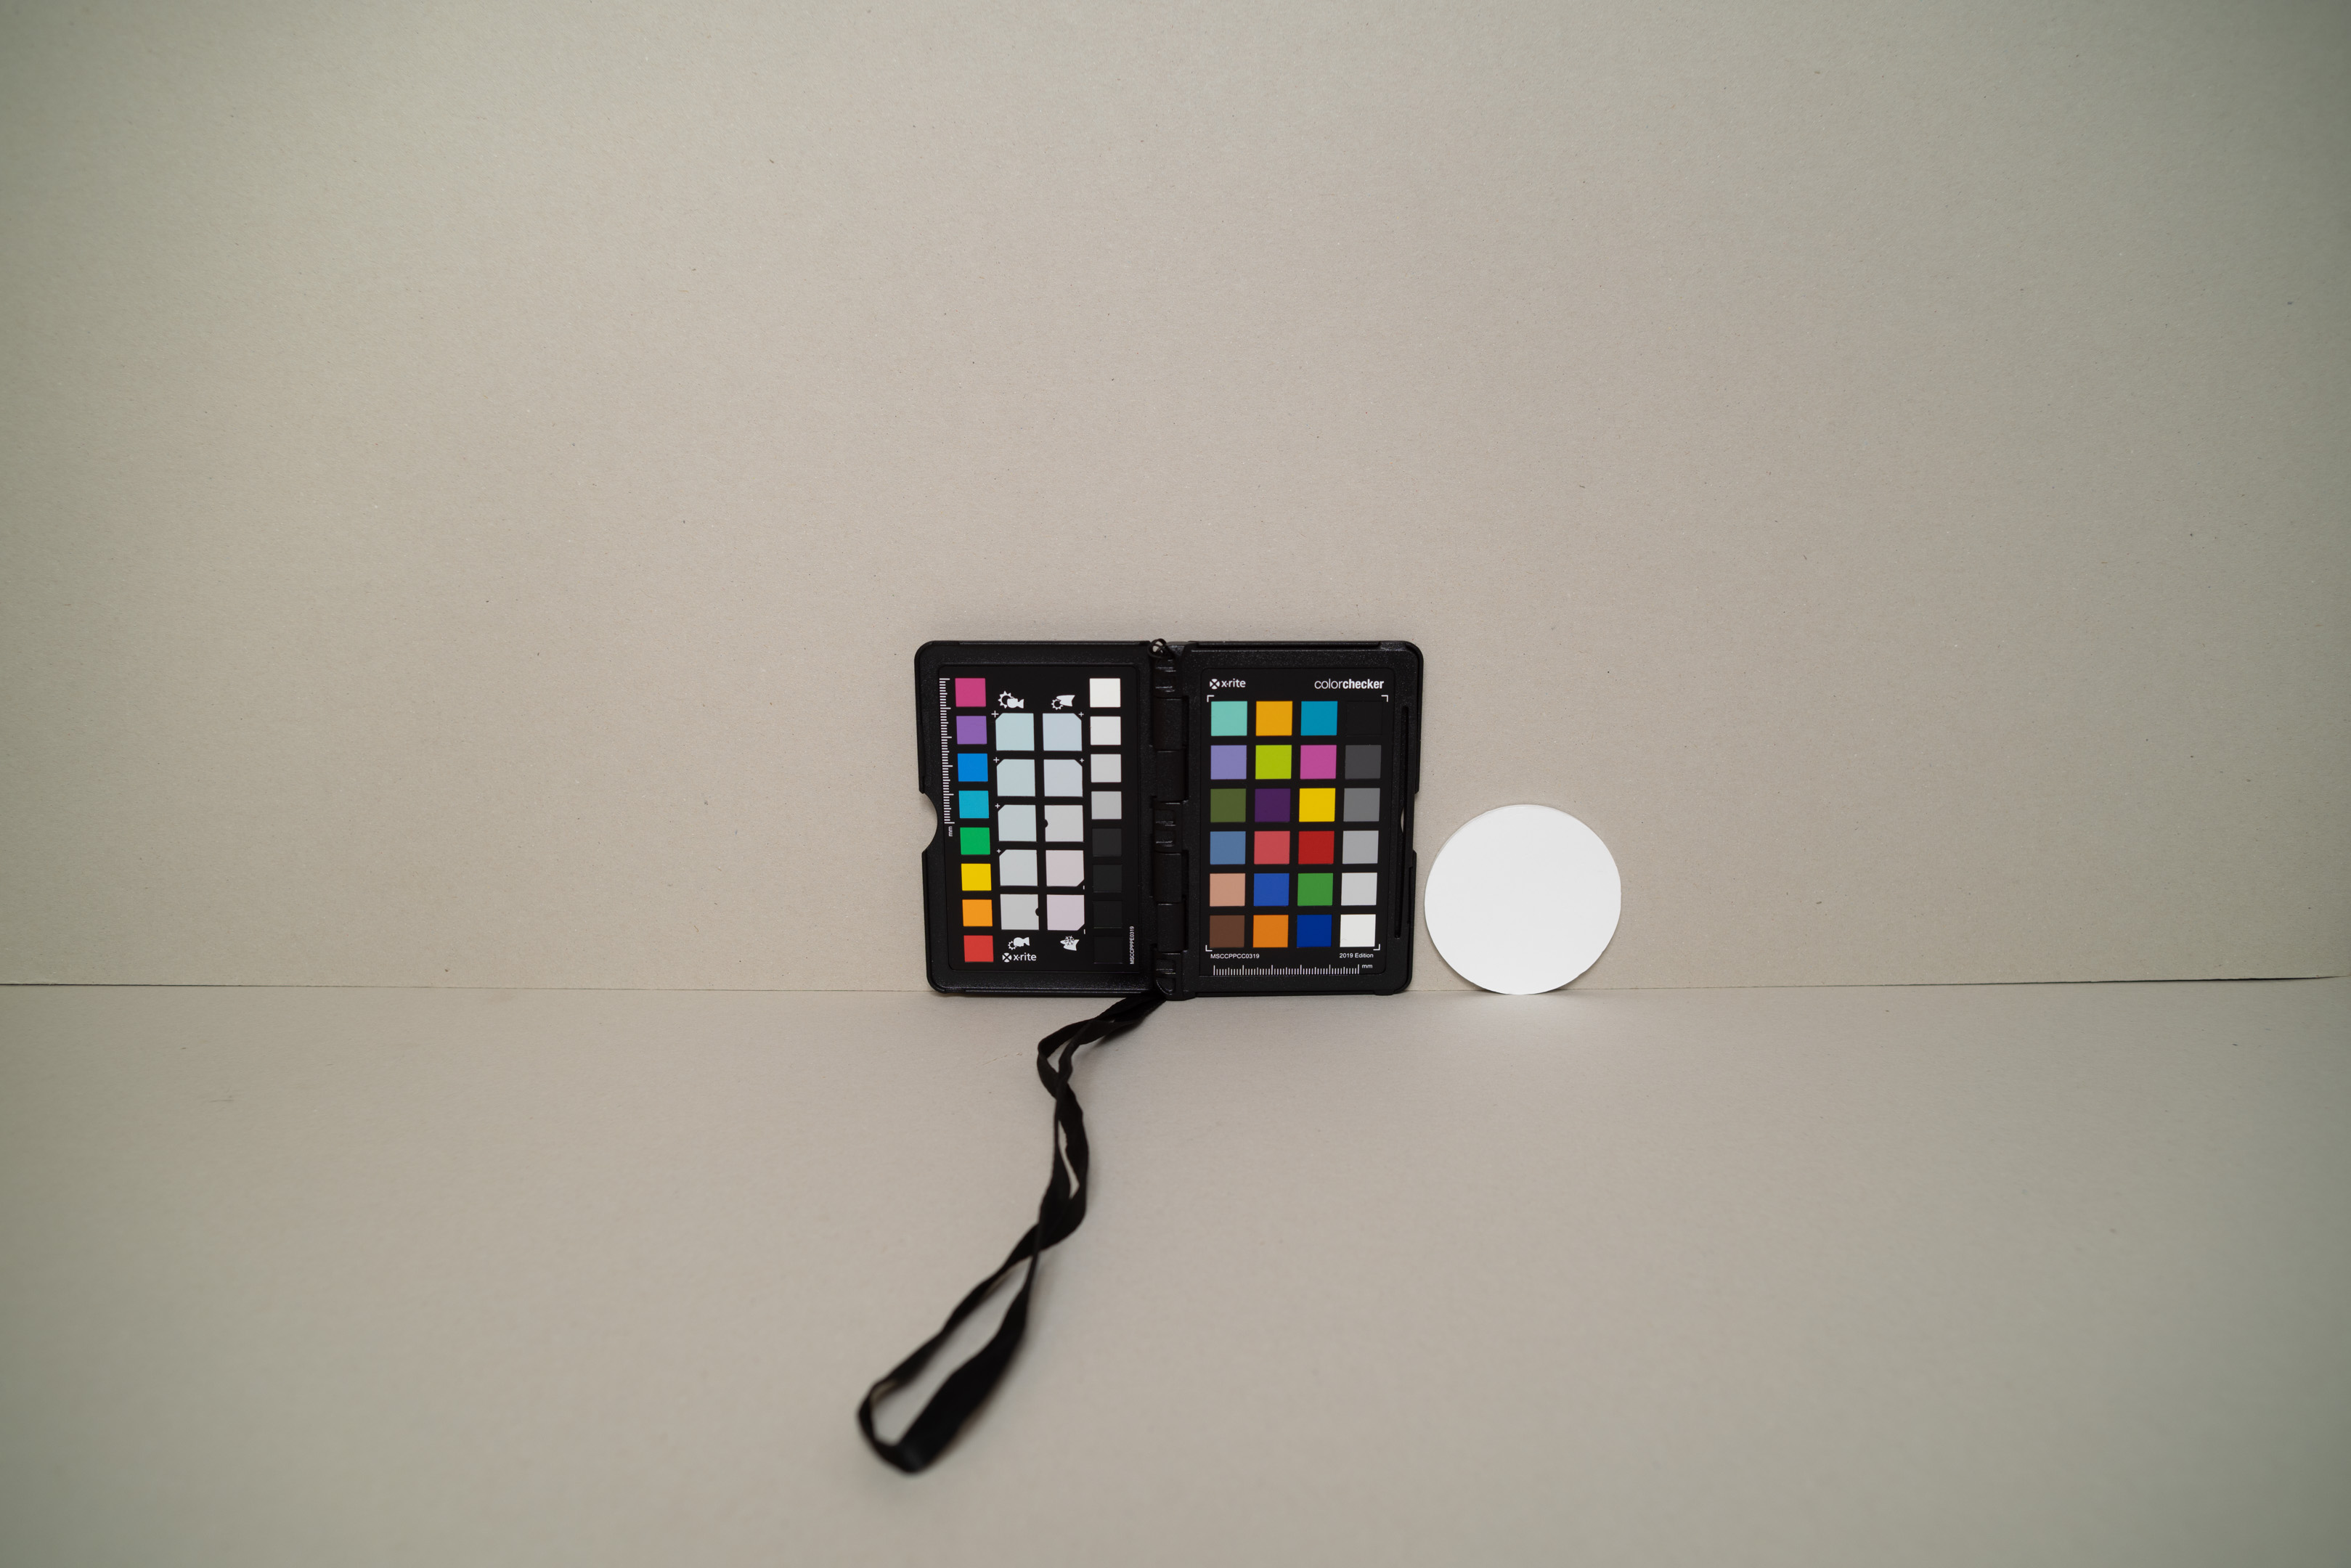
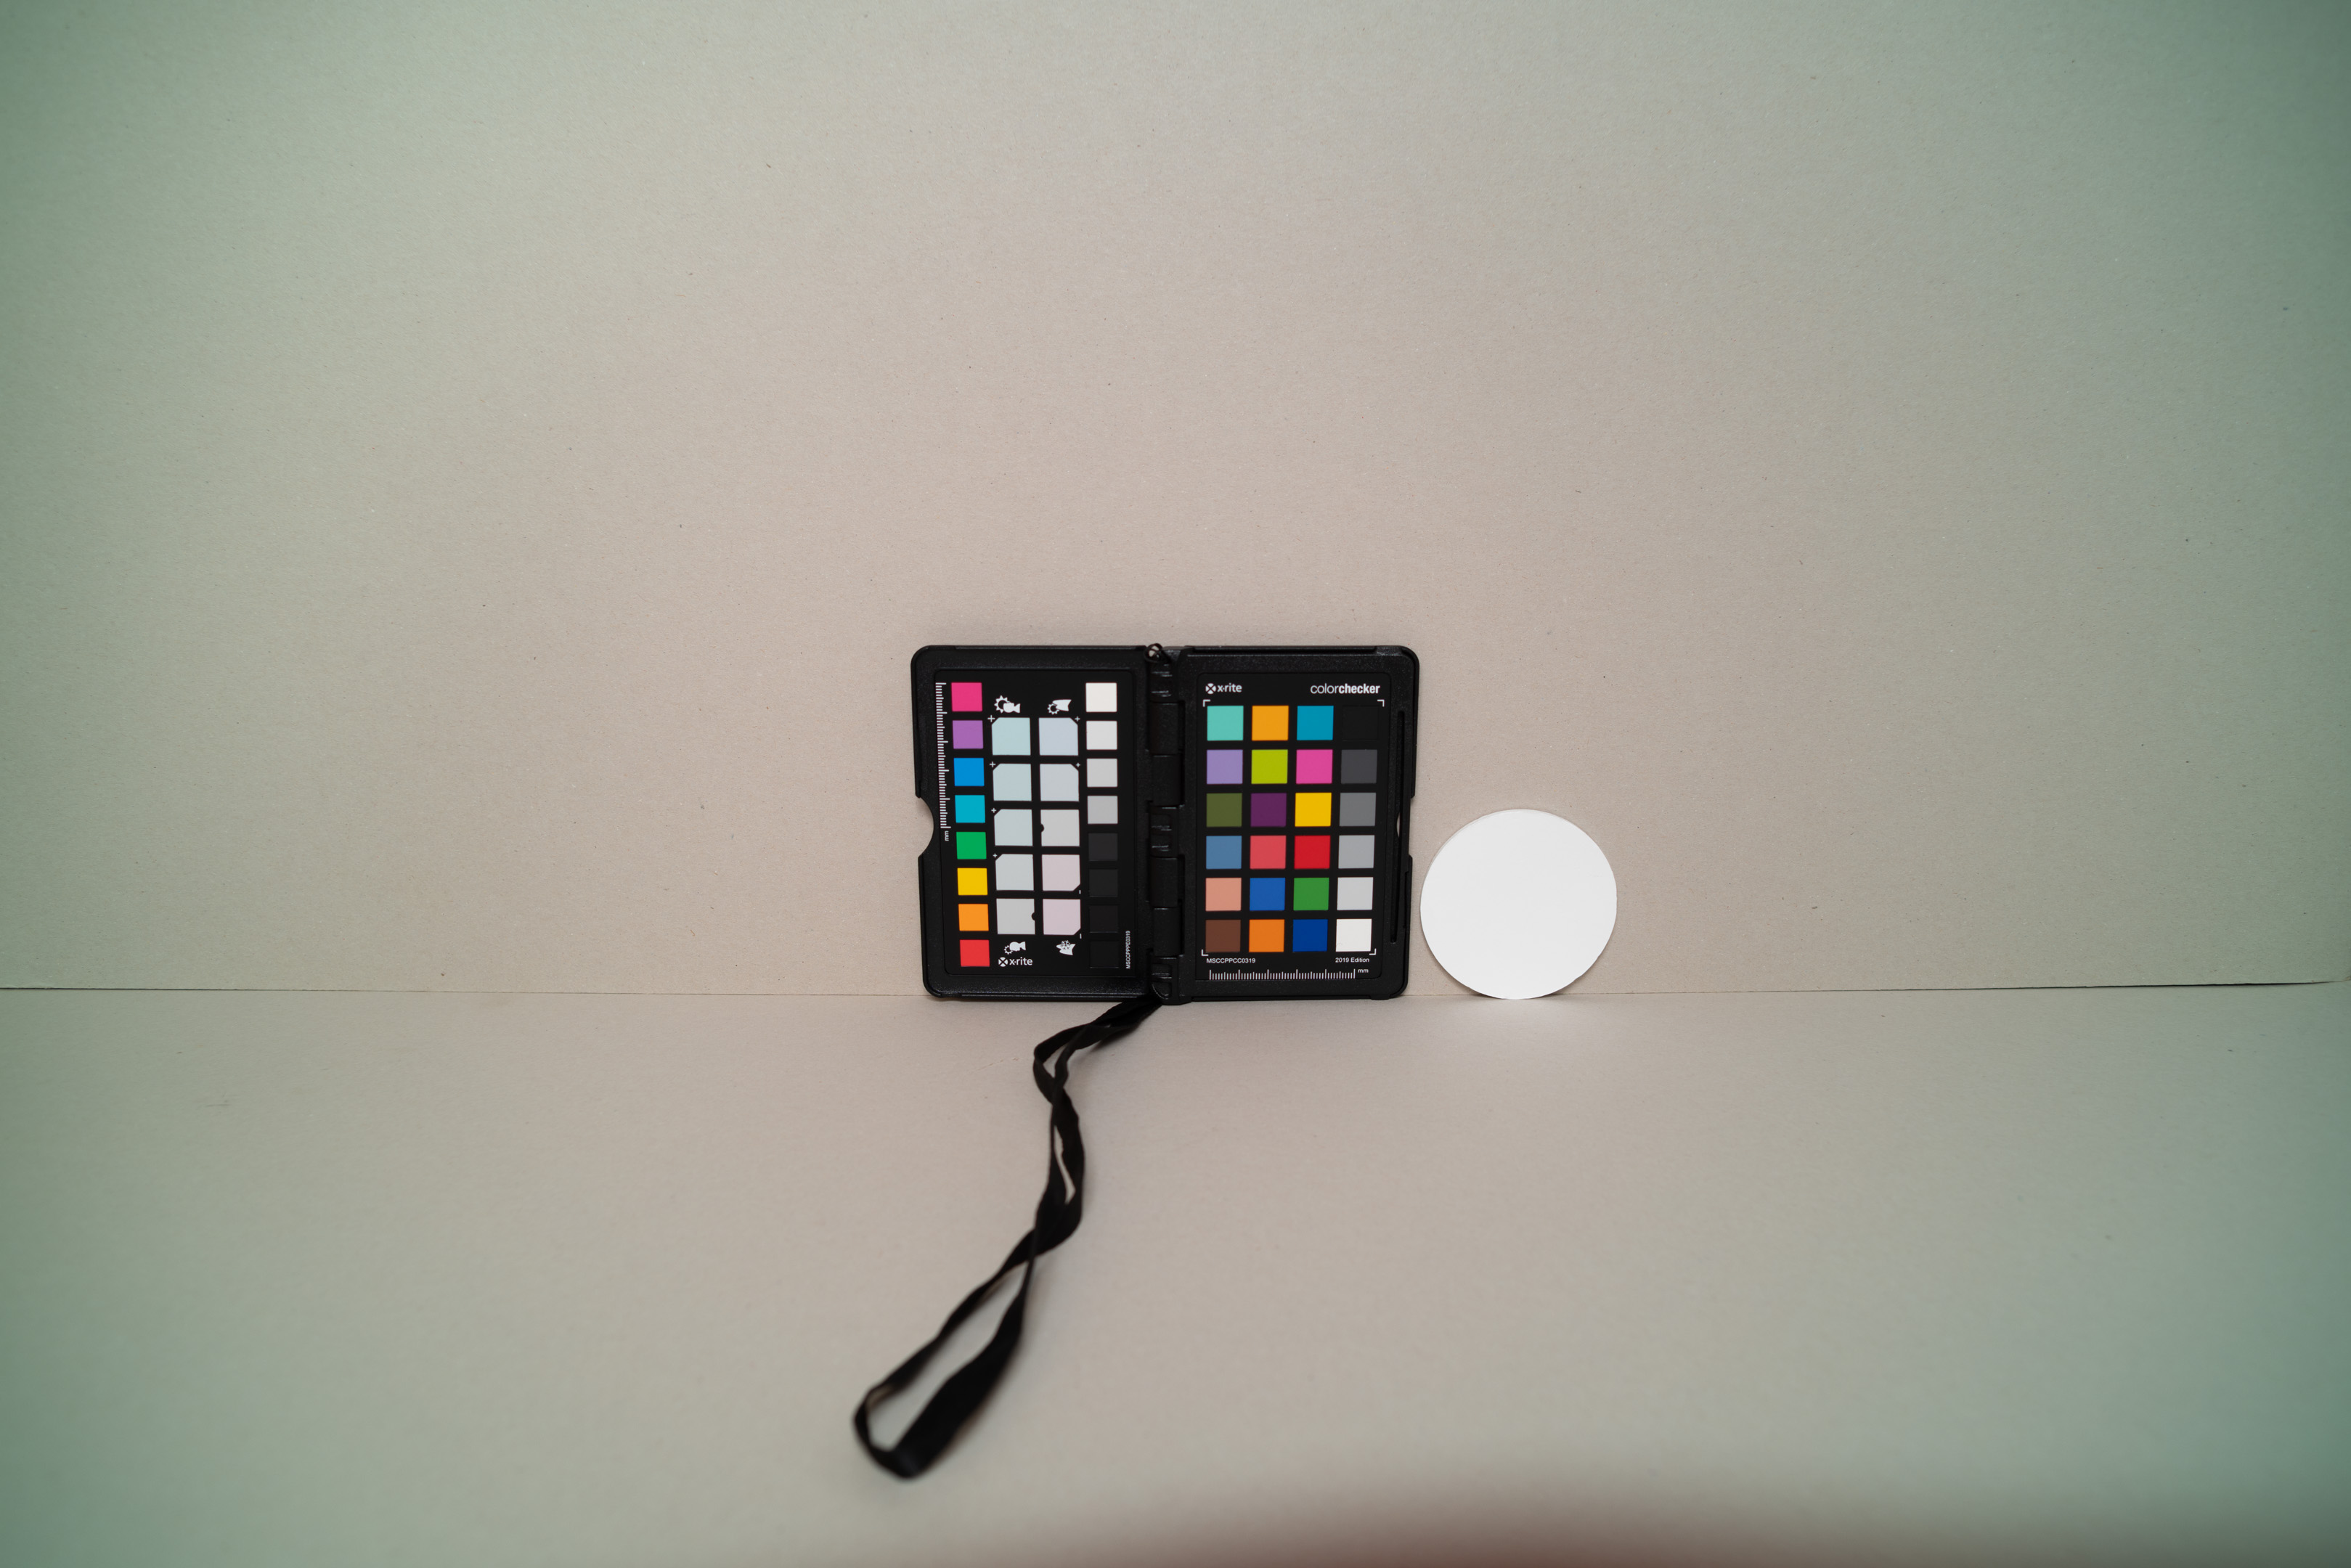
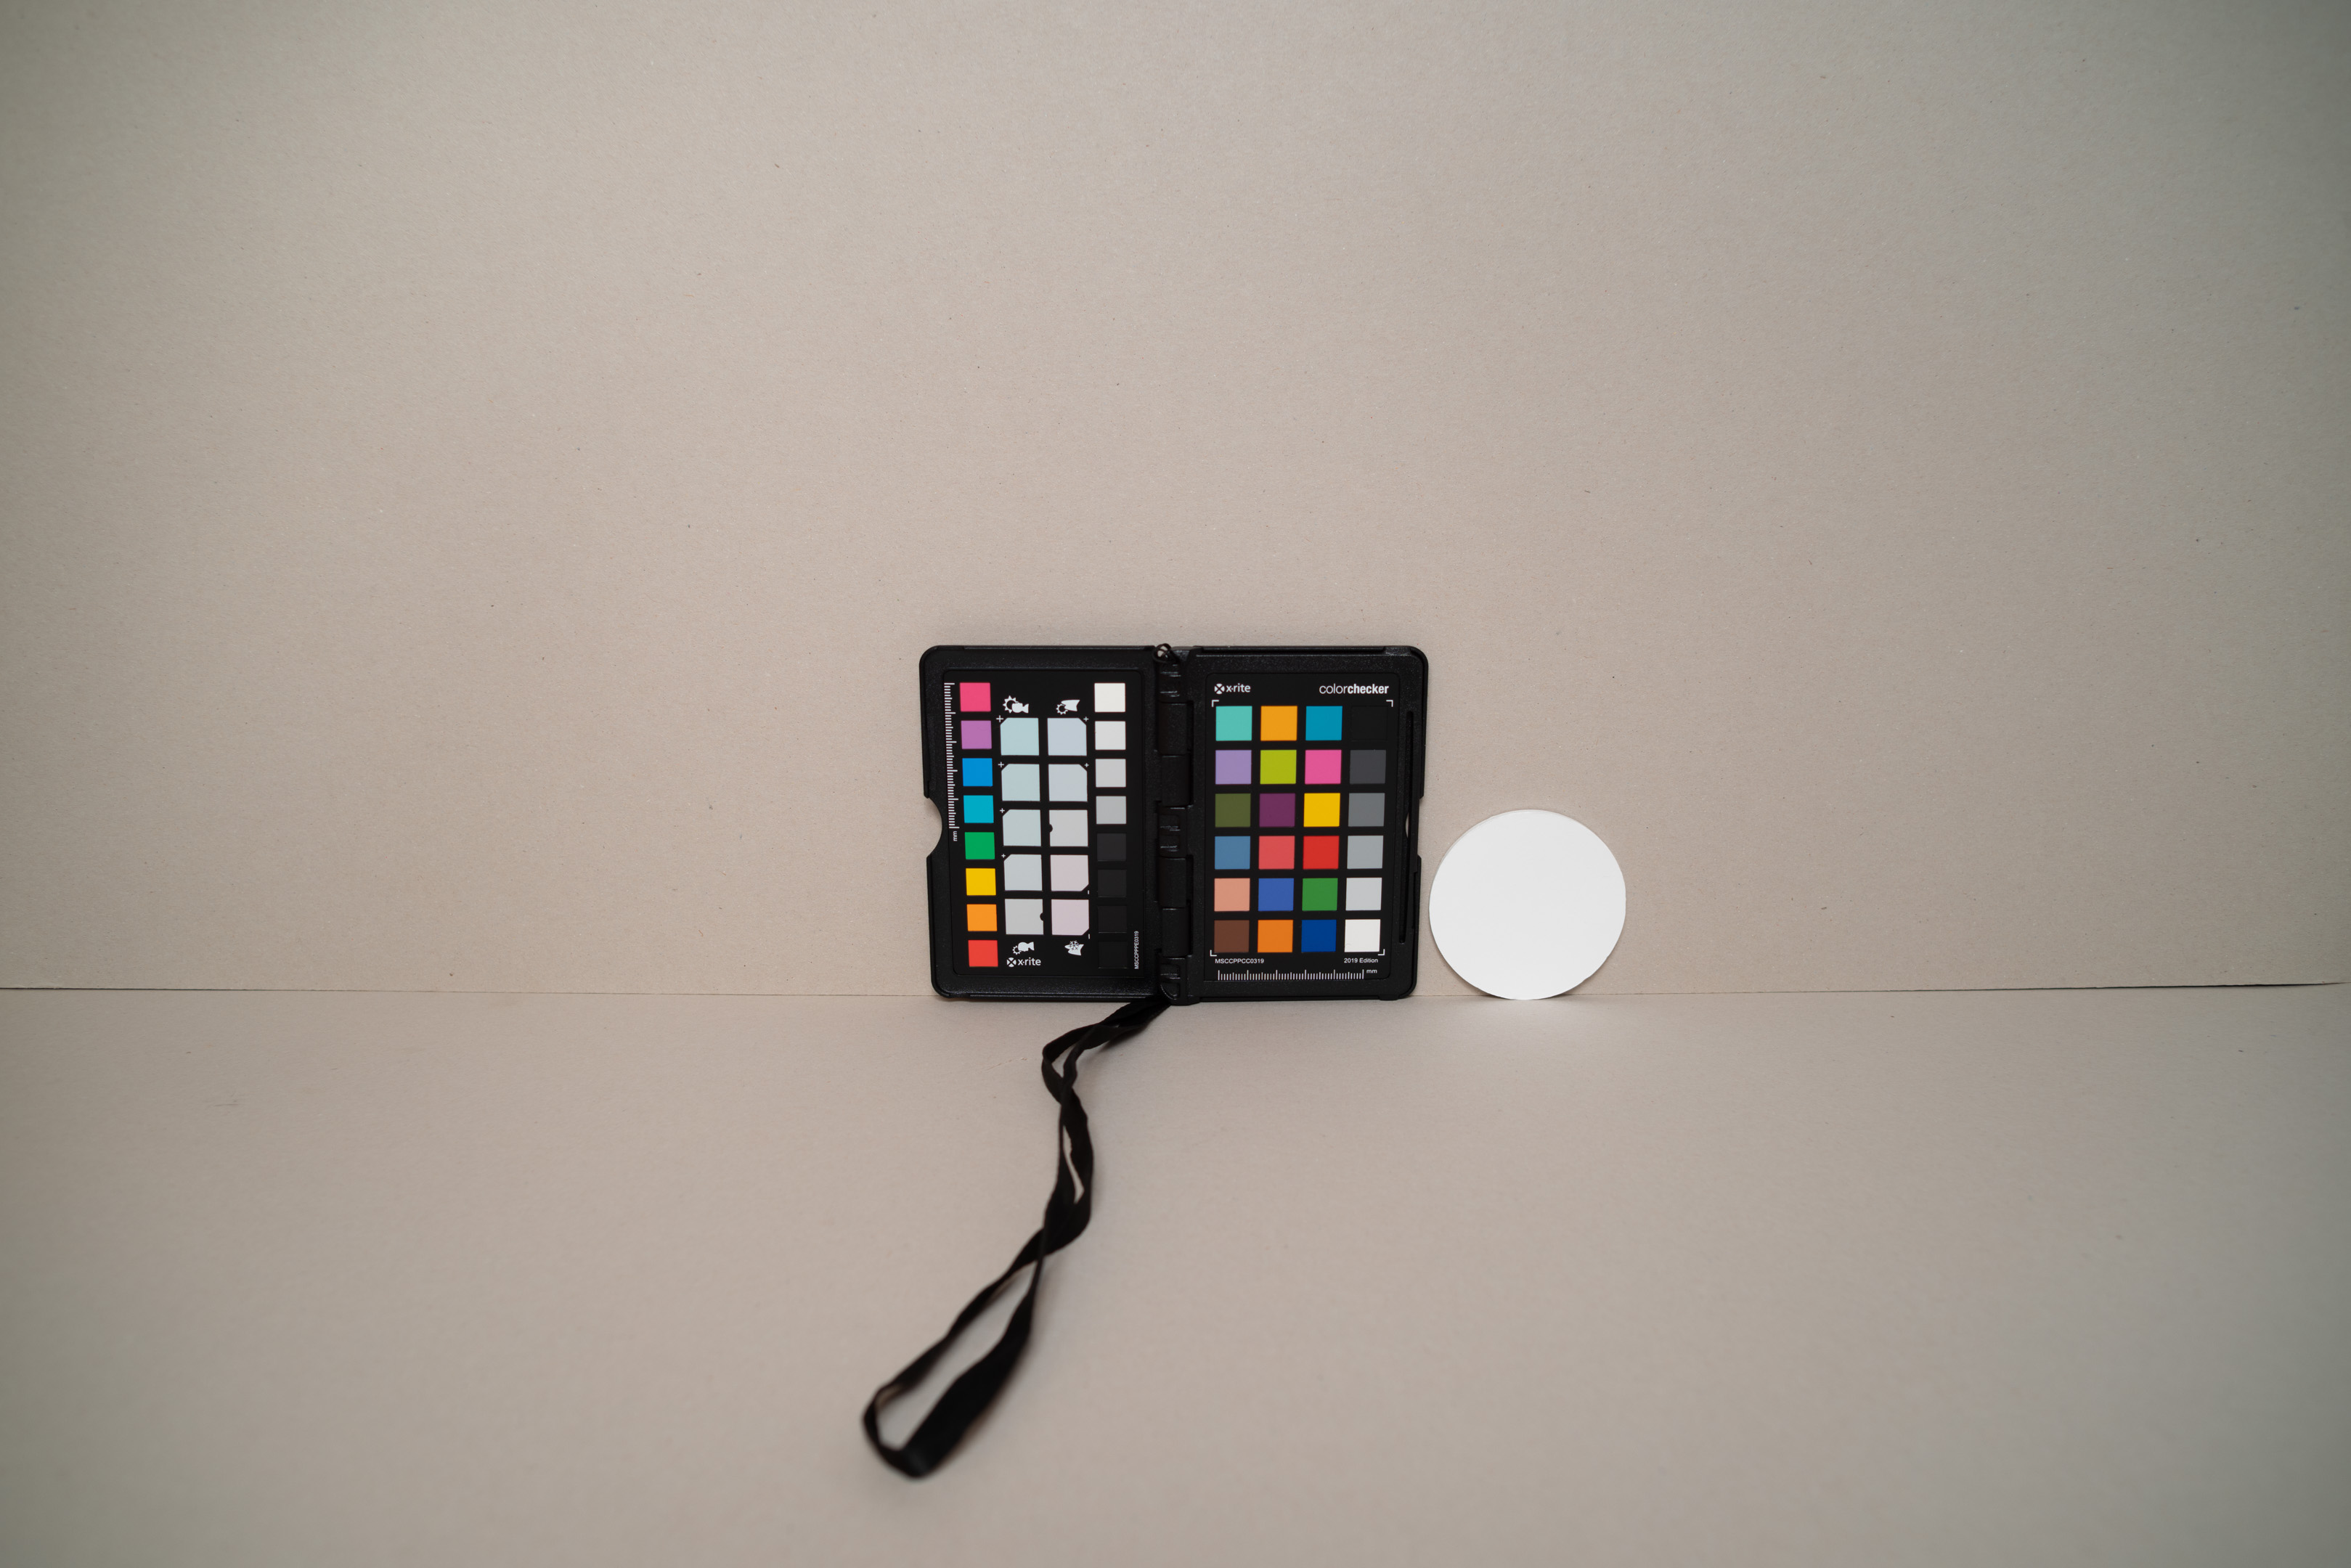
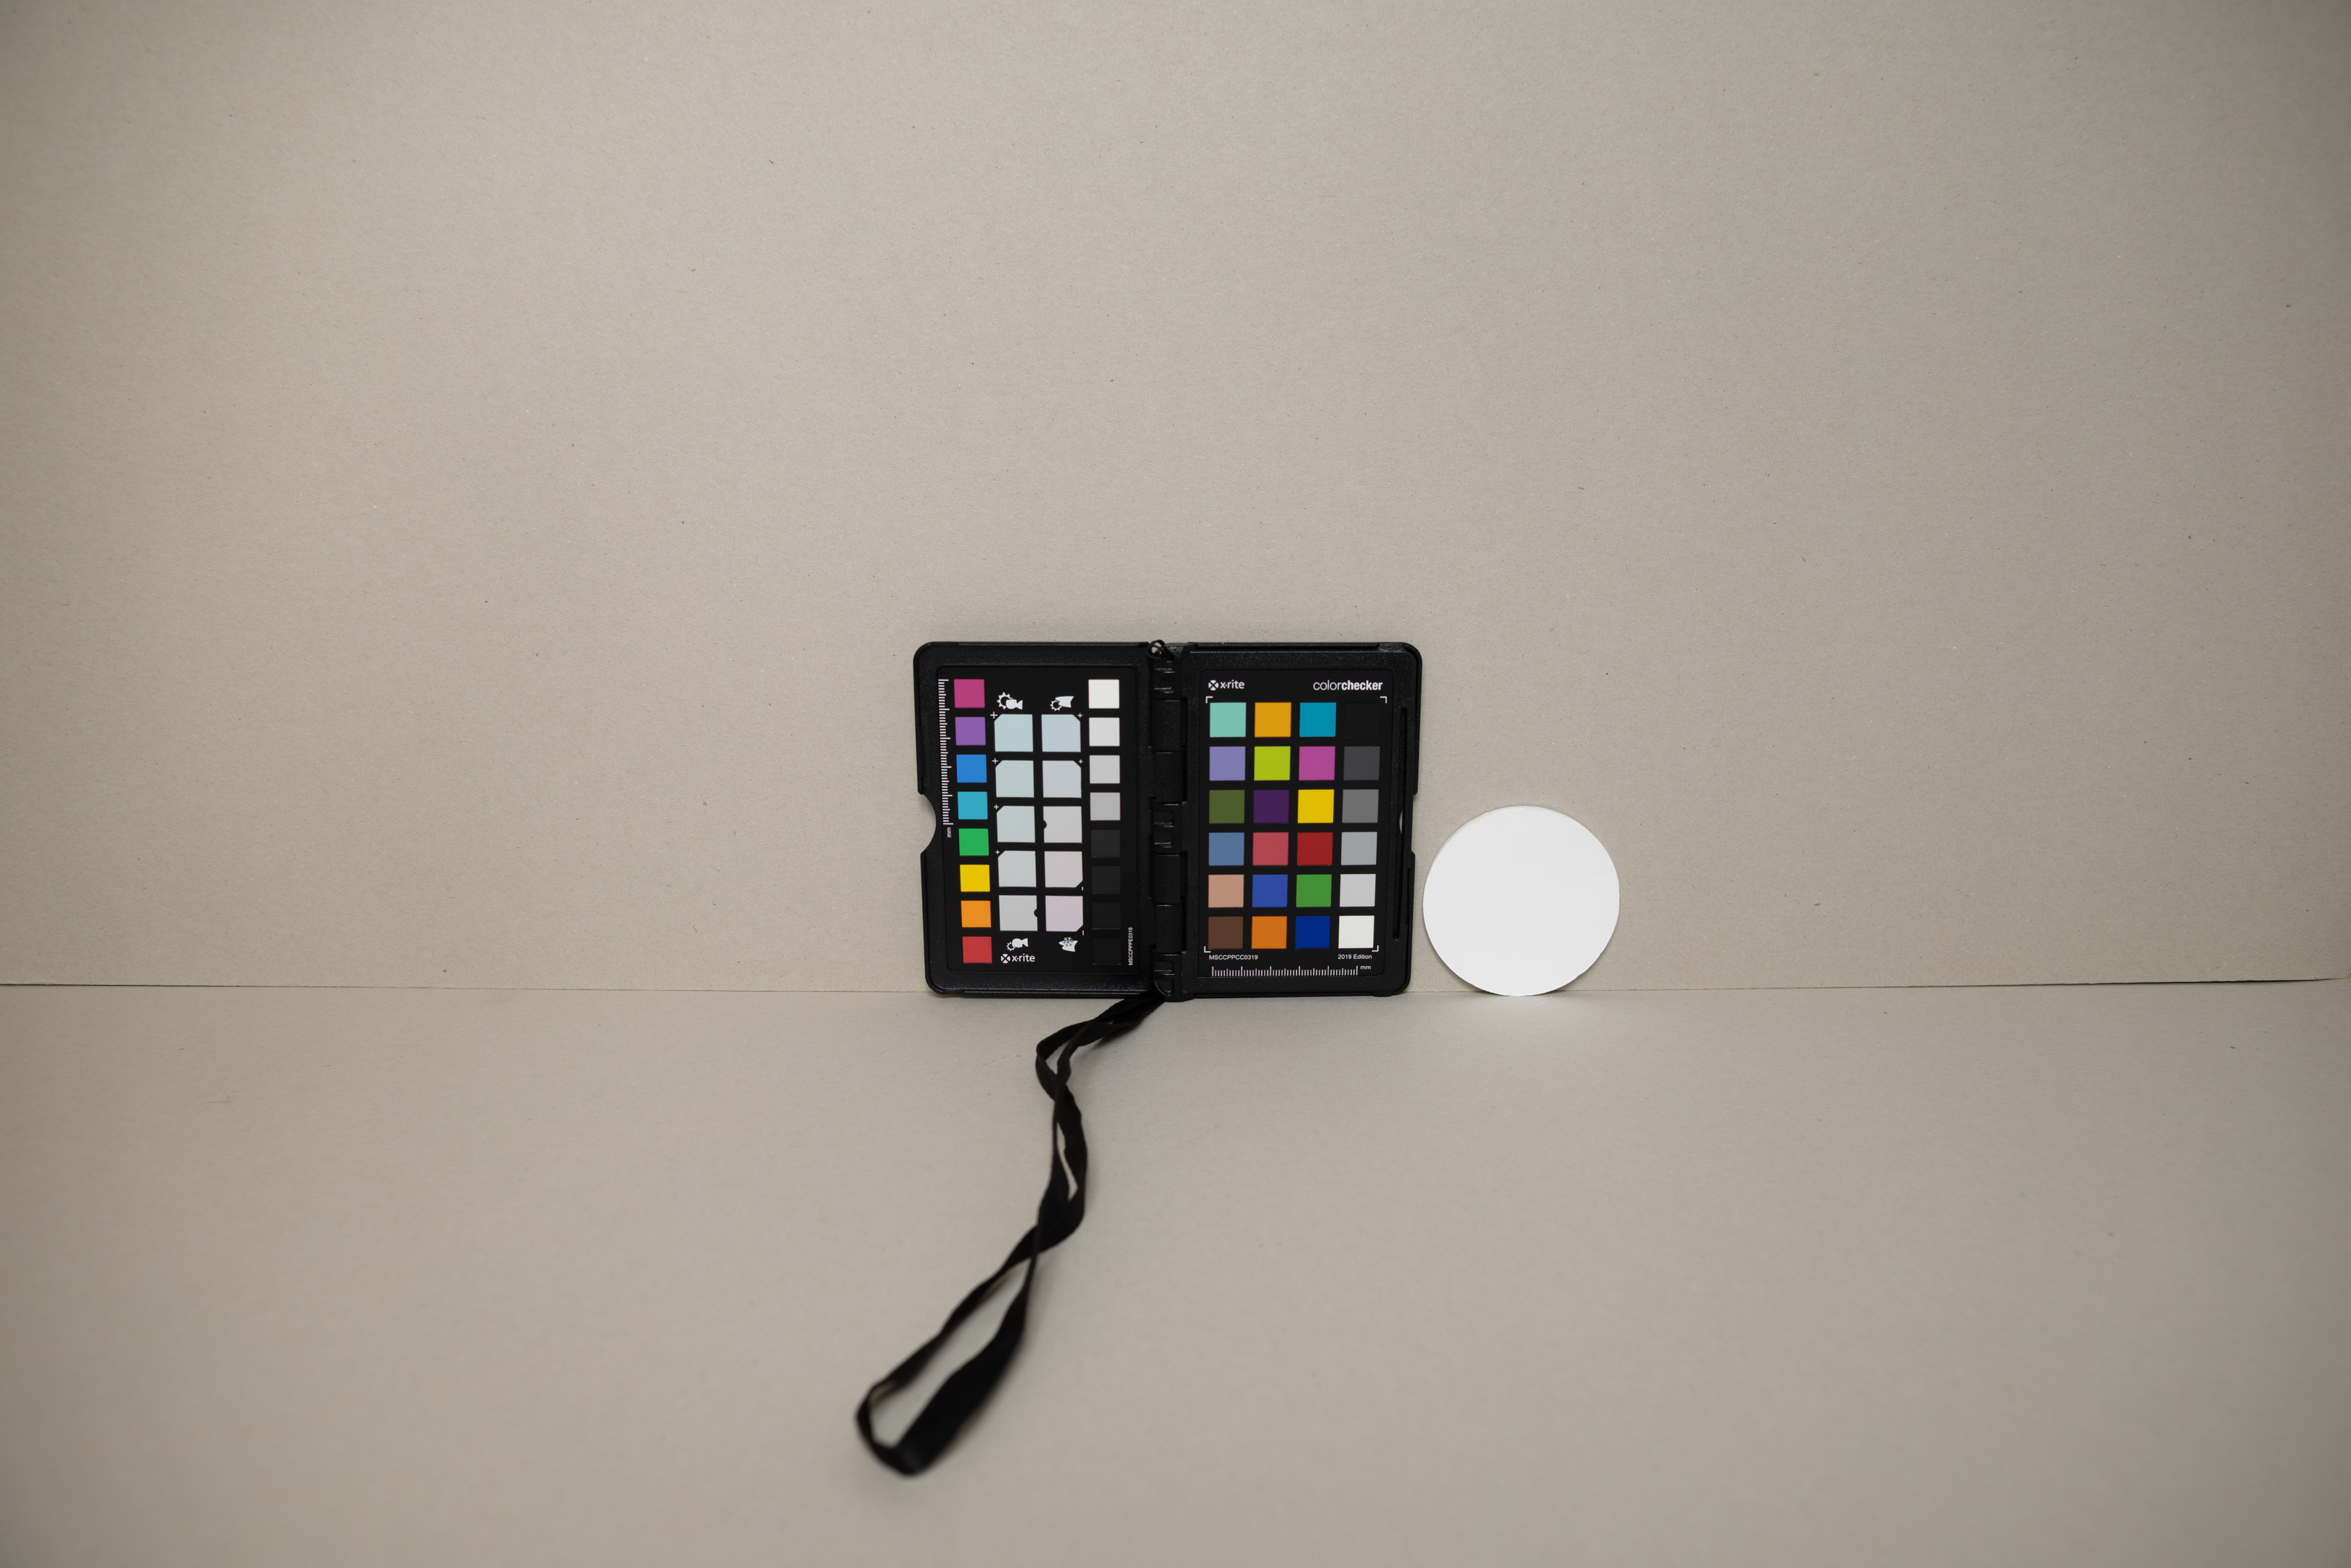
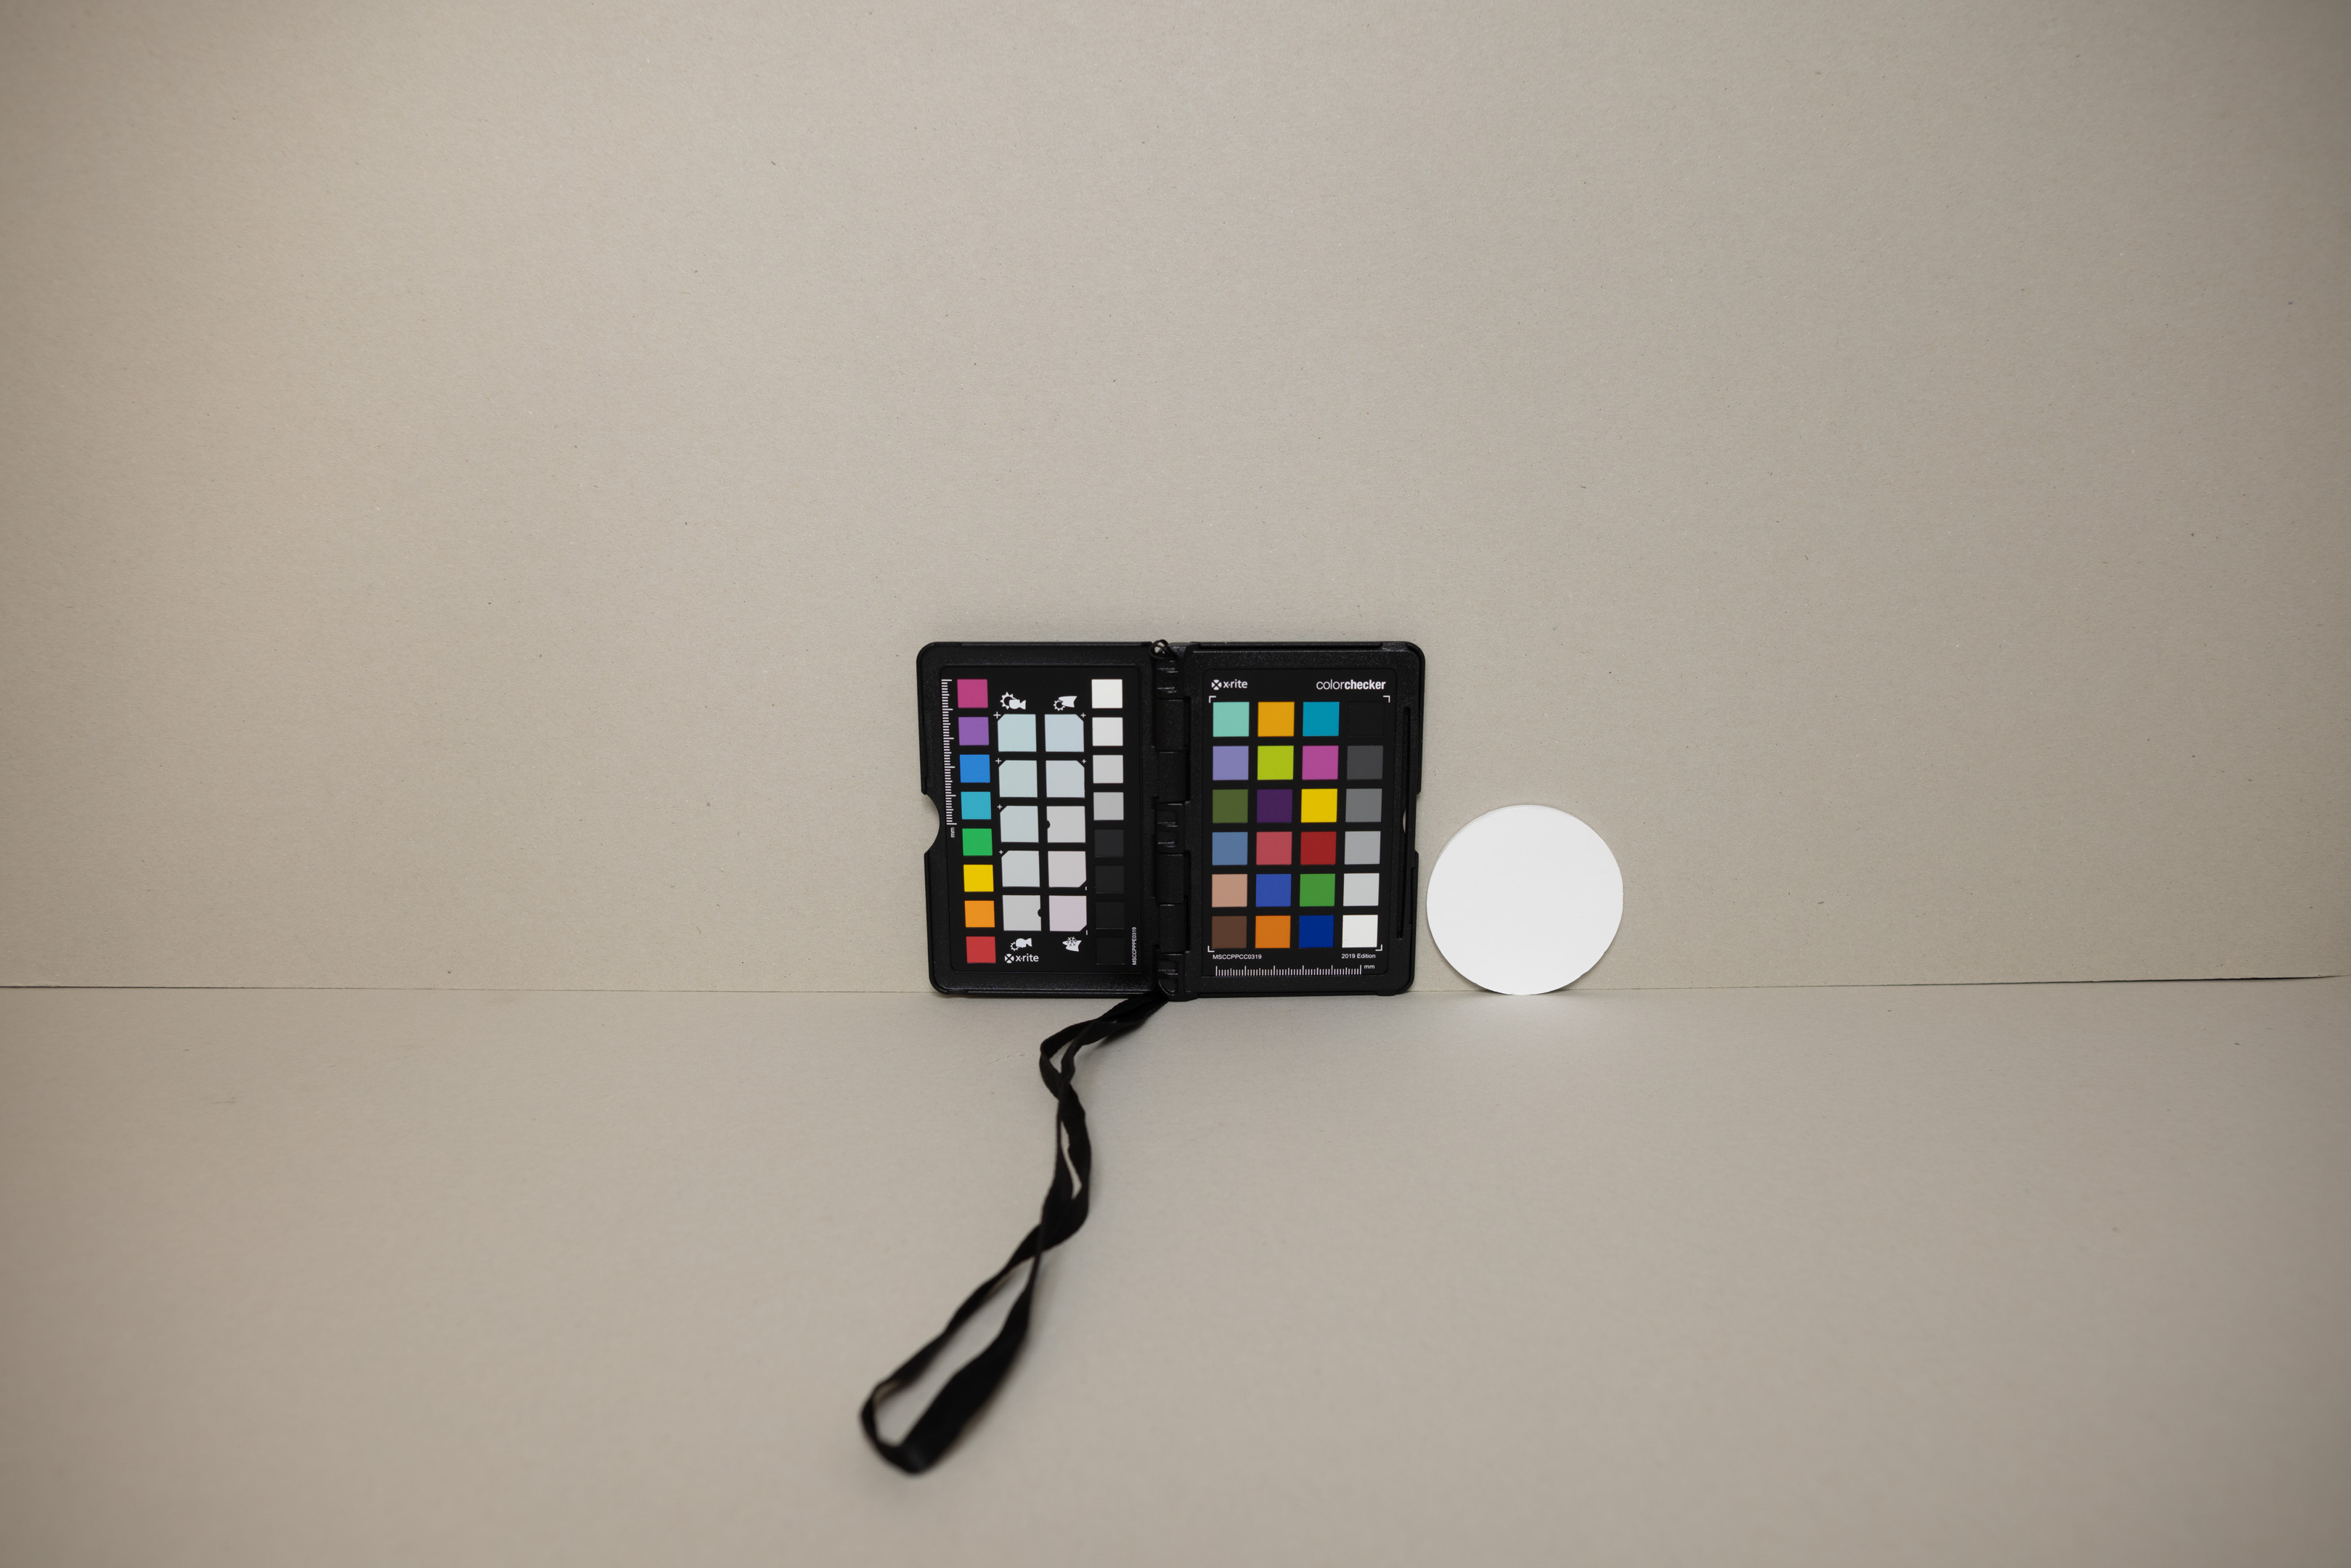
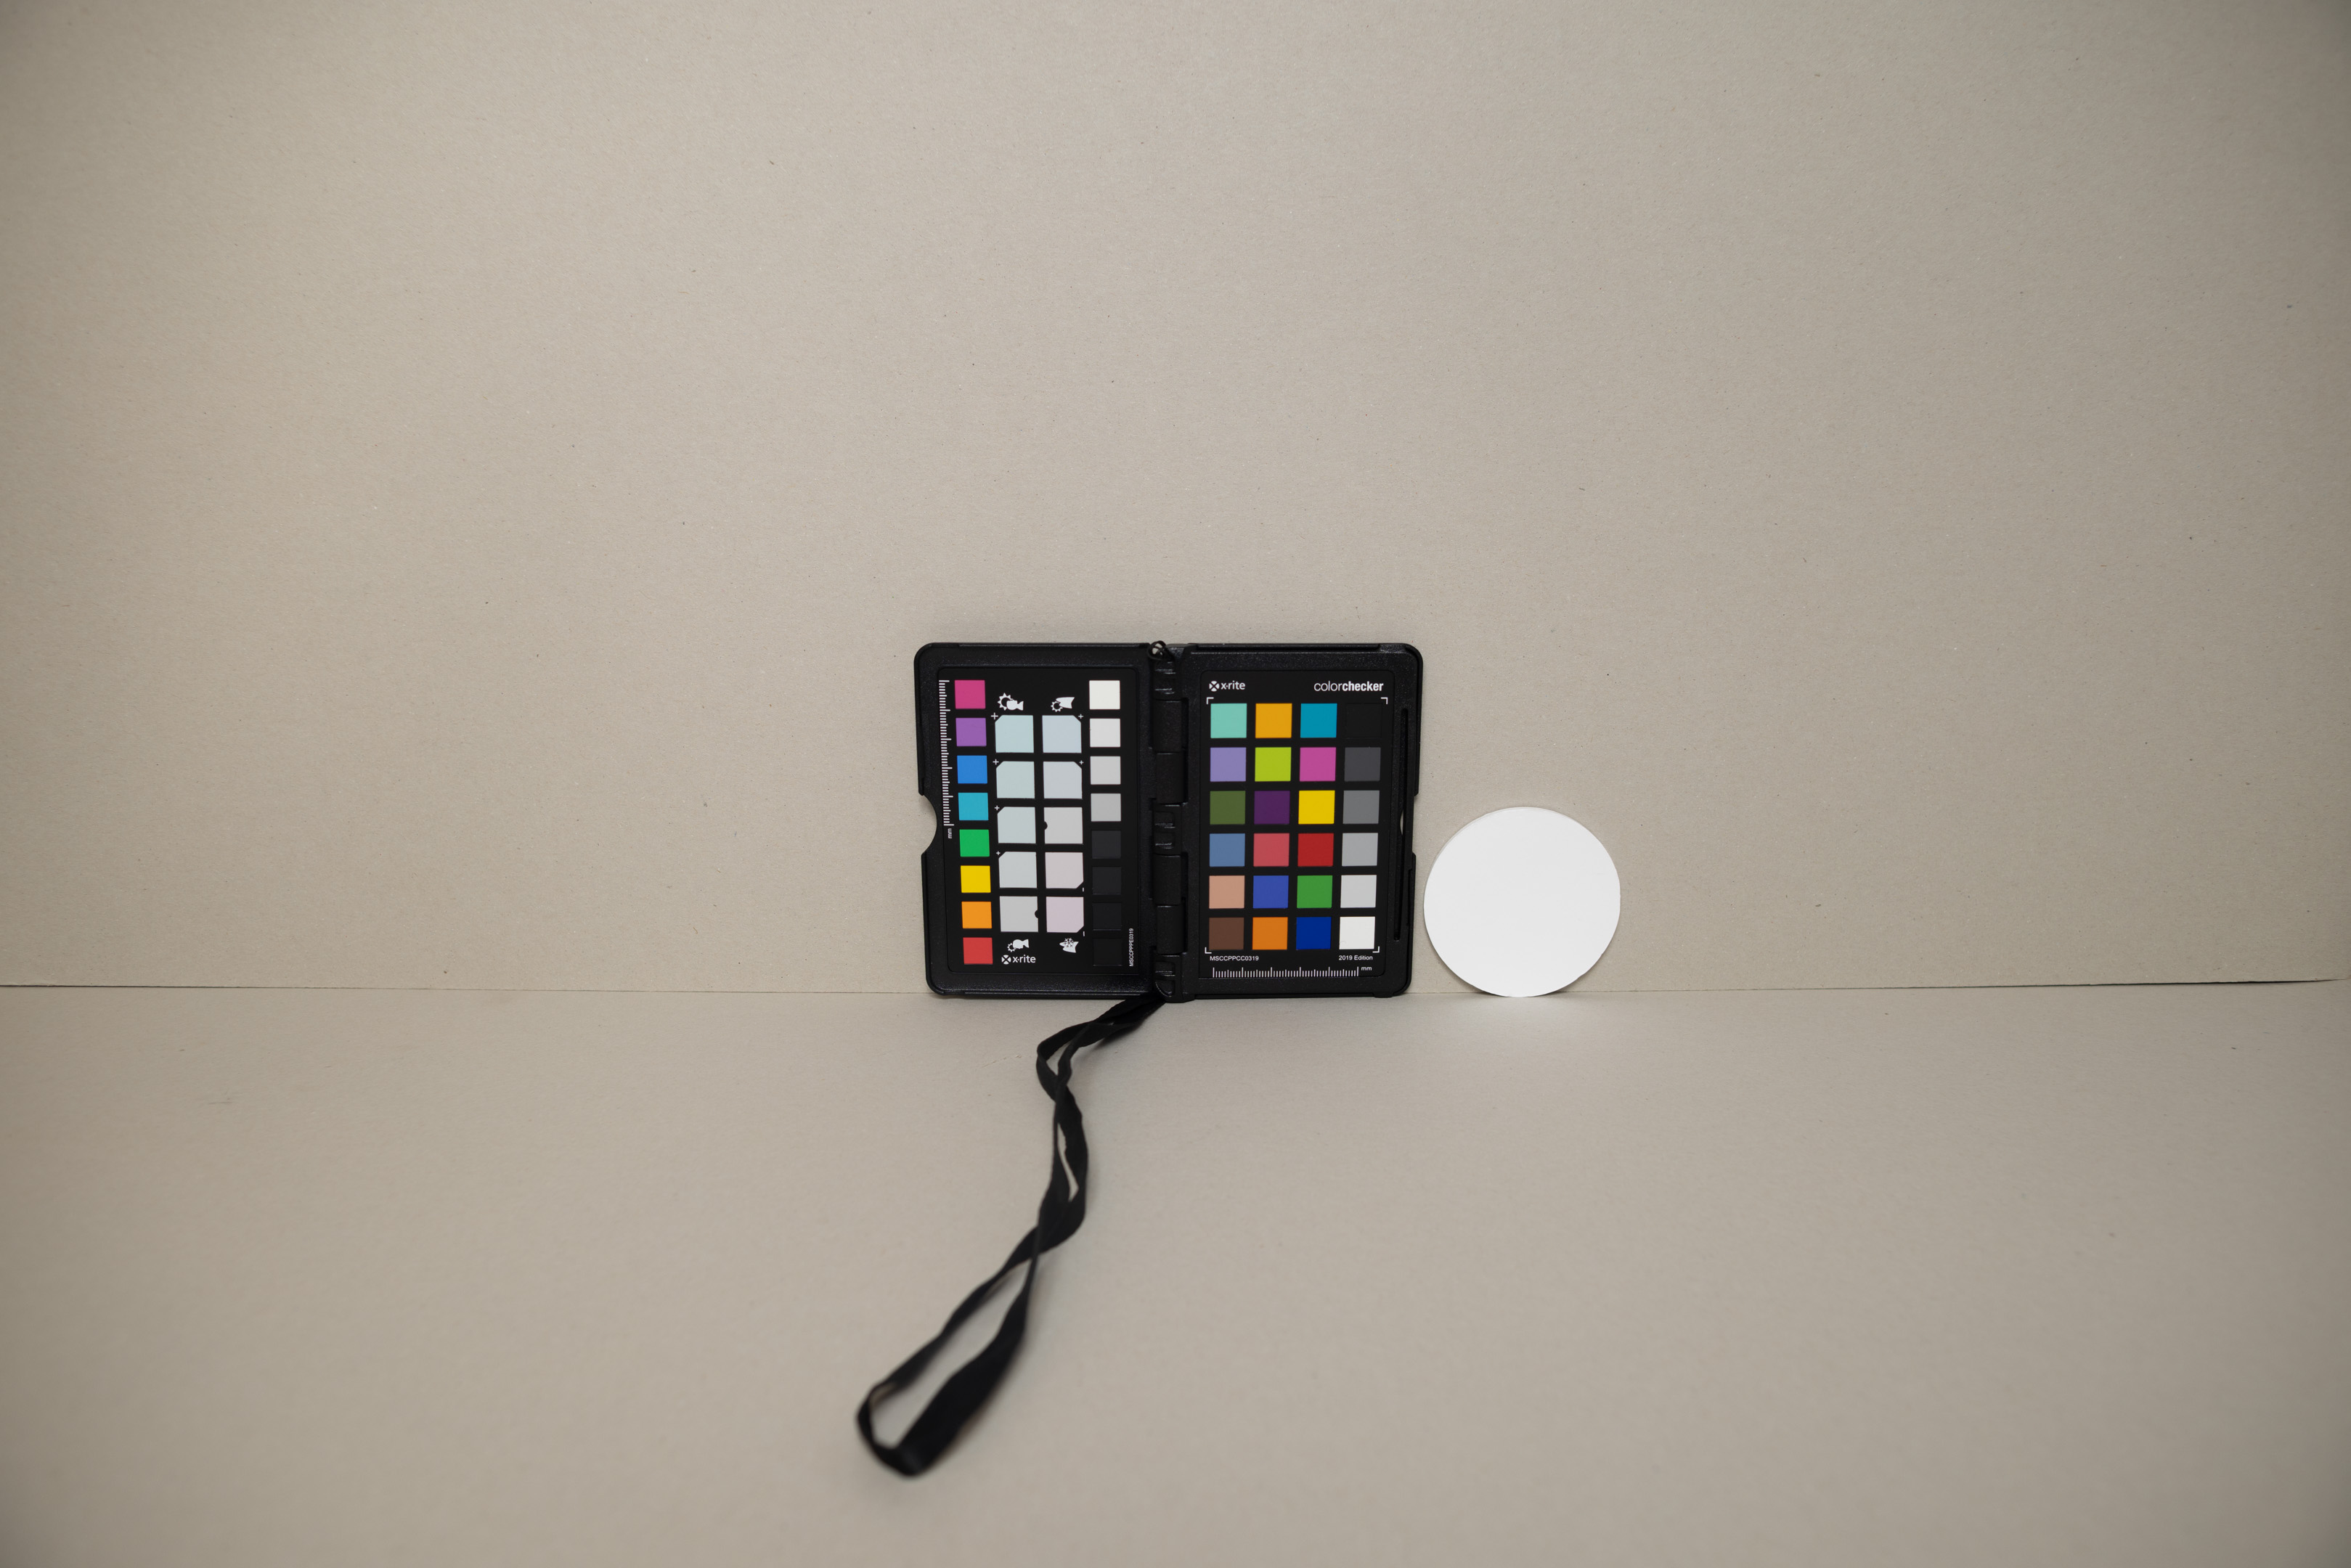
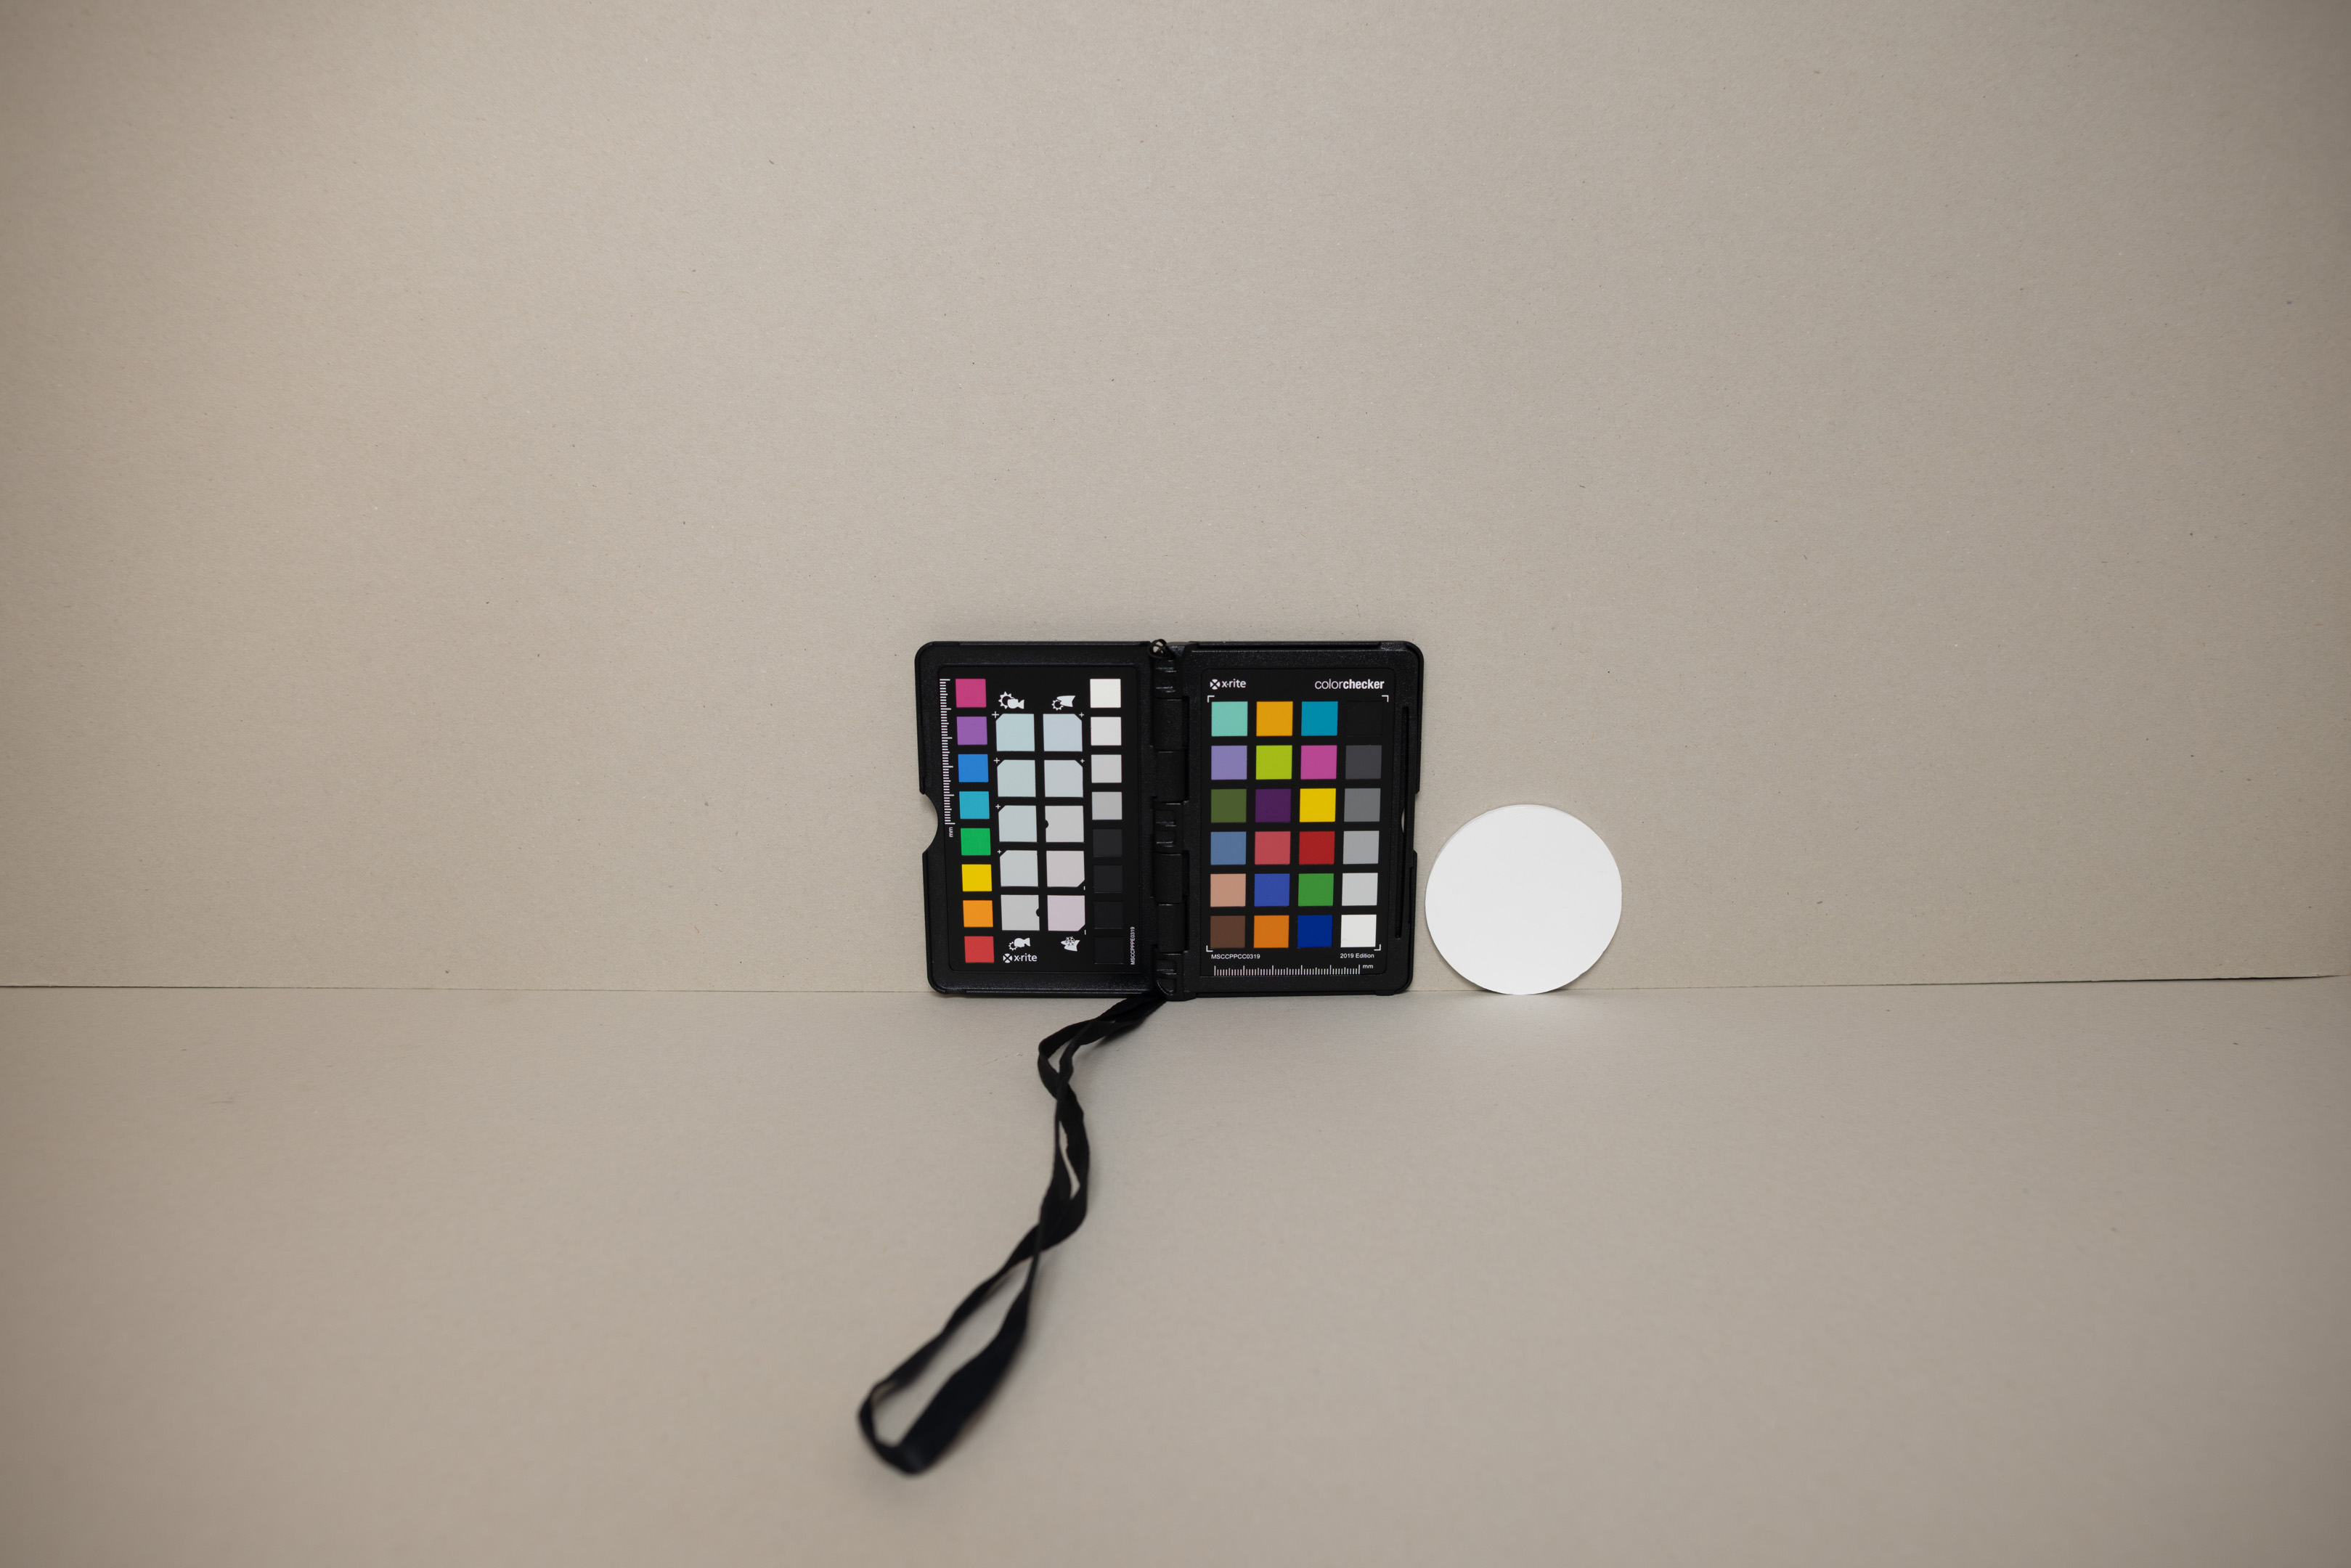
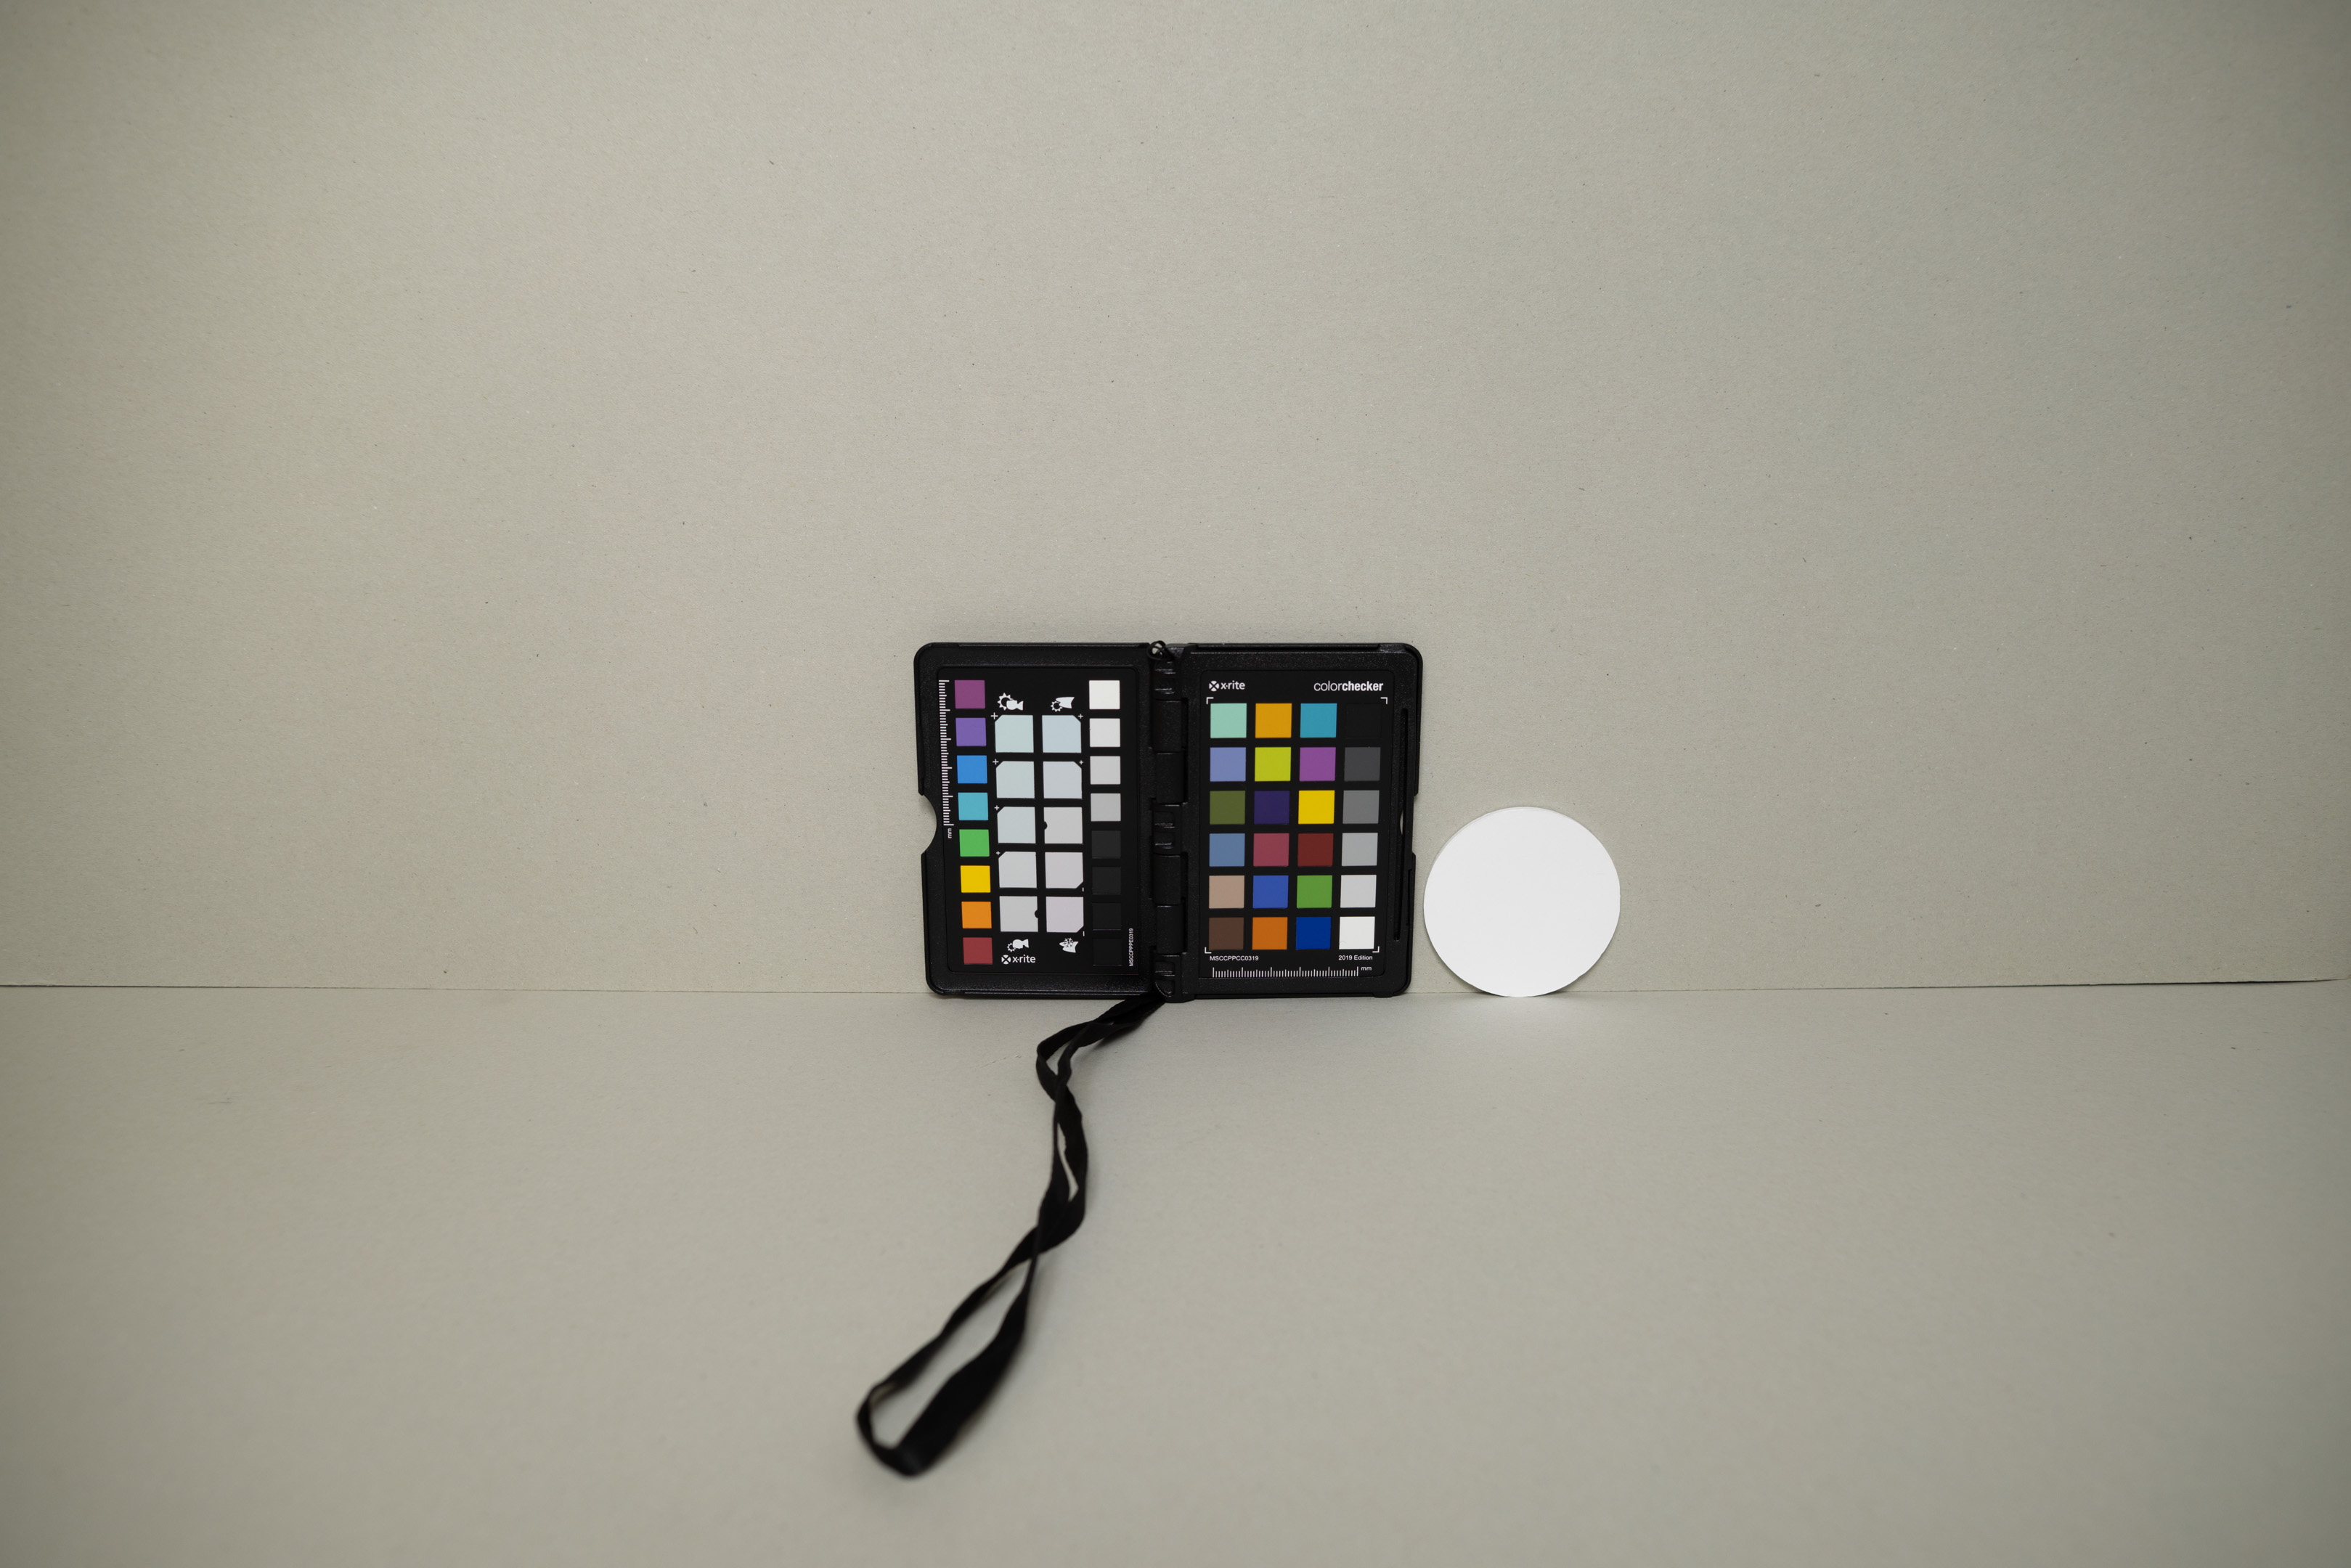
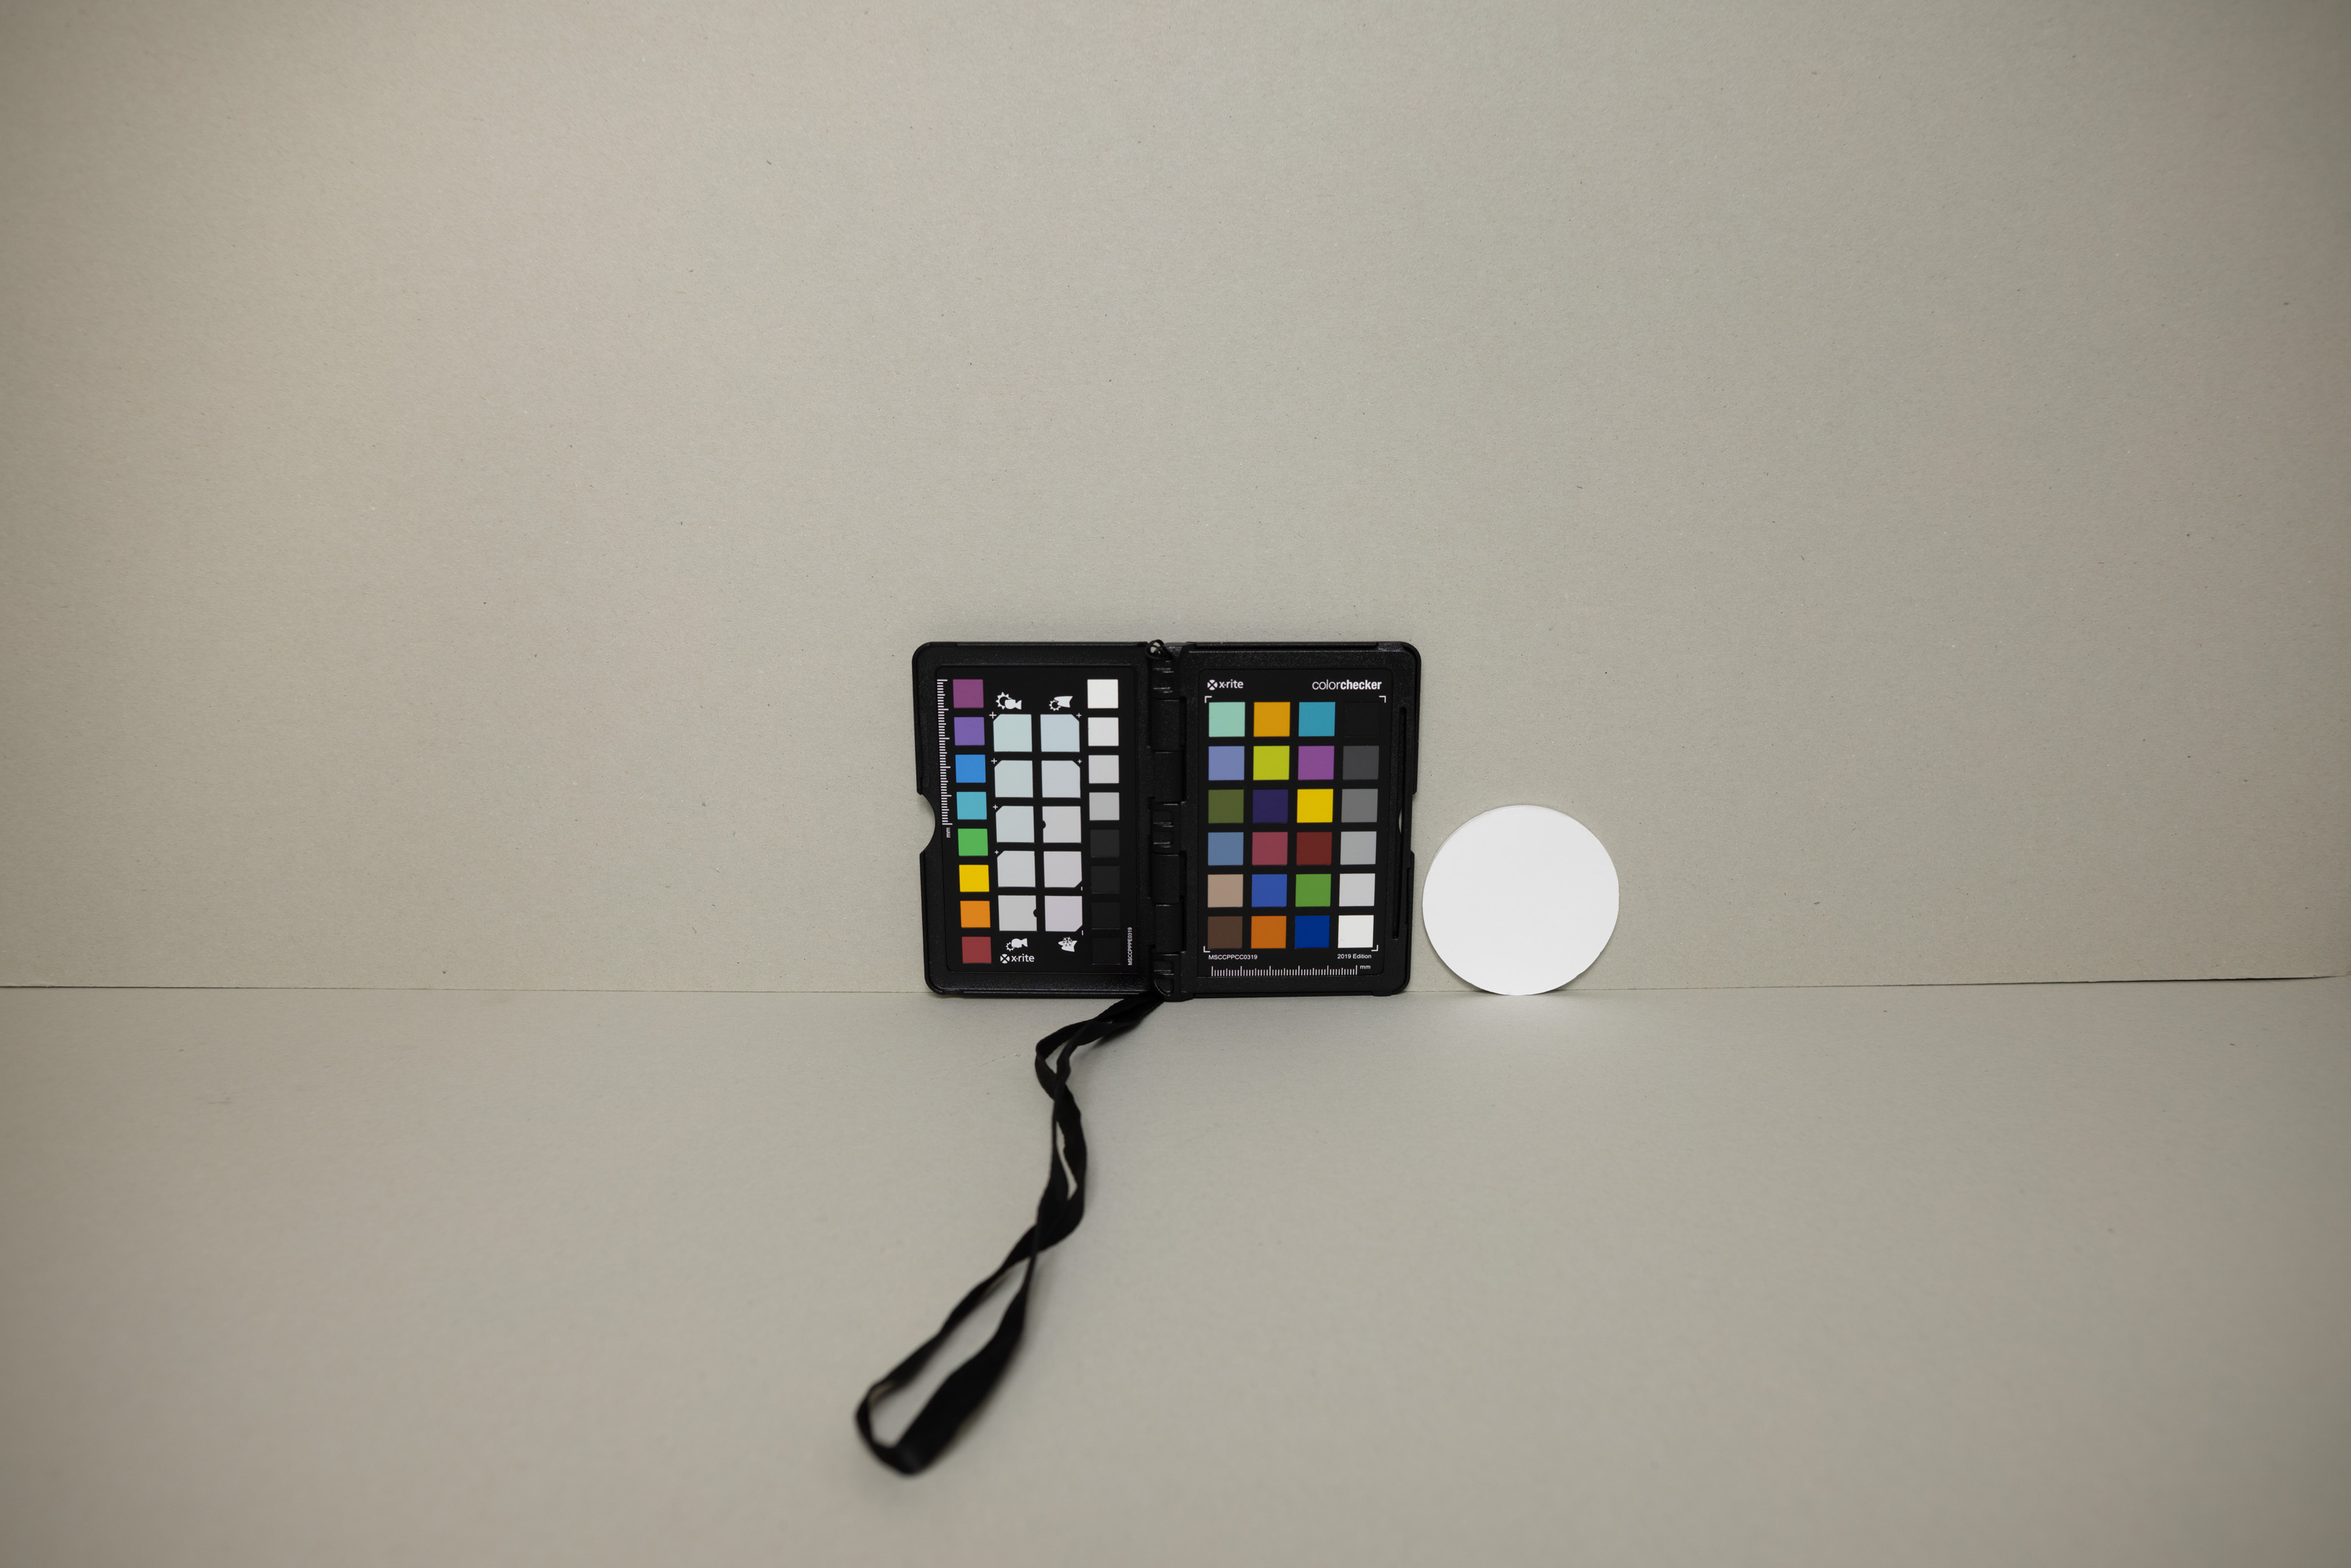
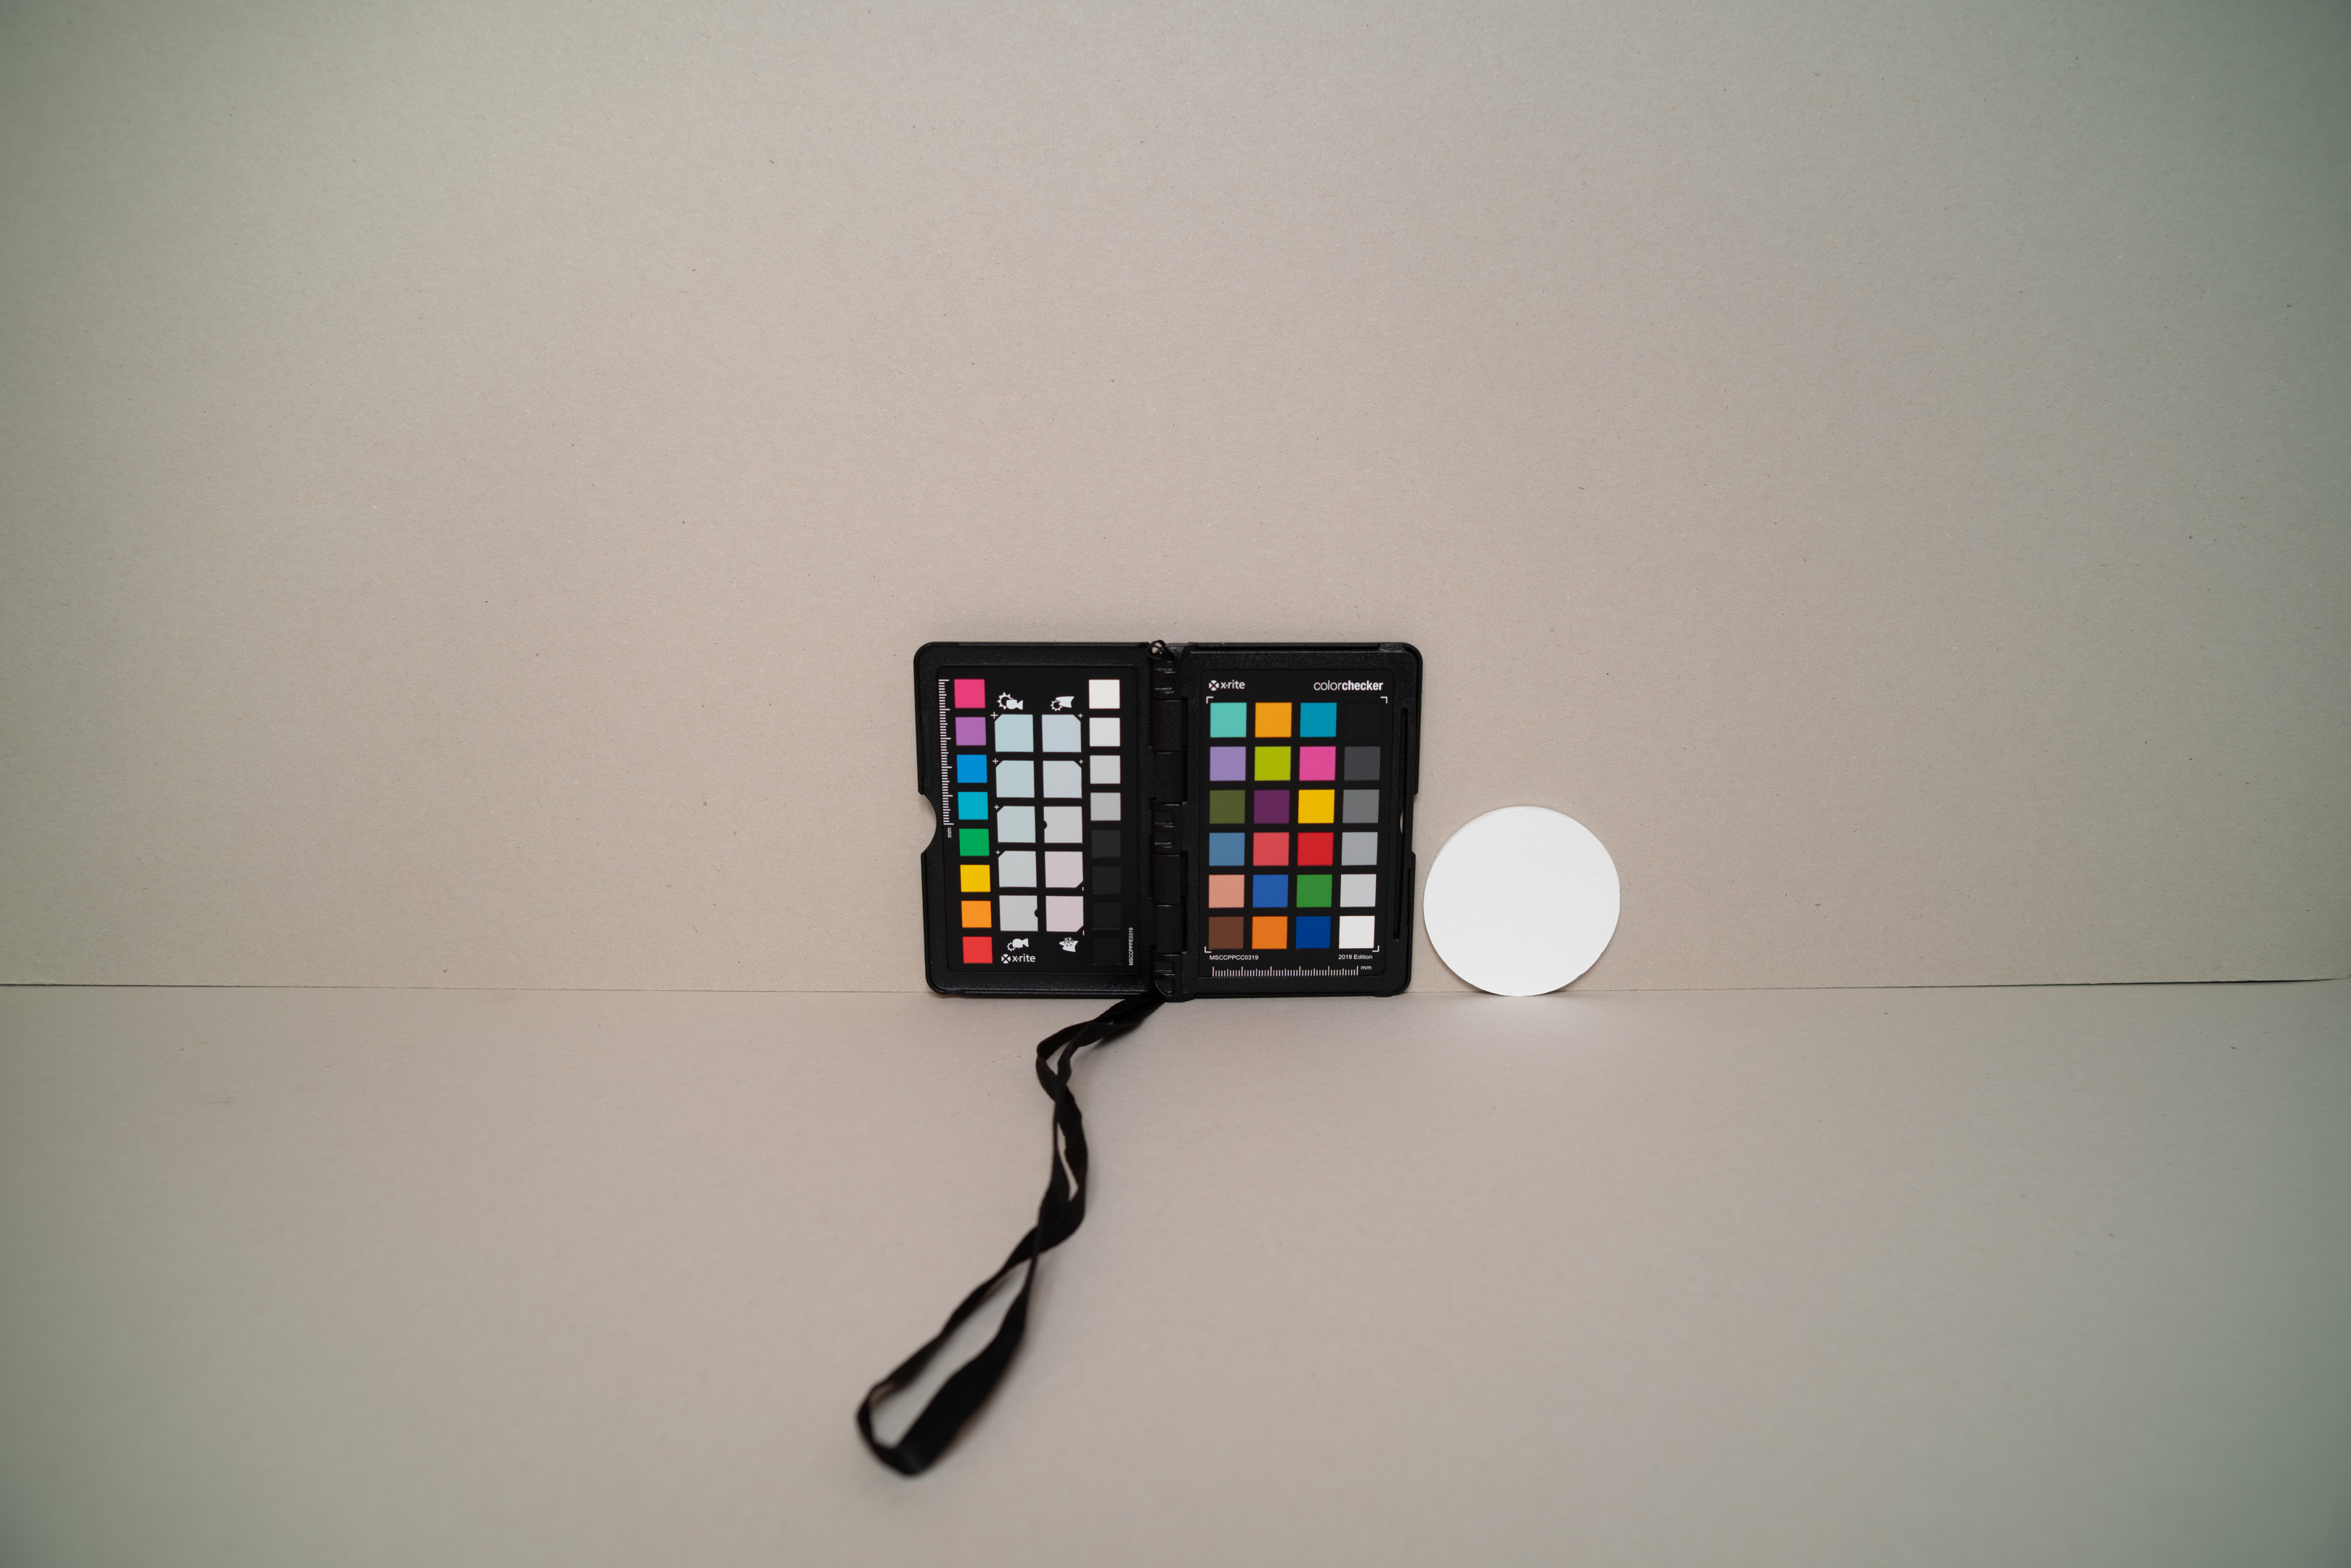
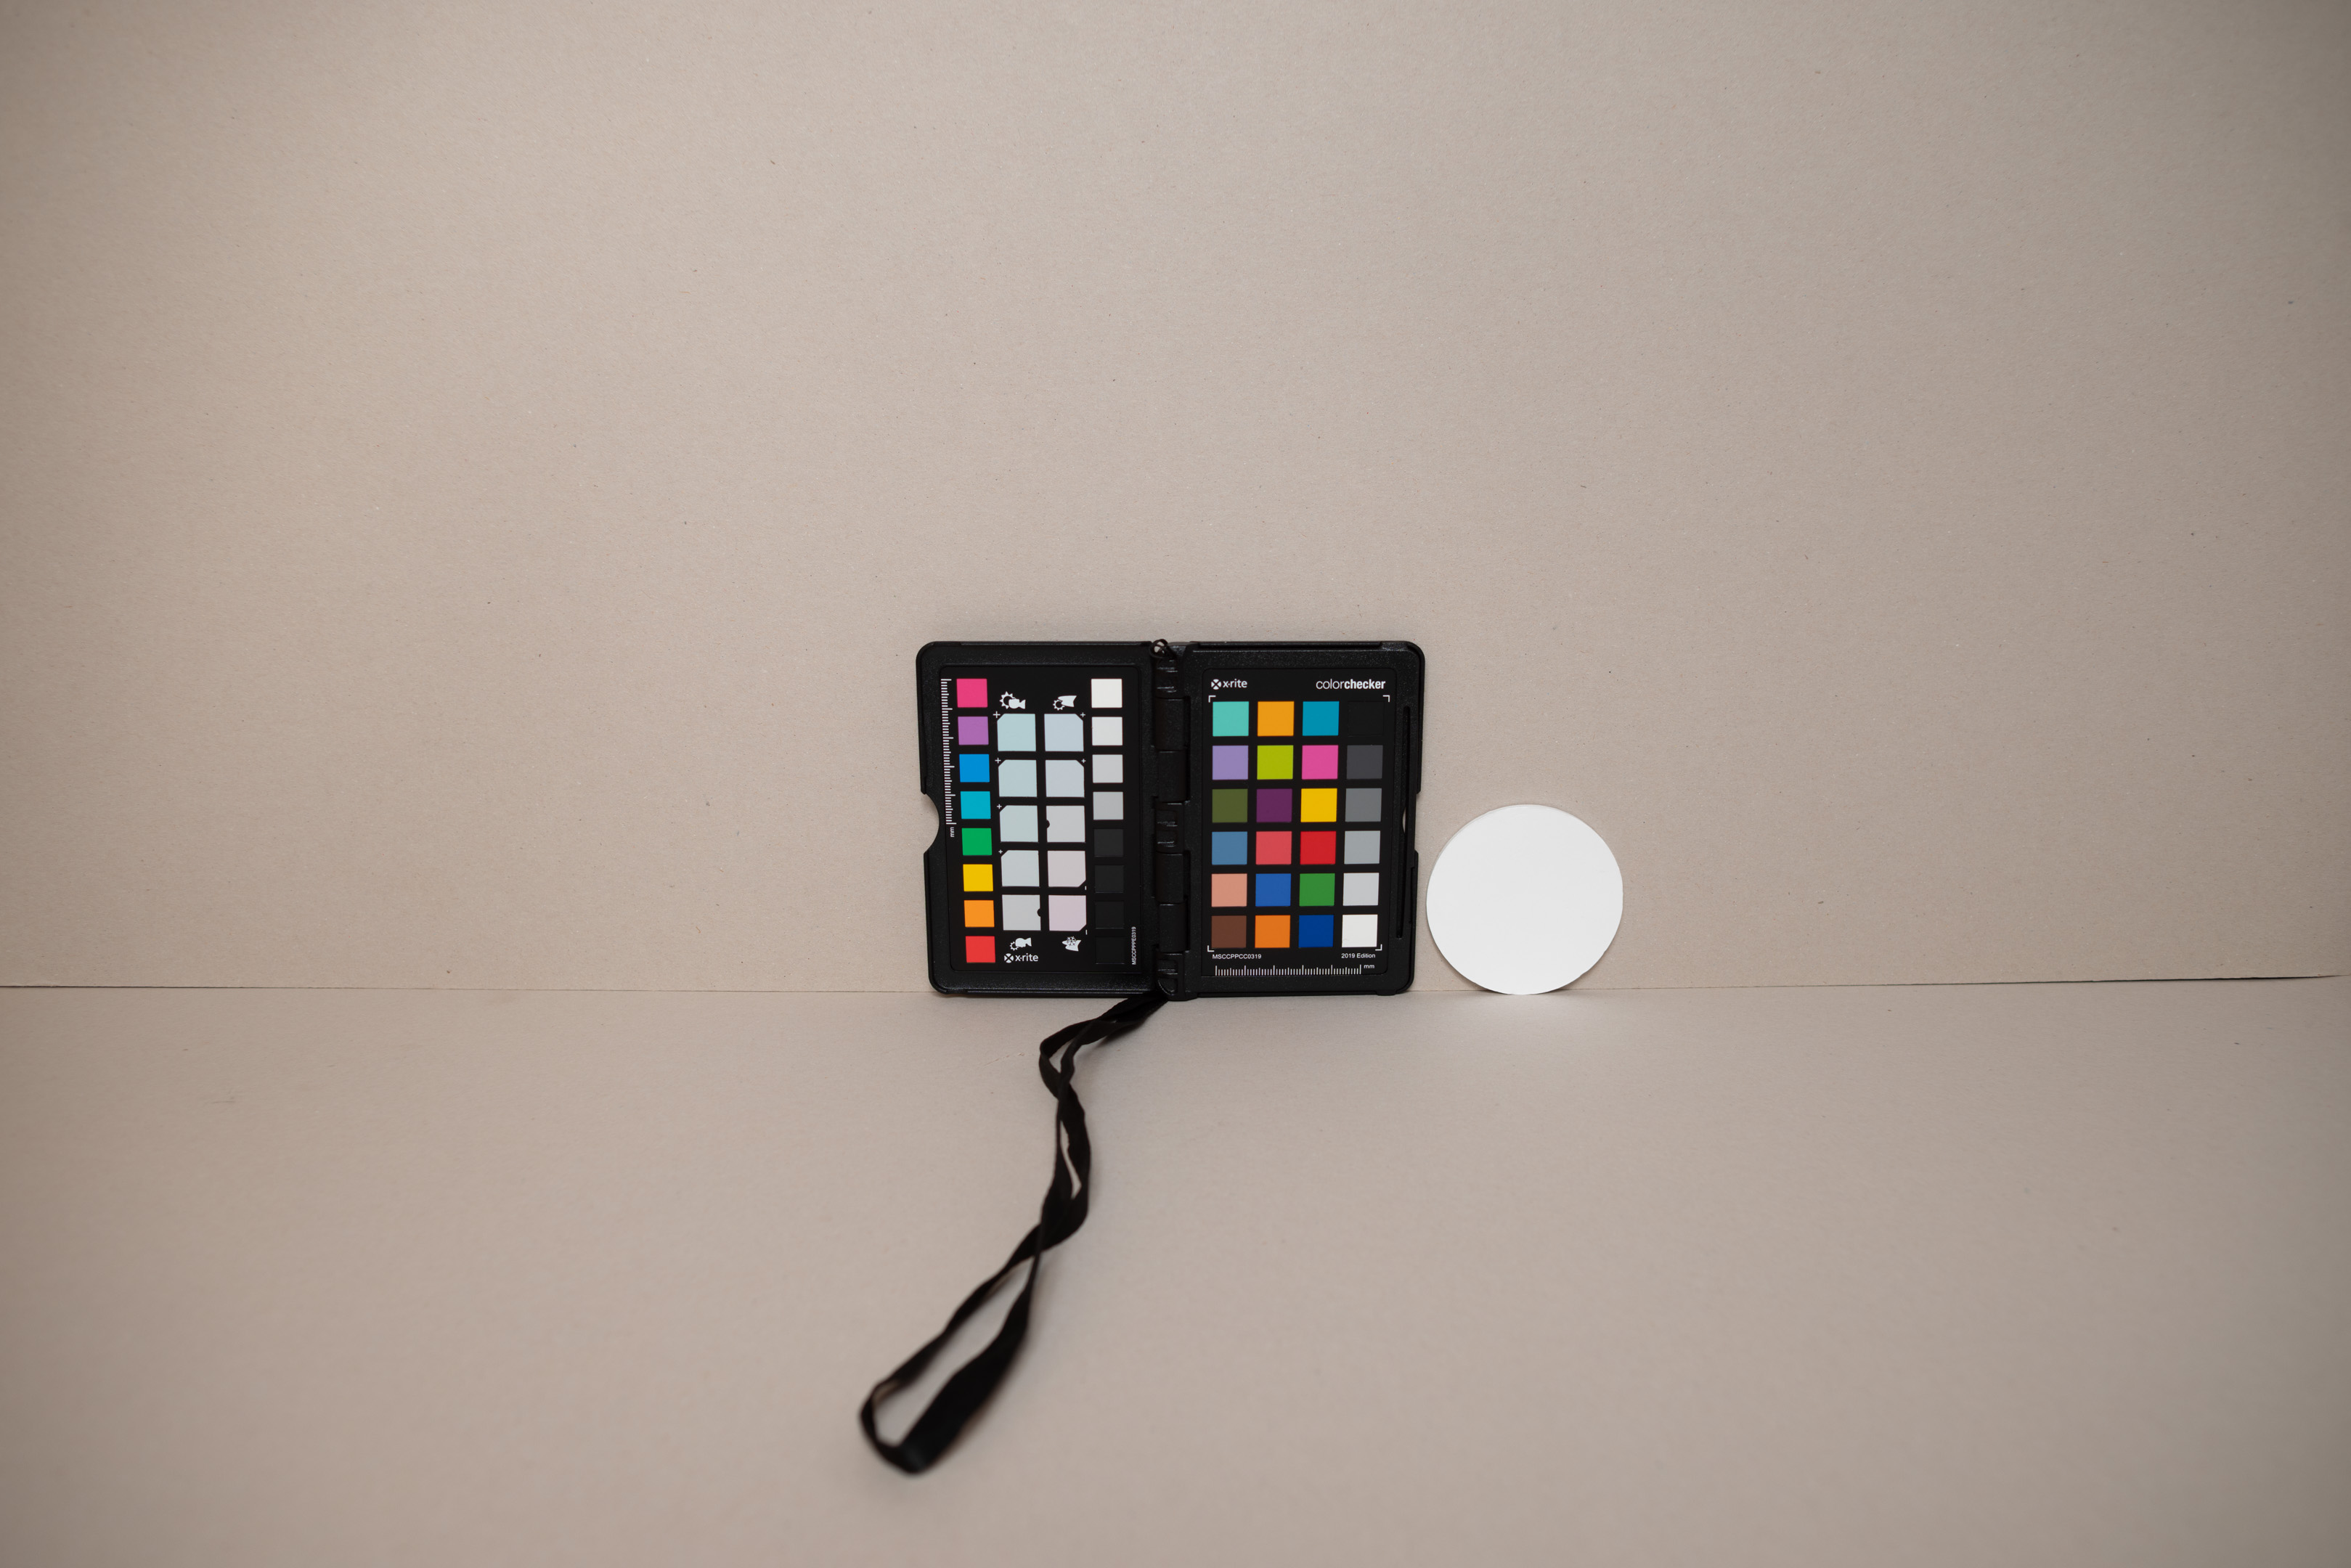
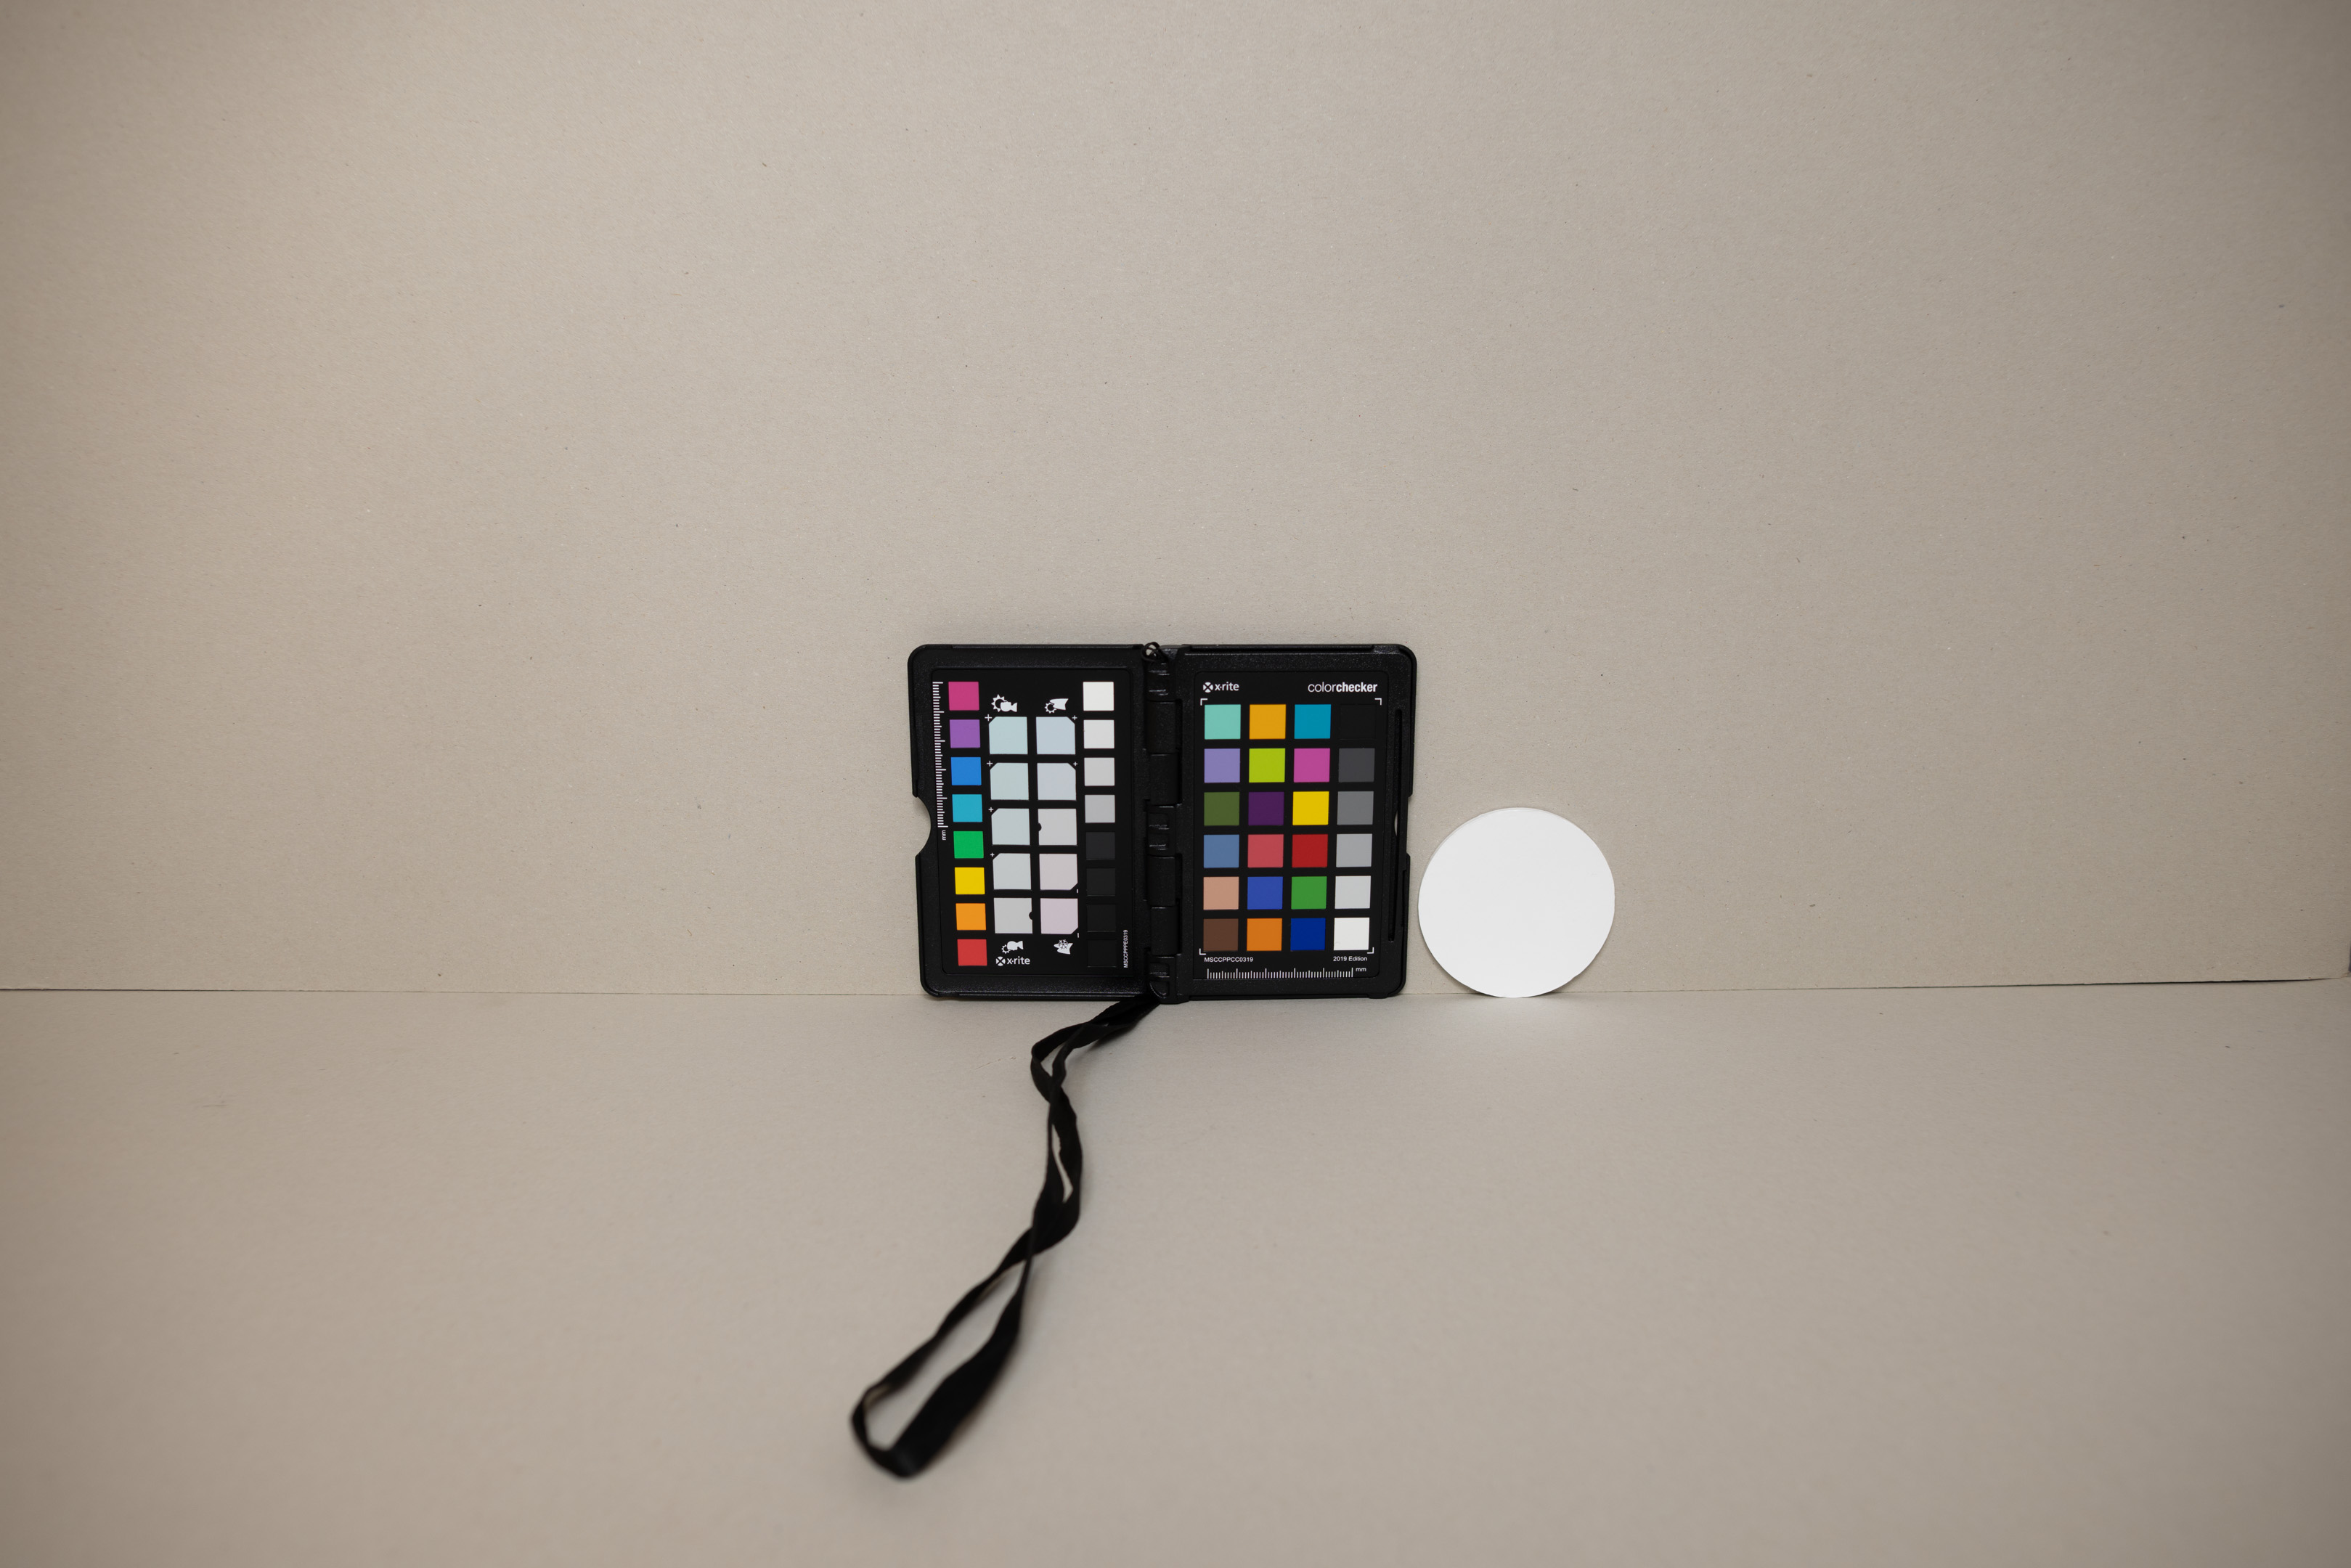
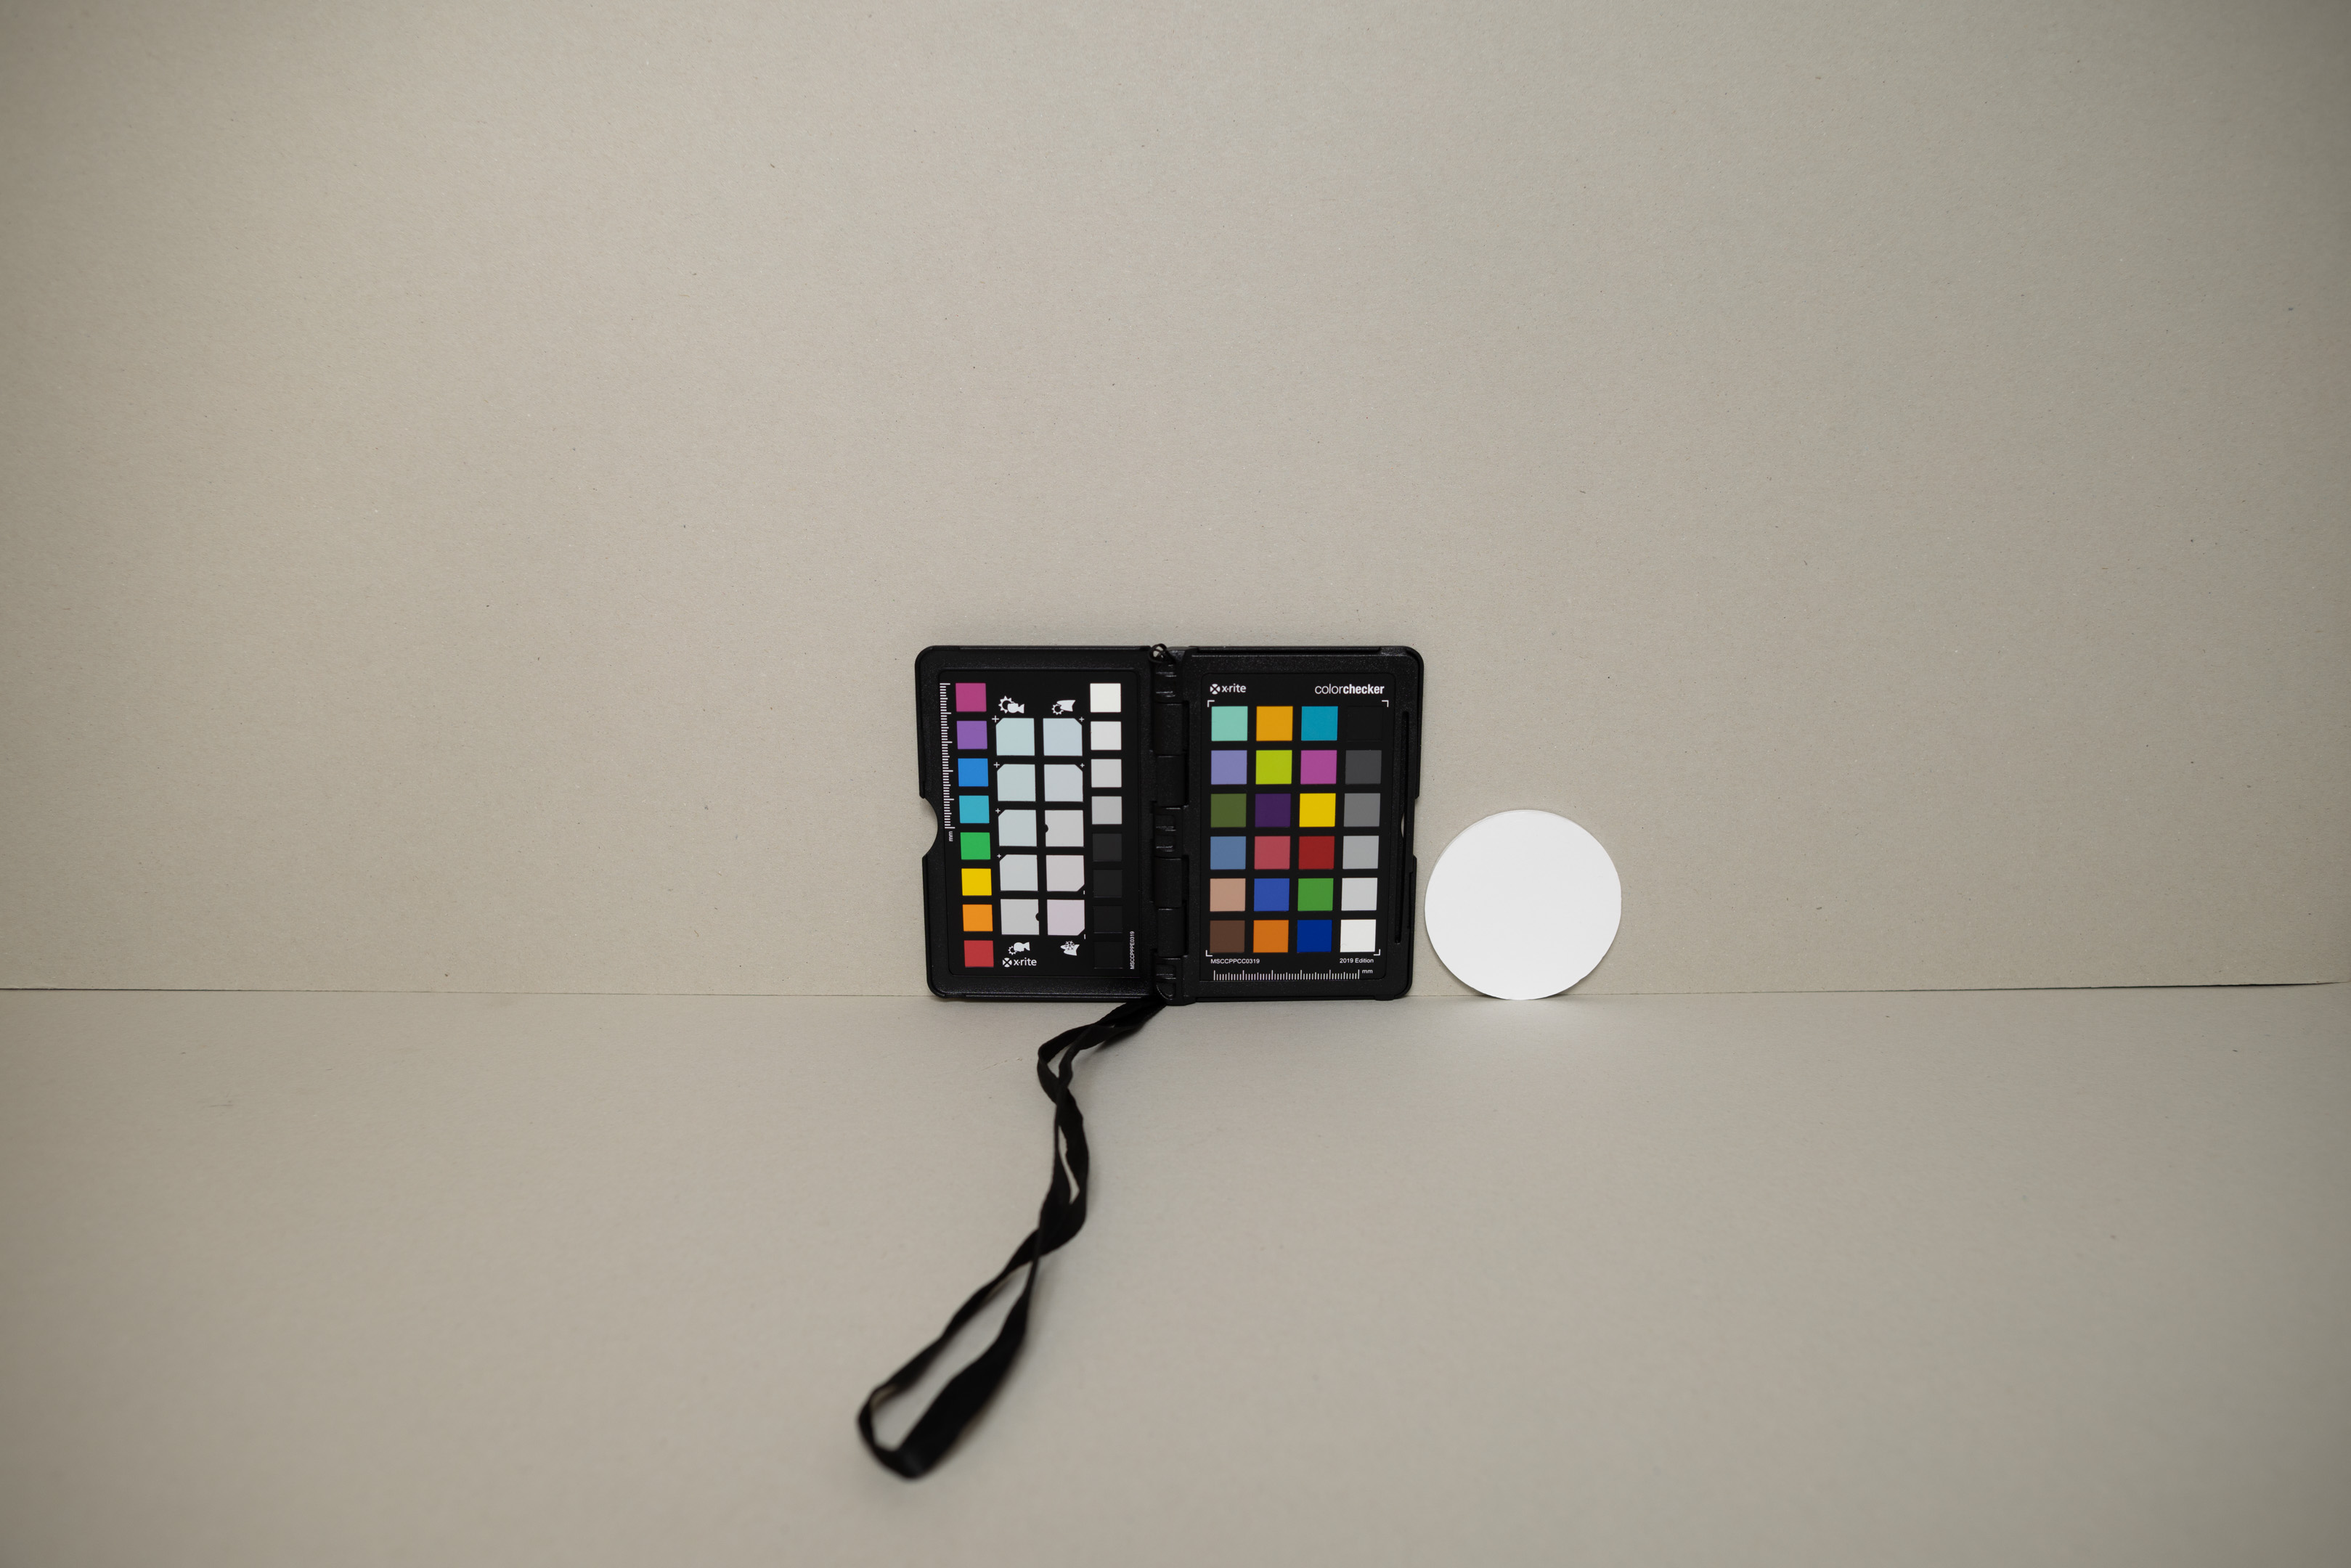
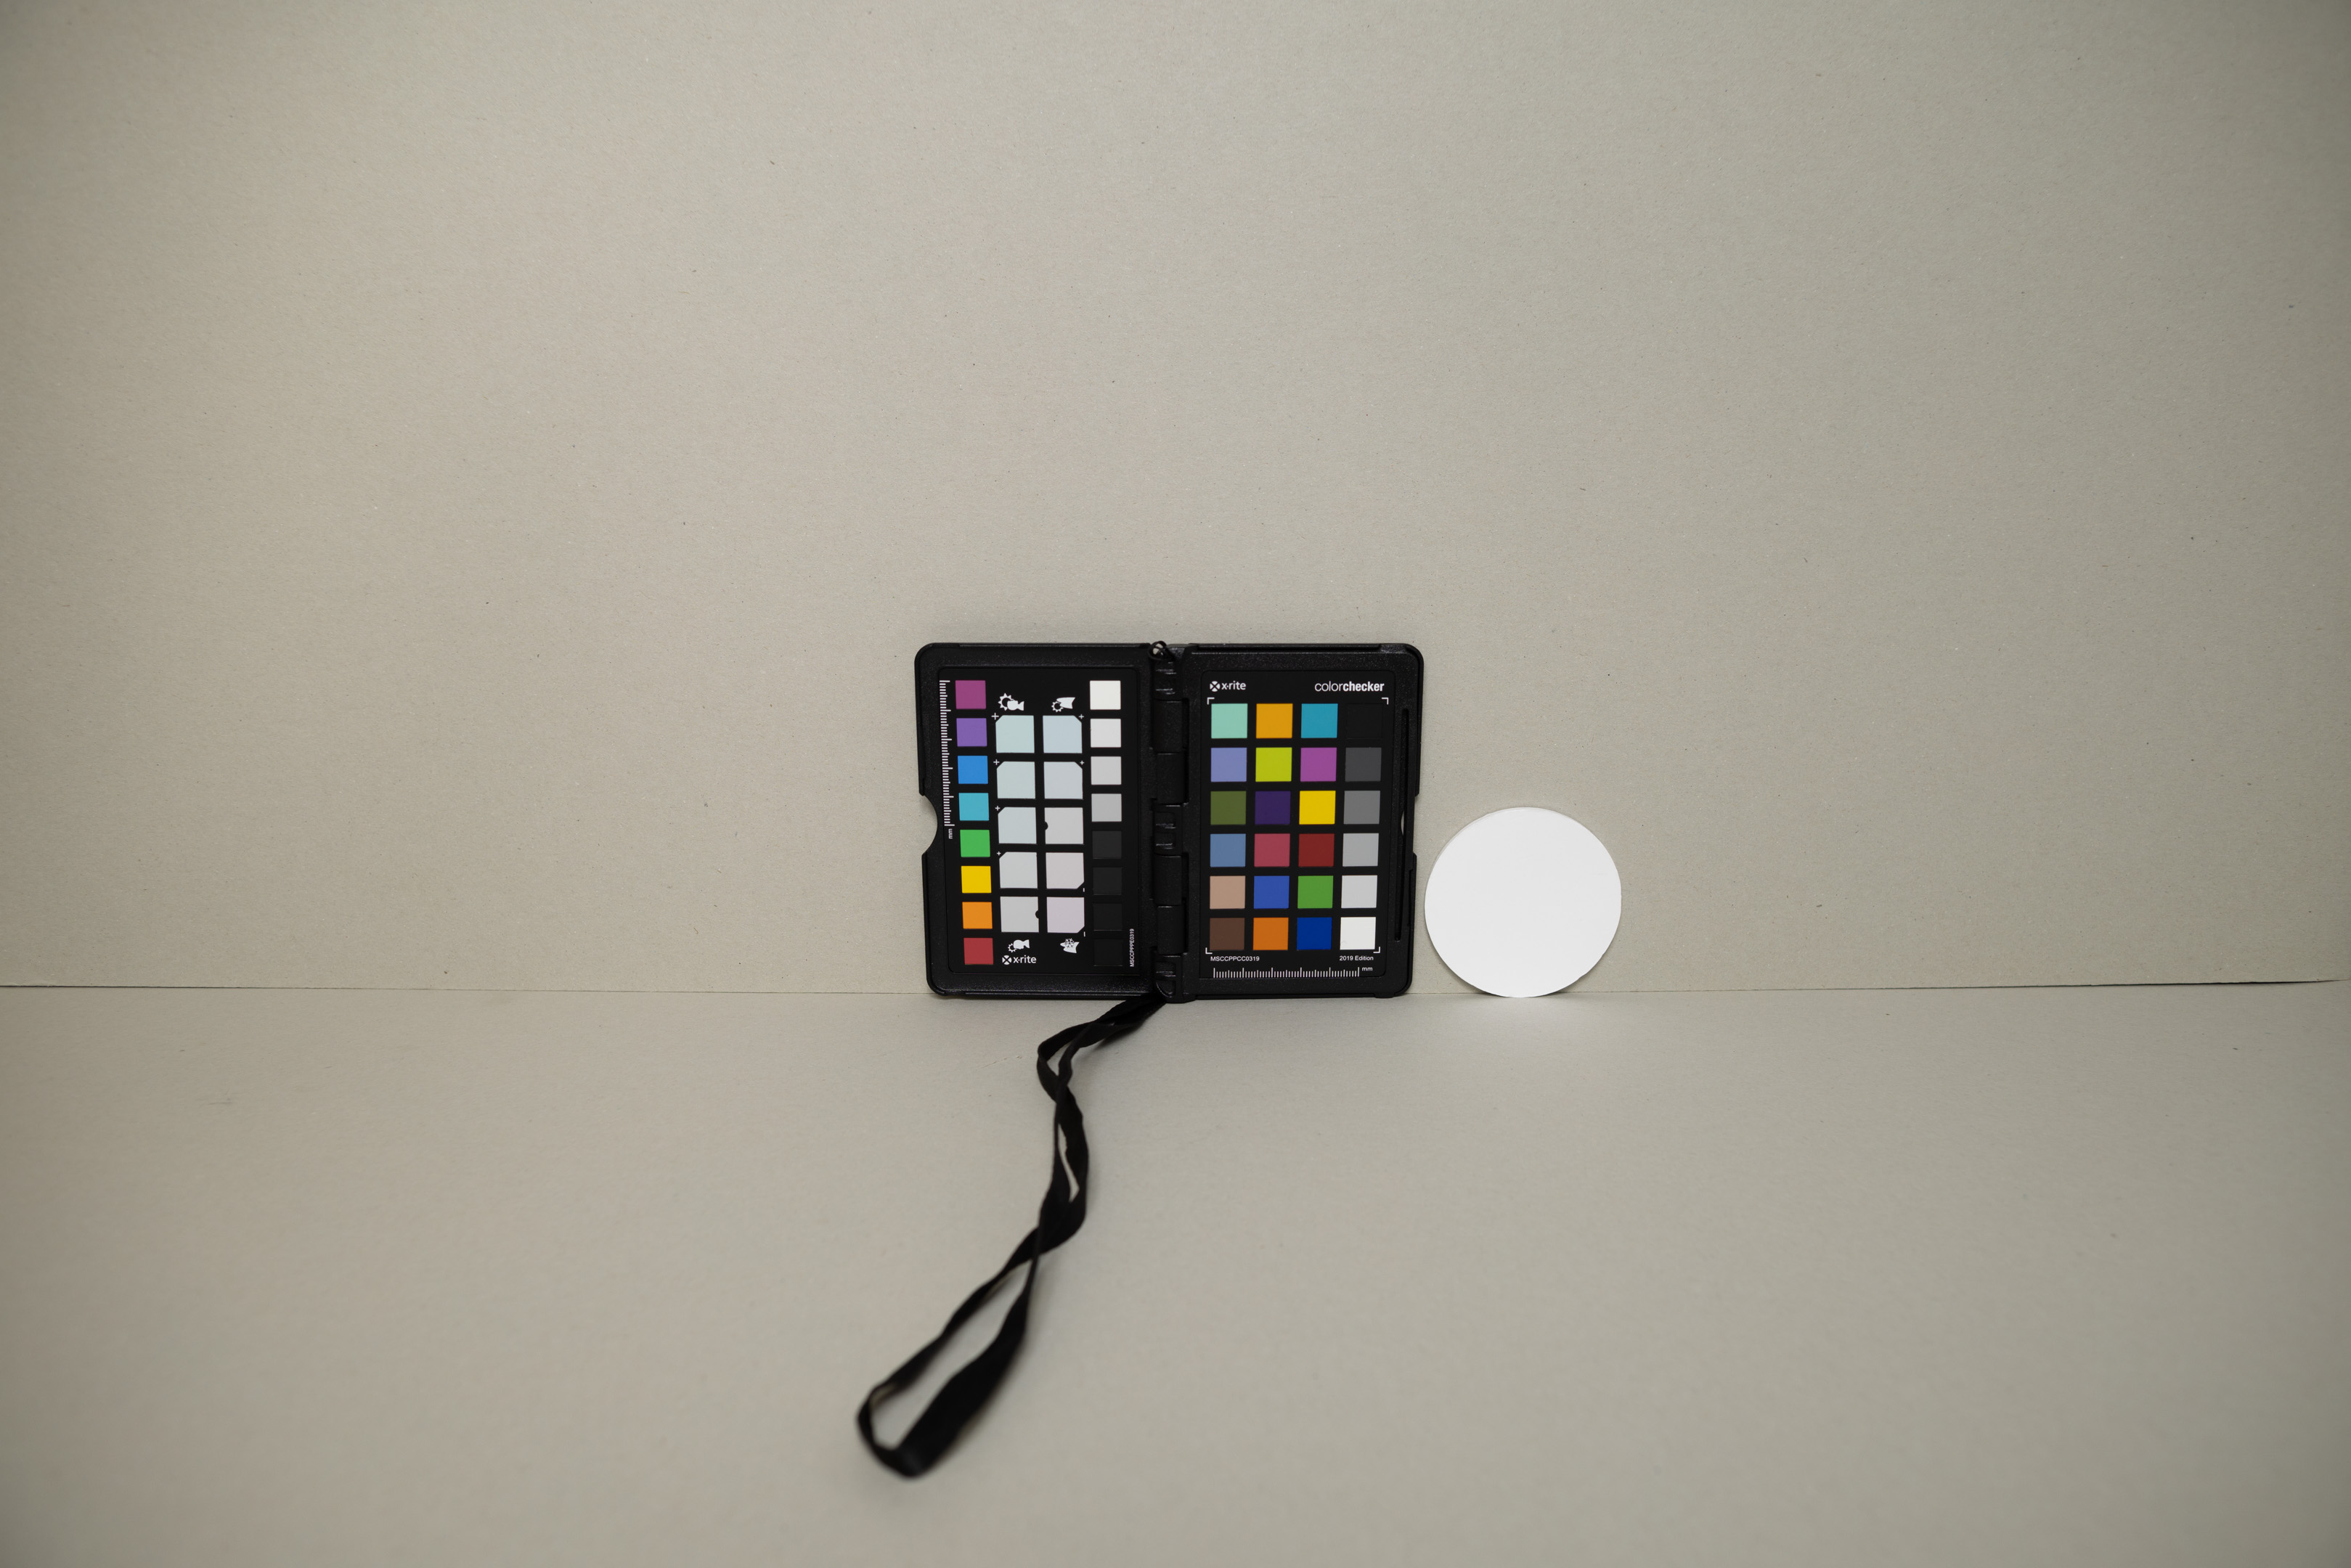
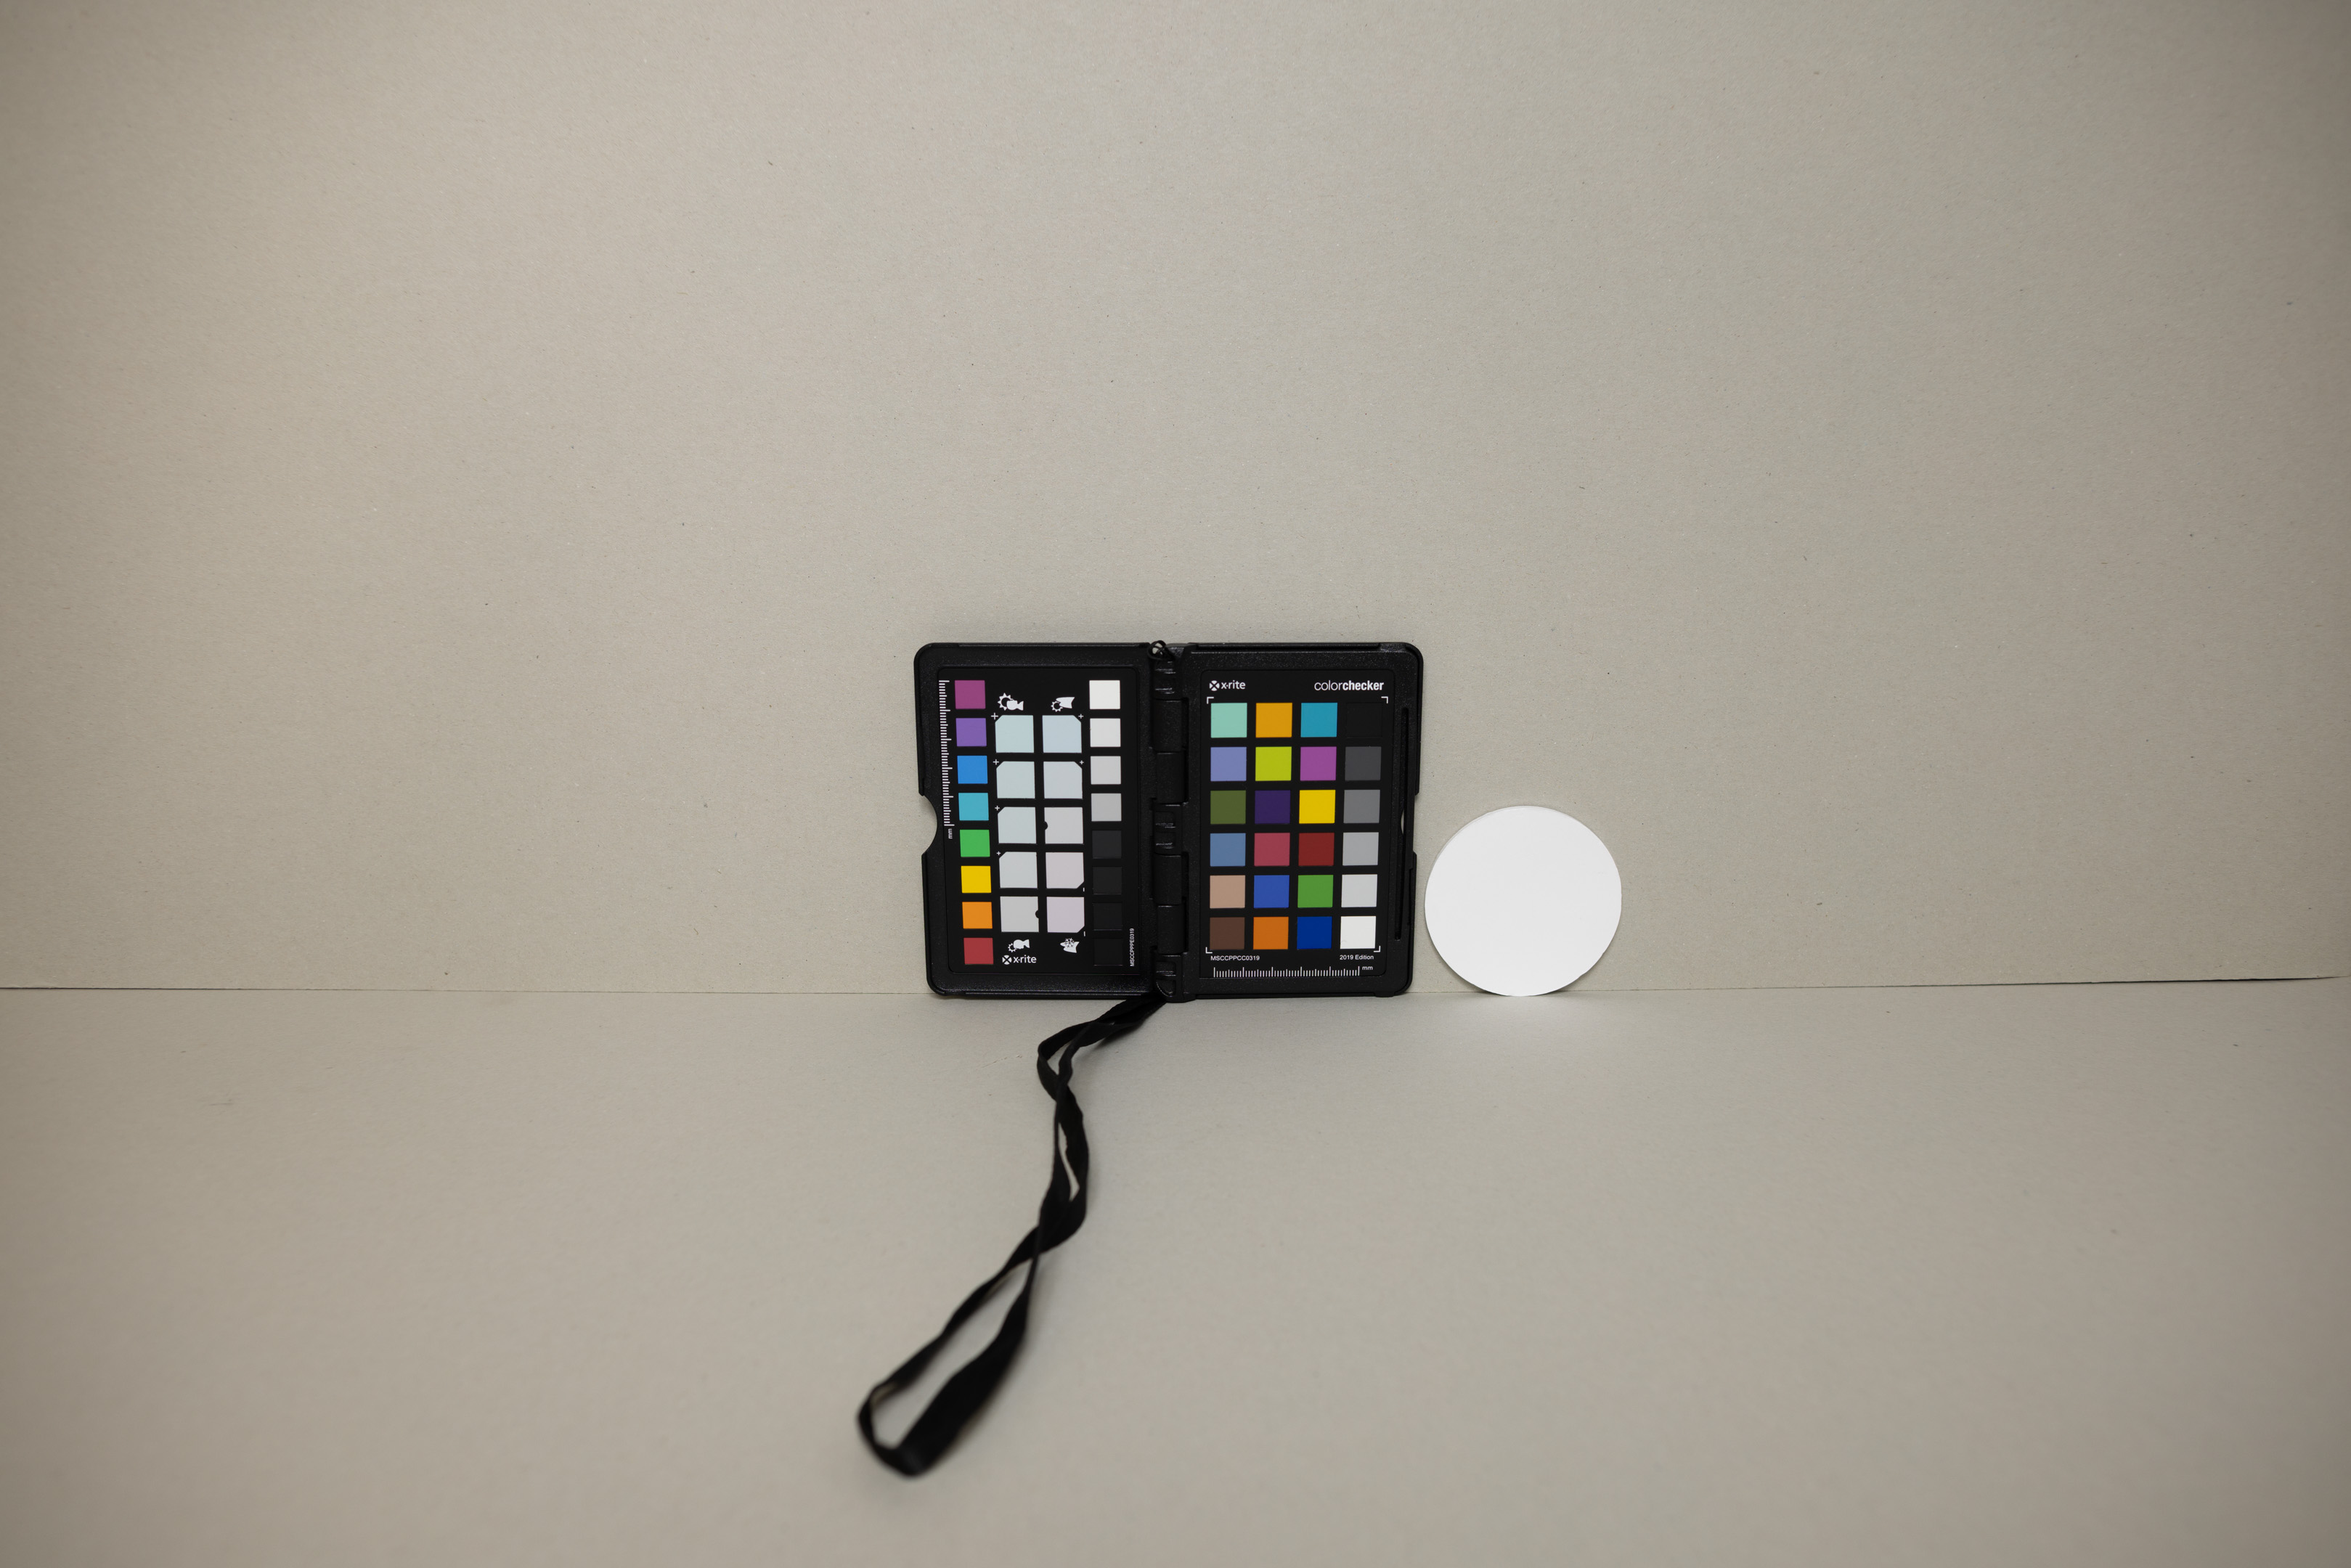
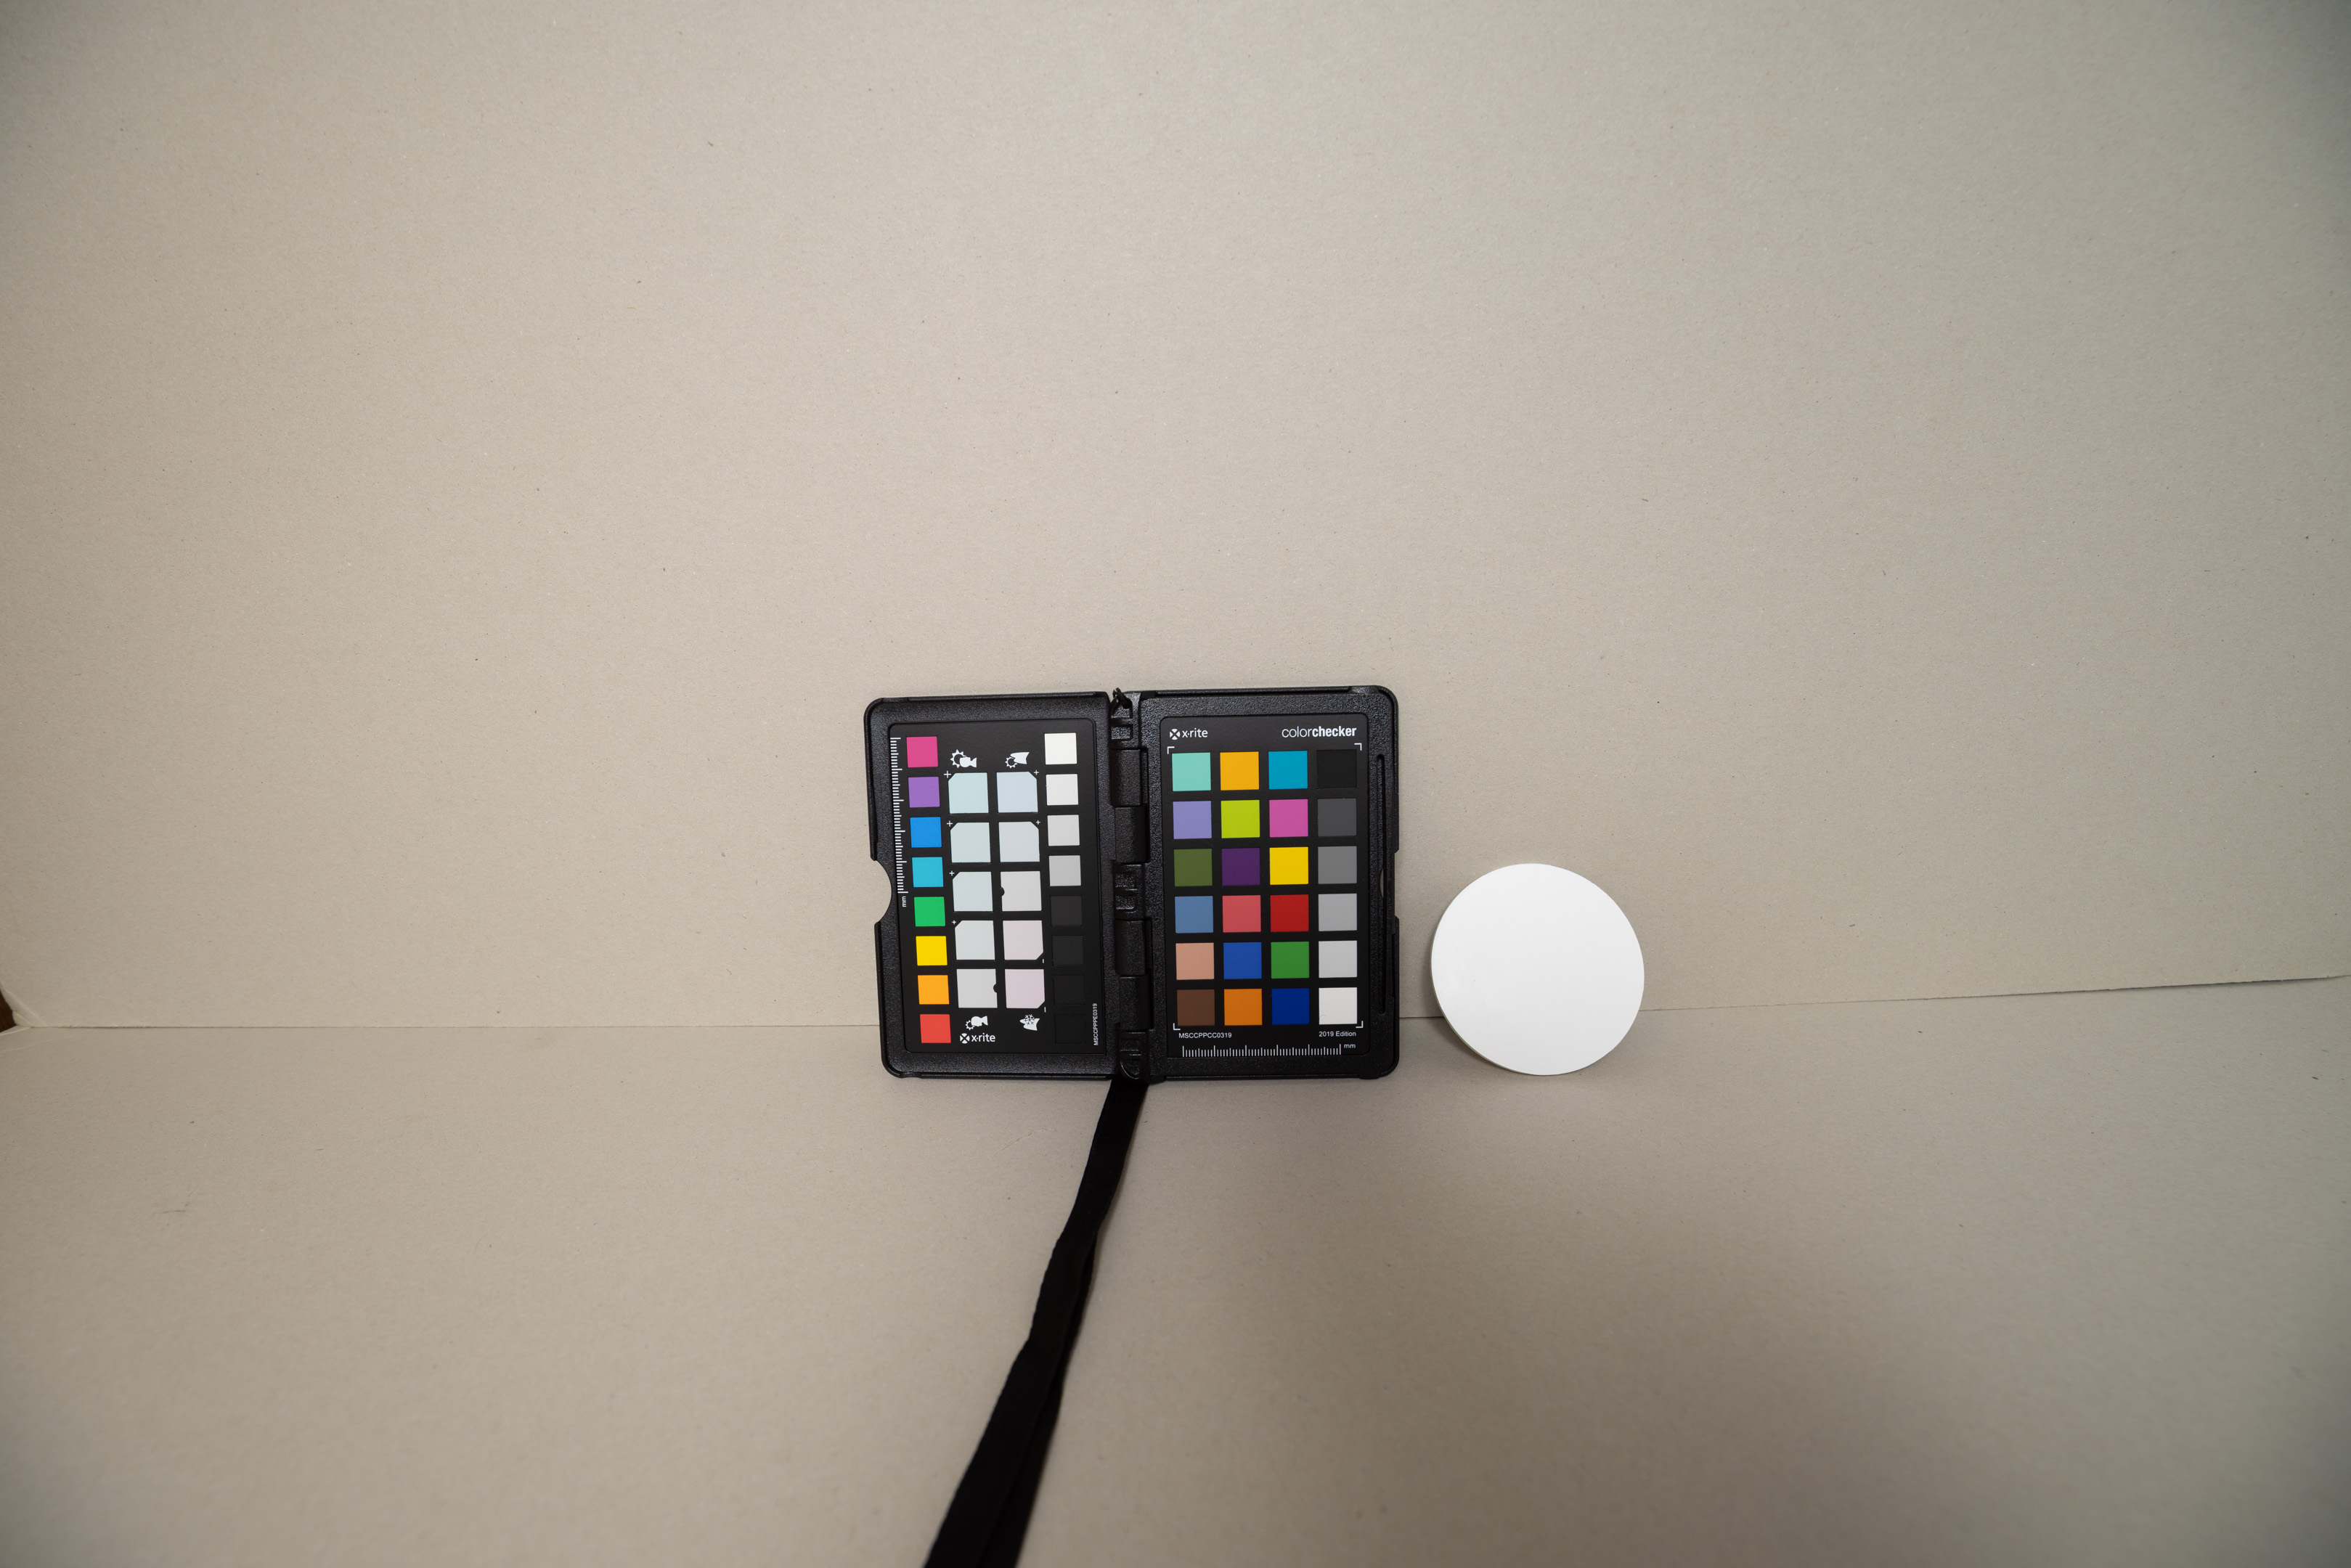
I photographed a Color Checker against a black fleece background. The fleece is used to help determine infrared leakage as it appears brighter in IR than it does in visible light. A white PTFE disc was used for setting white balance for each image, which was done when converting the RAW images, not in-camera. The bit of card with paint on is my attempt at an IR color checker, but can be ignored as it doesn't tell us anything useful in this test.
The images were lit using a full spectrum modified AD200 flash, which I think gives a similar output to daylight. Flash power was varied as needed between the filters. The RAW files were converted in Adobe Camera RAW, and the exposure slider was used to adjust the exposure of the image until the darker middle grey patch of the color checker had RGB values around 102. 102 is the value I got from a Color Checker generated from the Color Checker data provided by X-Rite.
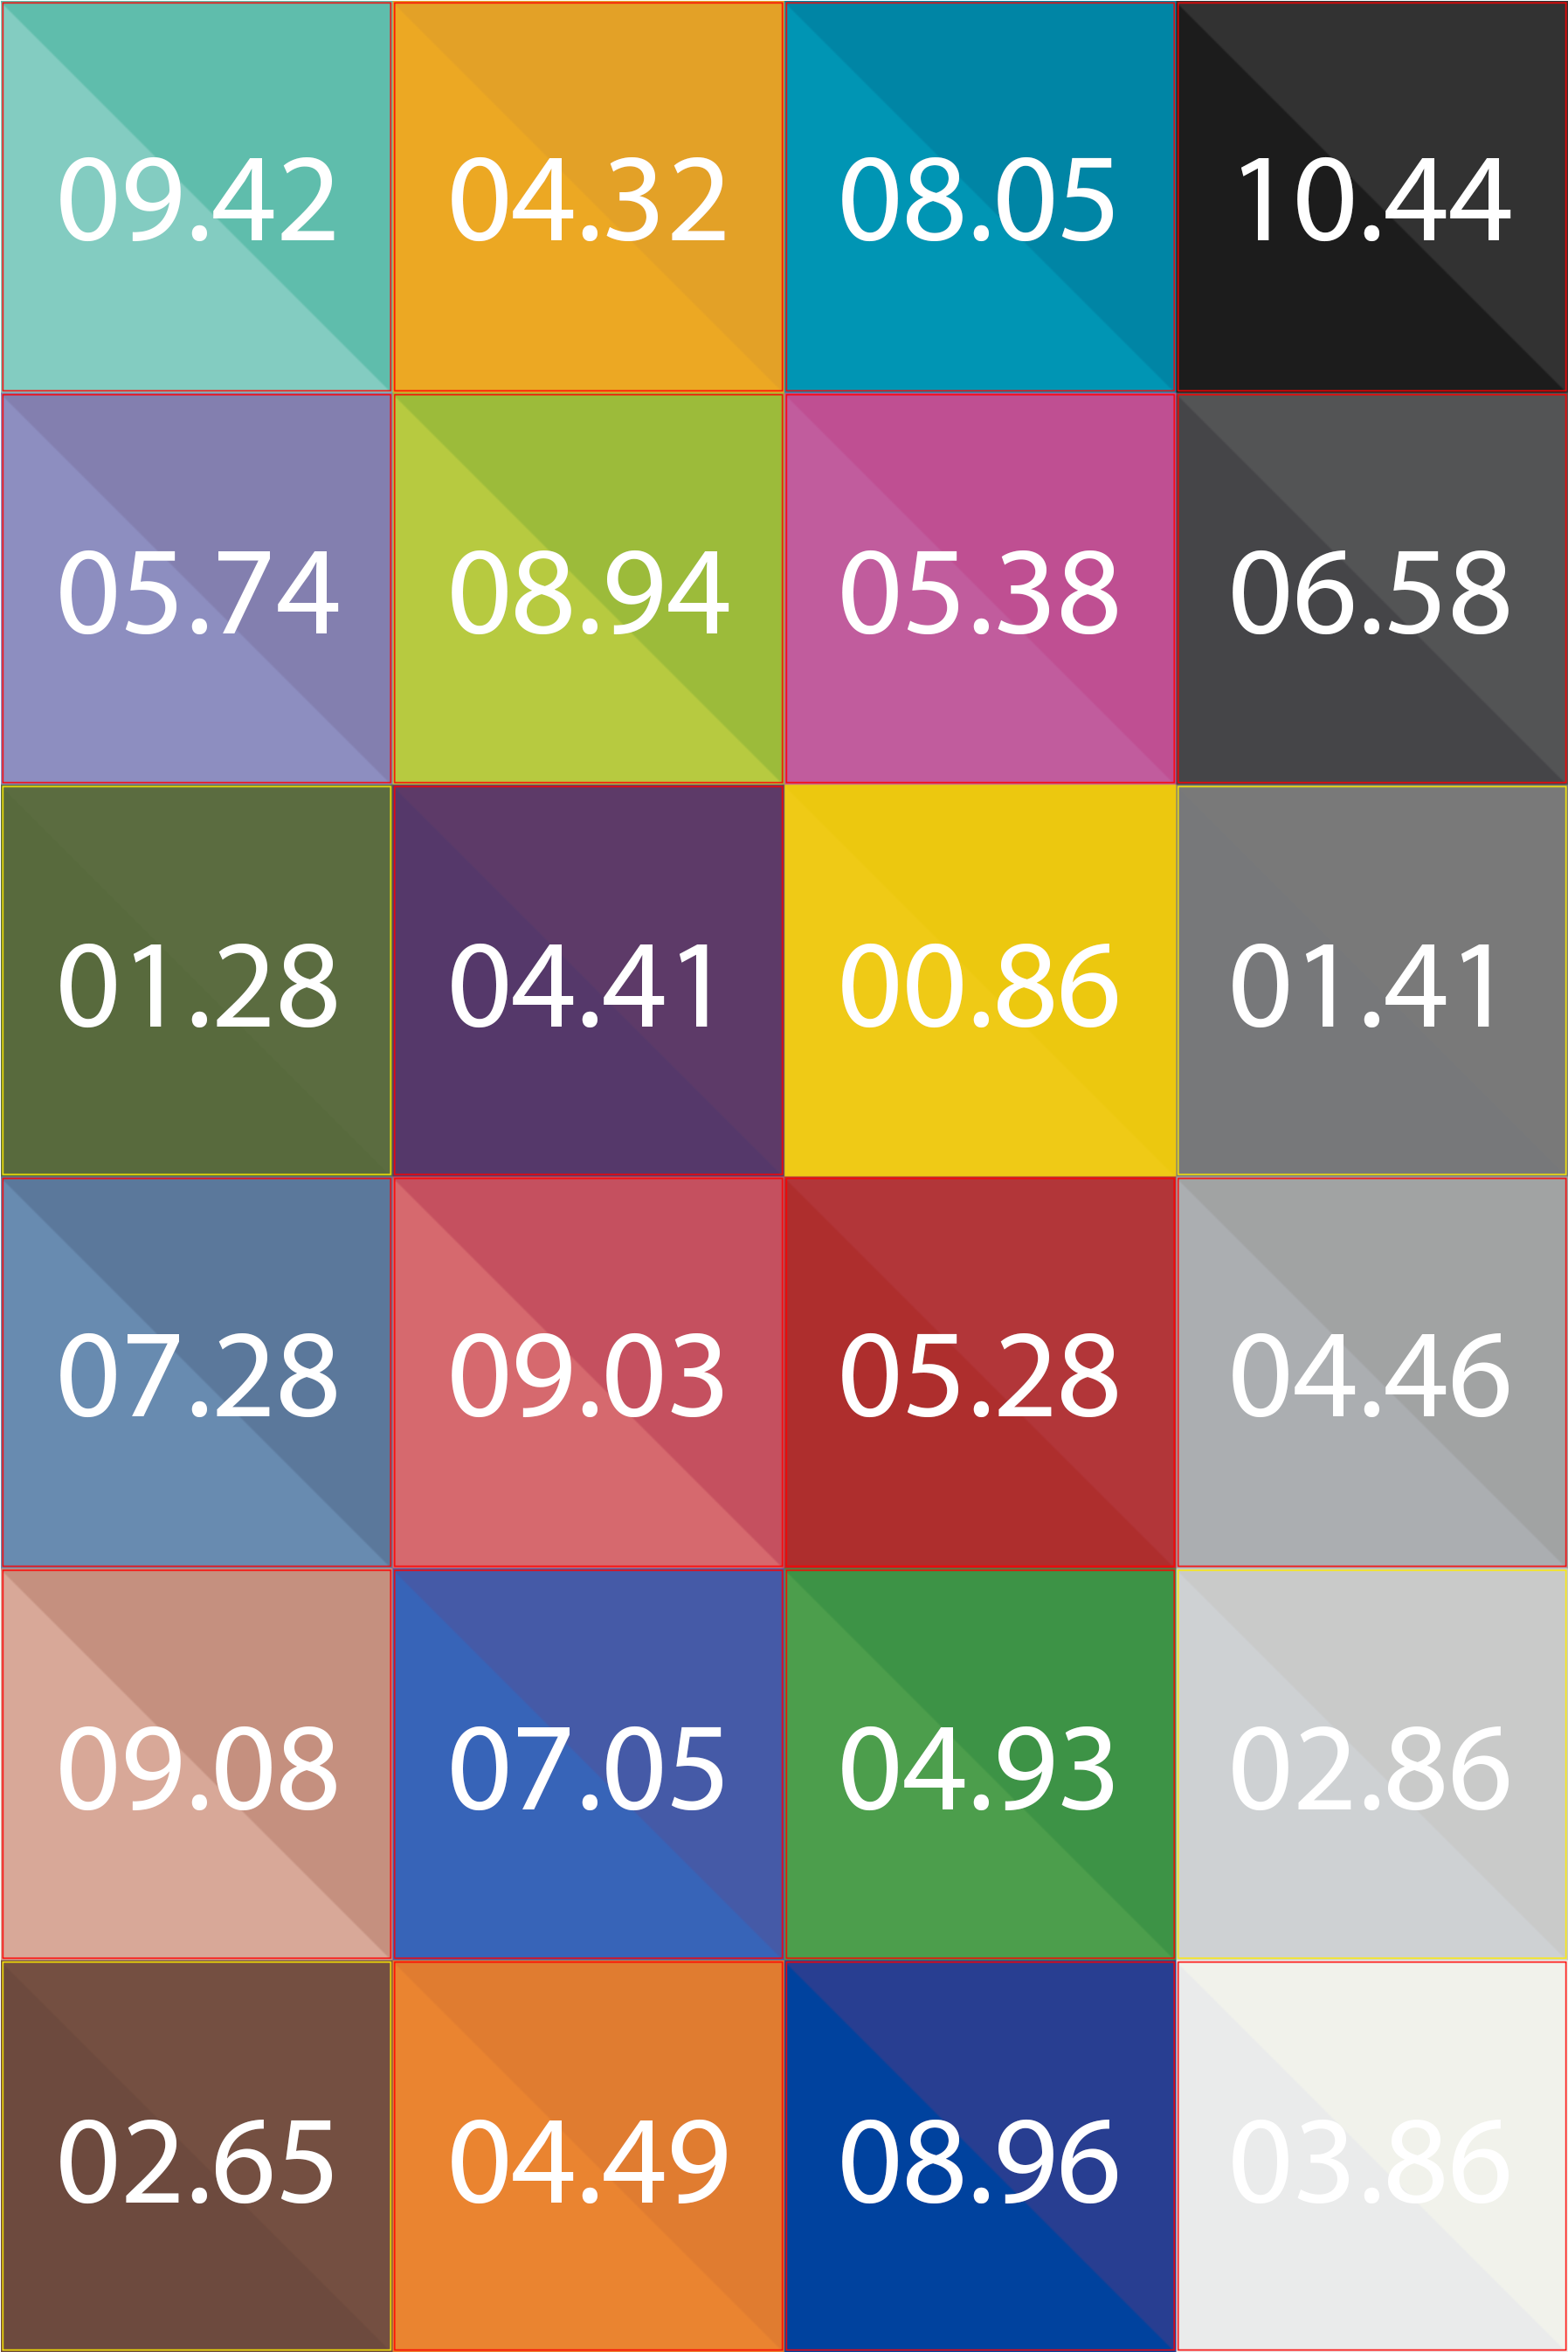
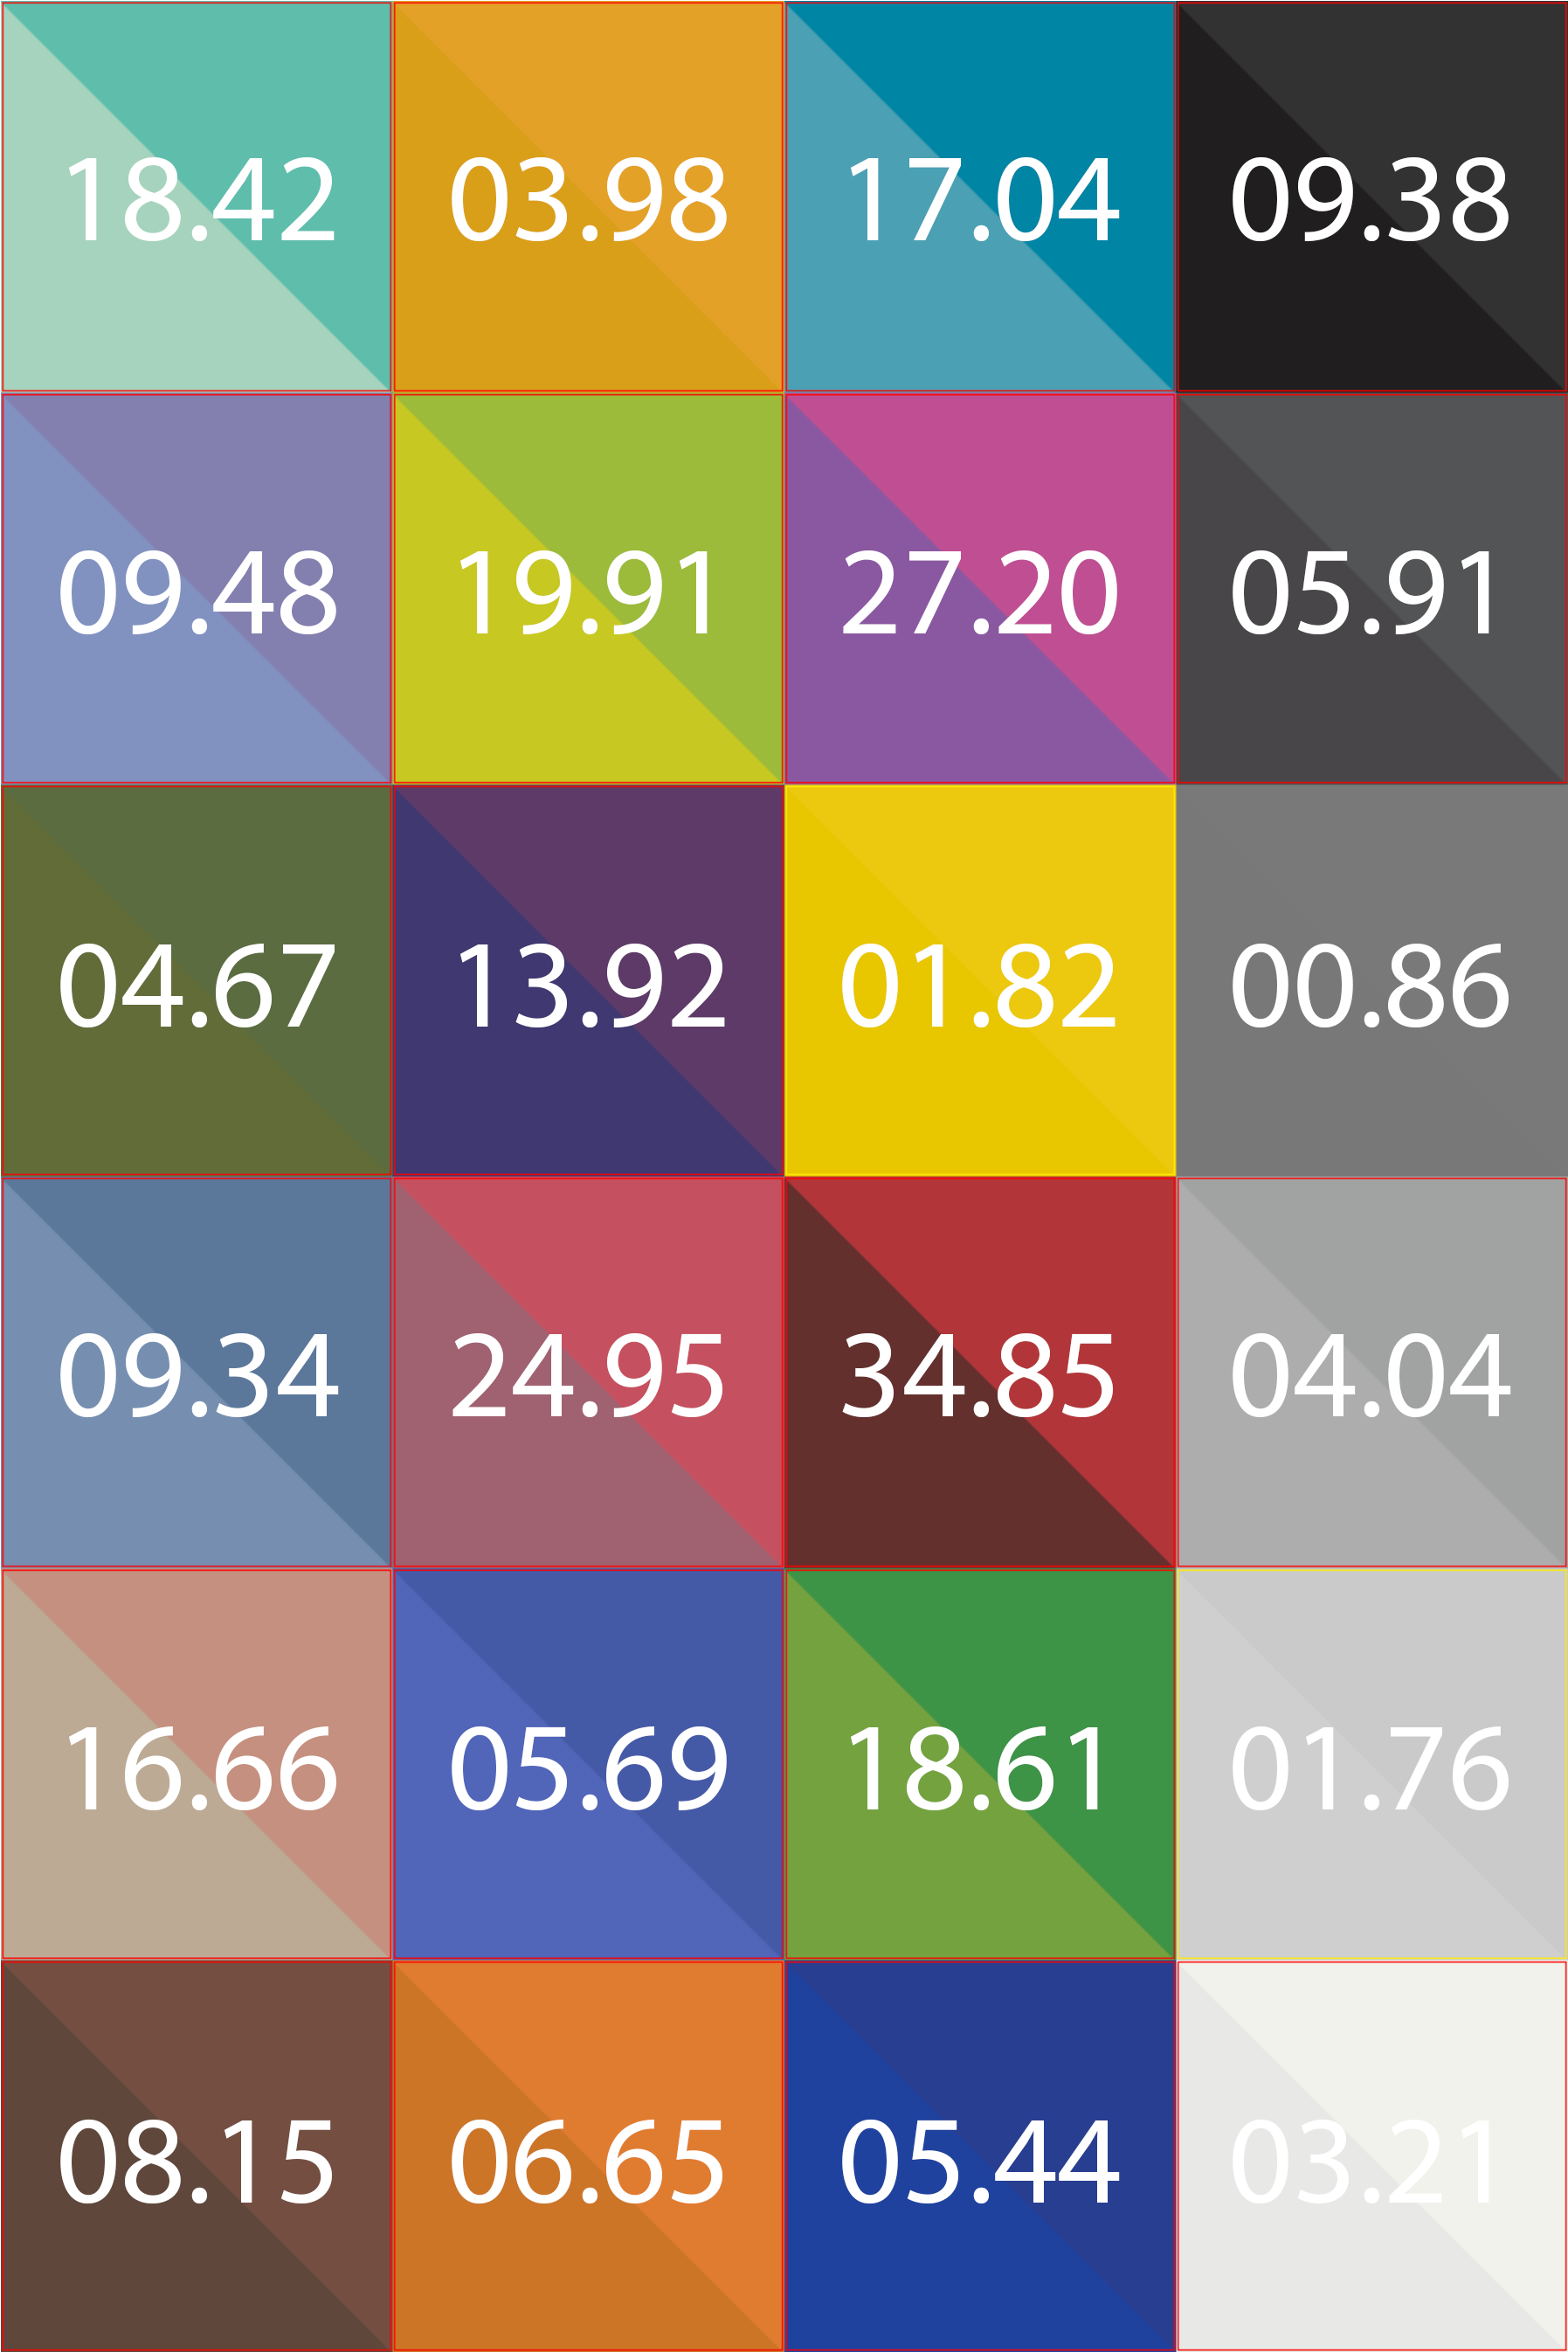
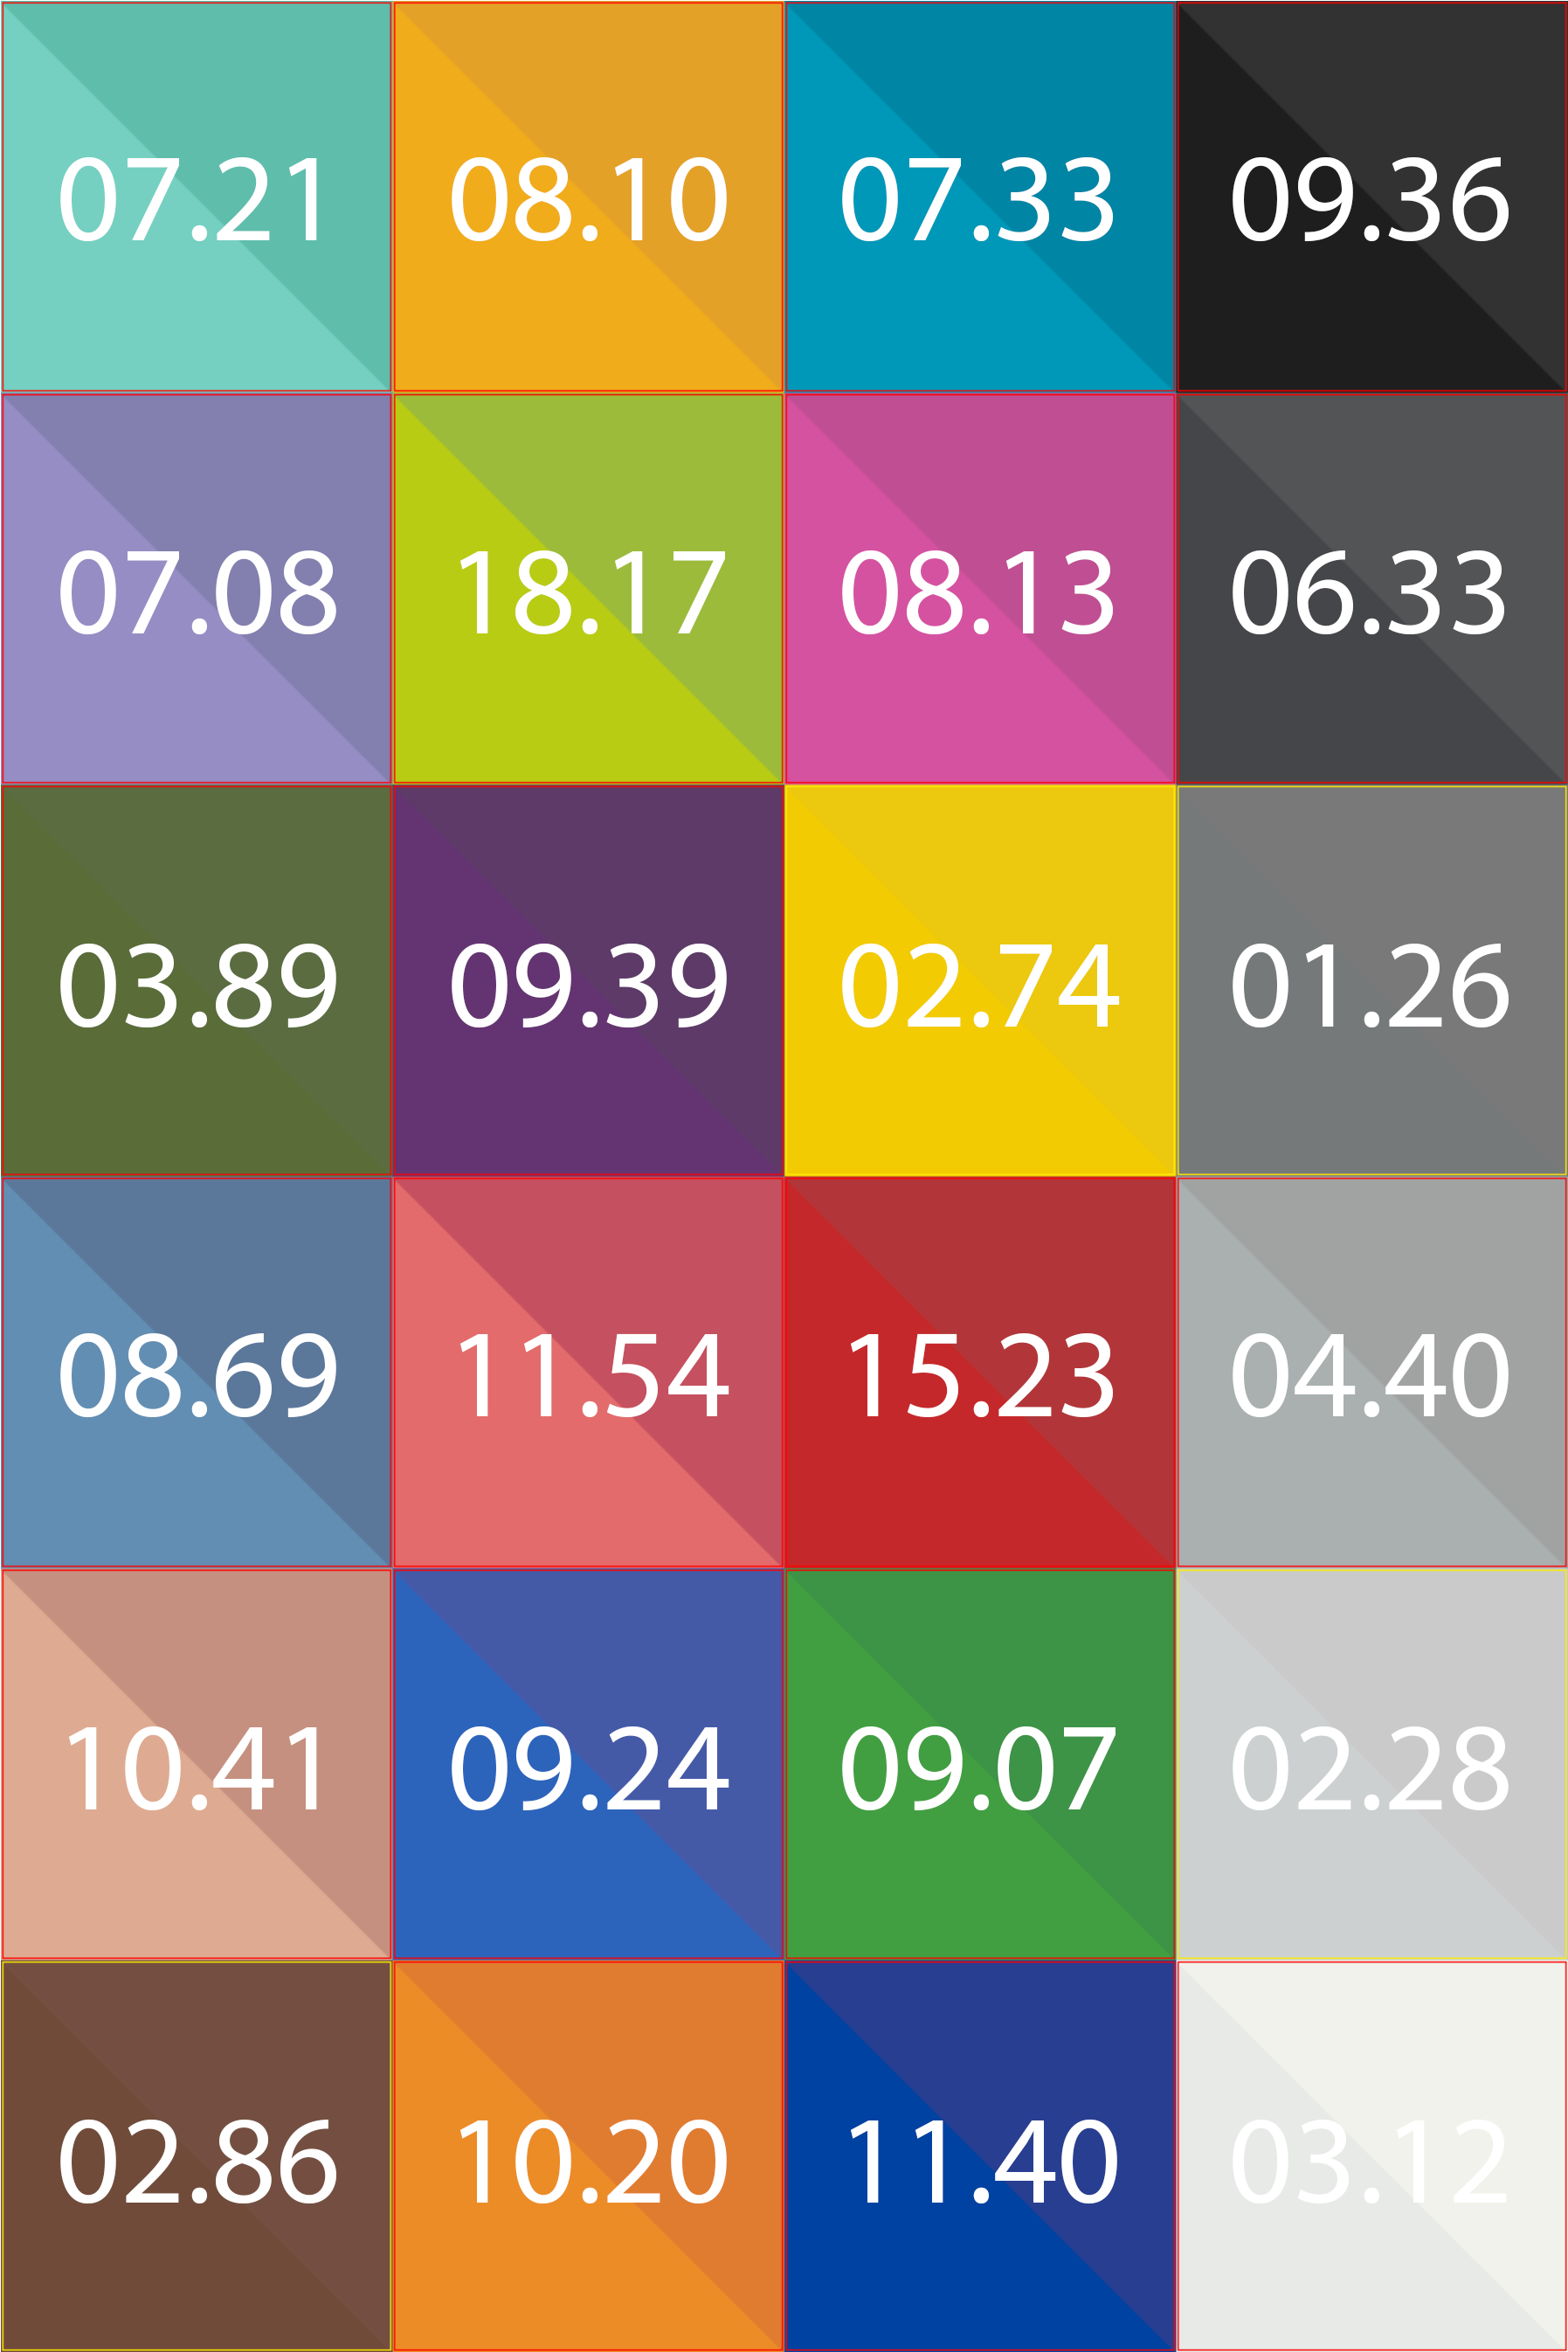
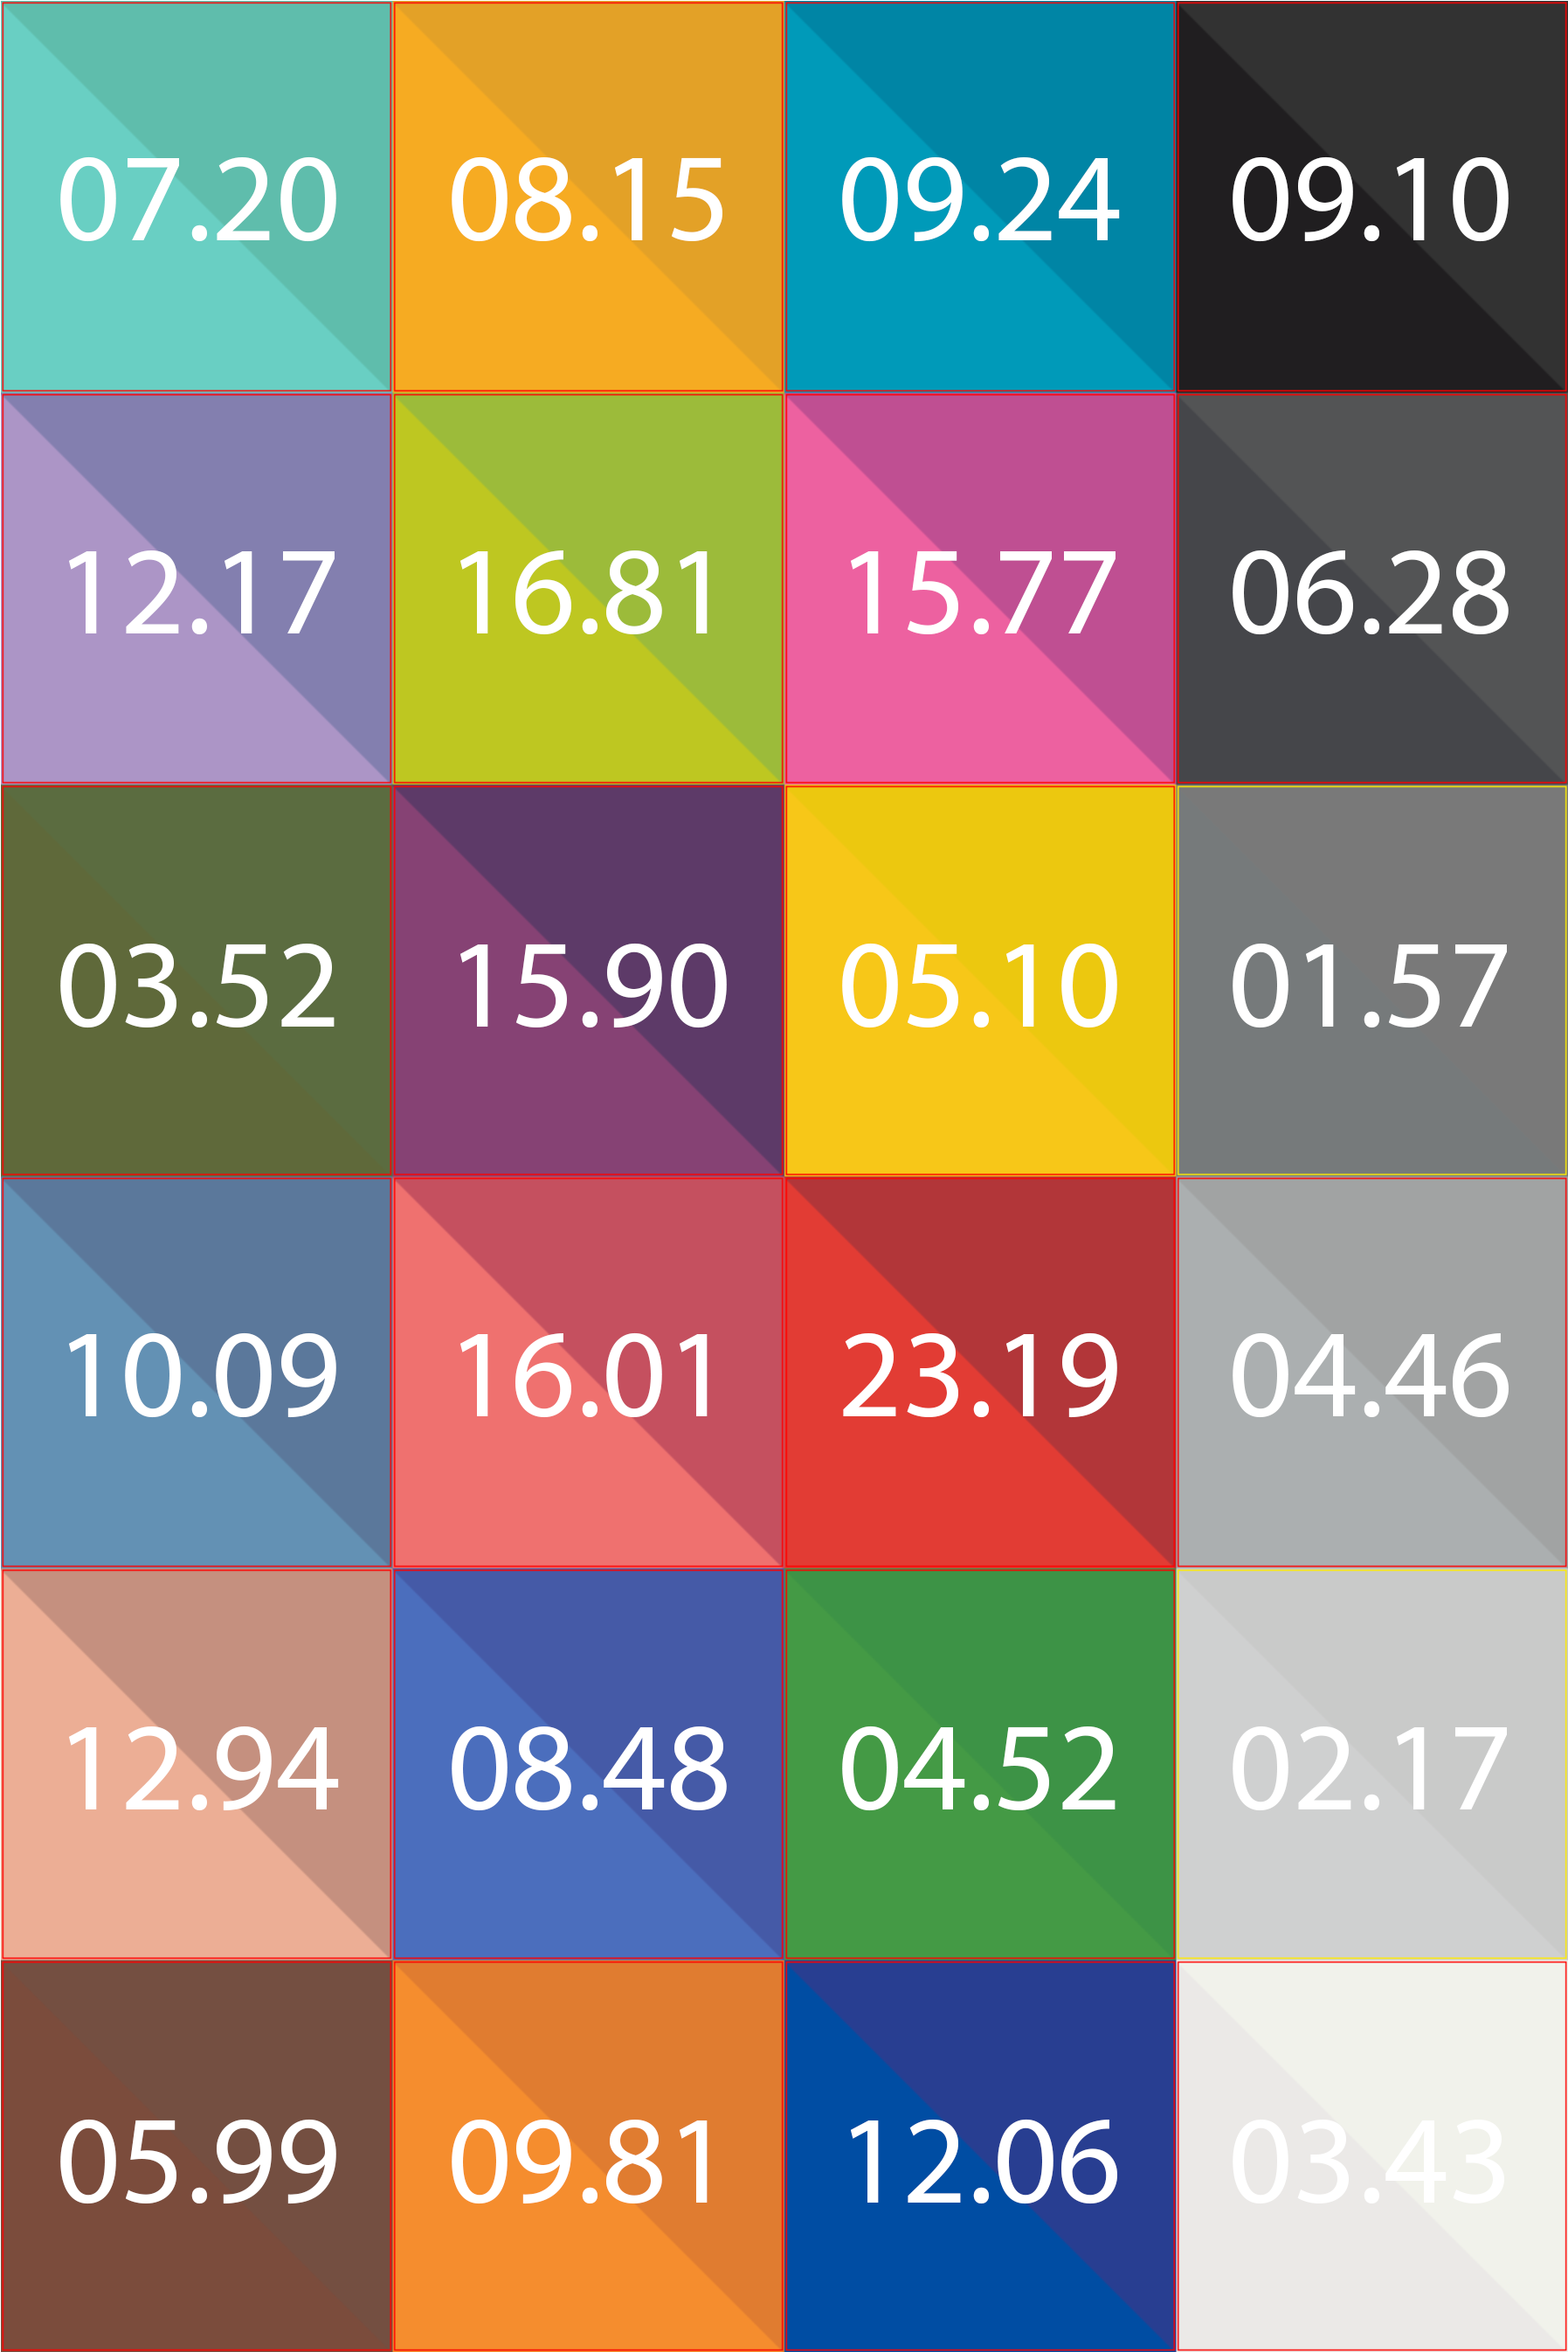
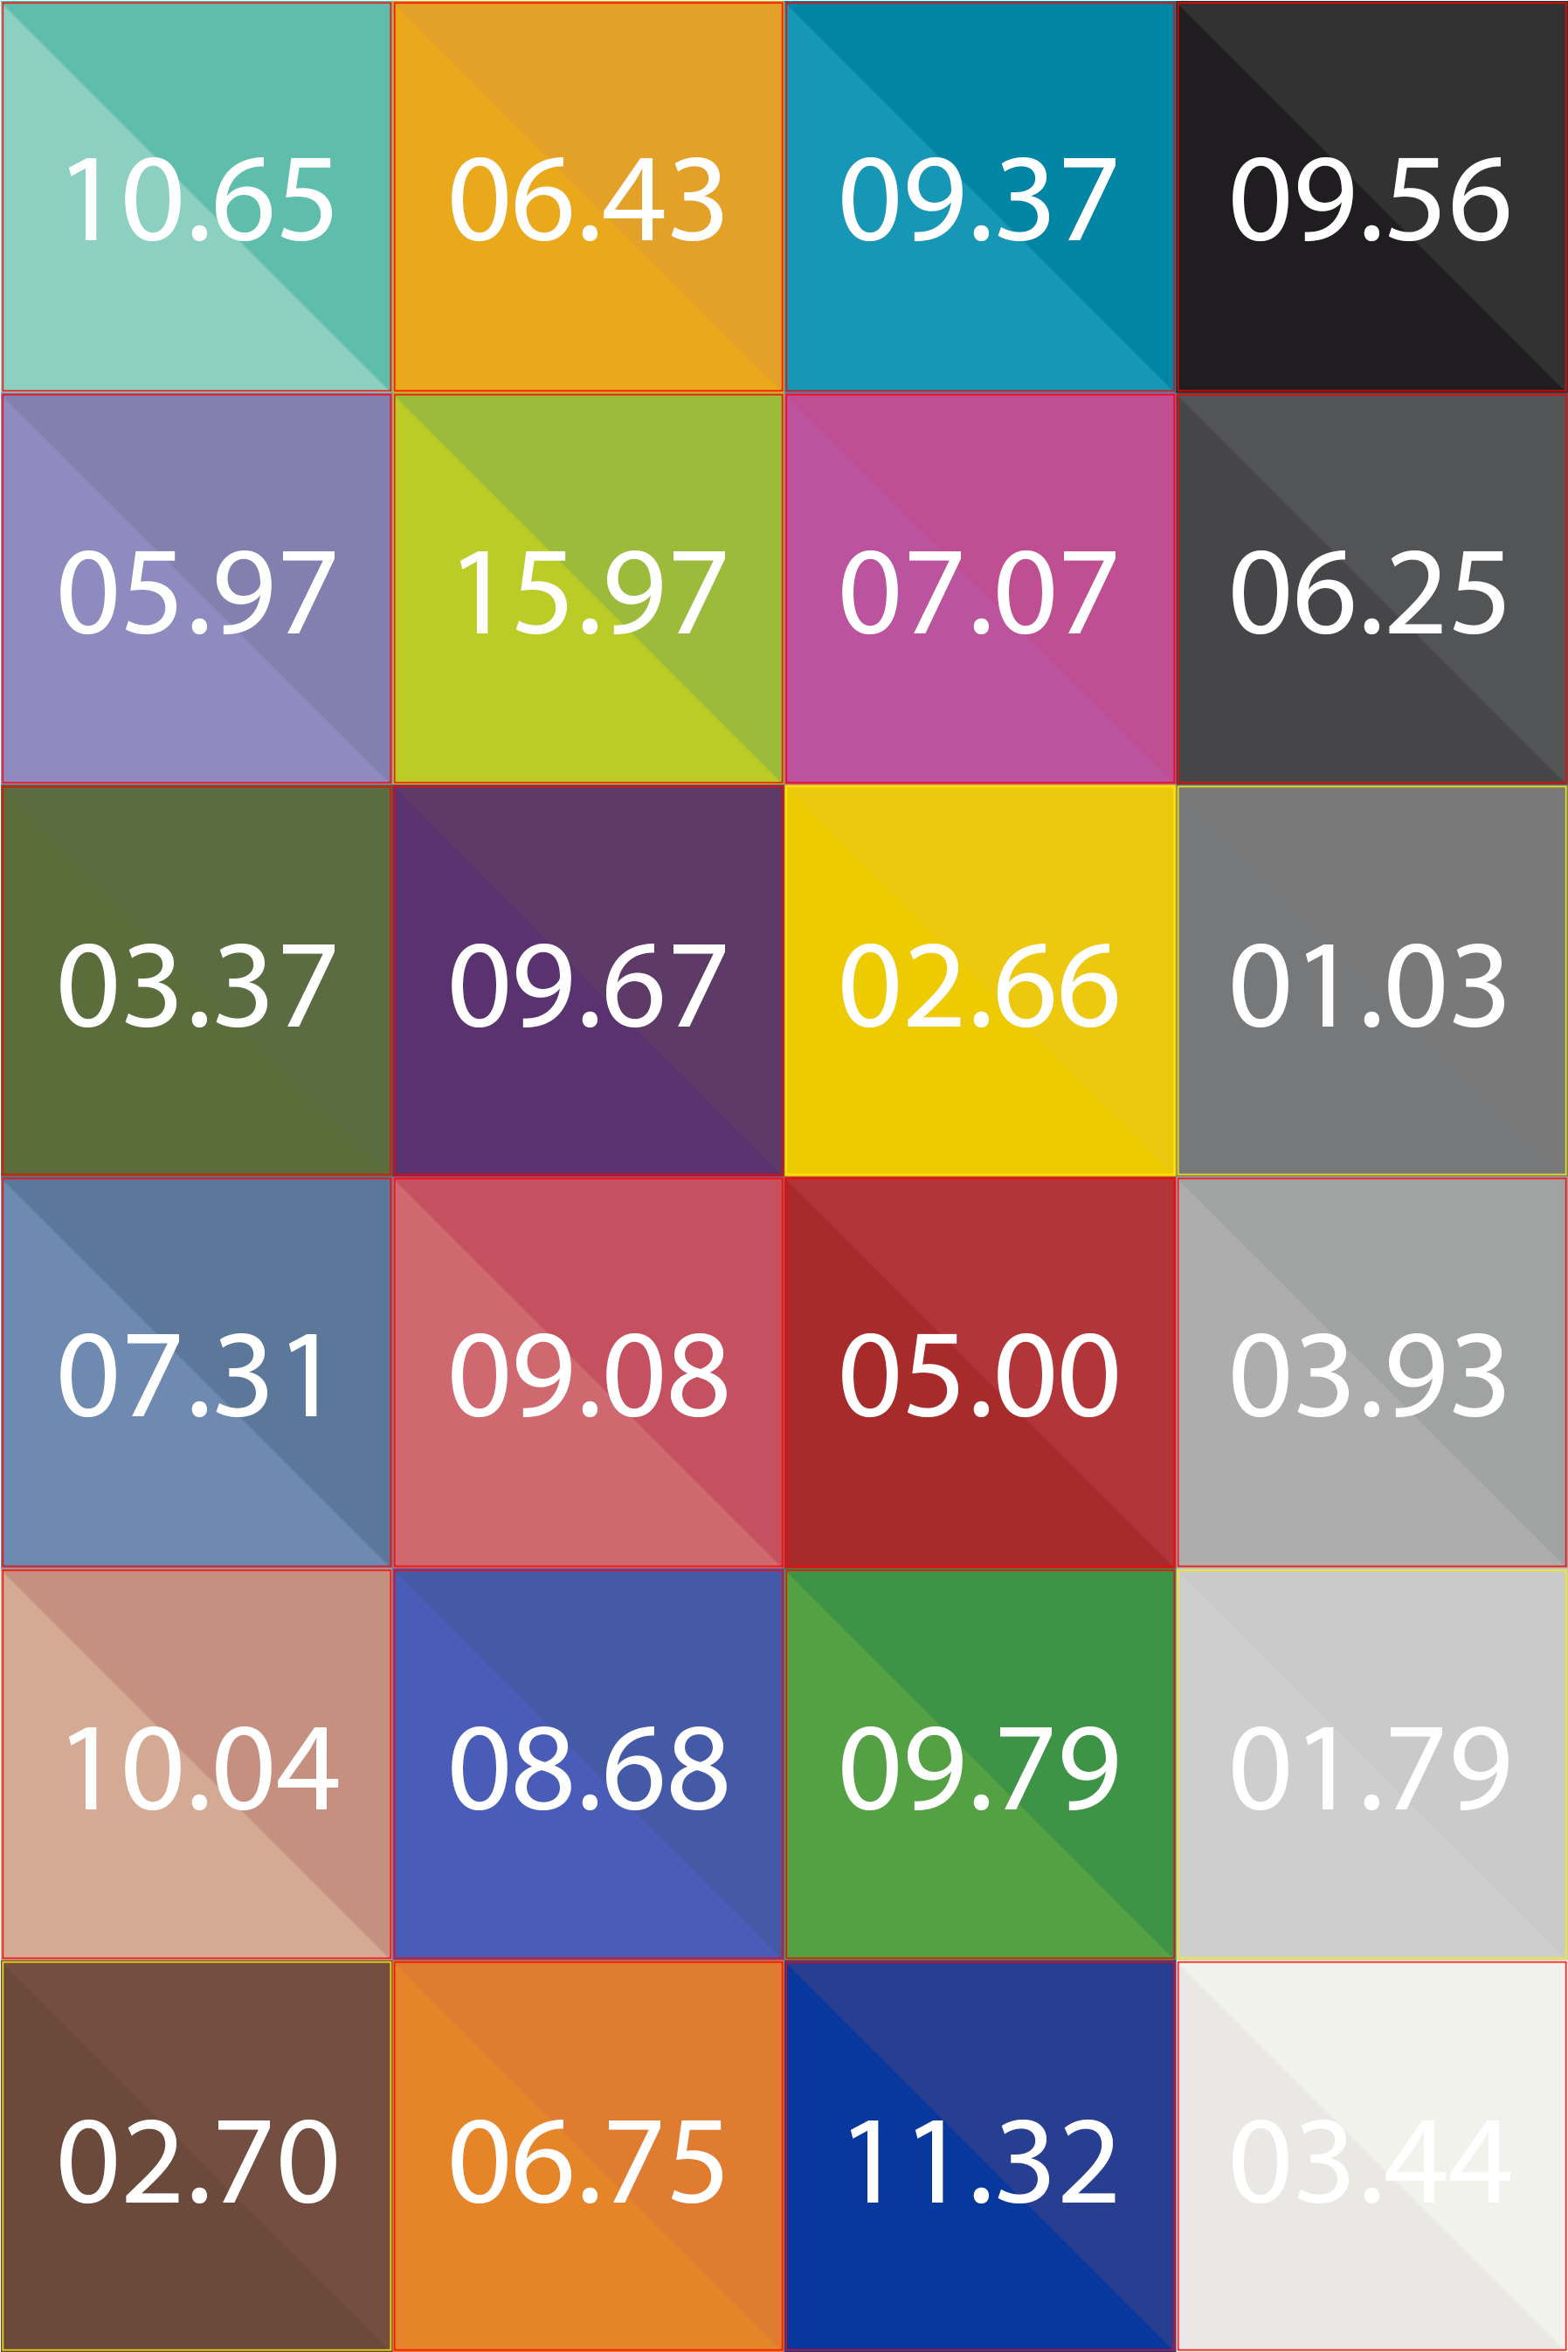
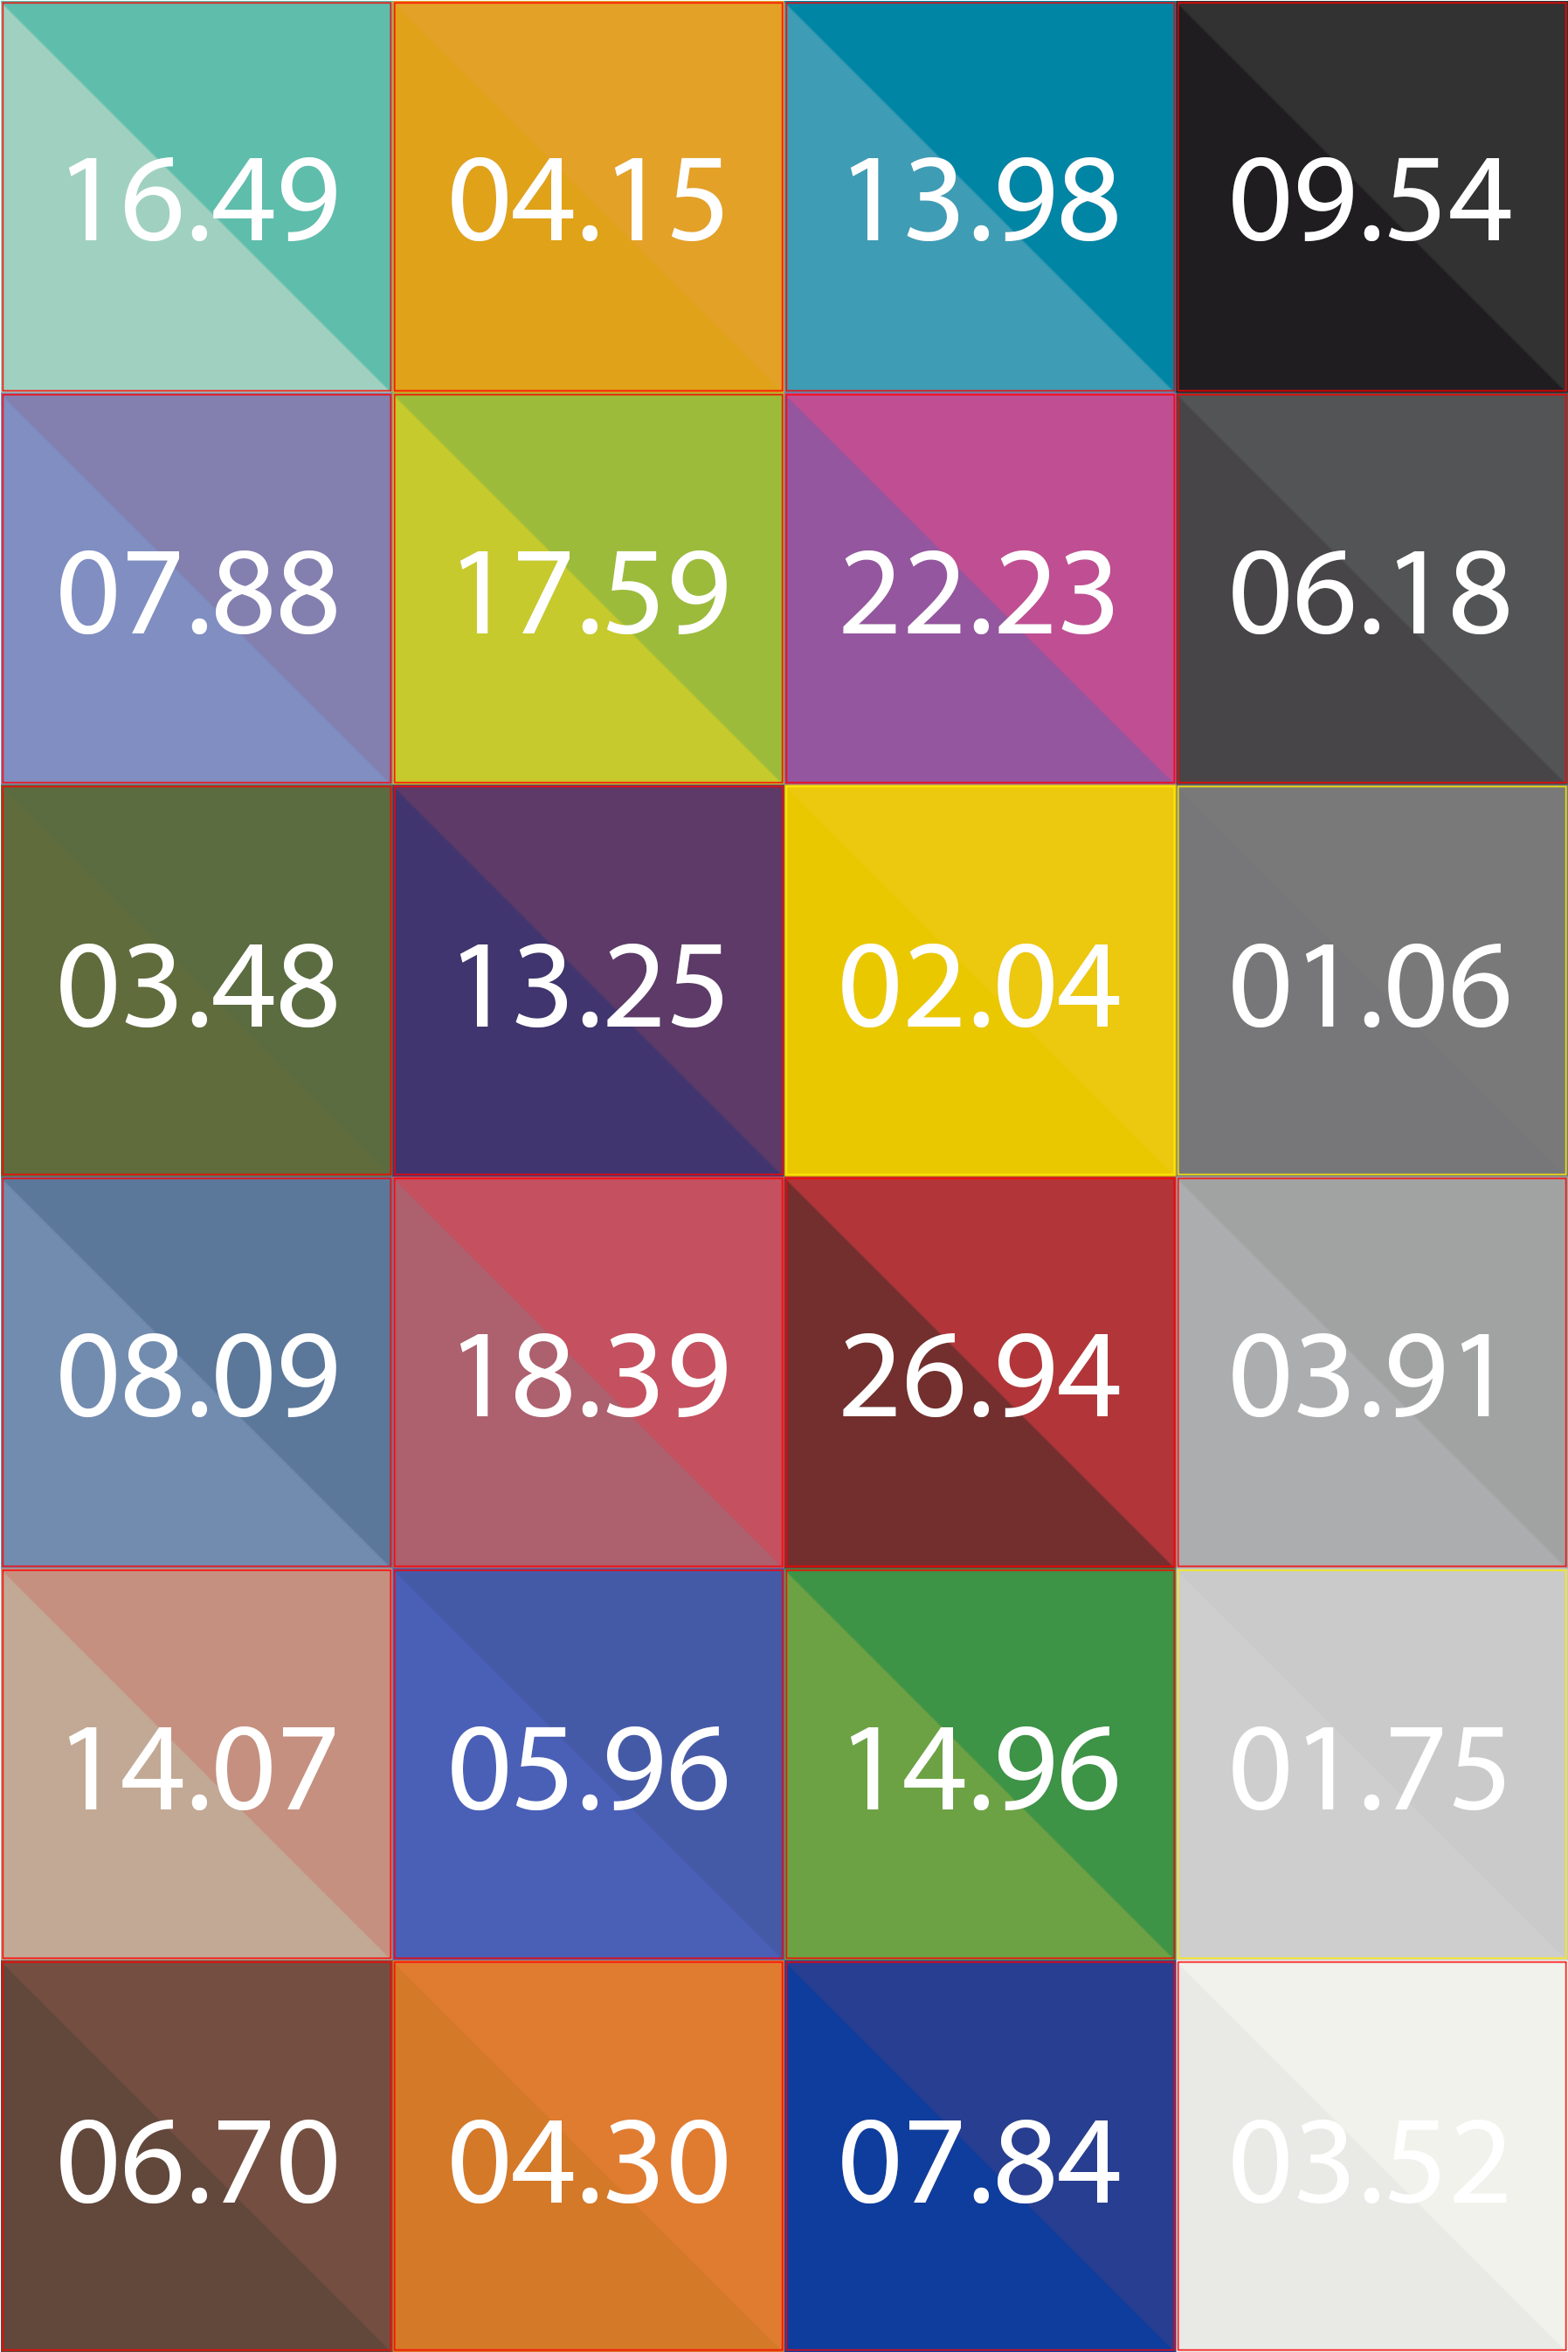
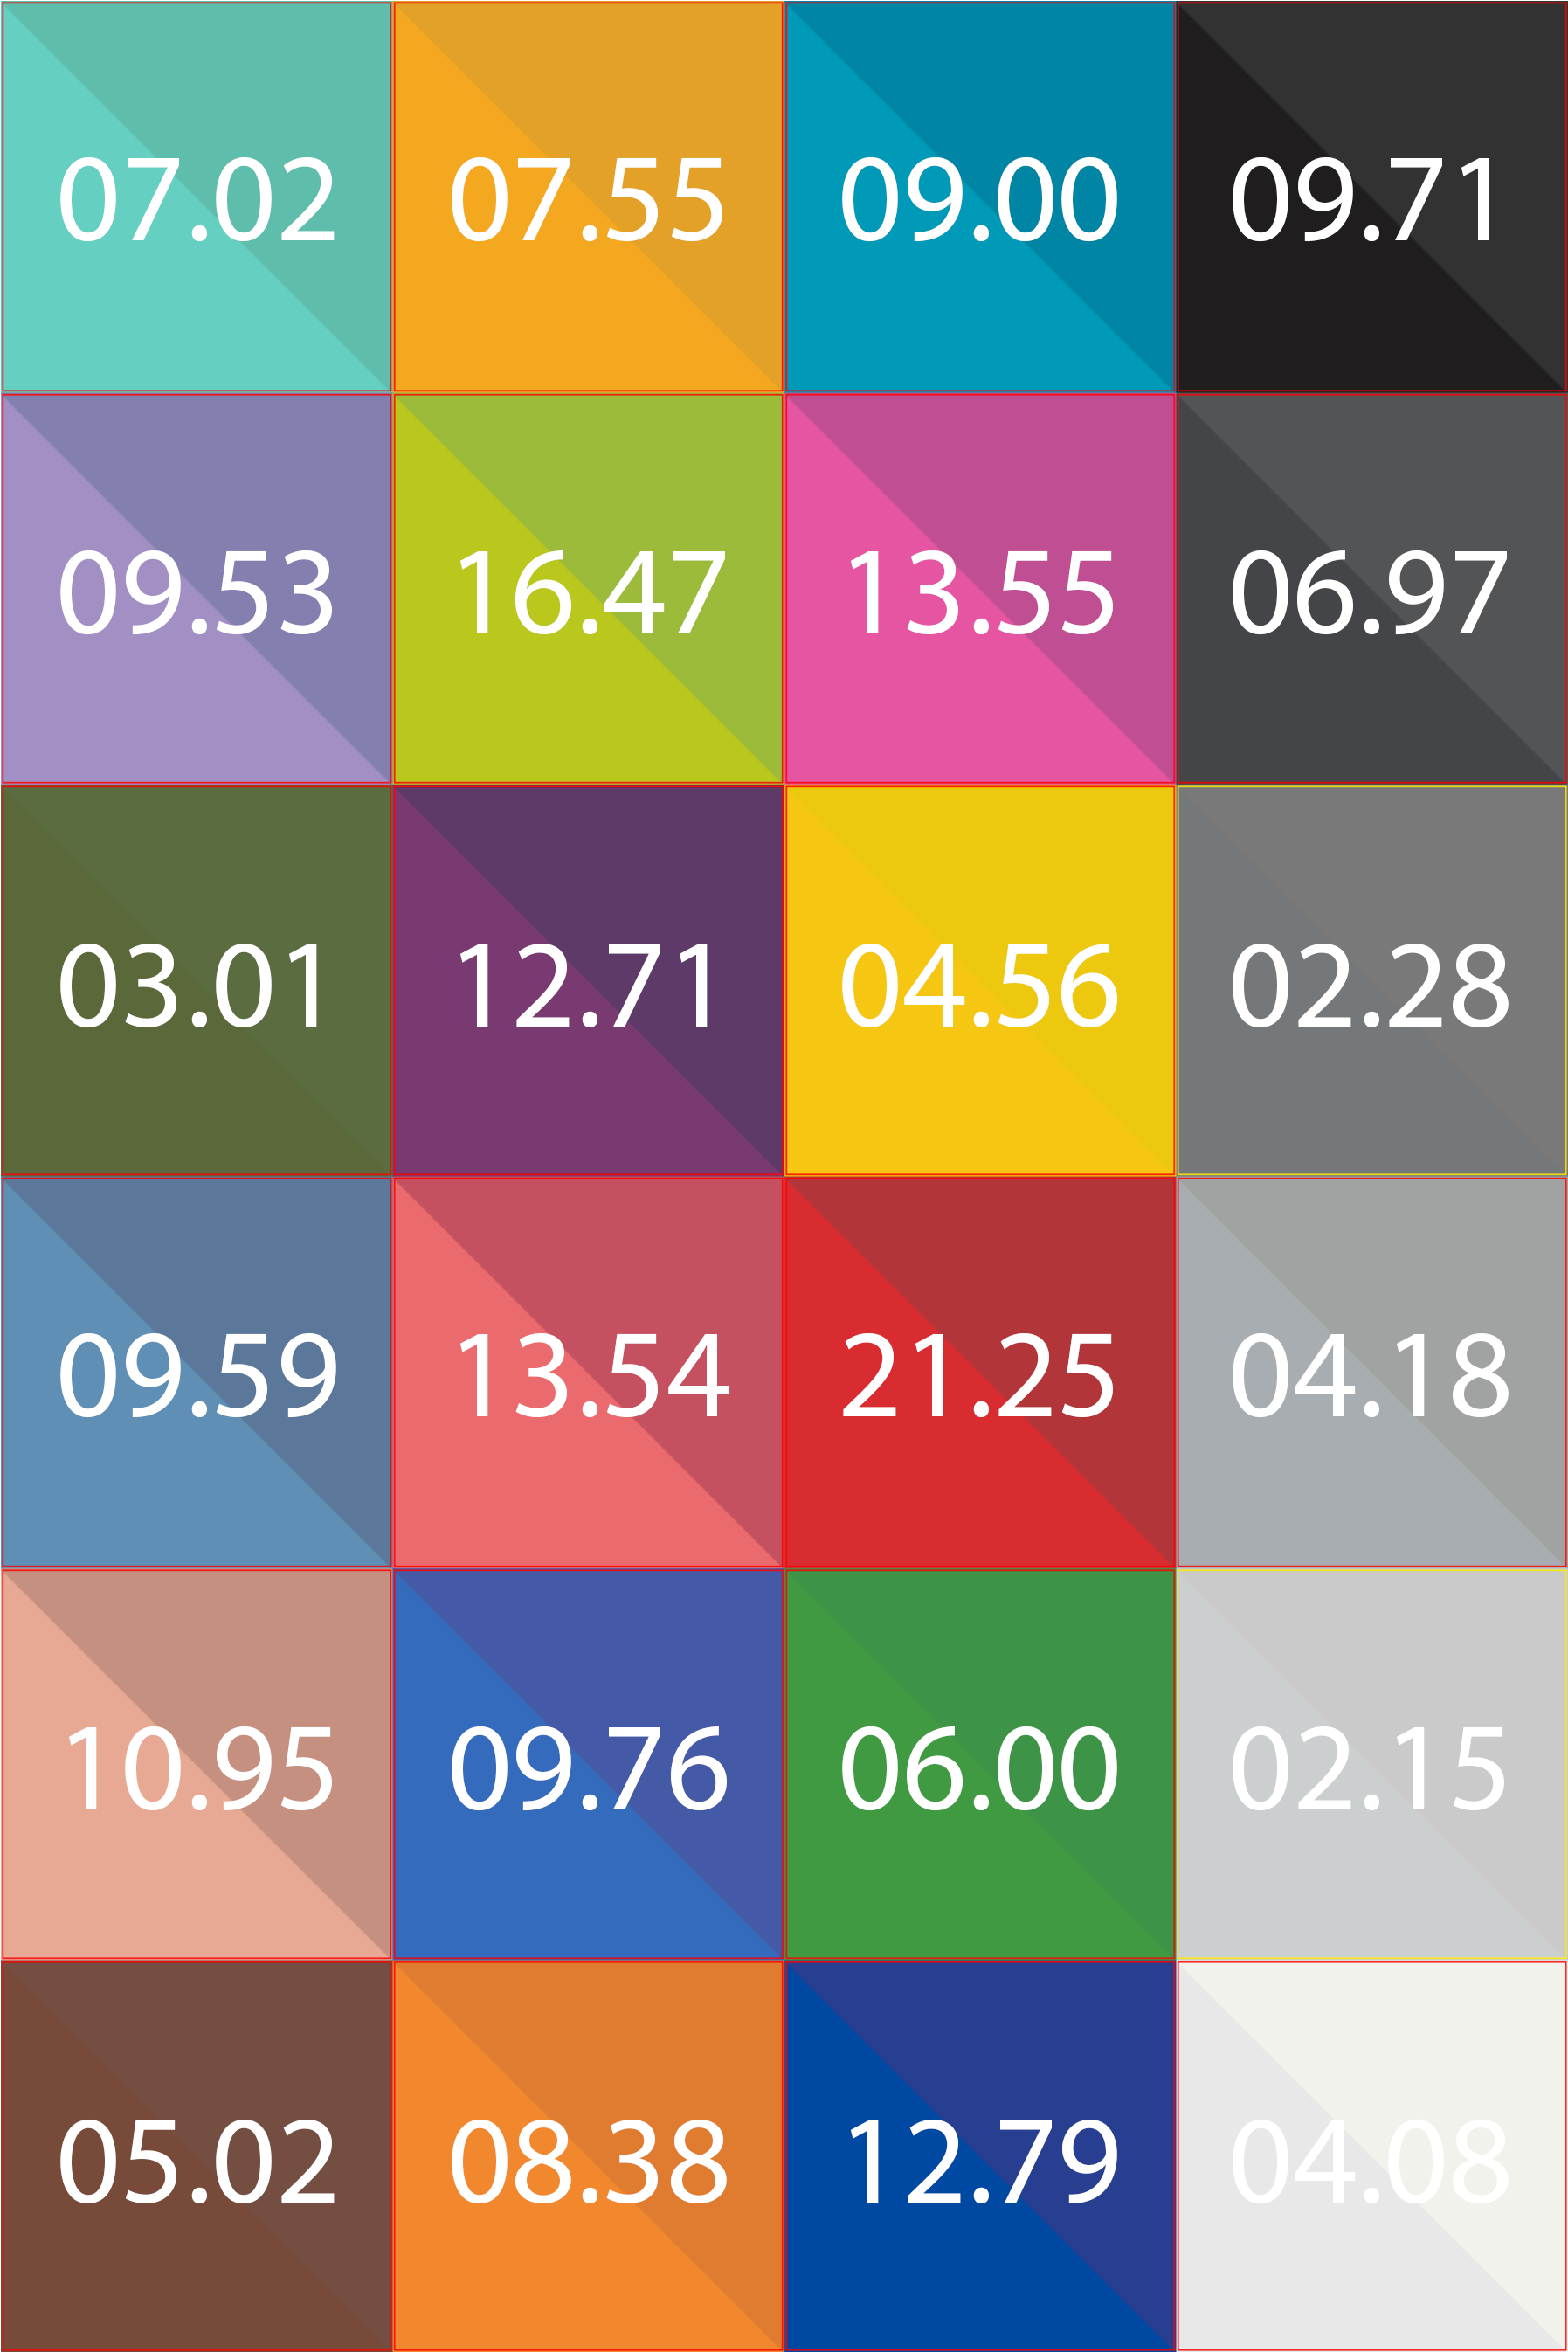
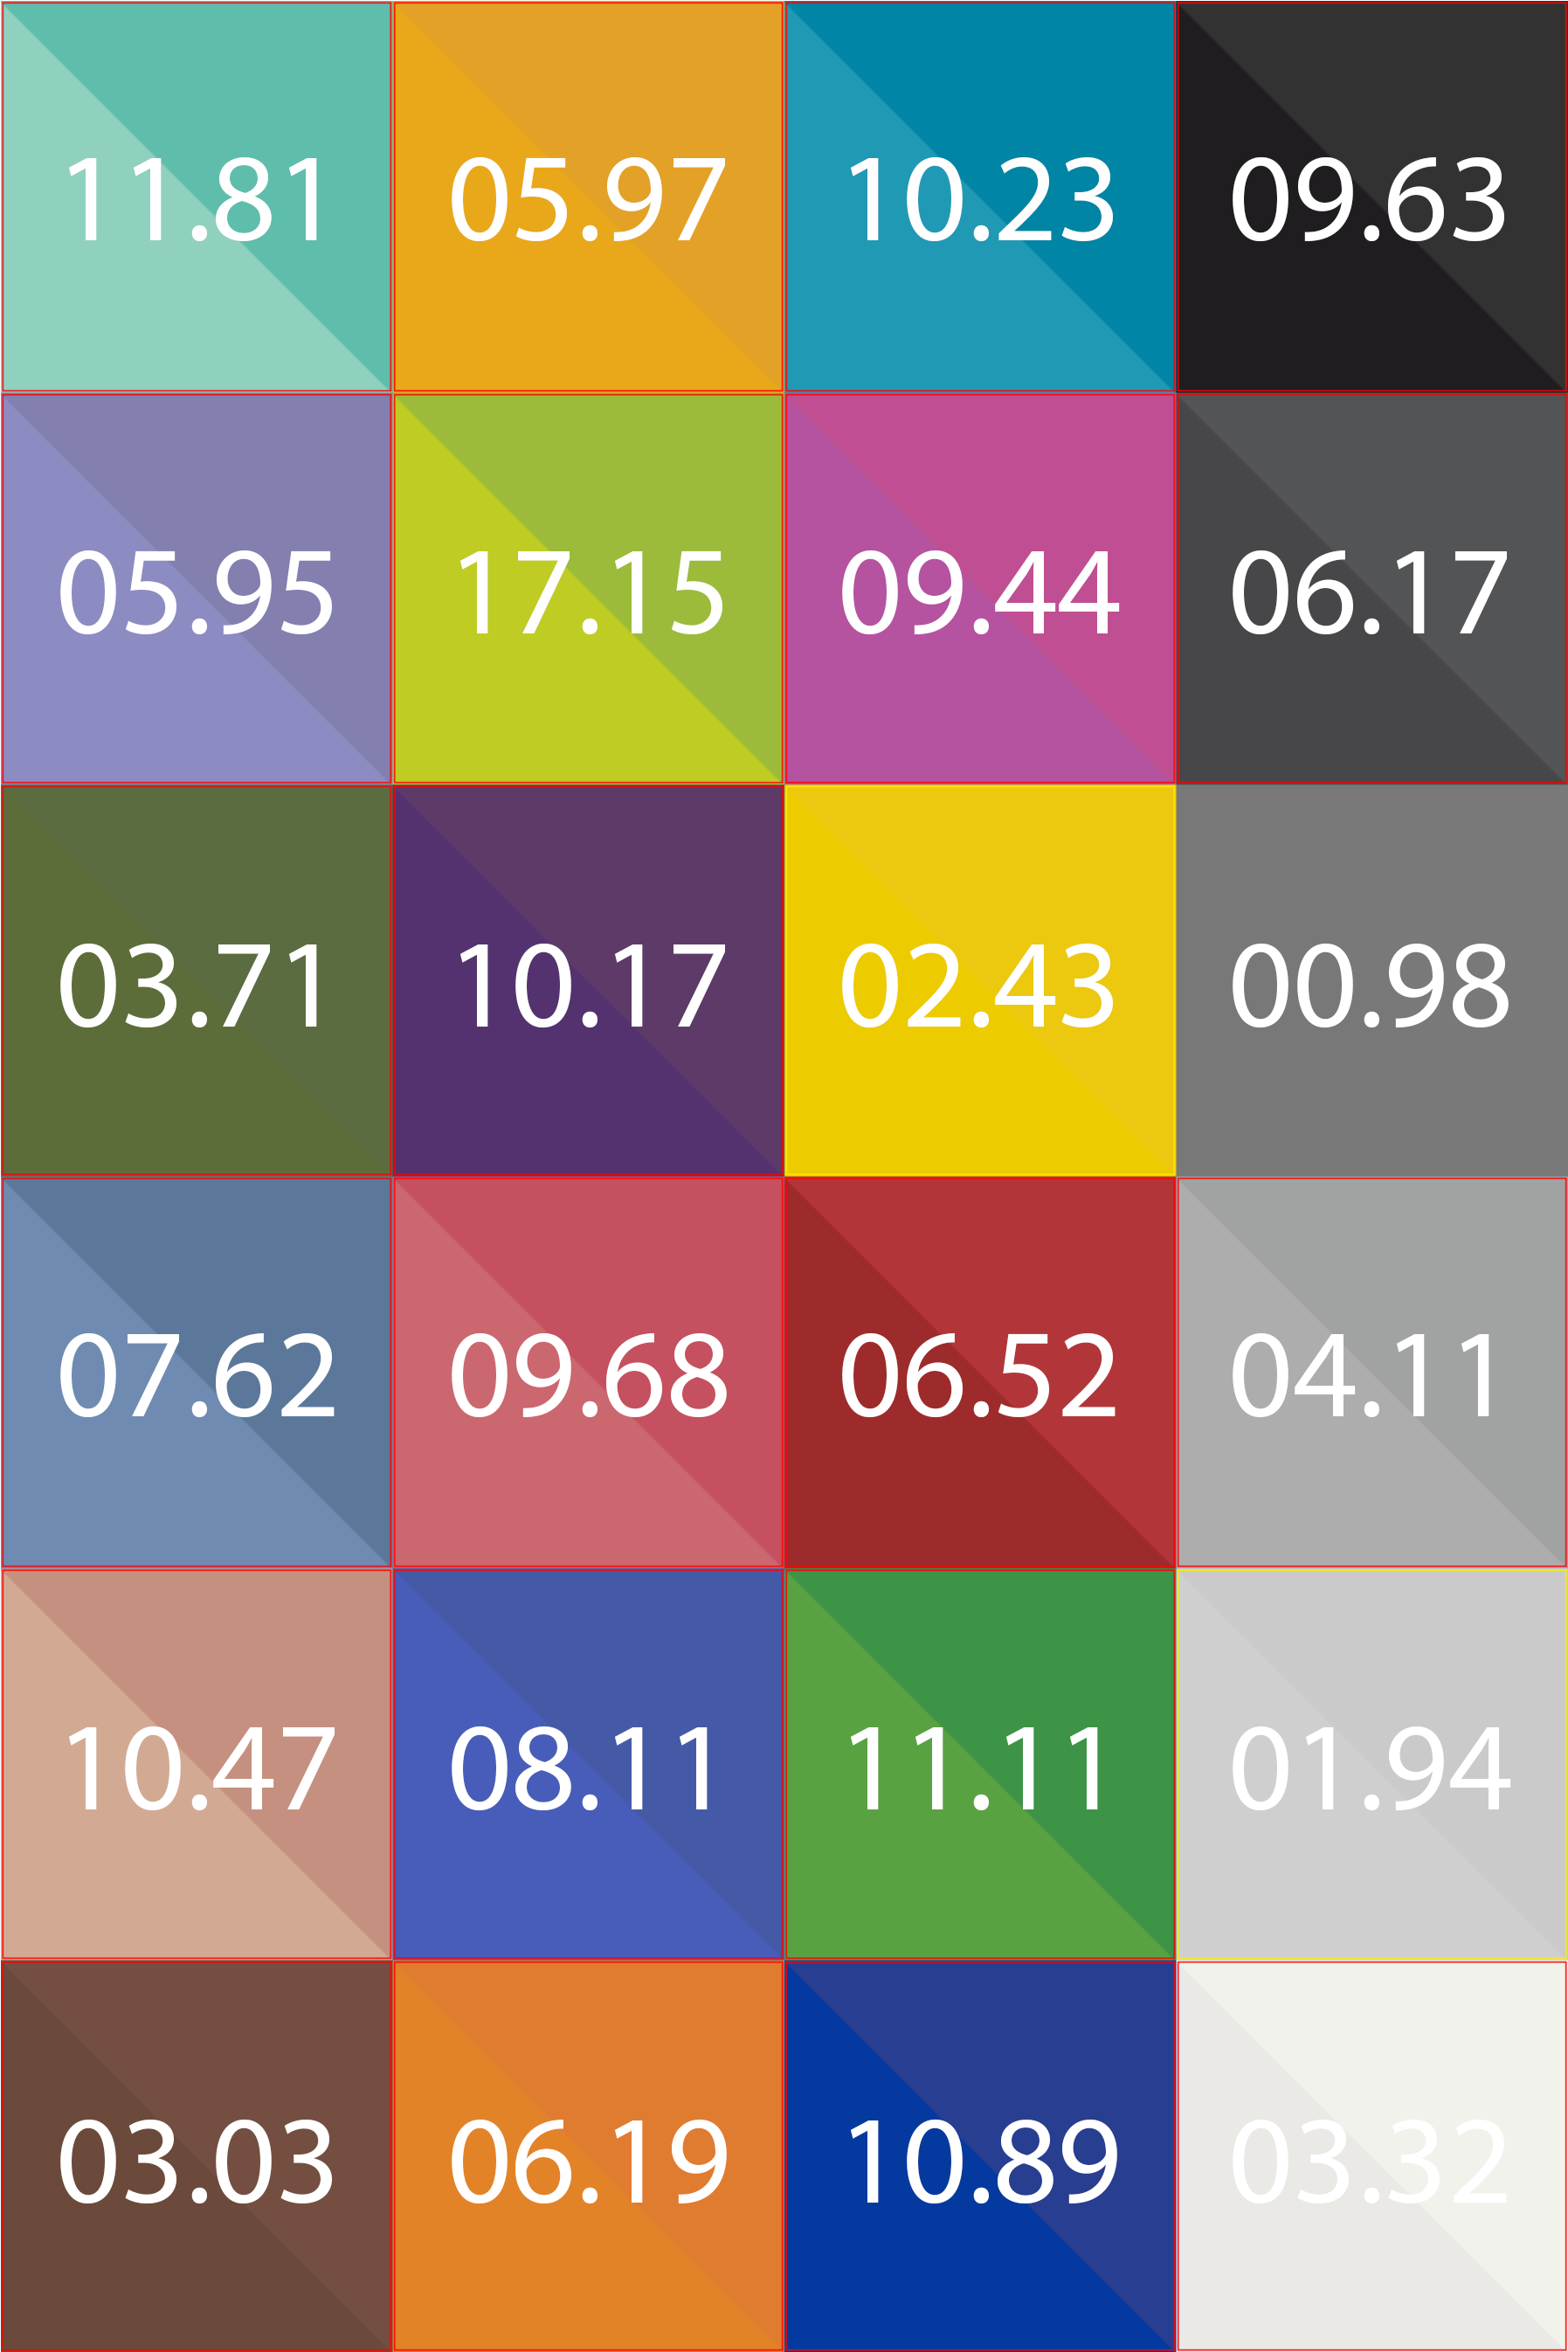
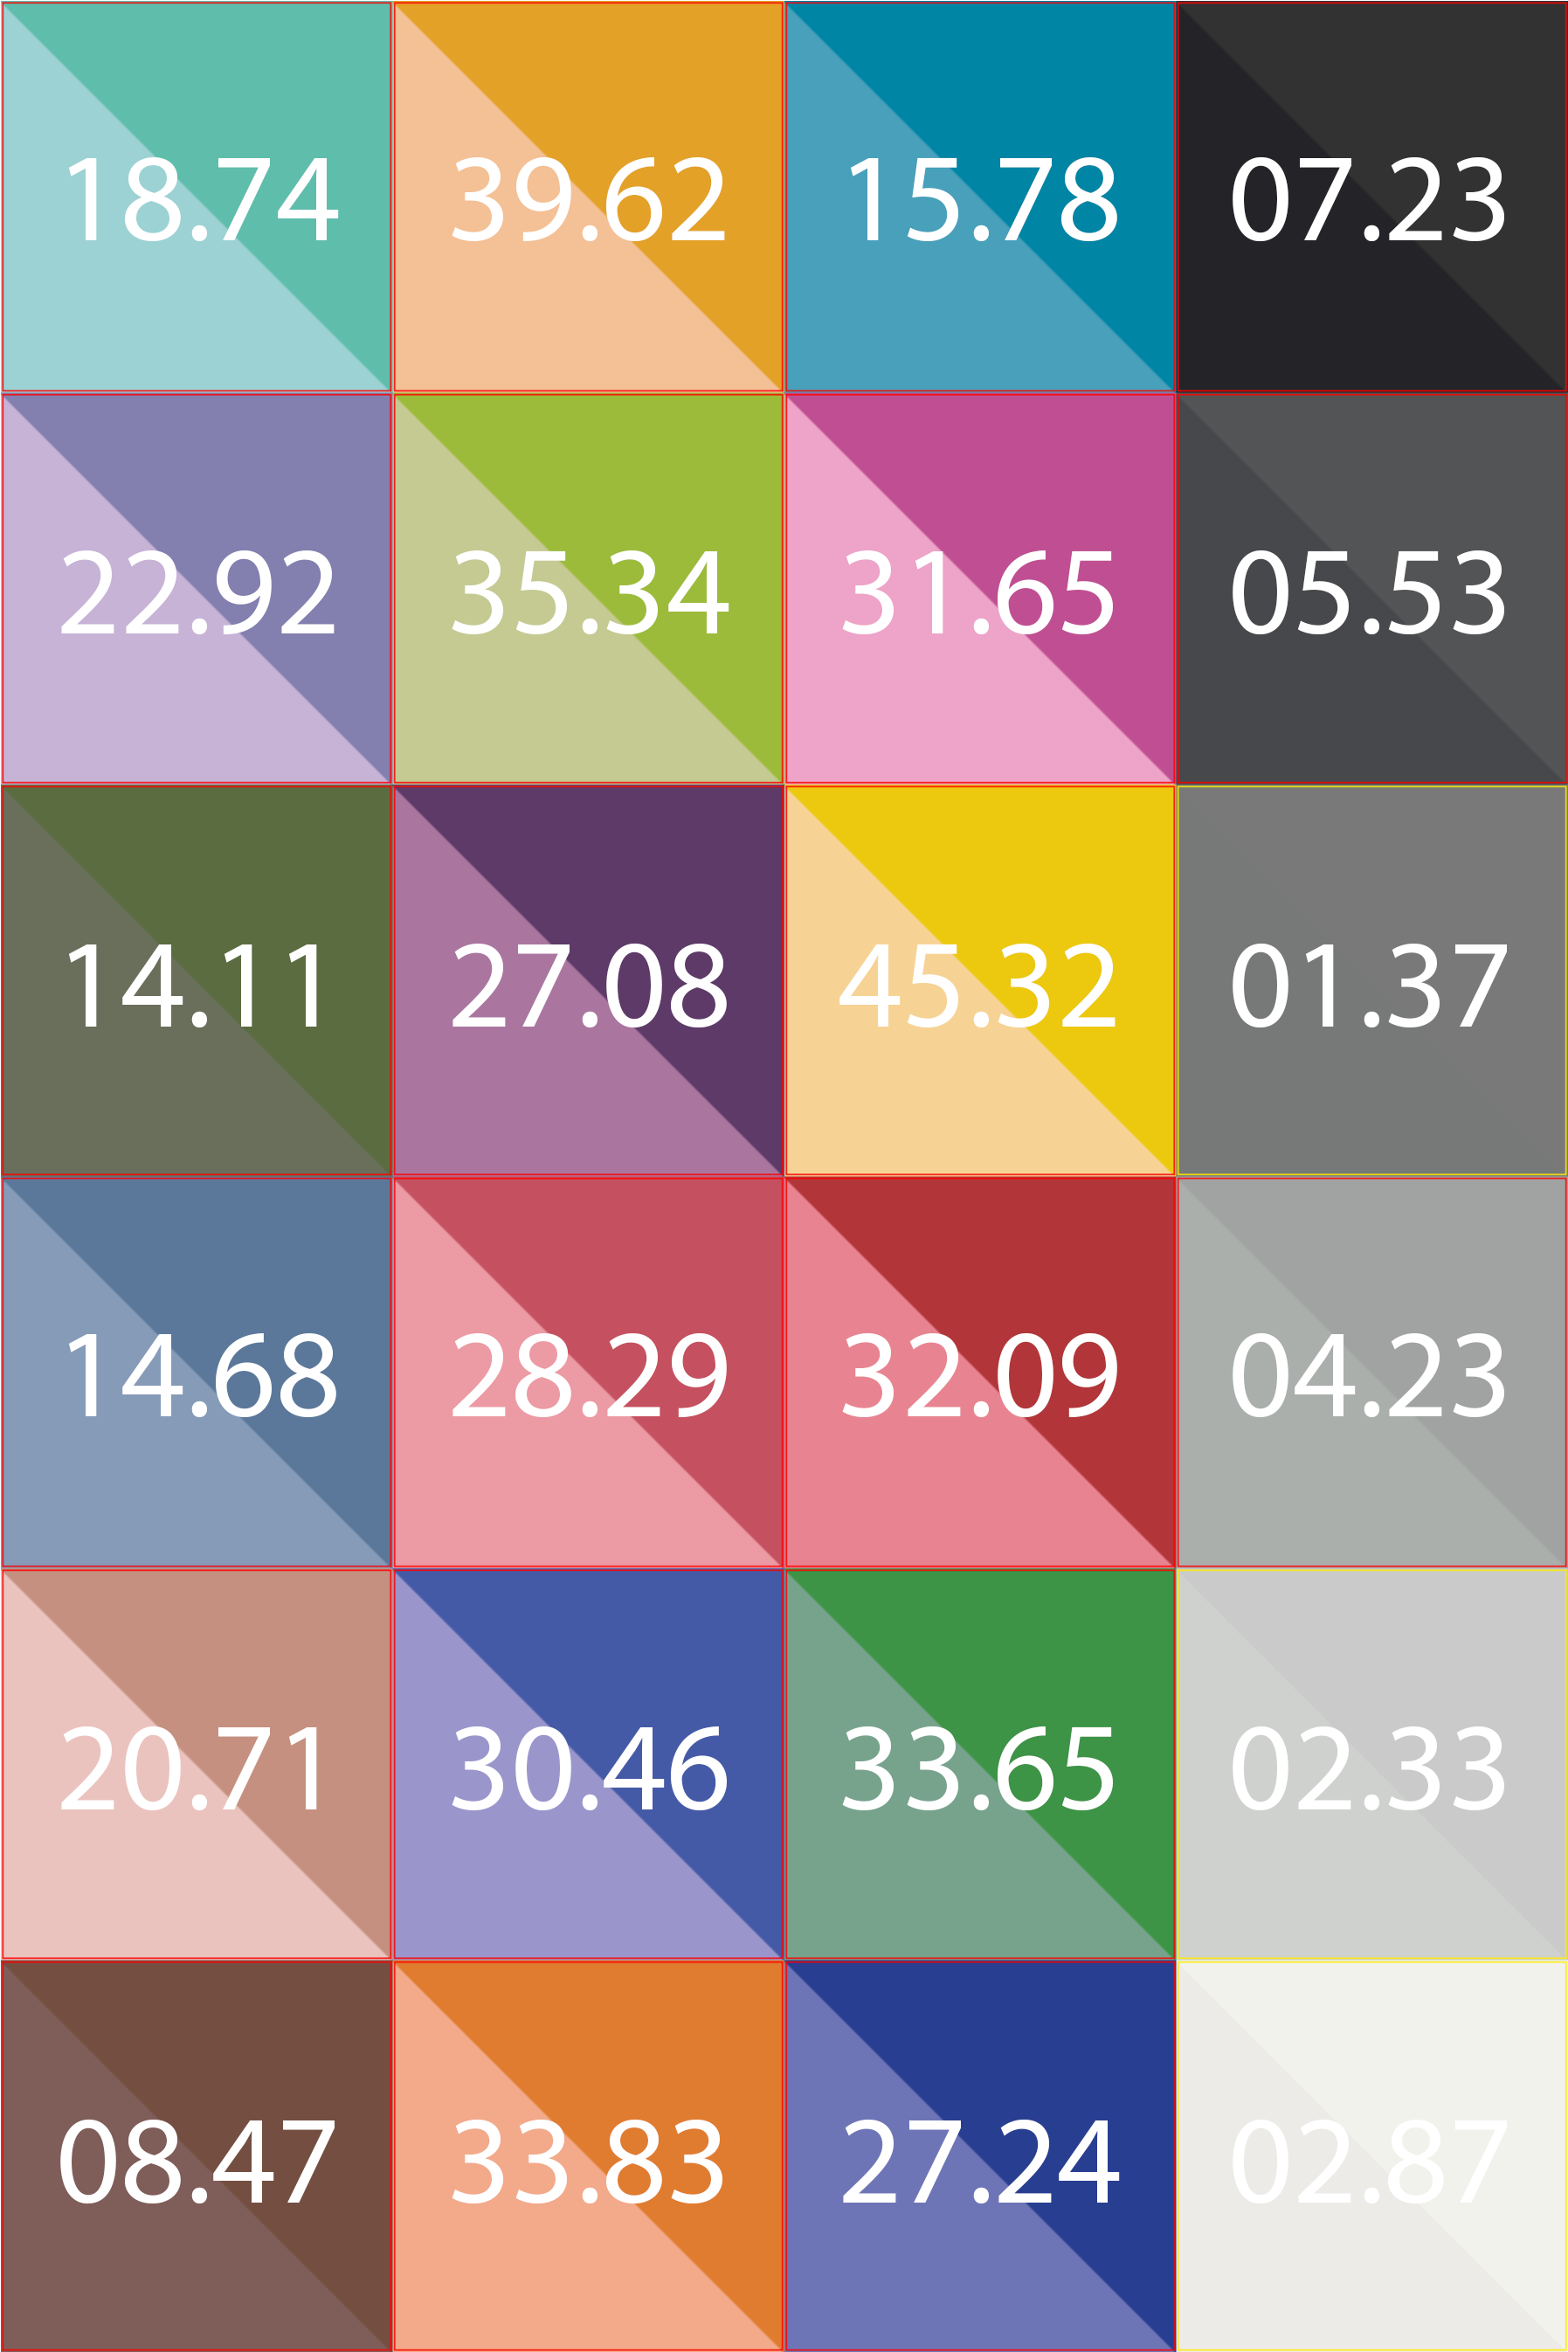
The photos were then exported as 16bit TIFFs in the ProPhoto RGB colour space. Using PatchTool, the color checker data was extracted from each image and then compared against the Color Checker data from X-Rite. The large colour patches show the X-Rite provided colours as the top right triangle of each patch, and the bottom left triangle is the colour extracted from the image. The number in each patch is the Delta E between the two.
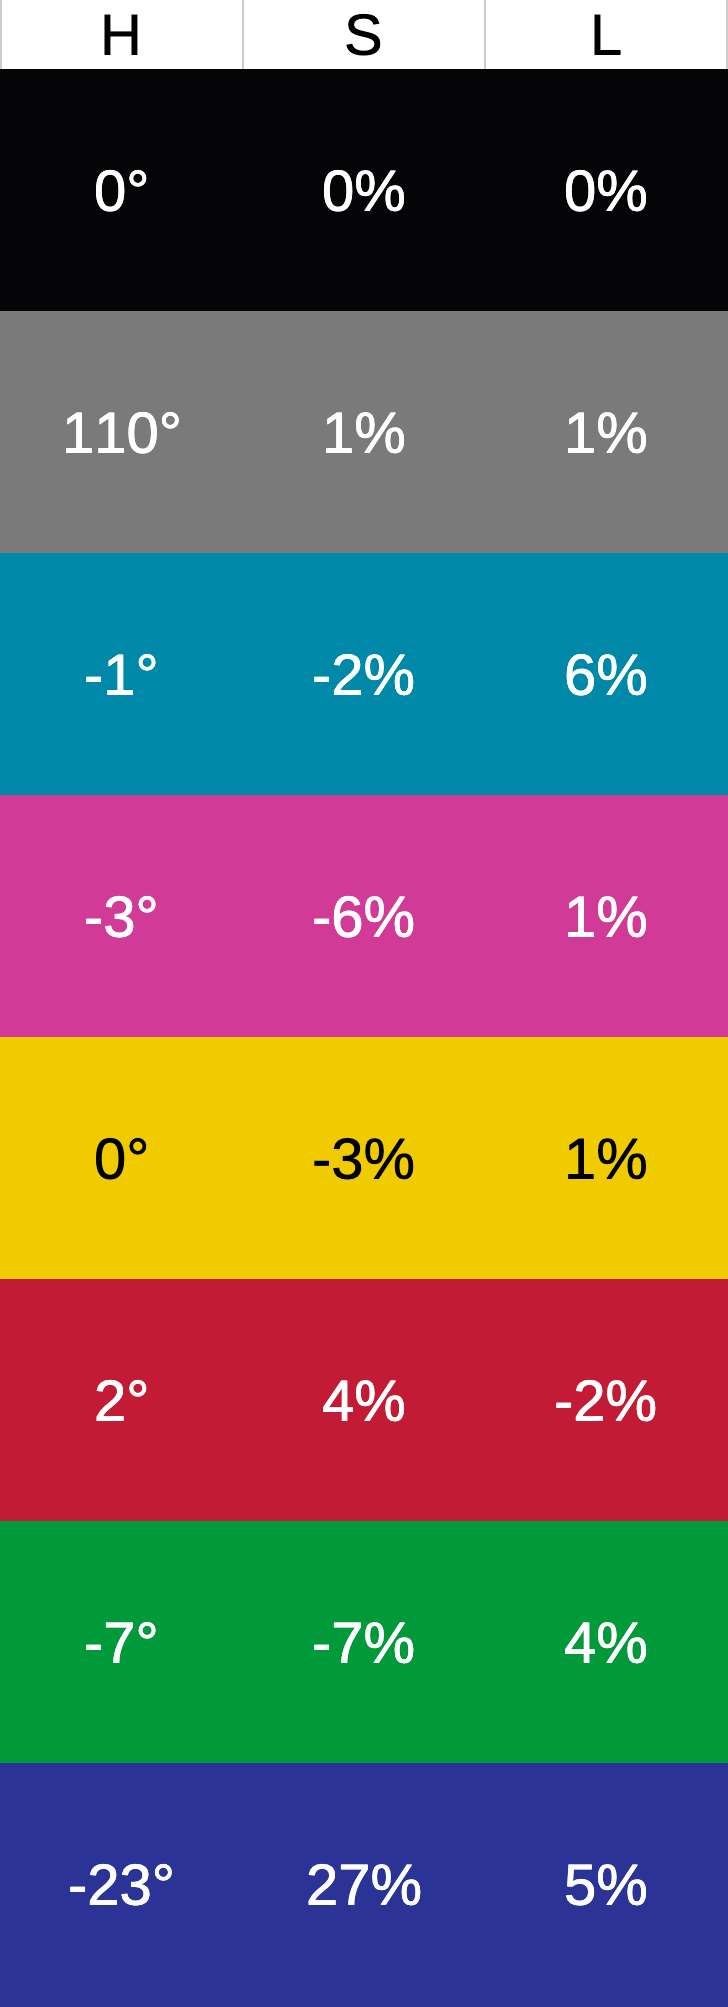
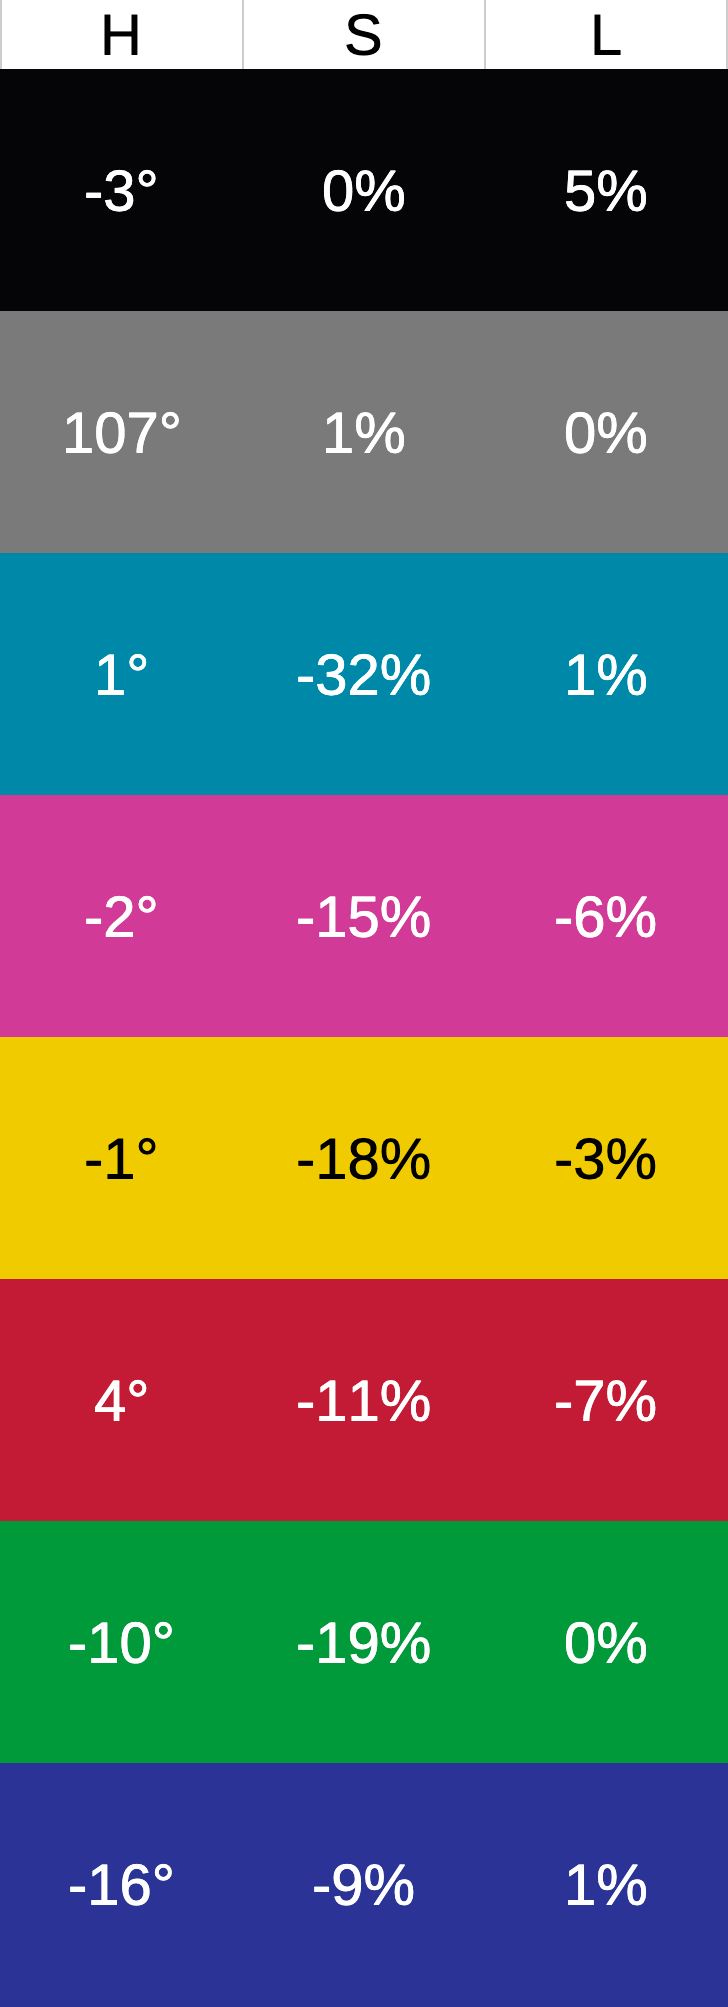
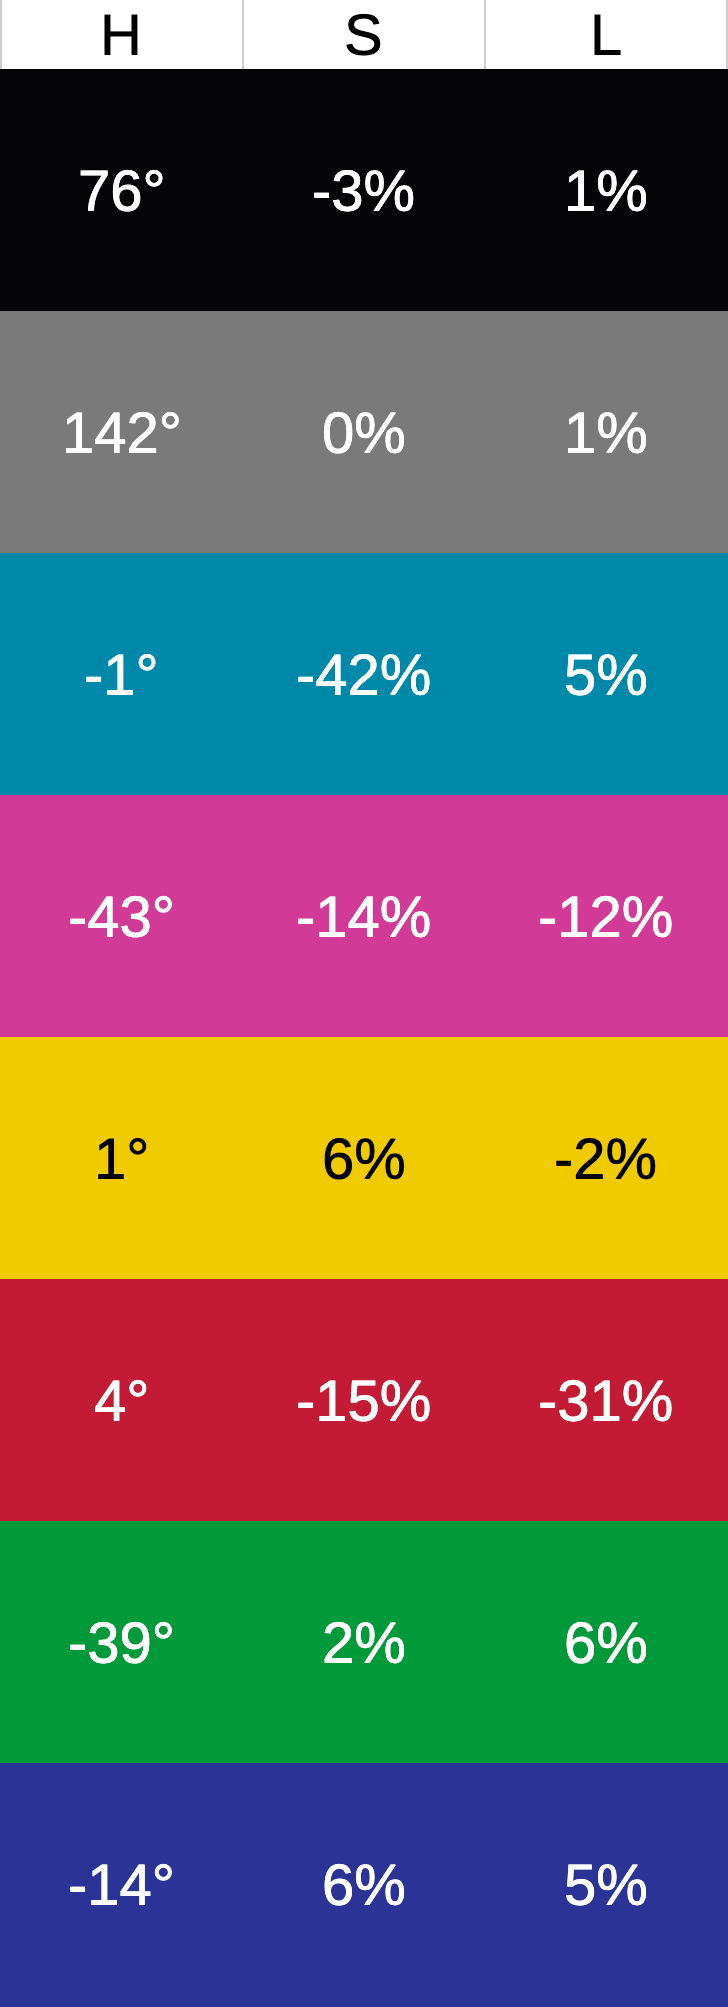
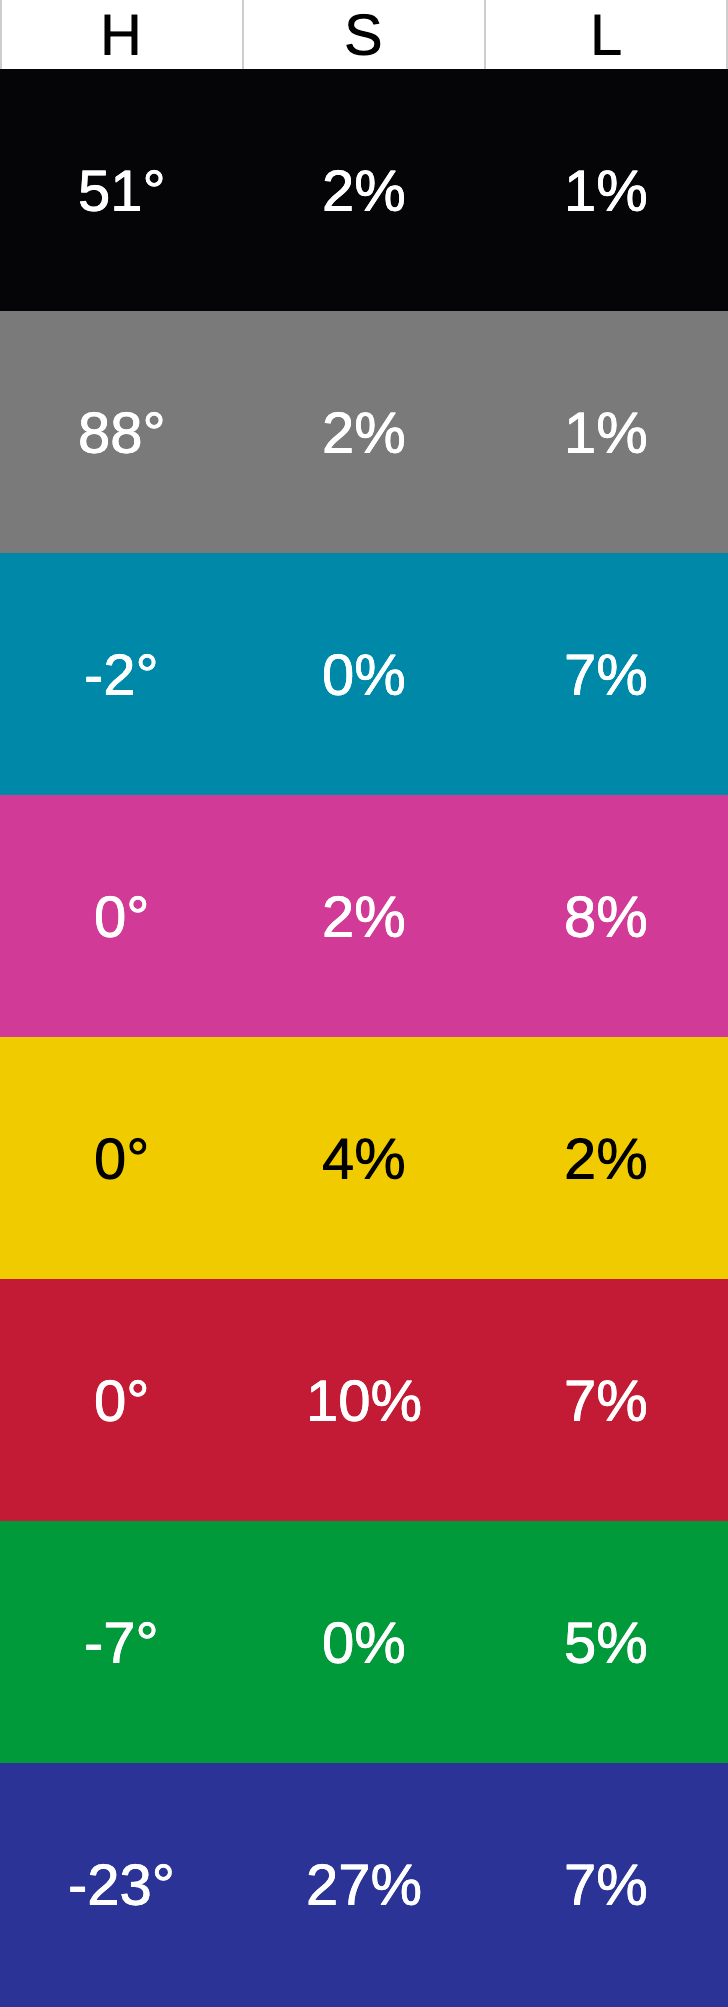
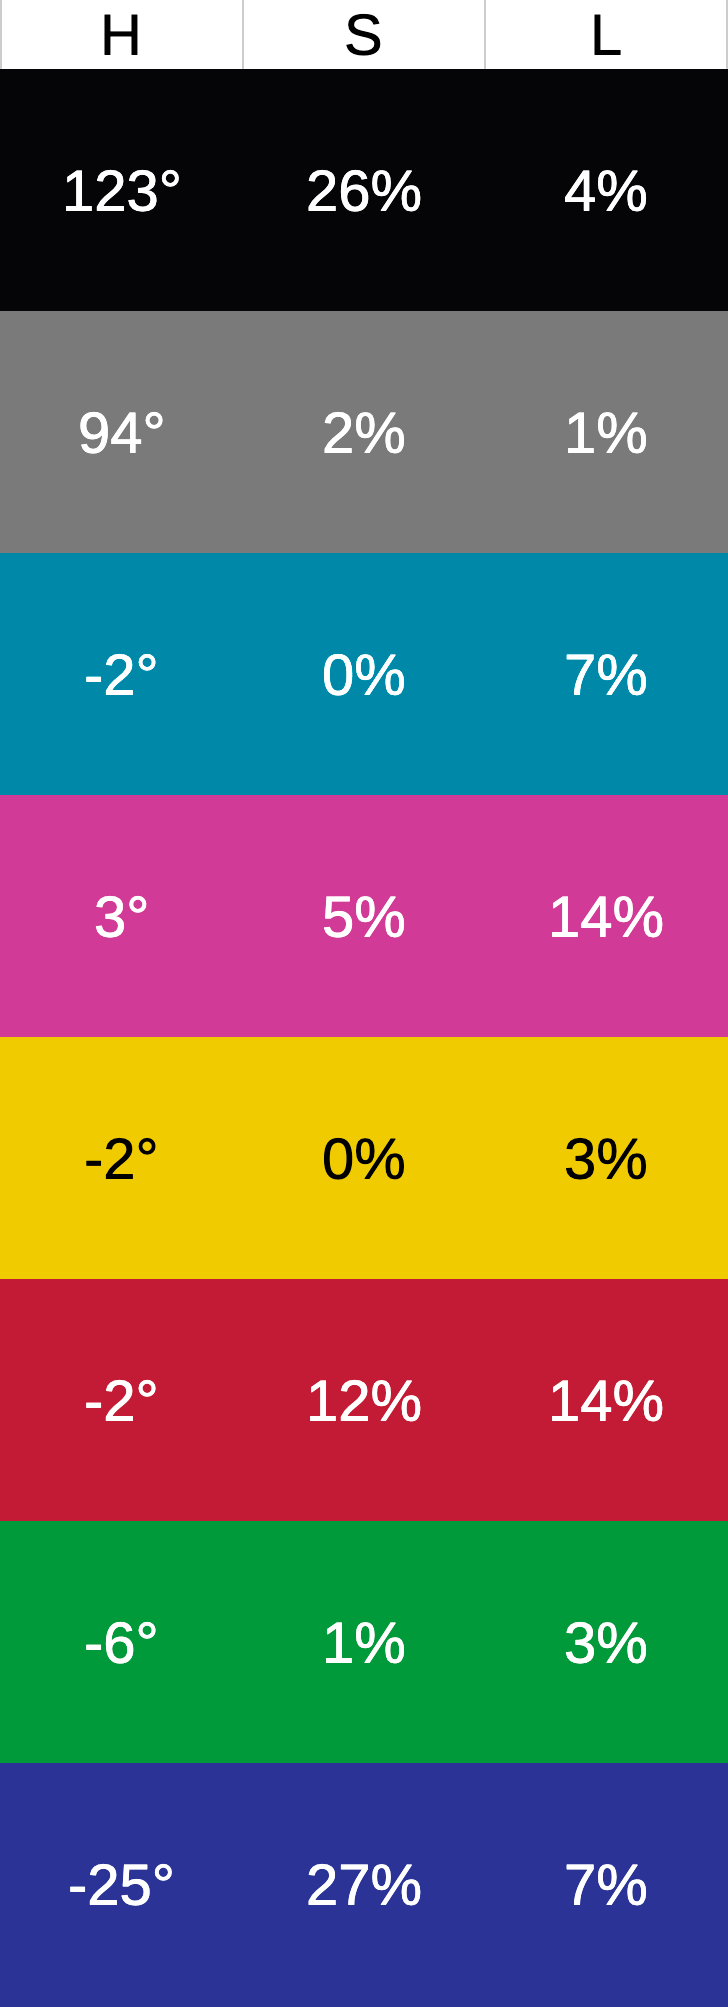
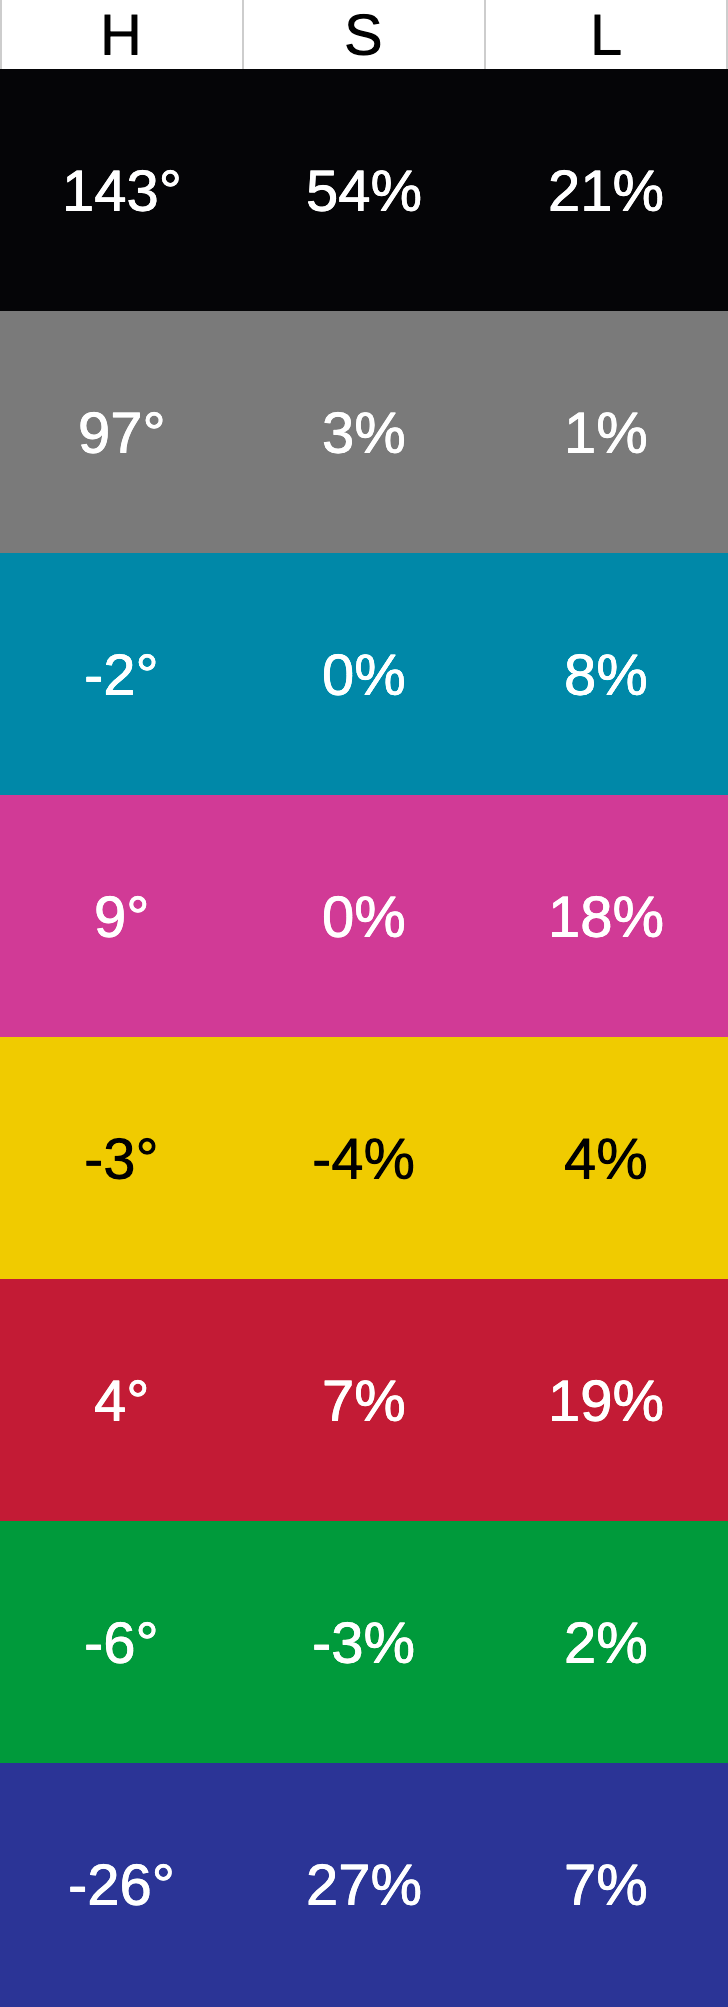
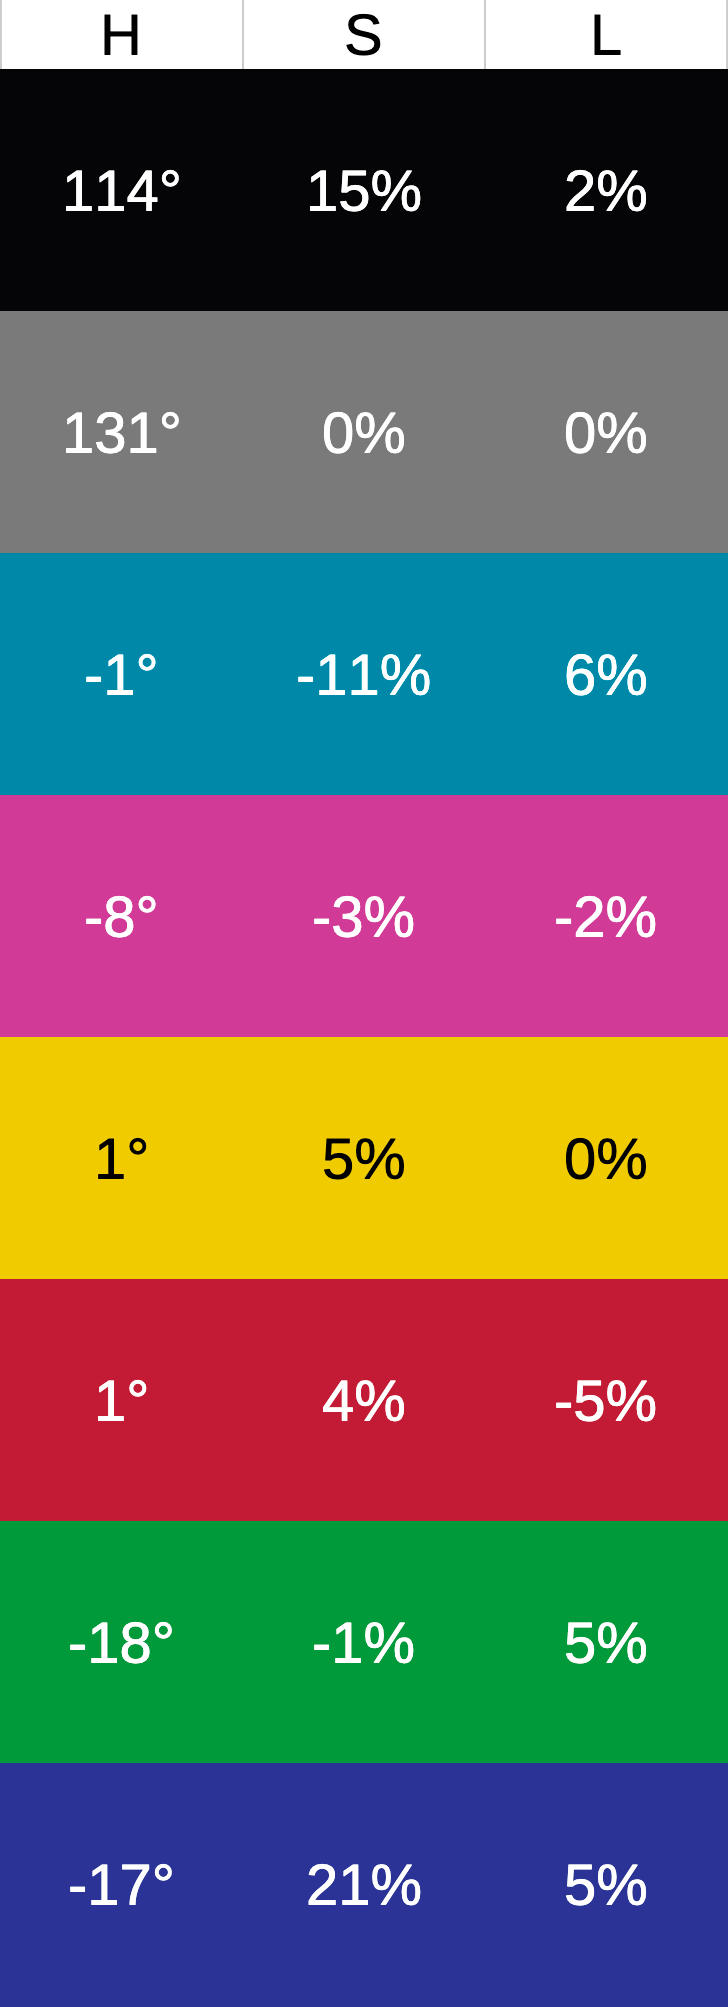
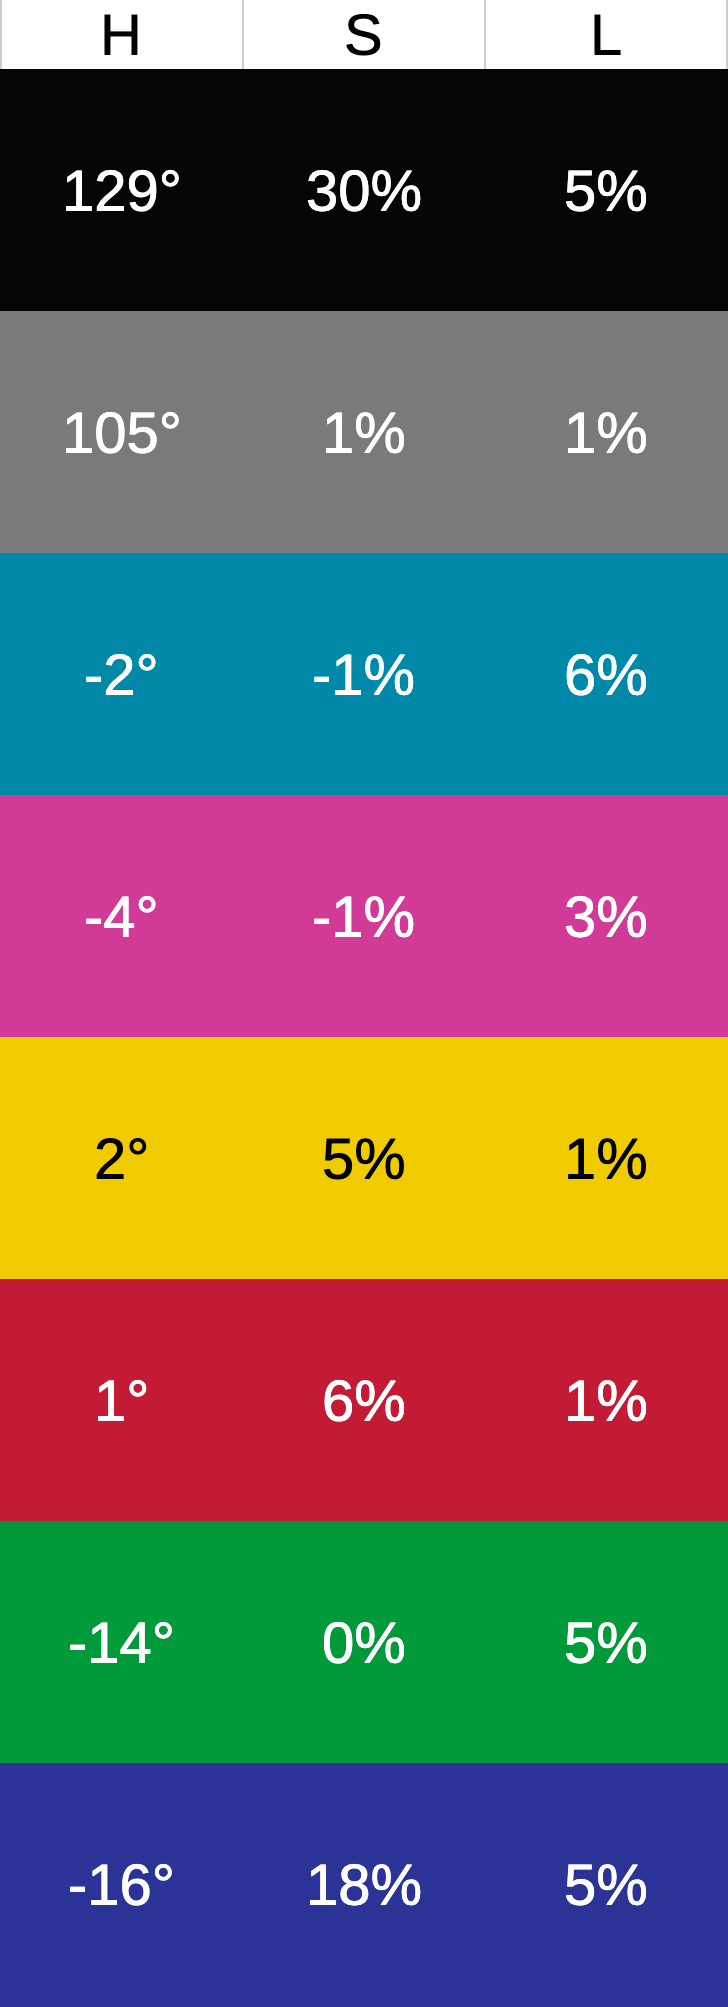
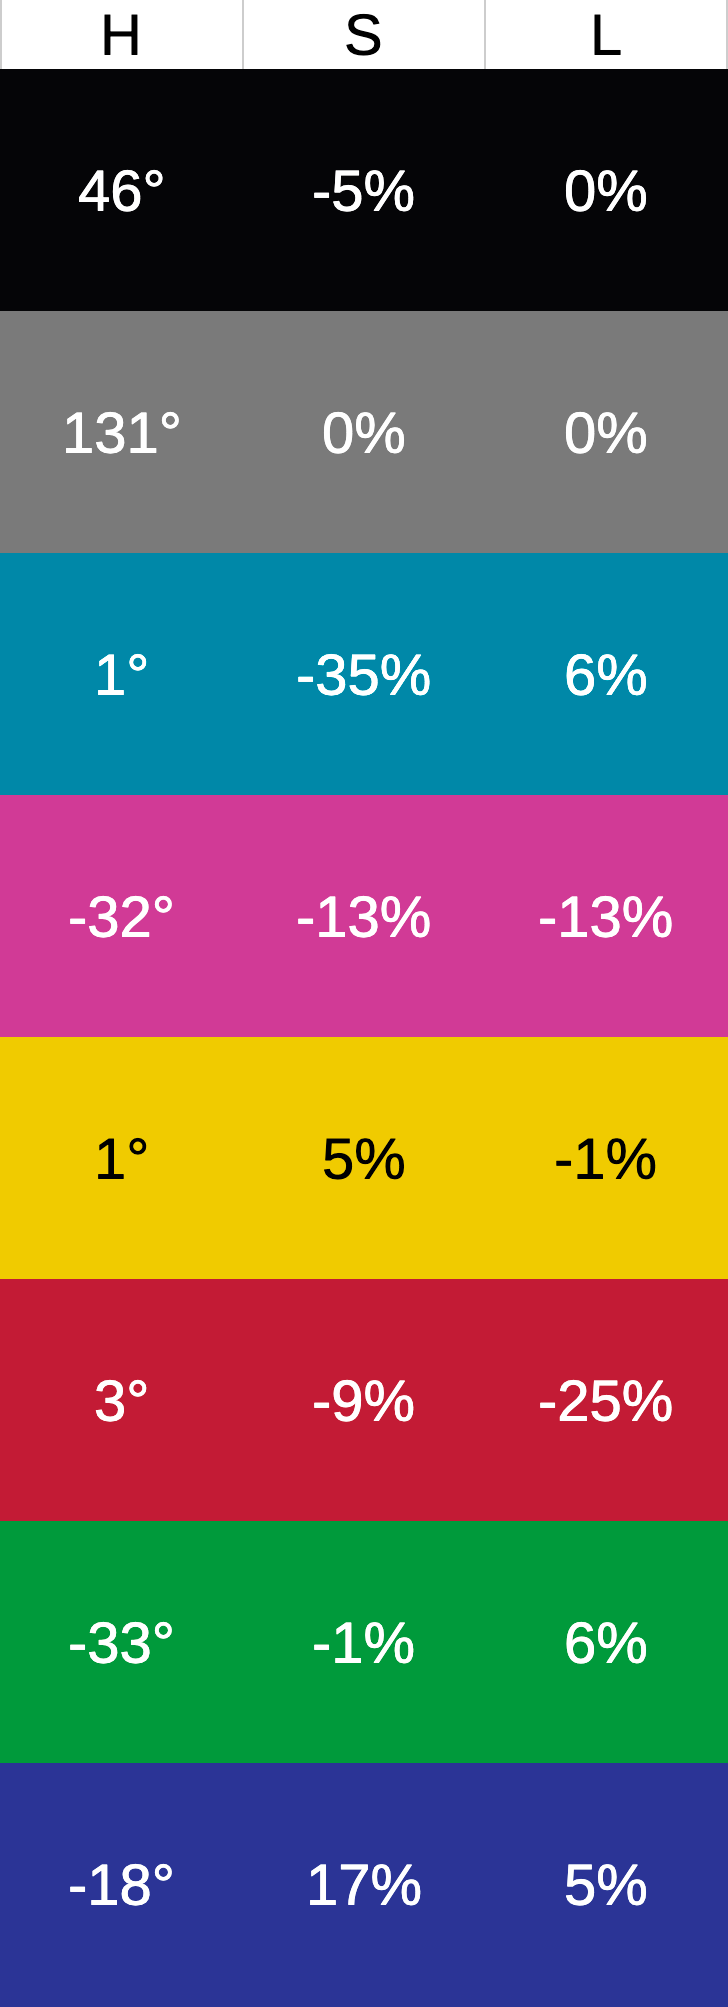
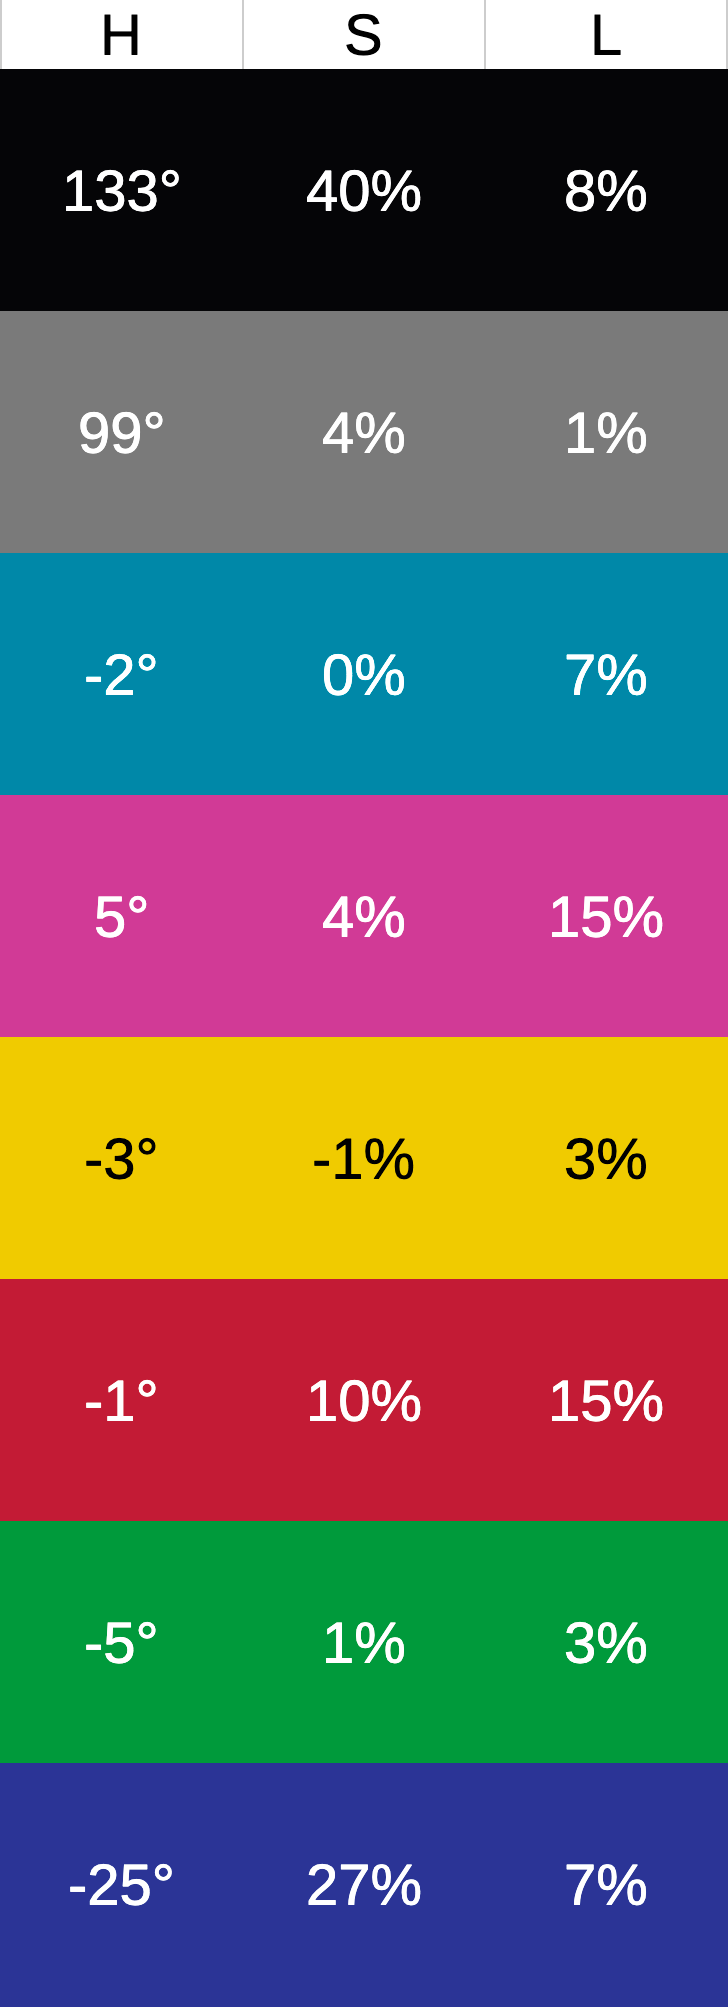
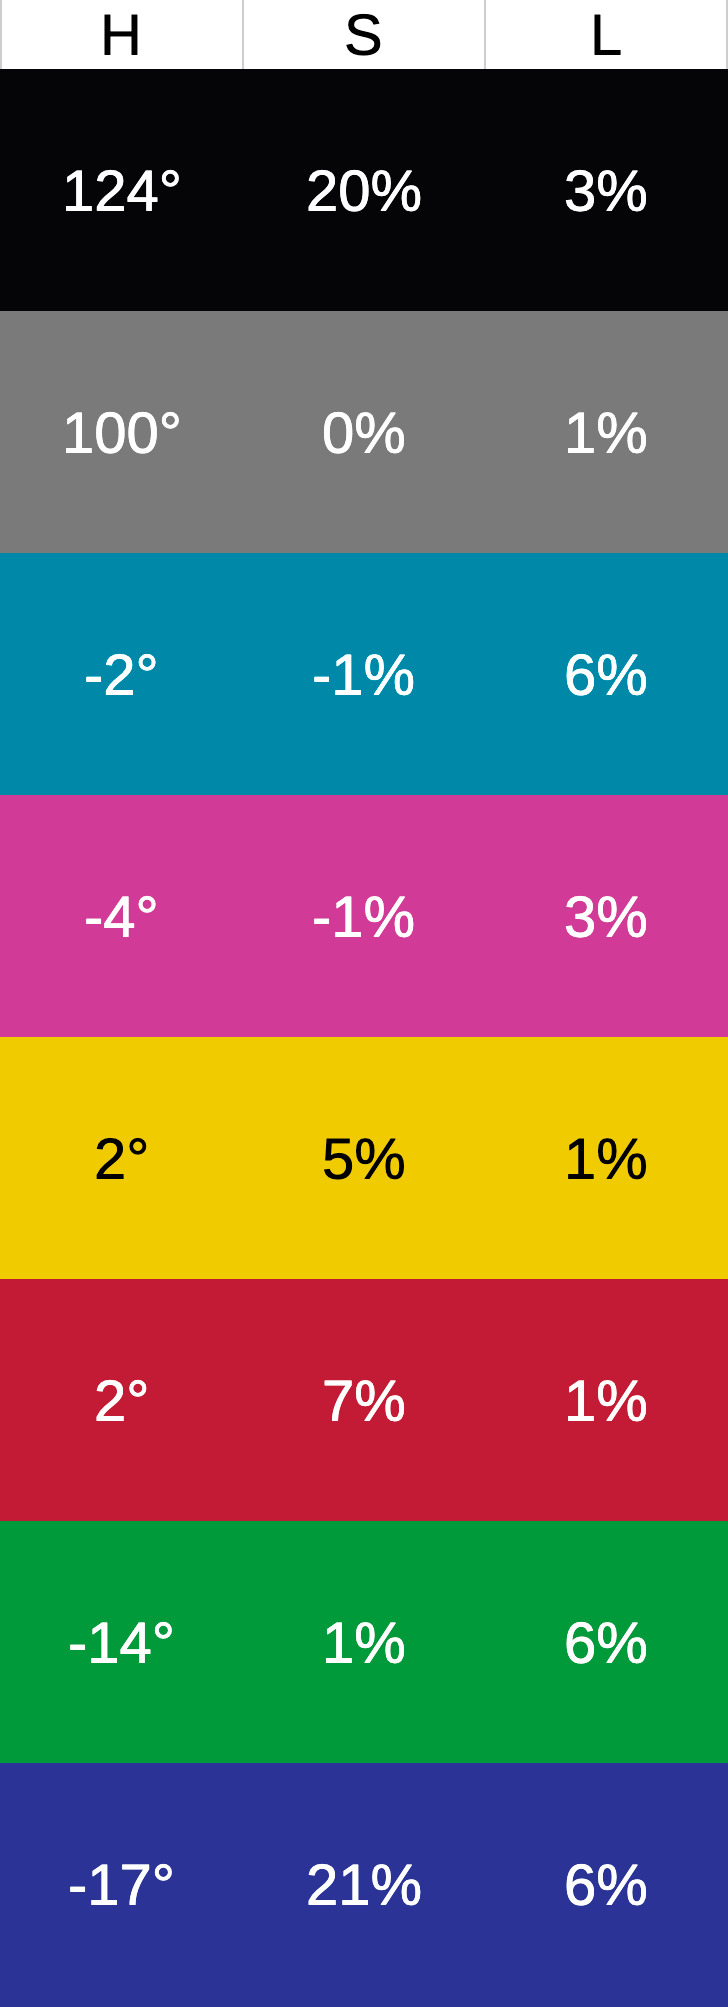
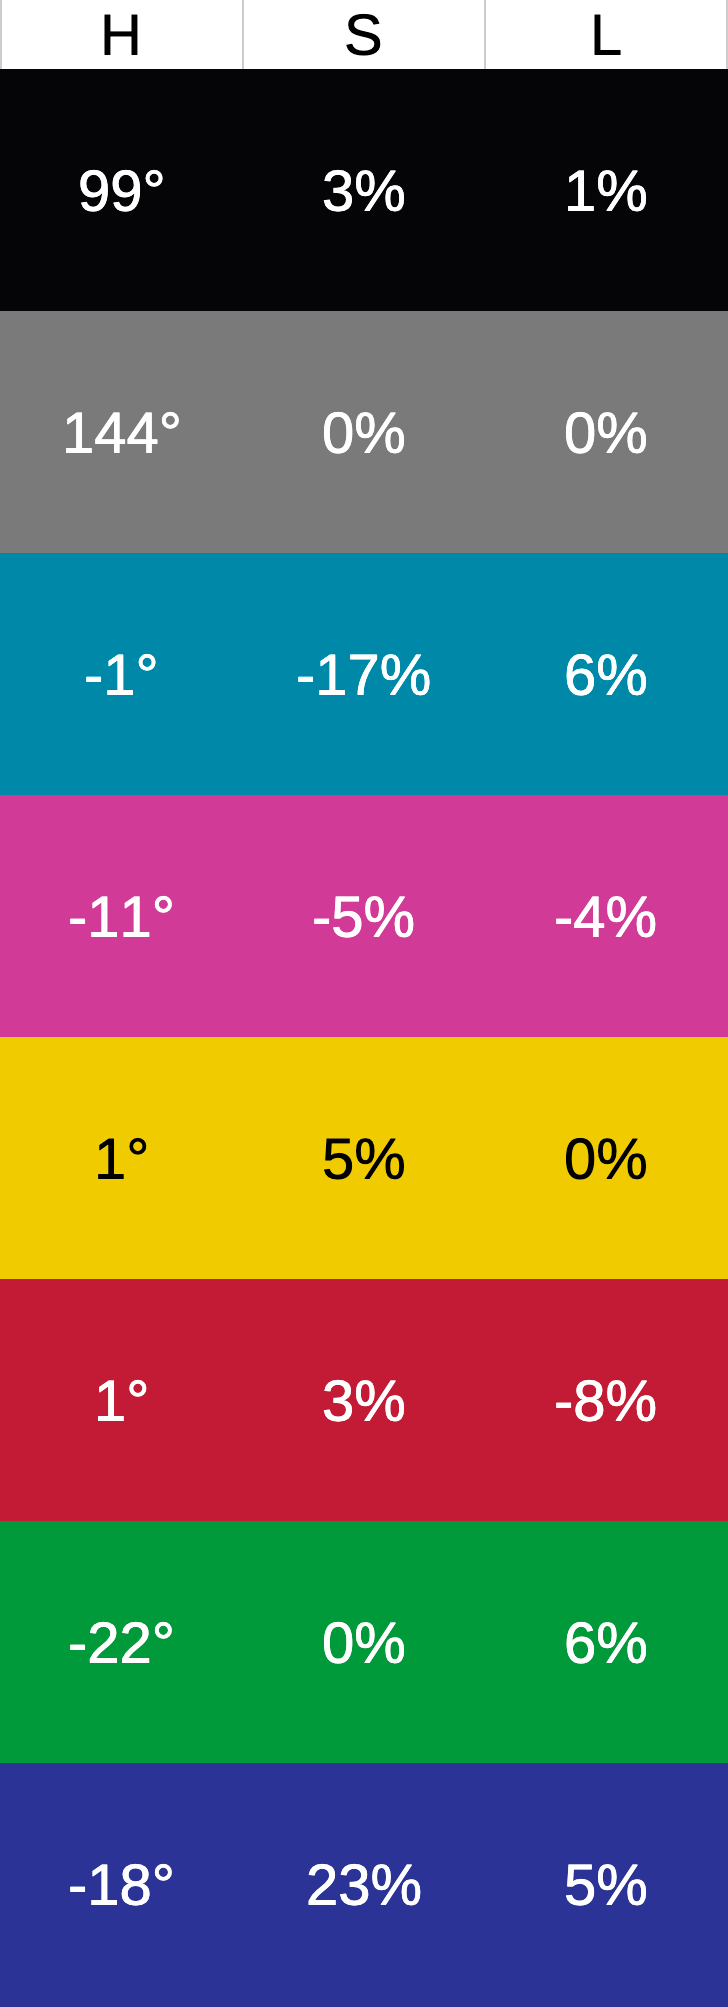
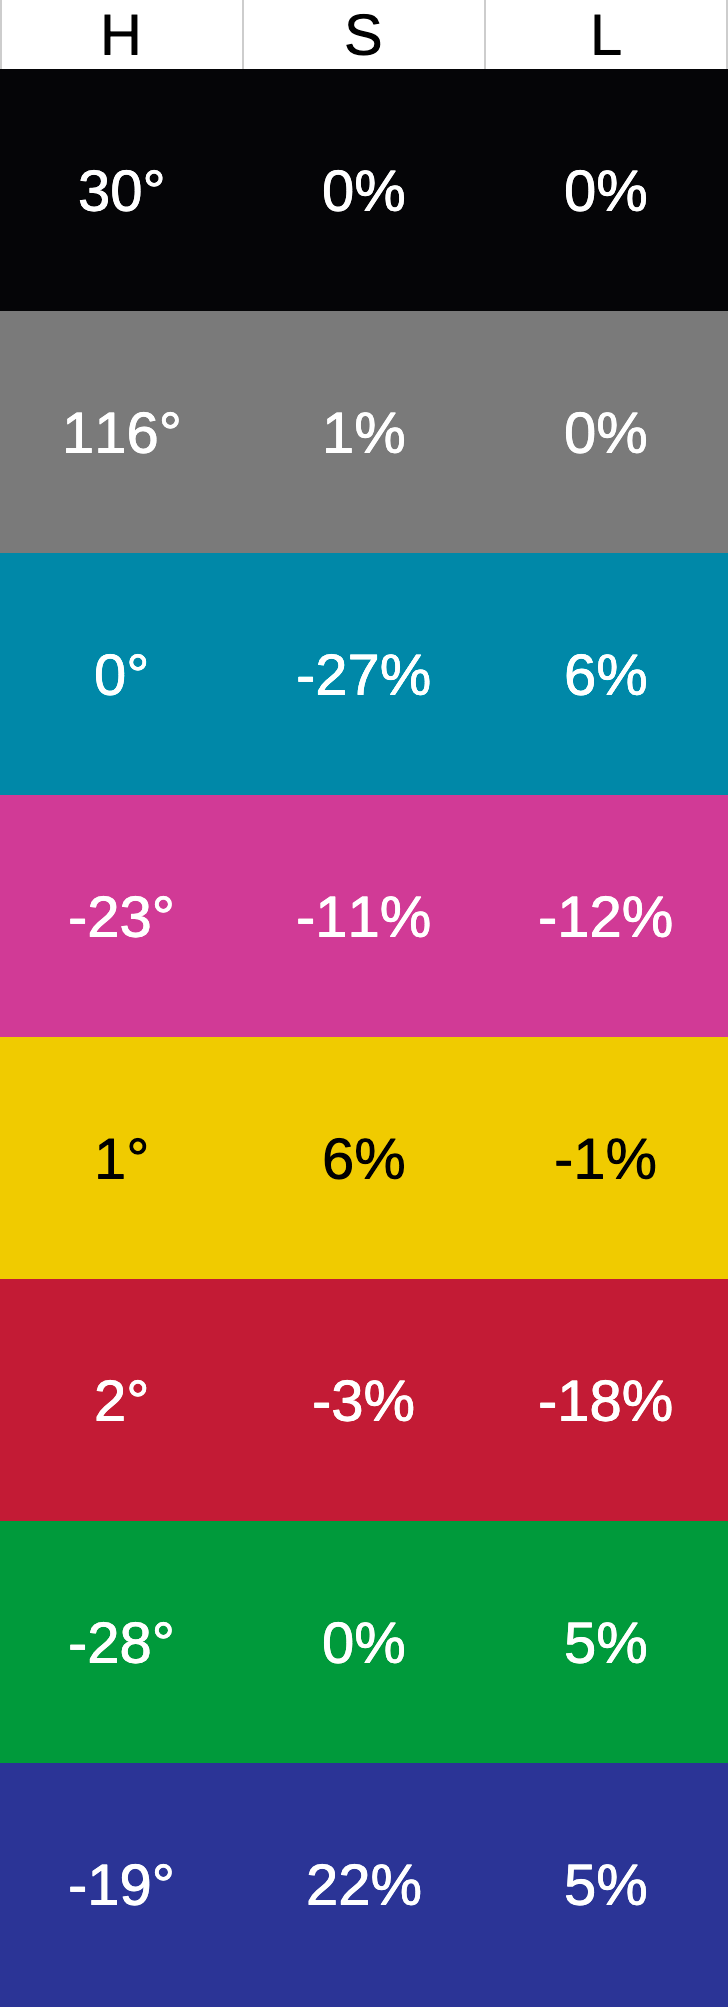
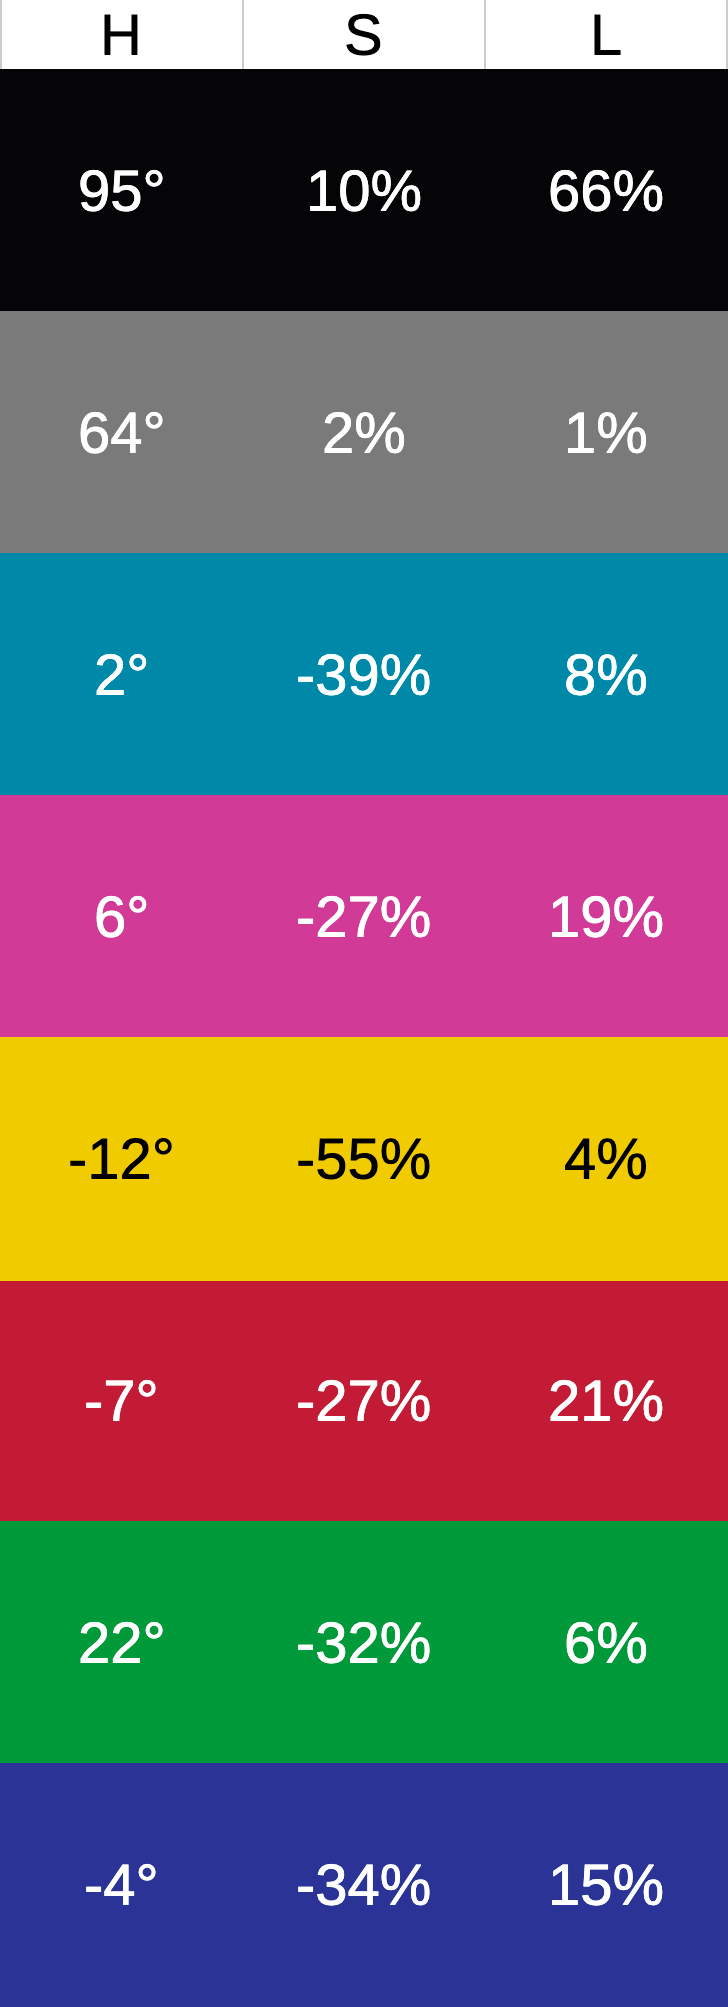
Then I also compared the Hue, Saturation, and Luminance values between the two as well. For these I just measured the main 6 colour patches, the darker middle grey patch, and the background. These were just measured using the colour picker tool in Photoshop. The comparison is done against the values from a colour target generated by PatchTool from the X-Rite provided Color Checker data. The background obviously wasn't included in that, so this is compared against the Sony image.
The Sony image was taken with the Zony 55/1.8 lens, and the Canon images with the Canon RF 50/1.8 lens.
Unconverted Sony camera
So, starting here with the Sony image, we can see the Color Checker values aren't actually that close to what they should be according to X-Rite. But this gives us a good baseline as to what we should expect for a 'good' result from the filters.
Because the Delta E values were so high on the Sony image, I tried a custom tone curve to get each of the neutral patches on the right-hand side of the Color Checker as close to their correct luminance values as I could (colour was not adjusted).
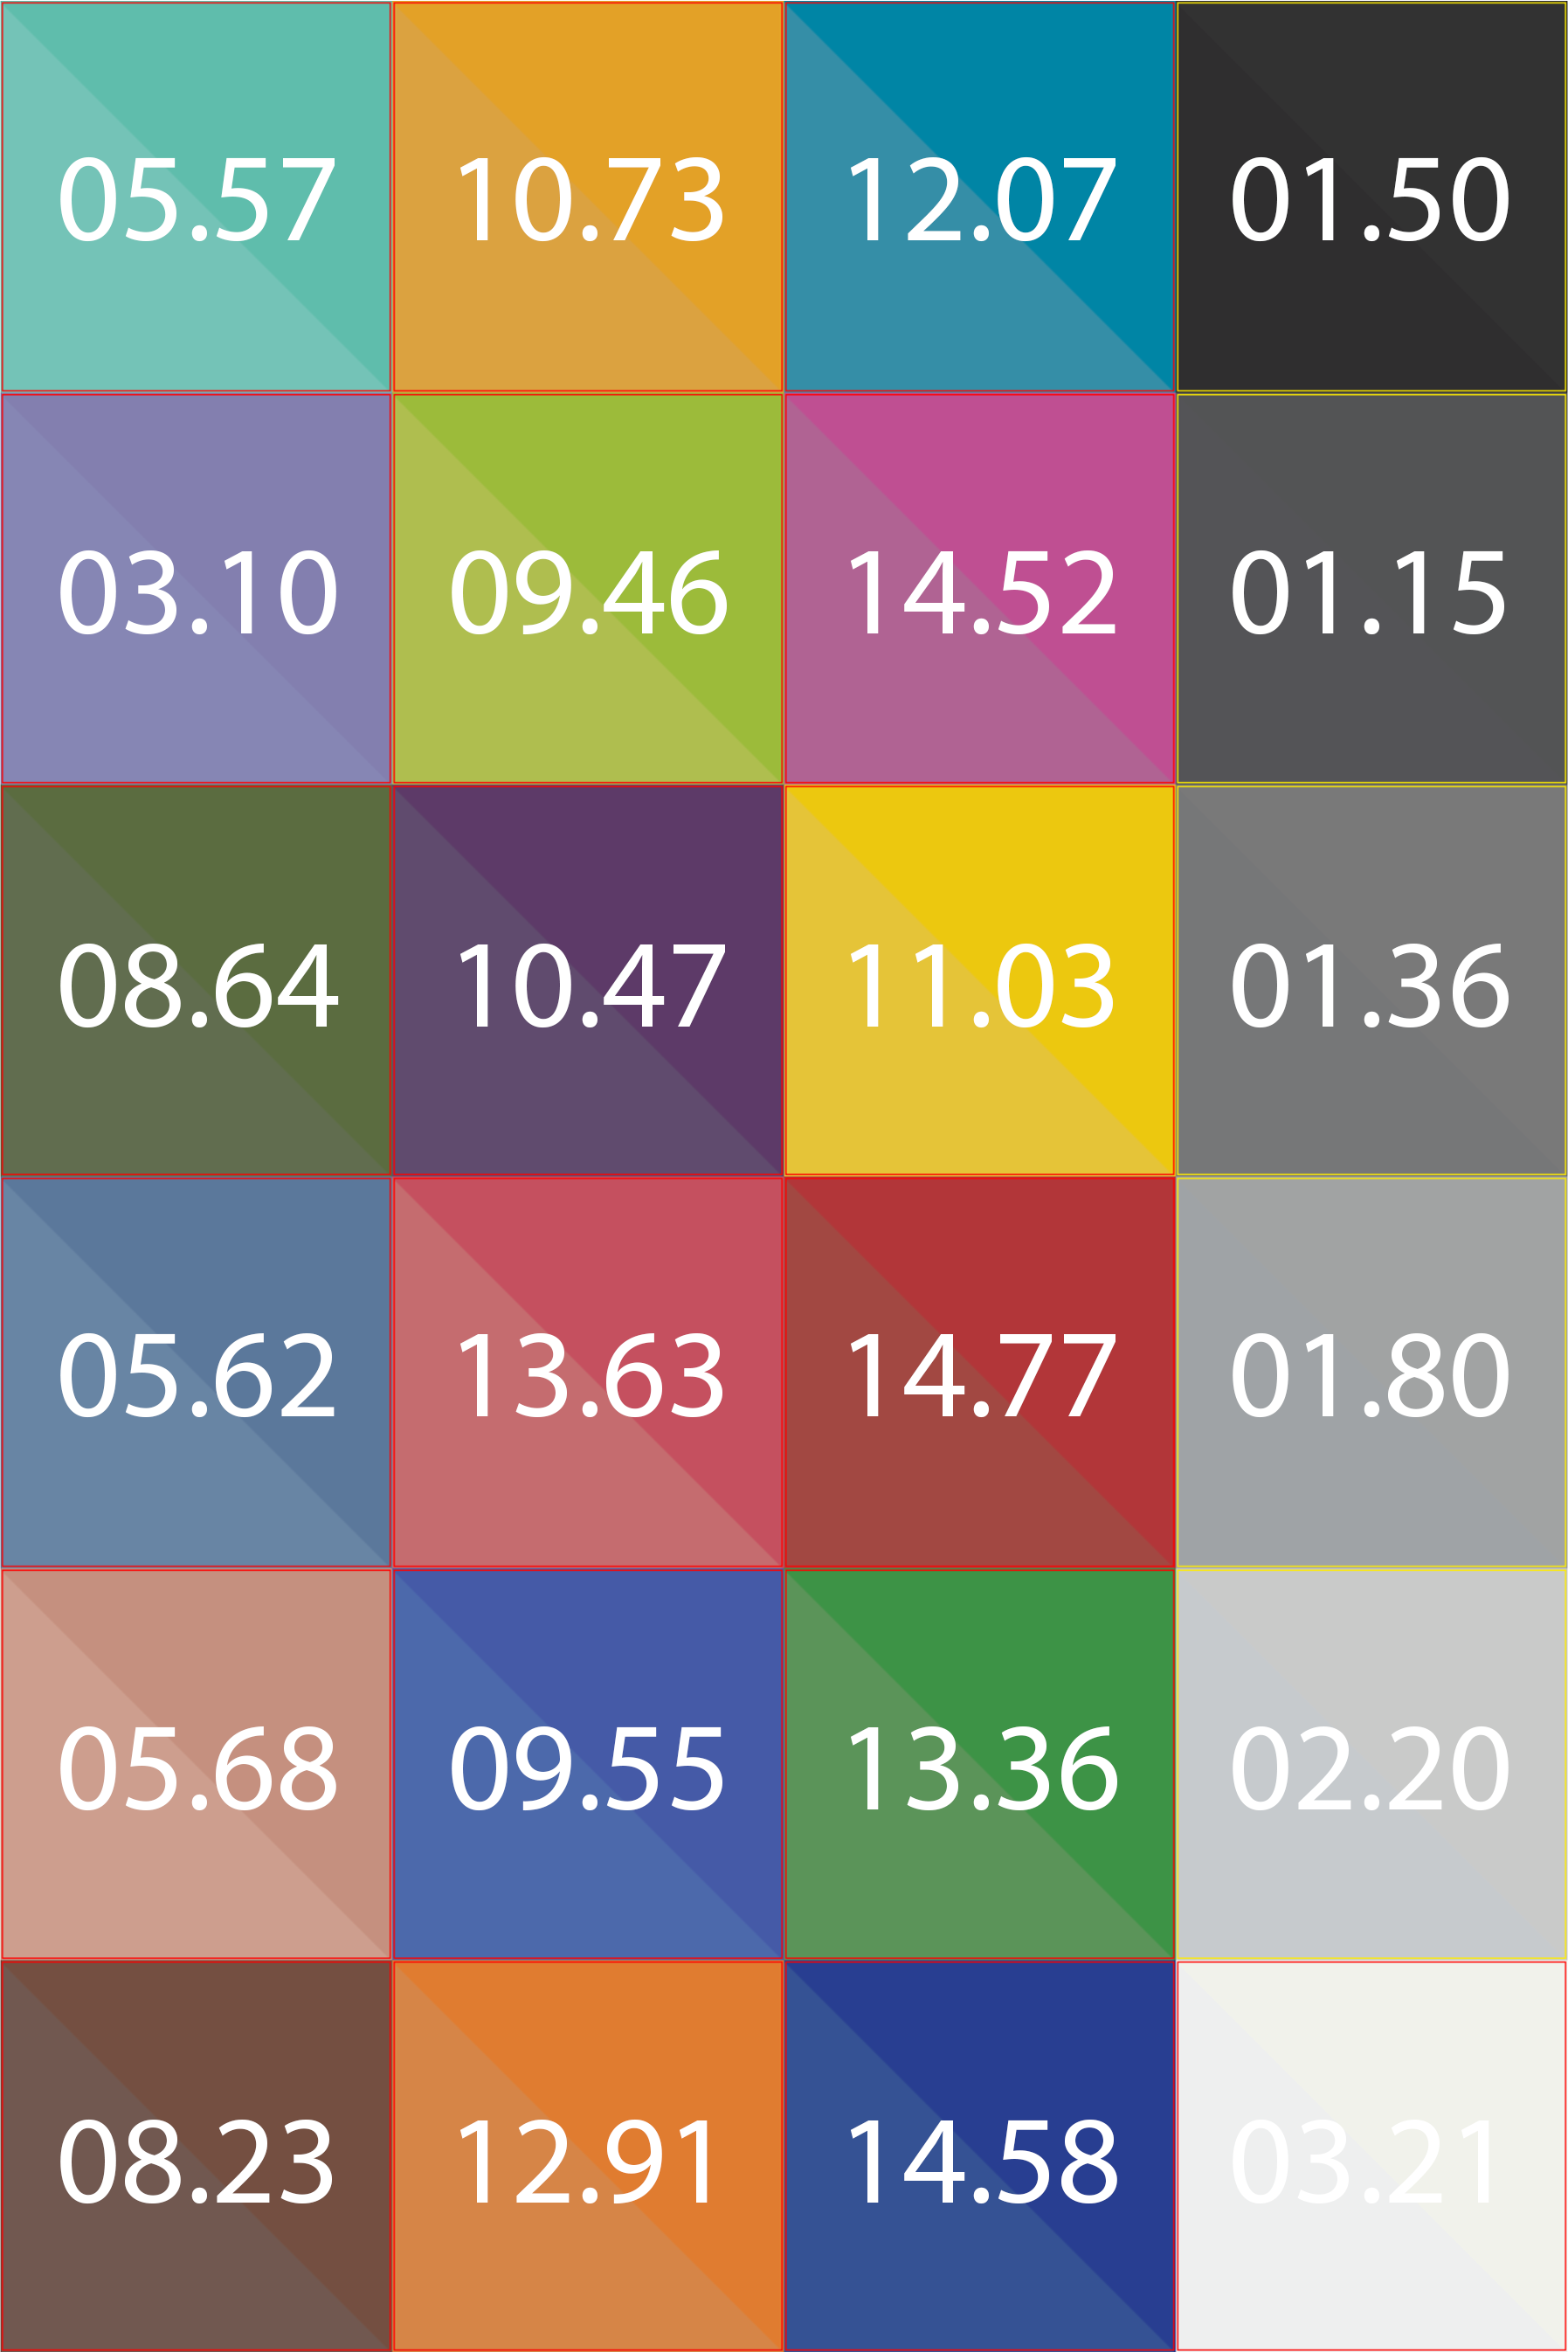
As you can see from the calculated Delta E values, while this has improved the scores for the neutral patches, the rest of the patches are arguably worse. So, the rest of the comparison images are just using the standard default tone curve.
TSN575
The TSN575 is not really designed to be a visible light bandpass, but rather an IR cut filter that can be combined with other filters, such as UV pass filters that leak IR. It cuts red light as well as IR, and we can see this in the red, pink, and purple patches.
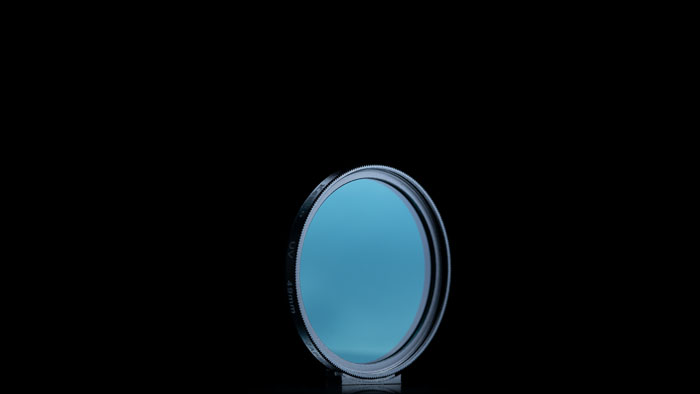
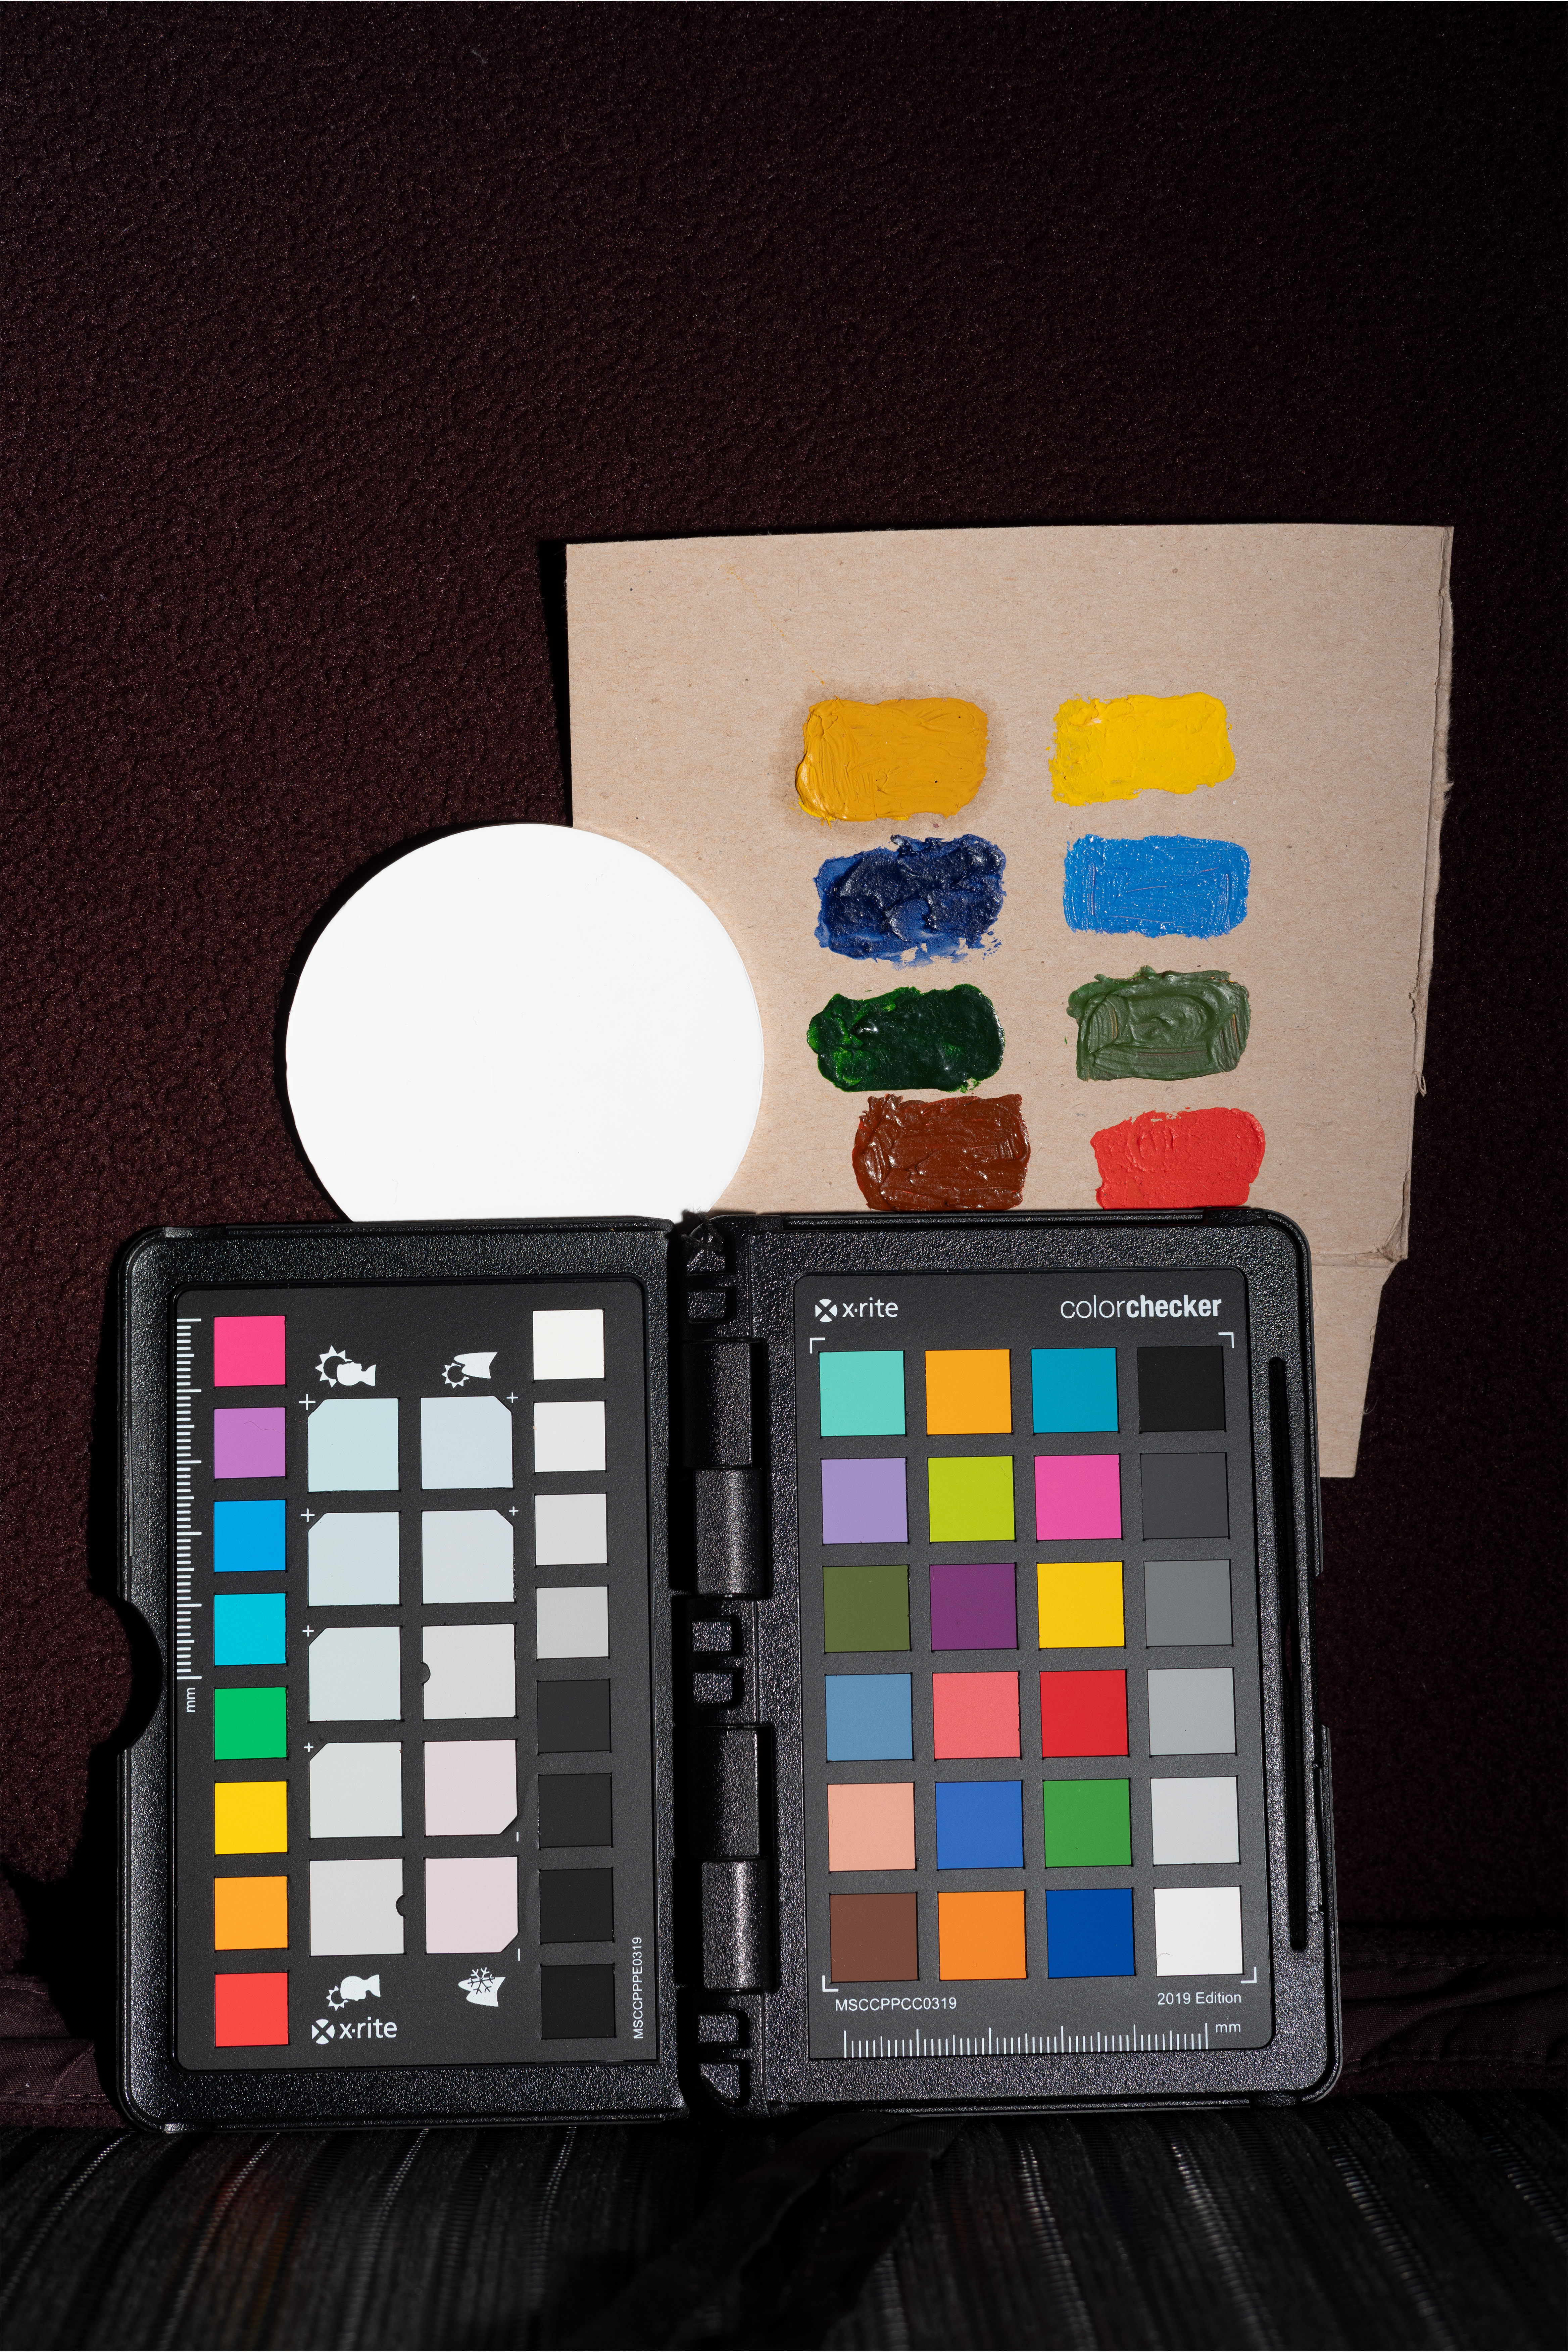
Fotga UVIR cut filter

The Fotga UVIR cut filter gives slightly more saturated colours than the unconverted Sony image, the red standing out particularly. The background looks good with no visible IR leak.
B+W 486 UVIR Cut
I used the B+W 486 as my 'visible light' filter for a long time, but you can see here that it does have a bit of an IR leak. The background is more red and lighter than it should be. Like the Fotga, the colours, especially the red are quite saturated.
Tiffen Standard Hot Mirror
You can immediately see from the background that the Tiffen Standard Hot Mirror filter leaks a lot of IR. So not a good choice for getting visible light images on a full spectrum camera.
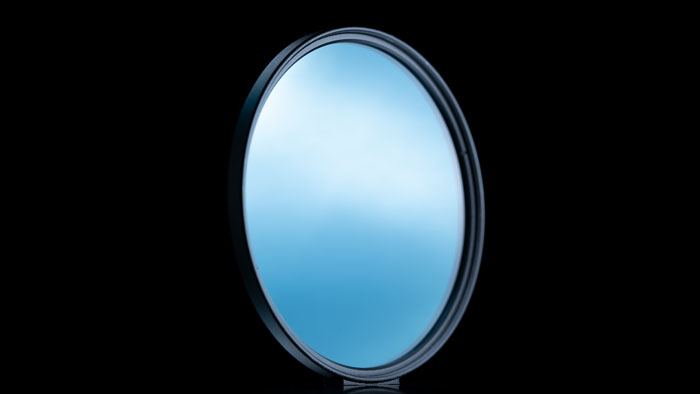
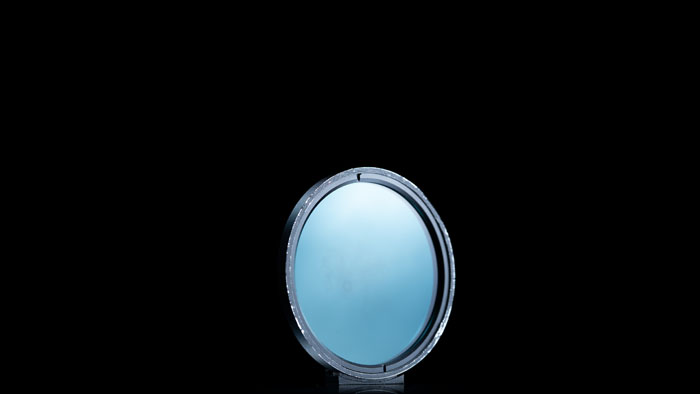
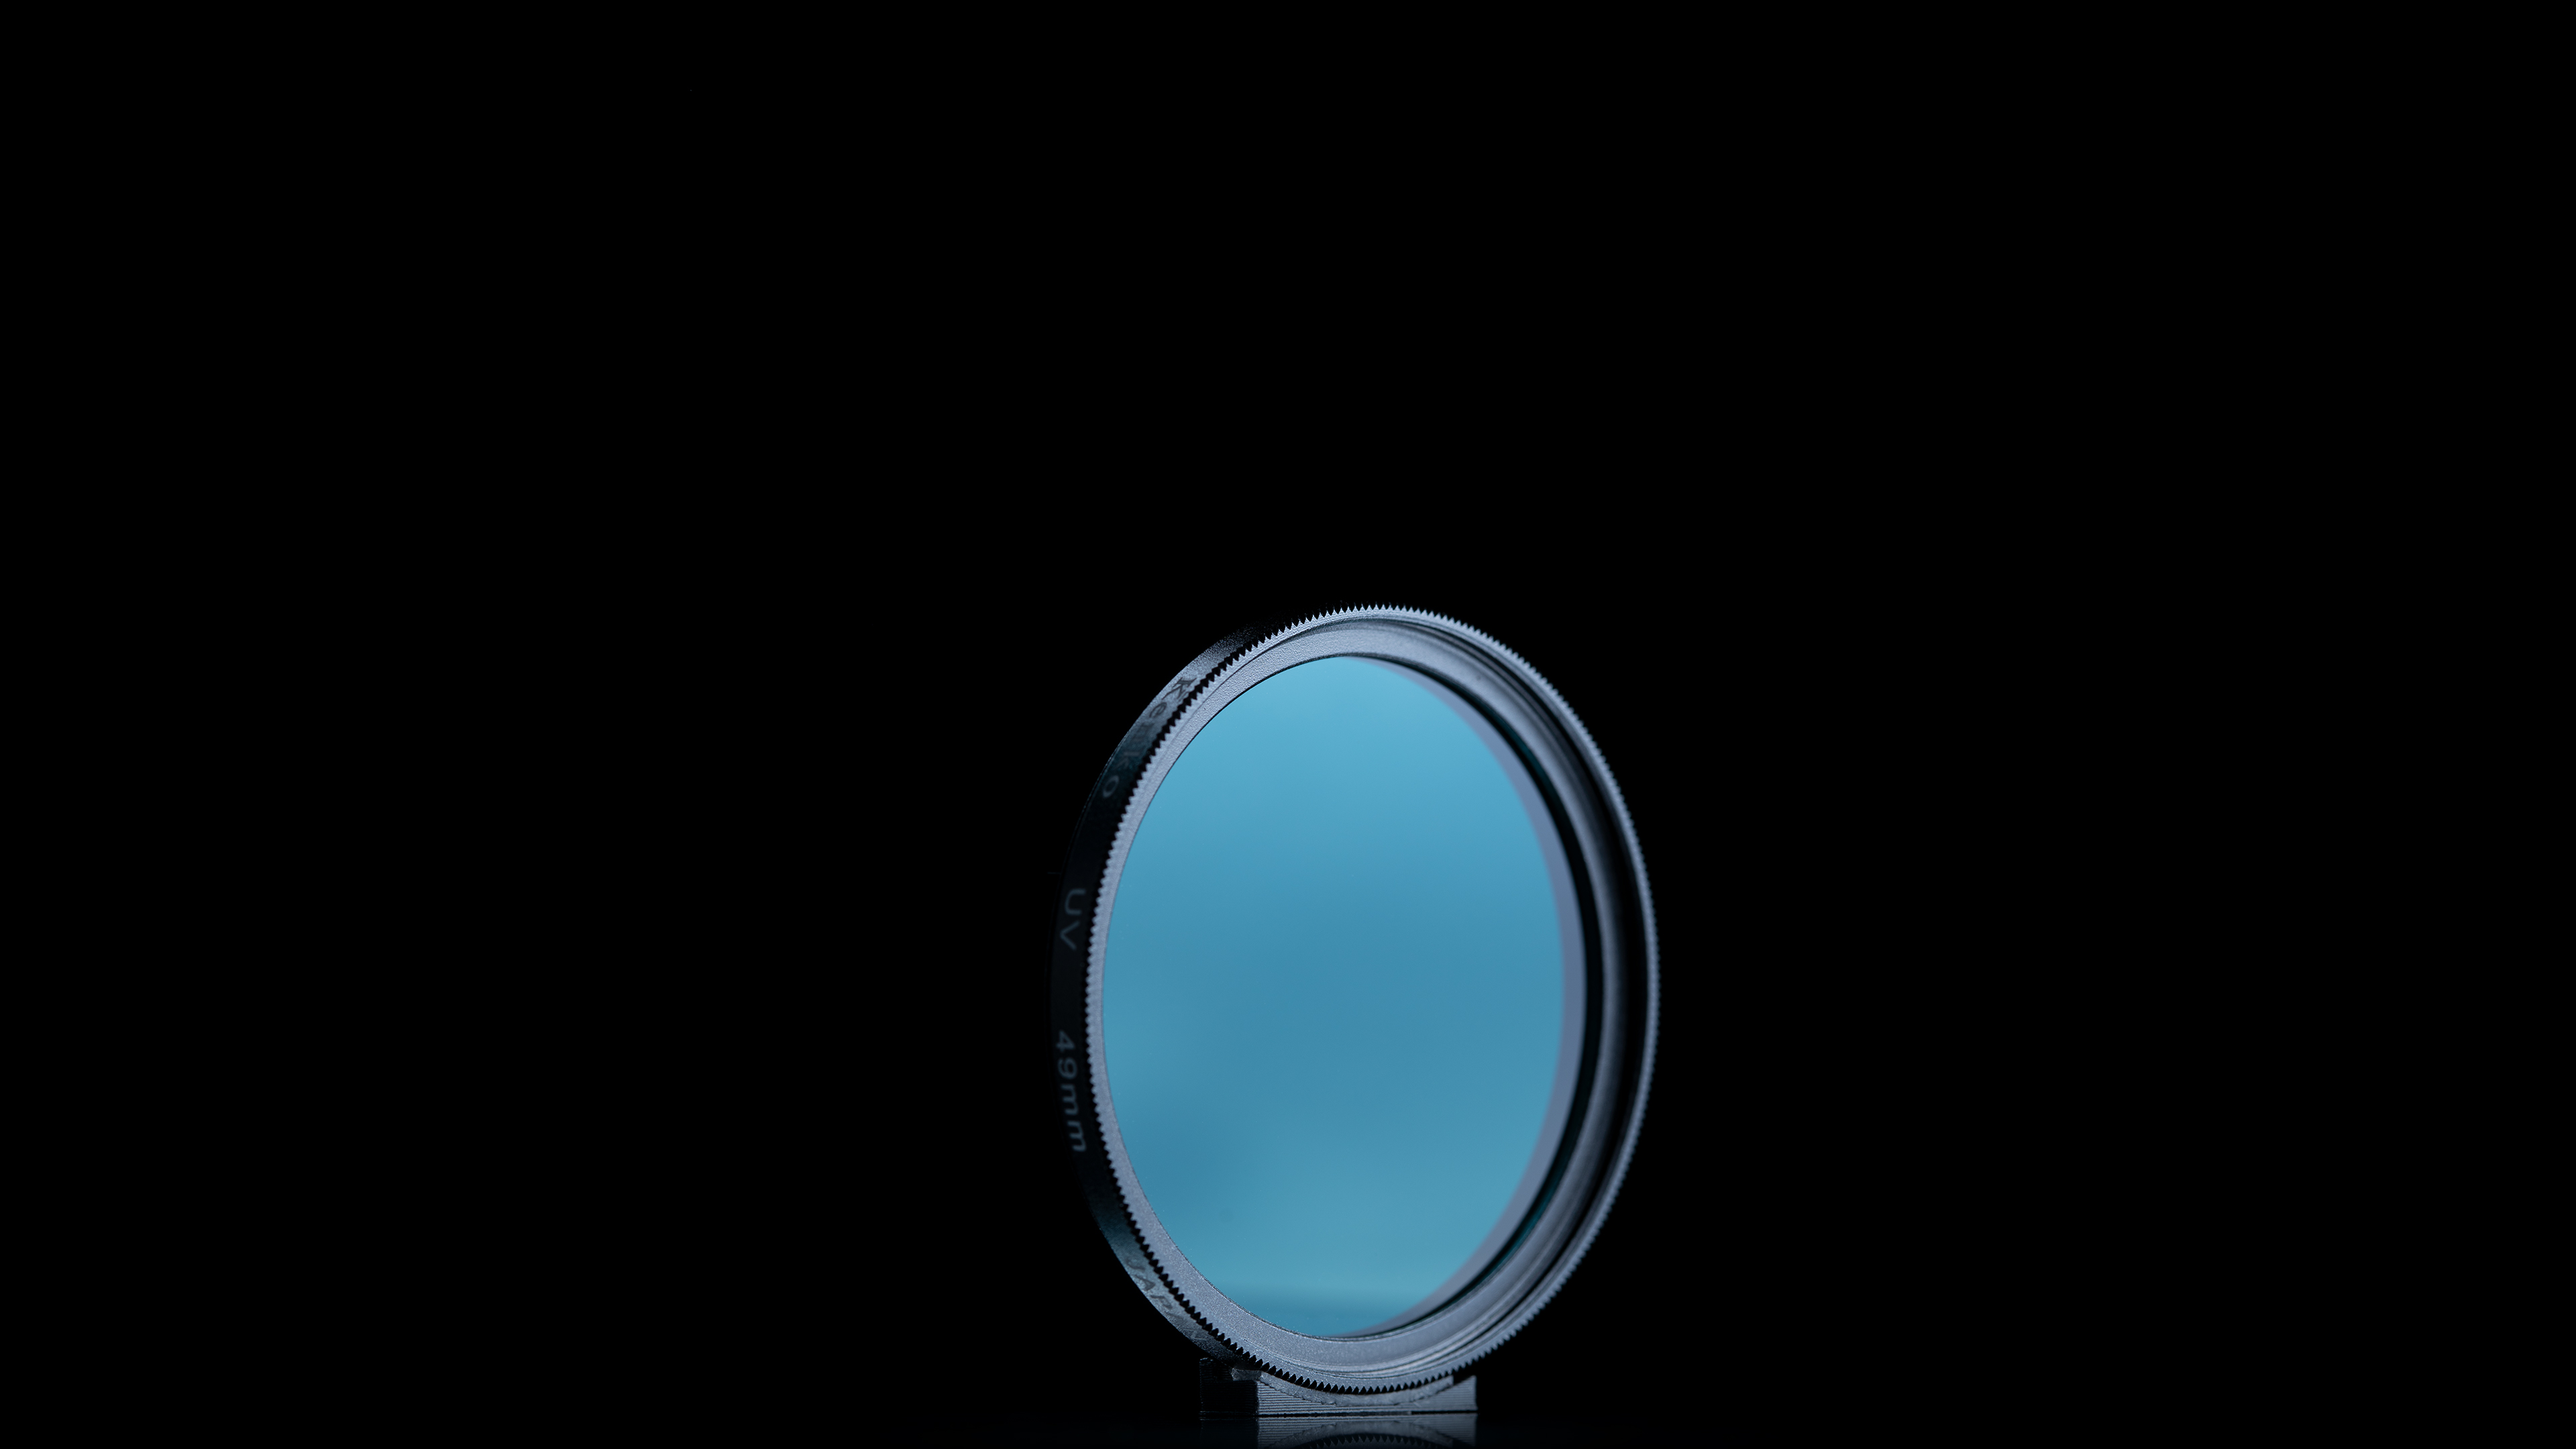
QB39 / BG39

The QB39 or BG39 (QB39 is the Chinese manufacturers' designation for this filter, BG39 is the Schott designation) is the filter I've been mainly using with my full spectrum Canon R5 for visible light work. It's also the filter that is generally recommended for getting visible light images on any brand of full spectrum camera.
If we average the Delta Es of the Color Checker comparison, this filter gives us the lowest score (6.99) of the filters tested compared to the unconverted Sony (5.70). Note this filter passes UV as well as visible light, but there is so little UV light that gets through the atmosphere (or output by a Xenon flashtube) compared to the amount of visible light that it doesn't have a noticeable effect on the image.
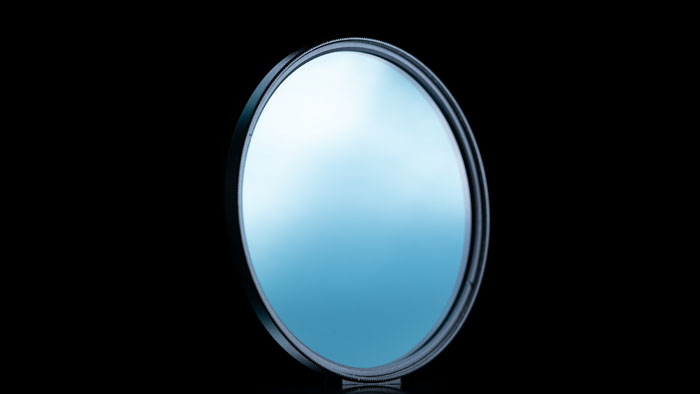
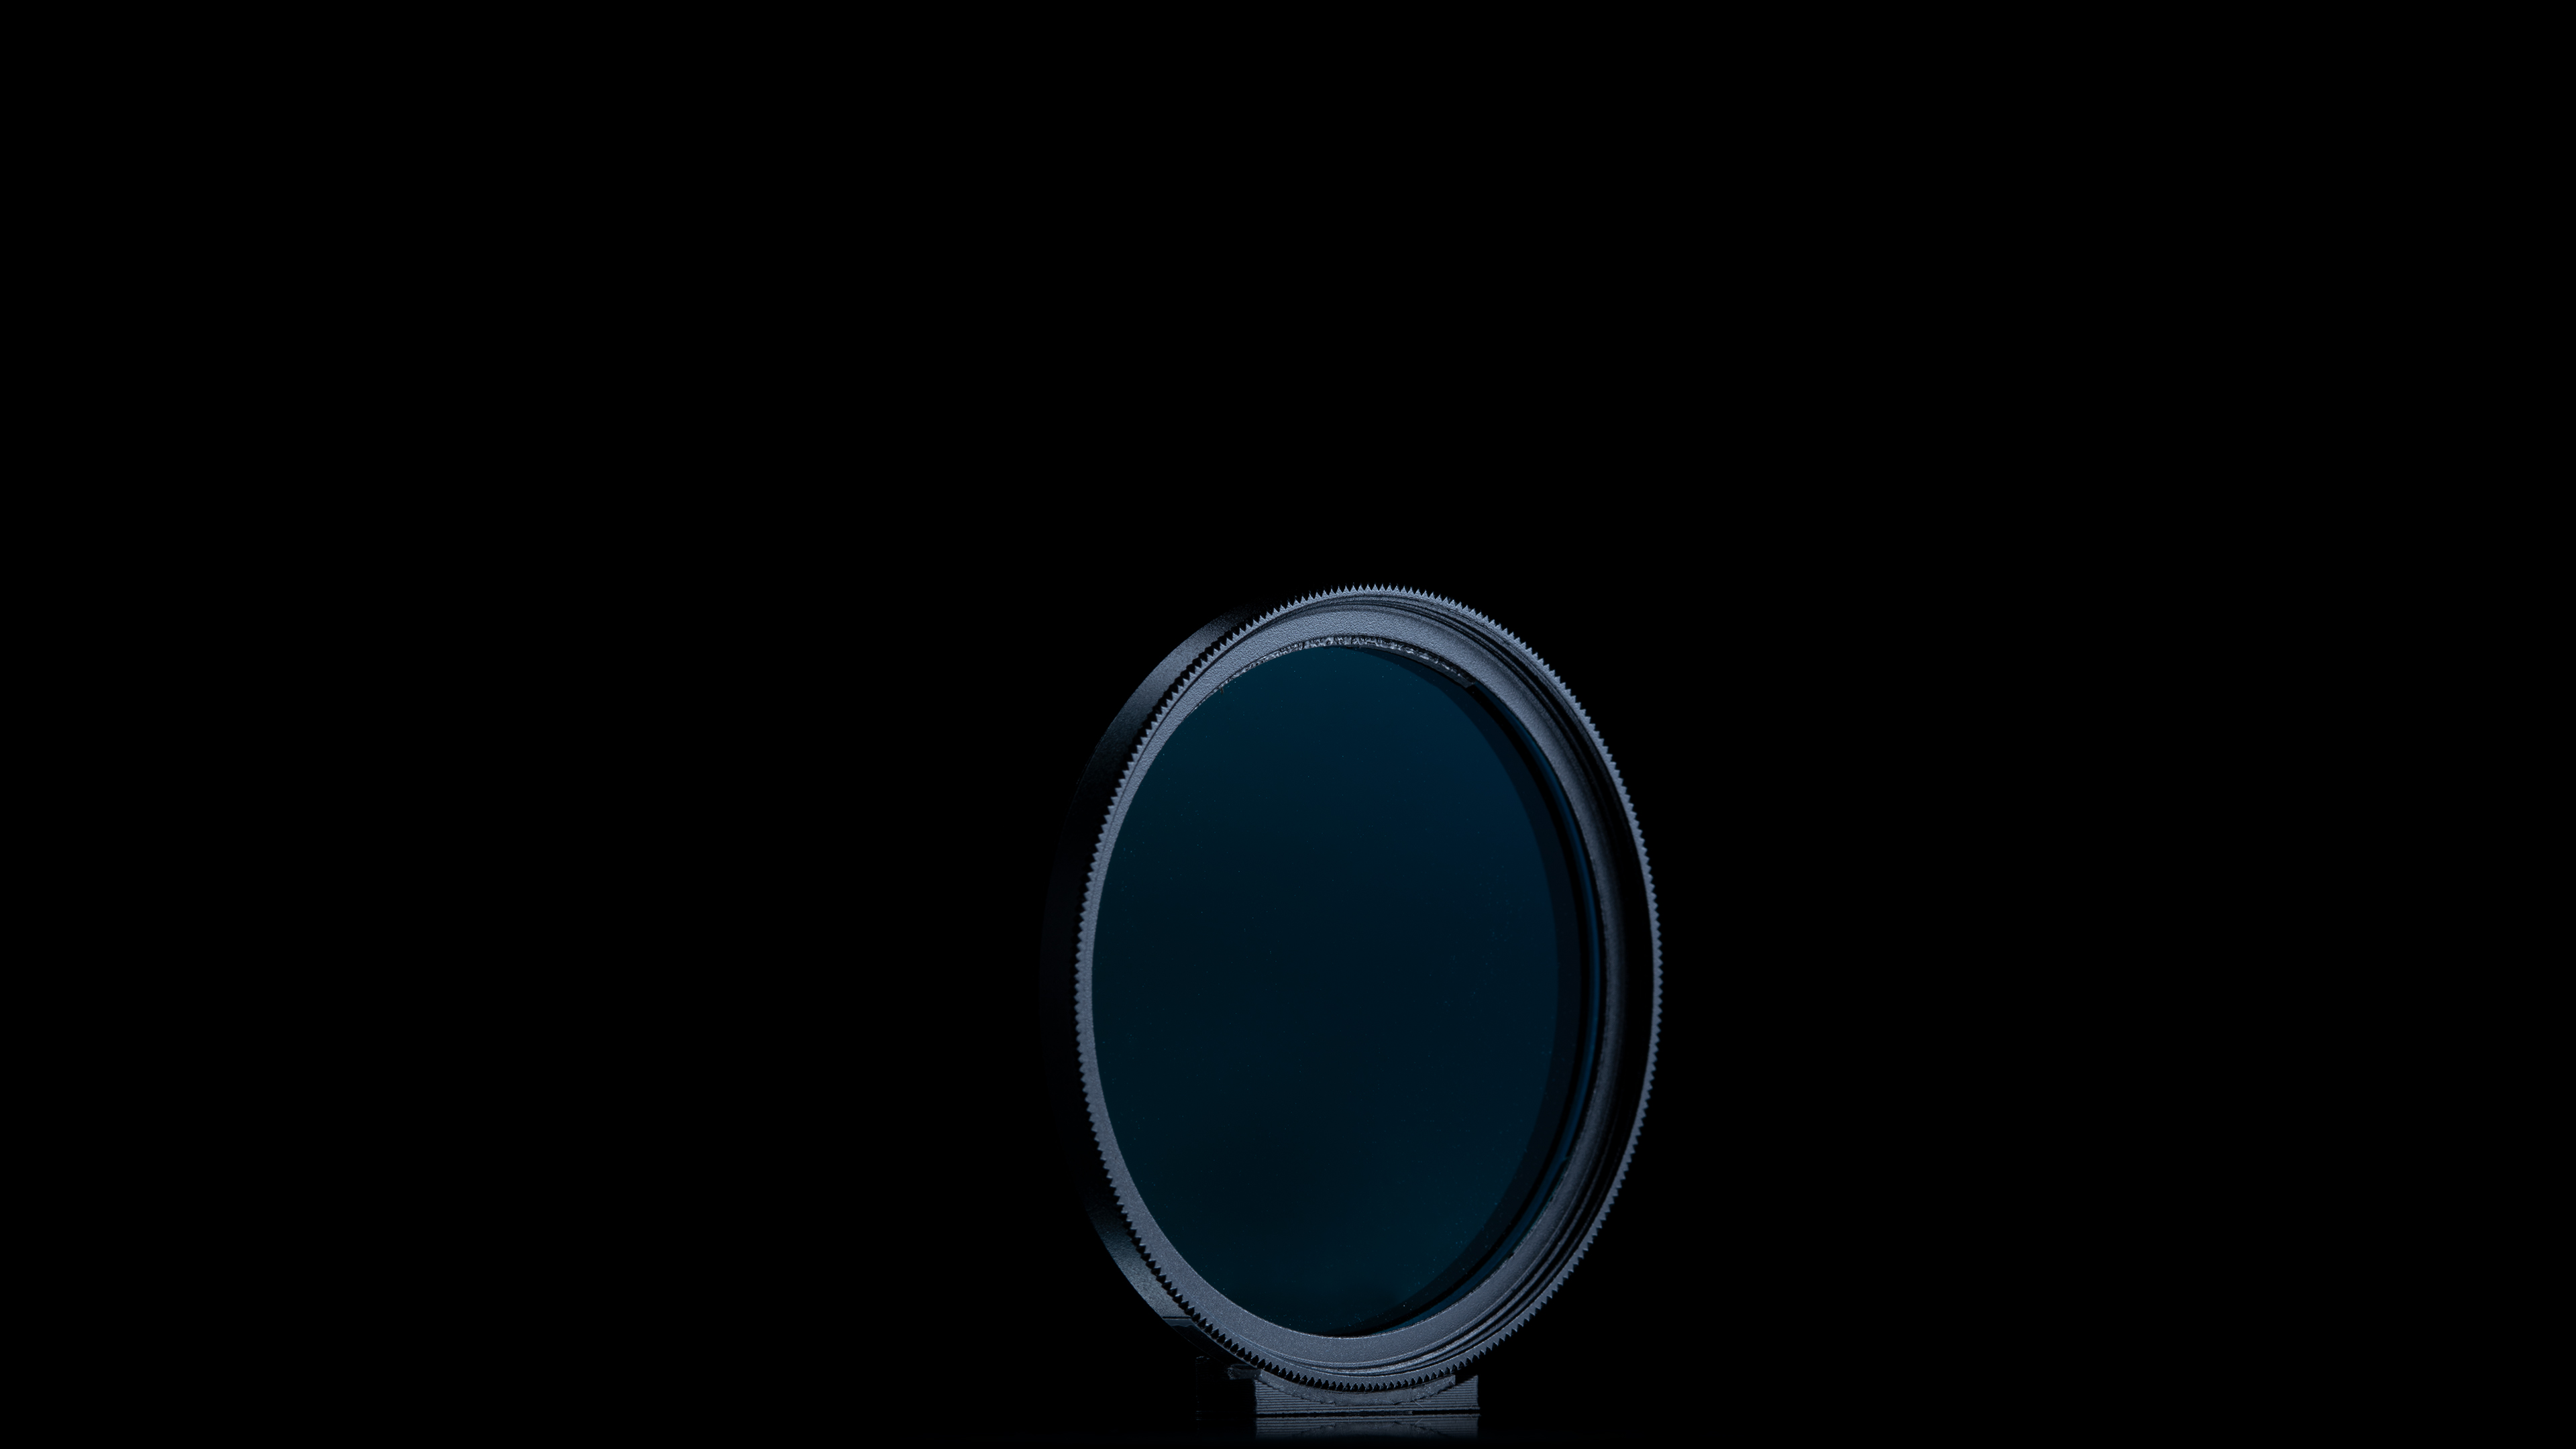
QB40 / BG40

The QB40 is much like the QB39 except it lets through some deeper reds and a small amount of IR.
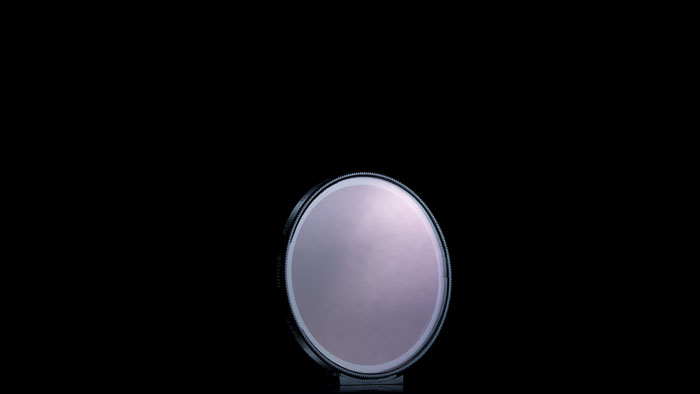
Tangsinuo BCF
The BCF filter is designed for astro photography, to let through the deep red of Hydrogen-alpha particles. As we'd expect from that, it leaks some IR and the reds are over saturated. So good for astro photography, but not really for normal visible light photography.
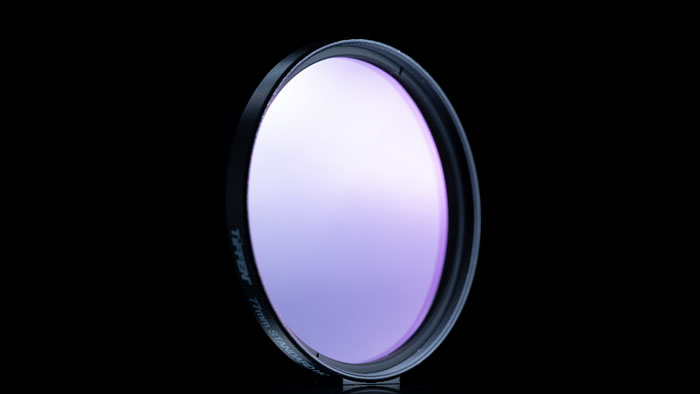
Tangsinuo ICF

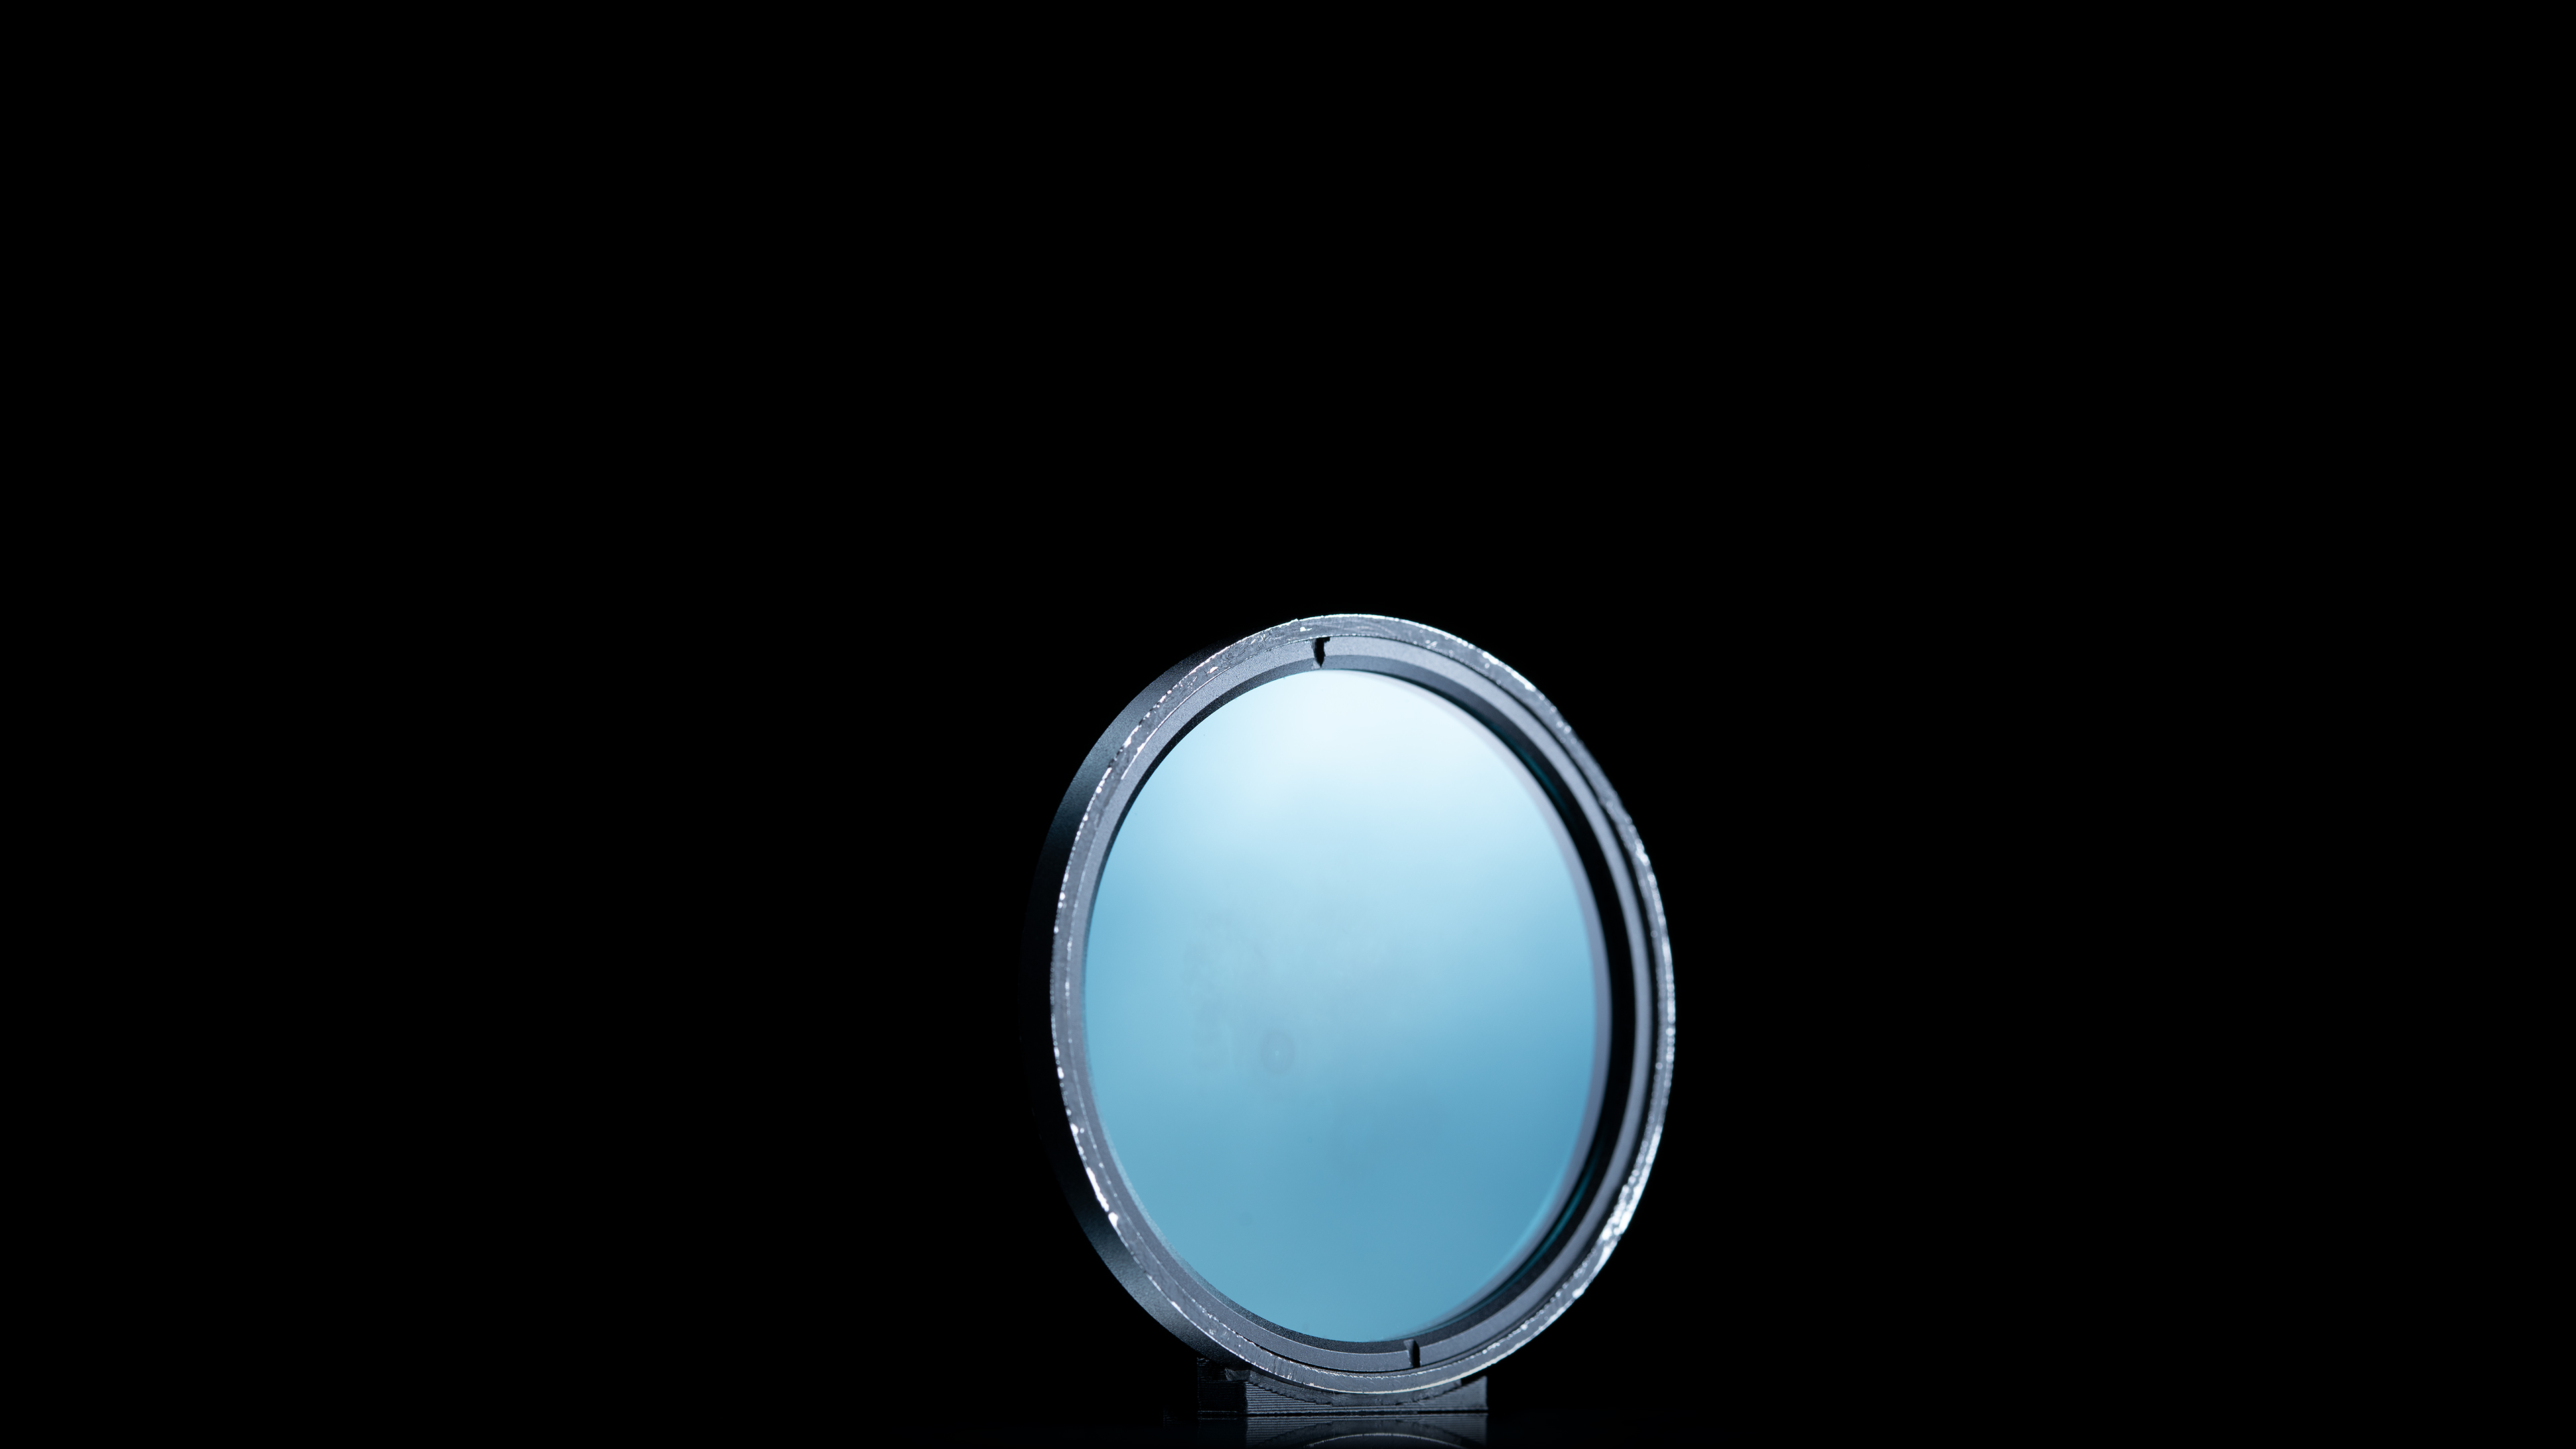
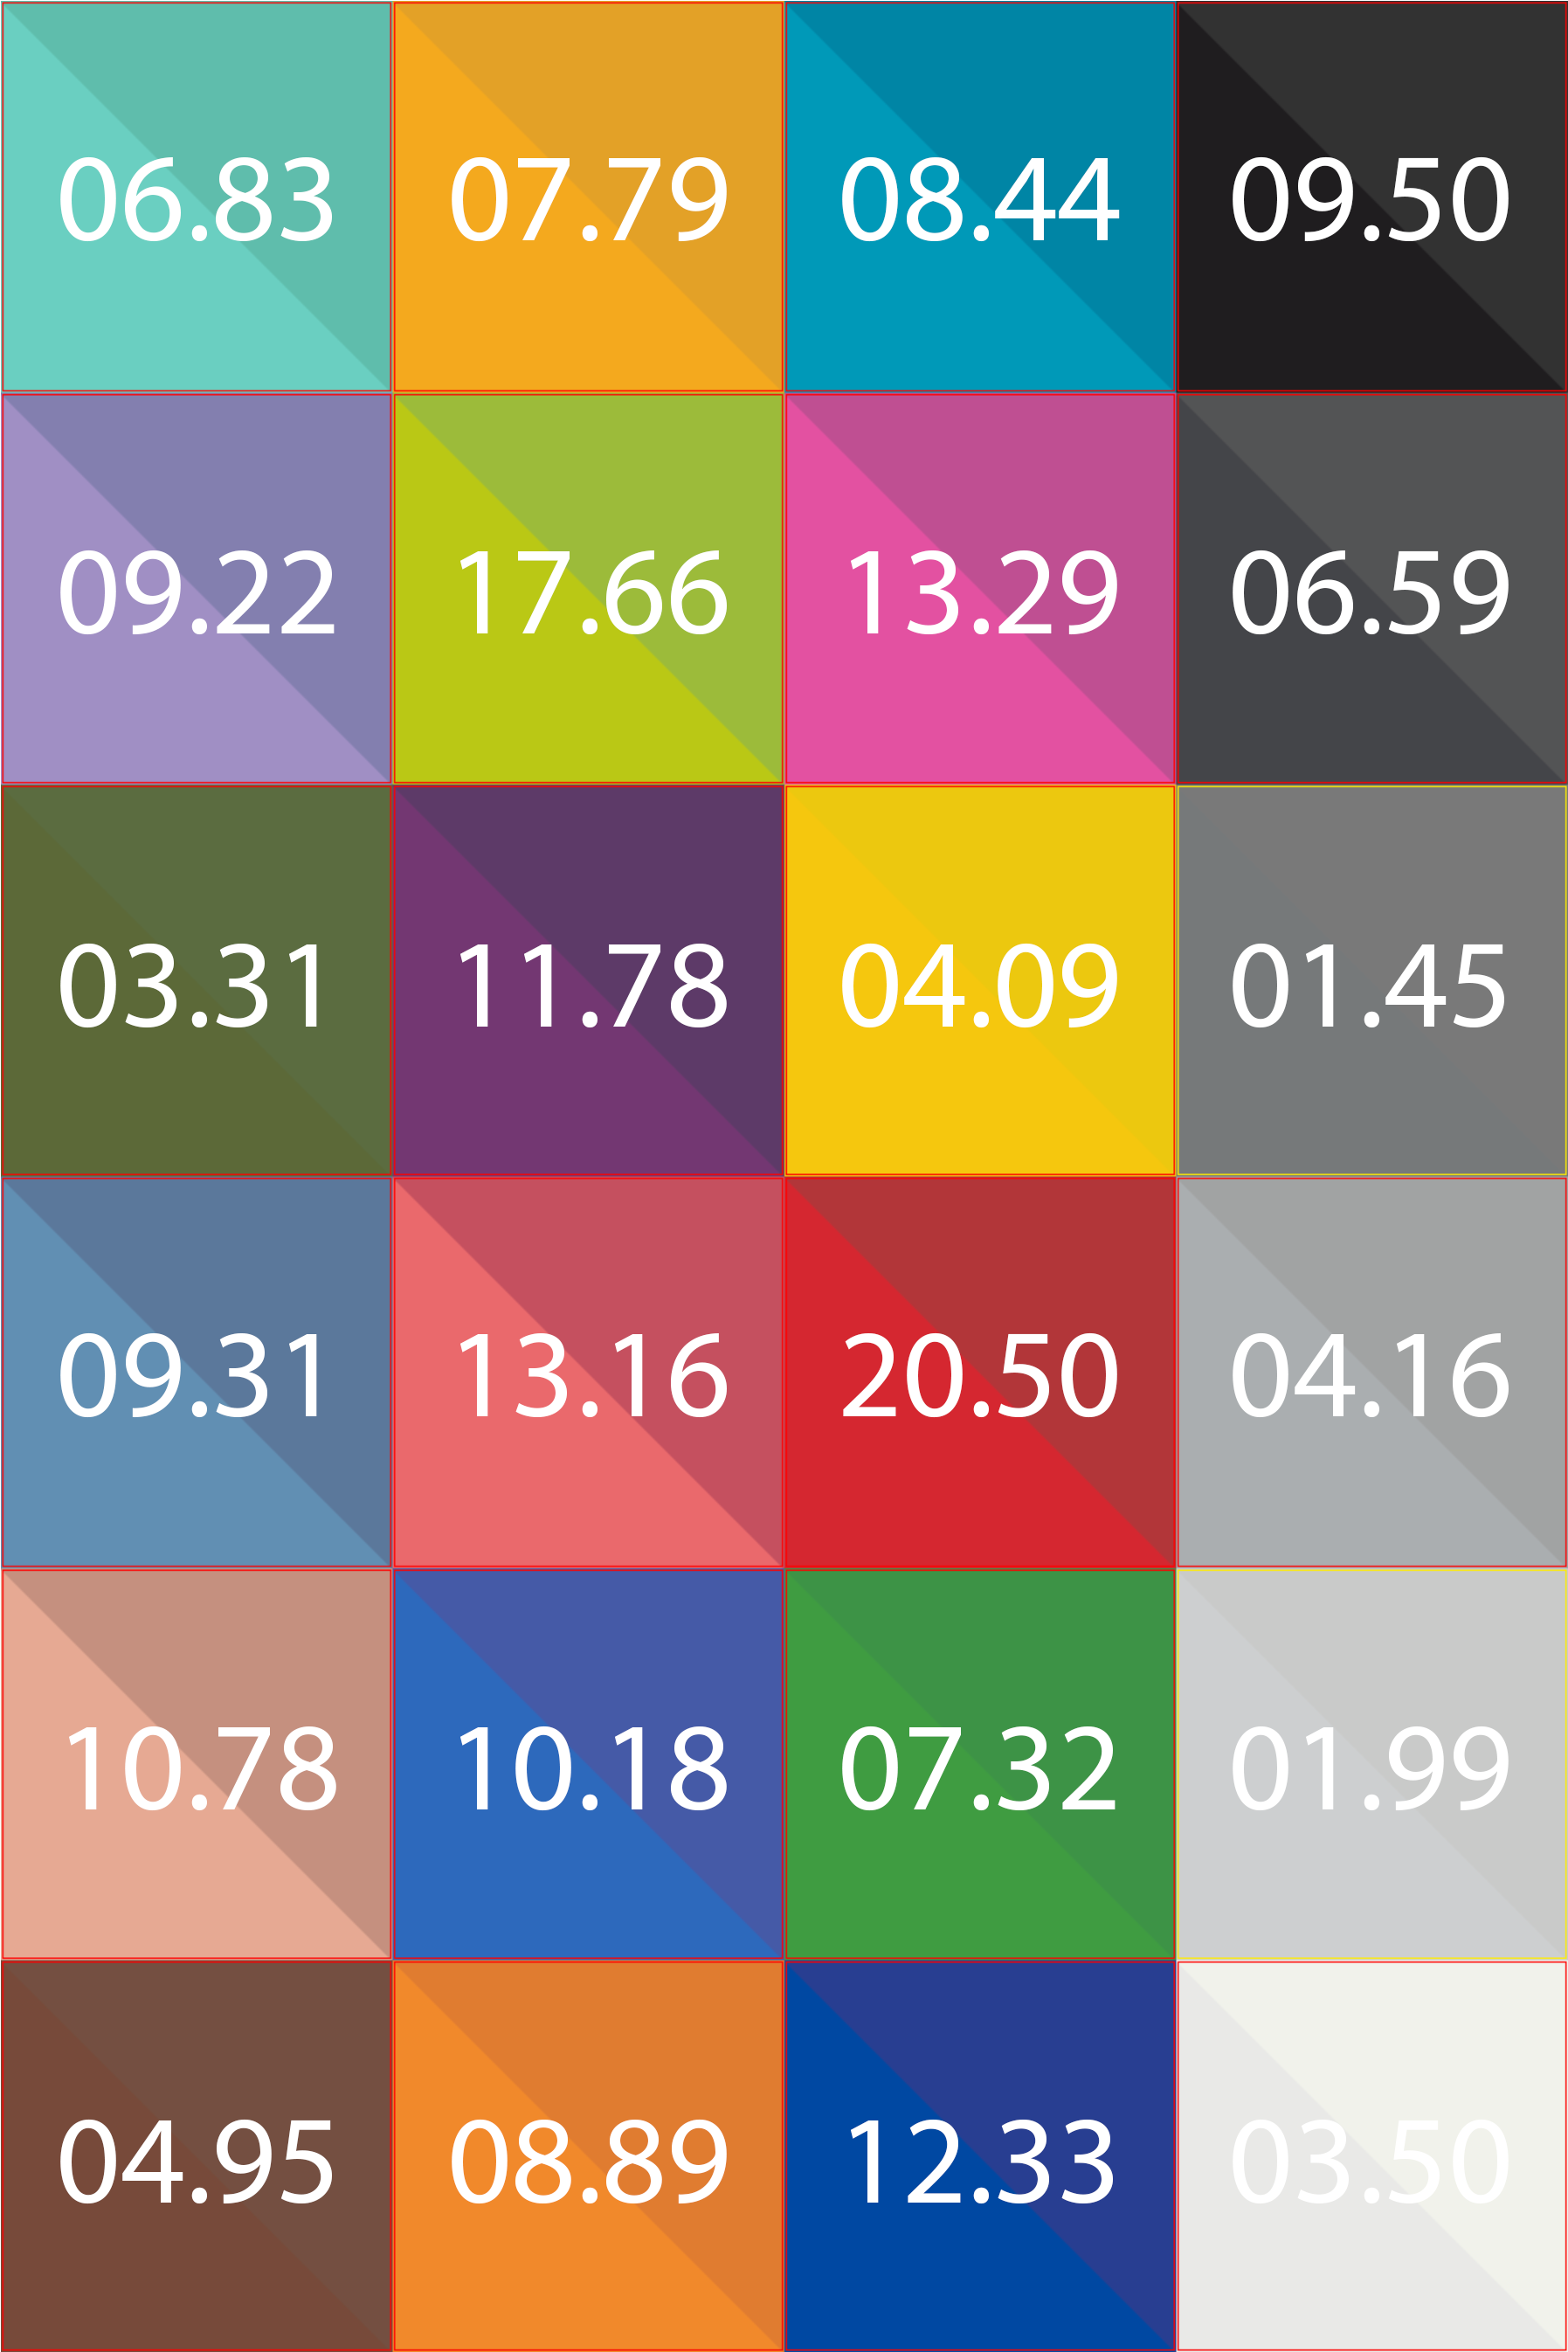
The ICF (Internal Cut Filter) from Tangsinuo is meant to be the same as QB21, but available with an anti-reflective coating. This gives a good result.
QB21 / BG38 2mm thick

Looking at the QB21 now, we can see it is not actually the same as the ICF (and these are both the same thickness of 2mm). The QB21 is cutting more of the deep red light.


No filter / Full spectrum
Finally, here is the camera with no filters for comparison. The background is quite bright and the colours are washed out from the large amount of IR light being captured.
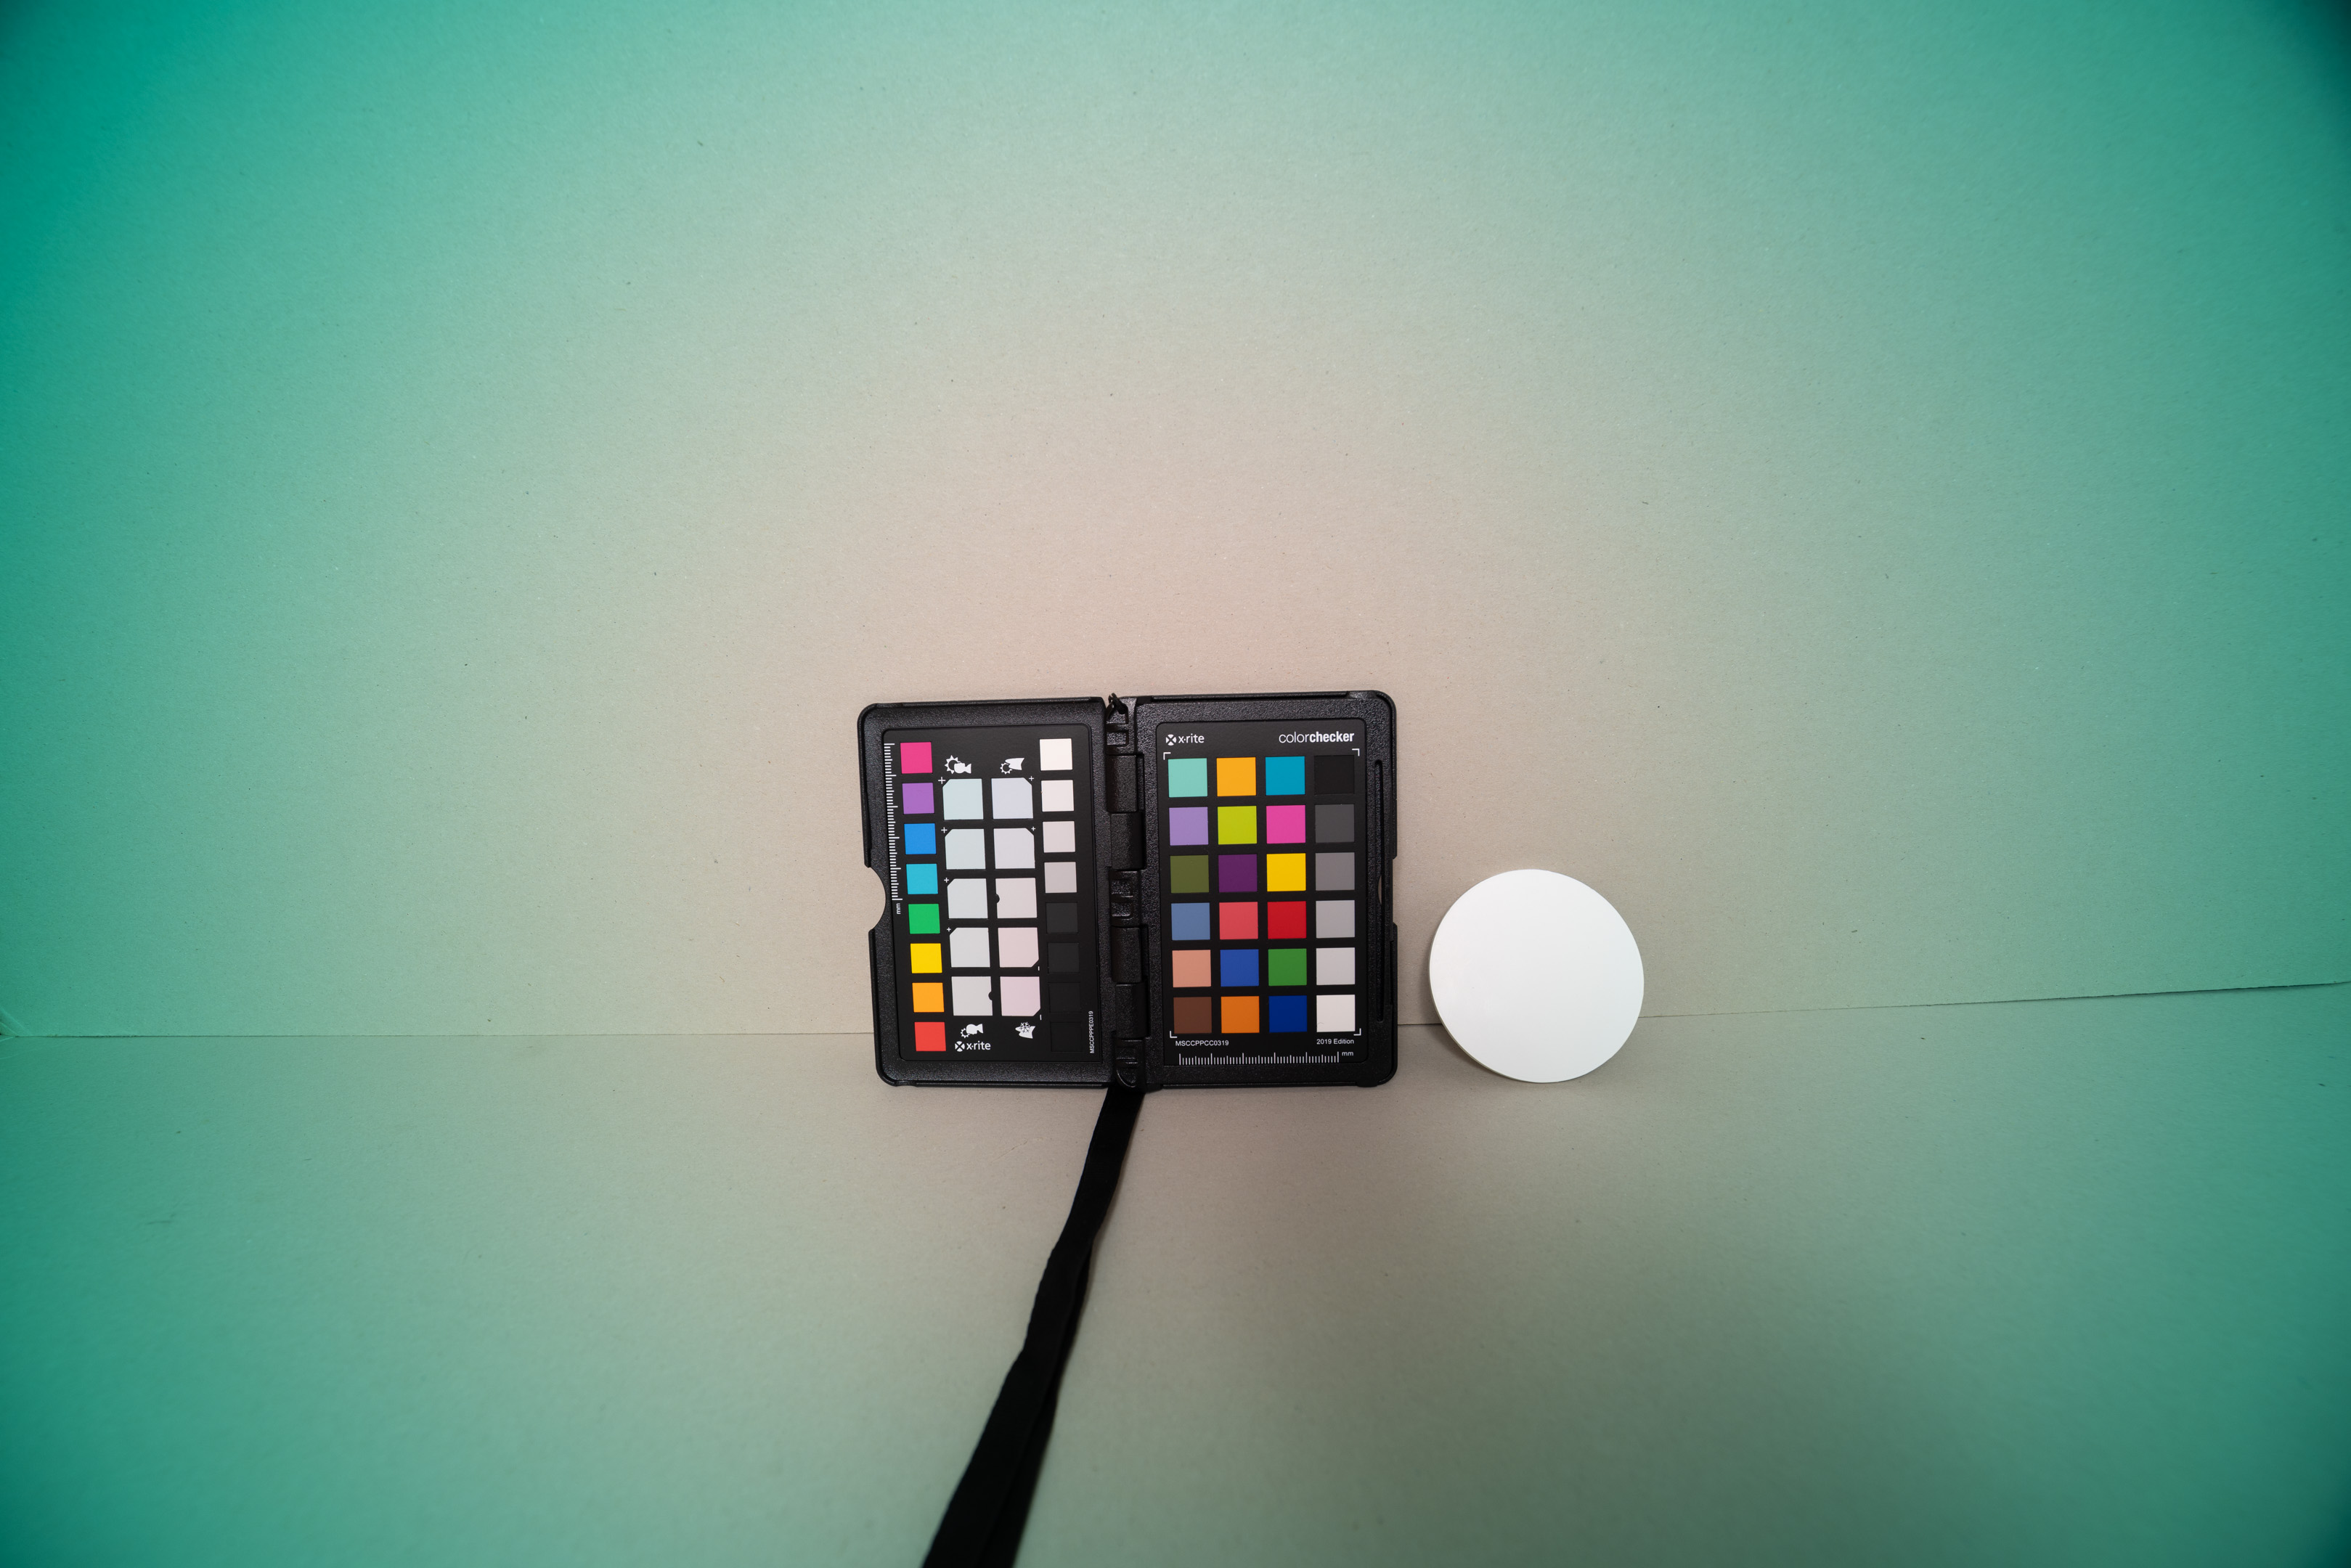
Wide-angle cyan vignetting comparison
The Fotga and B+W 486 UVIR cut filters are both interference based dichroic filters. This means on wide angle lenses you get a cyan vignetting effect. So I wanted to test the filters for this.
These were shot on a Canon EF 28mm lens on a Generic EF-RF drop-in filter adapter. A 52-49mm step-down ring on front of lens for all shots. Most of the filters being tested are 49mm size and were screwed into the step-down ring, for the larger filters these were just manually held against the step-down ring instead of using different stepping rings.
This was in an attempt to ensure that any vignetting caused by having to use a step-down ring for the 49mm filters would be consistent across all images, even those using the larger filters. But as you'll see from the shots I didn't quite manage to get the larger filters centred perfectly and so they sometimes have some vignetting from this. Still, it's more cyan vignetting than normal vignetting that we'll be looking at anyway.
Images were processed in ACR with lens profile corrections turned off. And white balanced on the PTFE disc.
No filter / Full spectrum

Starting with a full spectrum image (i.e. no filter) we can see a small amount of vignetting but nothing bad.
Fotga UVIR Cut
The Fotga UVIR cut has very pronounced cyan vignetting. The cyan vignetting should be correctable using a Flat, but this is another post processing step. And if you use Adobe software like me, requires creating DNG copies of all your images, so not a great solution.
I wanted to test the filters behind the lens as well to see if this made any difference.
This shot was taken using a 49mm size of the Fotga UVIR filter in the drop-in adapter, and you can see it does make a big difference. The light rays are at much less of an angle as they exit the lens towards the sensor, and so the cyan vignetting caused by the dichroic coatings of the filter is greatly reduced. There is still a bit of a cyan tint towards the edges and corners, but much better than when the filter is used in front of the lens.
B+W 486 UVIR Cut
The B+W 486 does not seem as bad as the Fotga when used in front of the lens, but it is still not very good. I don't have this filter in a small enough size to use behind the lens, but I would imagine it would be much better used like that.
Tiffen Standard Hot Mirror
The Tiffen Hot Mirror filter surprised me by not having any green-cyan vignetting. When you look at the filter itself, it is quite reflective like the Fotga and B+W 486 dichroic filters.
Looking back at one of my previous tests though, it did have green vignetting there. So we can probably summise that the filter does have green vignetting, but it is fairly weak and you have to go pretty wide to be able to see it.
QB39 / BG39
QB39 looks good. As far as I'm aware all QB etc. glass filters from the Chinese manufacturers are uncoated. Though they are starting to offer more filters with AR coatings, but this is always mentioned in the product name.
Placing the filter behind the lens makes no difference.
QB40 / BG40
QB40 is much the same, no coloured vignetting is visible.
Again, no difference if the filter is behind the lens.
Tangsinuo BCF
The Tangsinuo BCF filter does have a bit of cyan vignetting.
If we put it behind the lens though it clears up nicely.
Tangsinuo ICF

The Tangsinuo ICF is sold as being AR coated, we can see the coatings have no negative effective when used on a wide-angle lens though.
And as we'd expect, it's the same when used behind the lens.
QB21 / BG38 2mm thick
QB21 has no issues. I don't have the 2mm thickness of QB21 to test behind the lens but based on the other results you can be pretty sure it will give the same results as when used in front of the lens.
QB21 / BG38 3mm thick
3mm thick QB21 similarly has no issues.
And no issues when used behind the lens either.
Fotga UVIR cut on 16mm lens
Now looking at a more extreme example, using a 16mm focal length with the Fotga UVIR cut in front the lens you can see the cyan vignetting is terrible.
But switch to the filter behind the lens and it is fine. The results here actually seem better than when used with the Canon EF 28/2.8 lens. So it seems how well a dichroic filter works behind the lens is dependent on how the lens is designed rather than how wide the focal length is.
Fotga UVIR cut on fisheye lens
With the Canon 8-15mm fisheye set at 15mm, even an 82mm filter pushed right up against the front element is not large enough to avoid mechanical vignetting. And the cyan vignetting caused by a dichroic filter overwhelms the image.
But place the filter behind the lens and there's no problem.
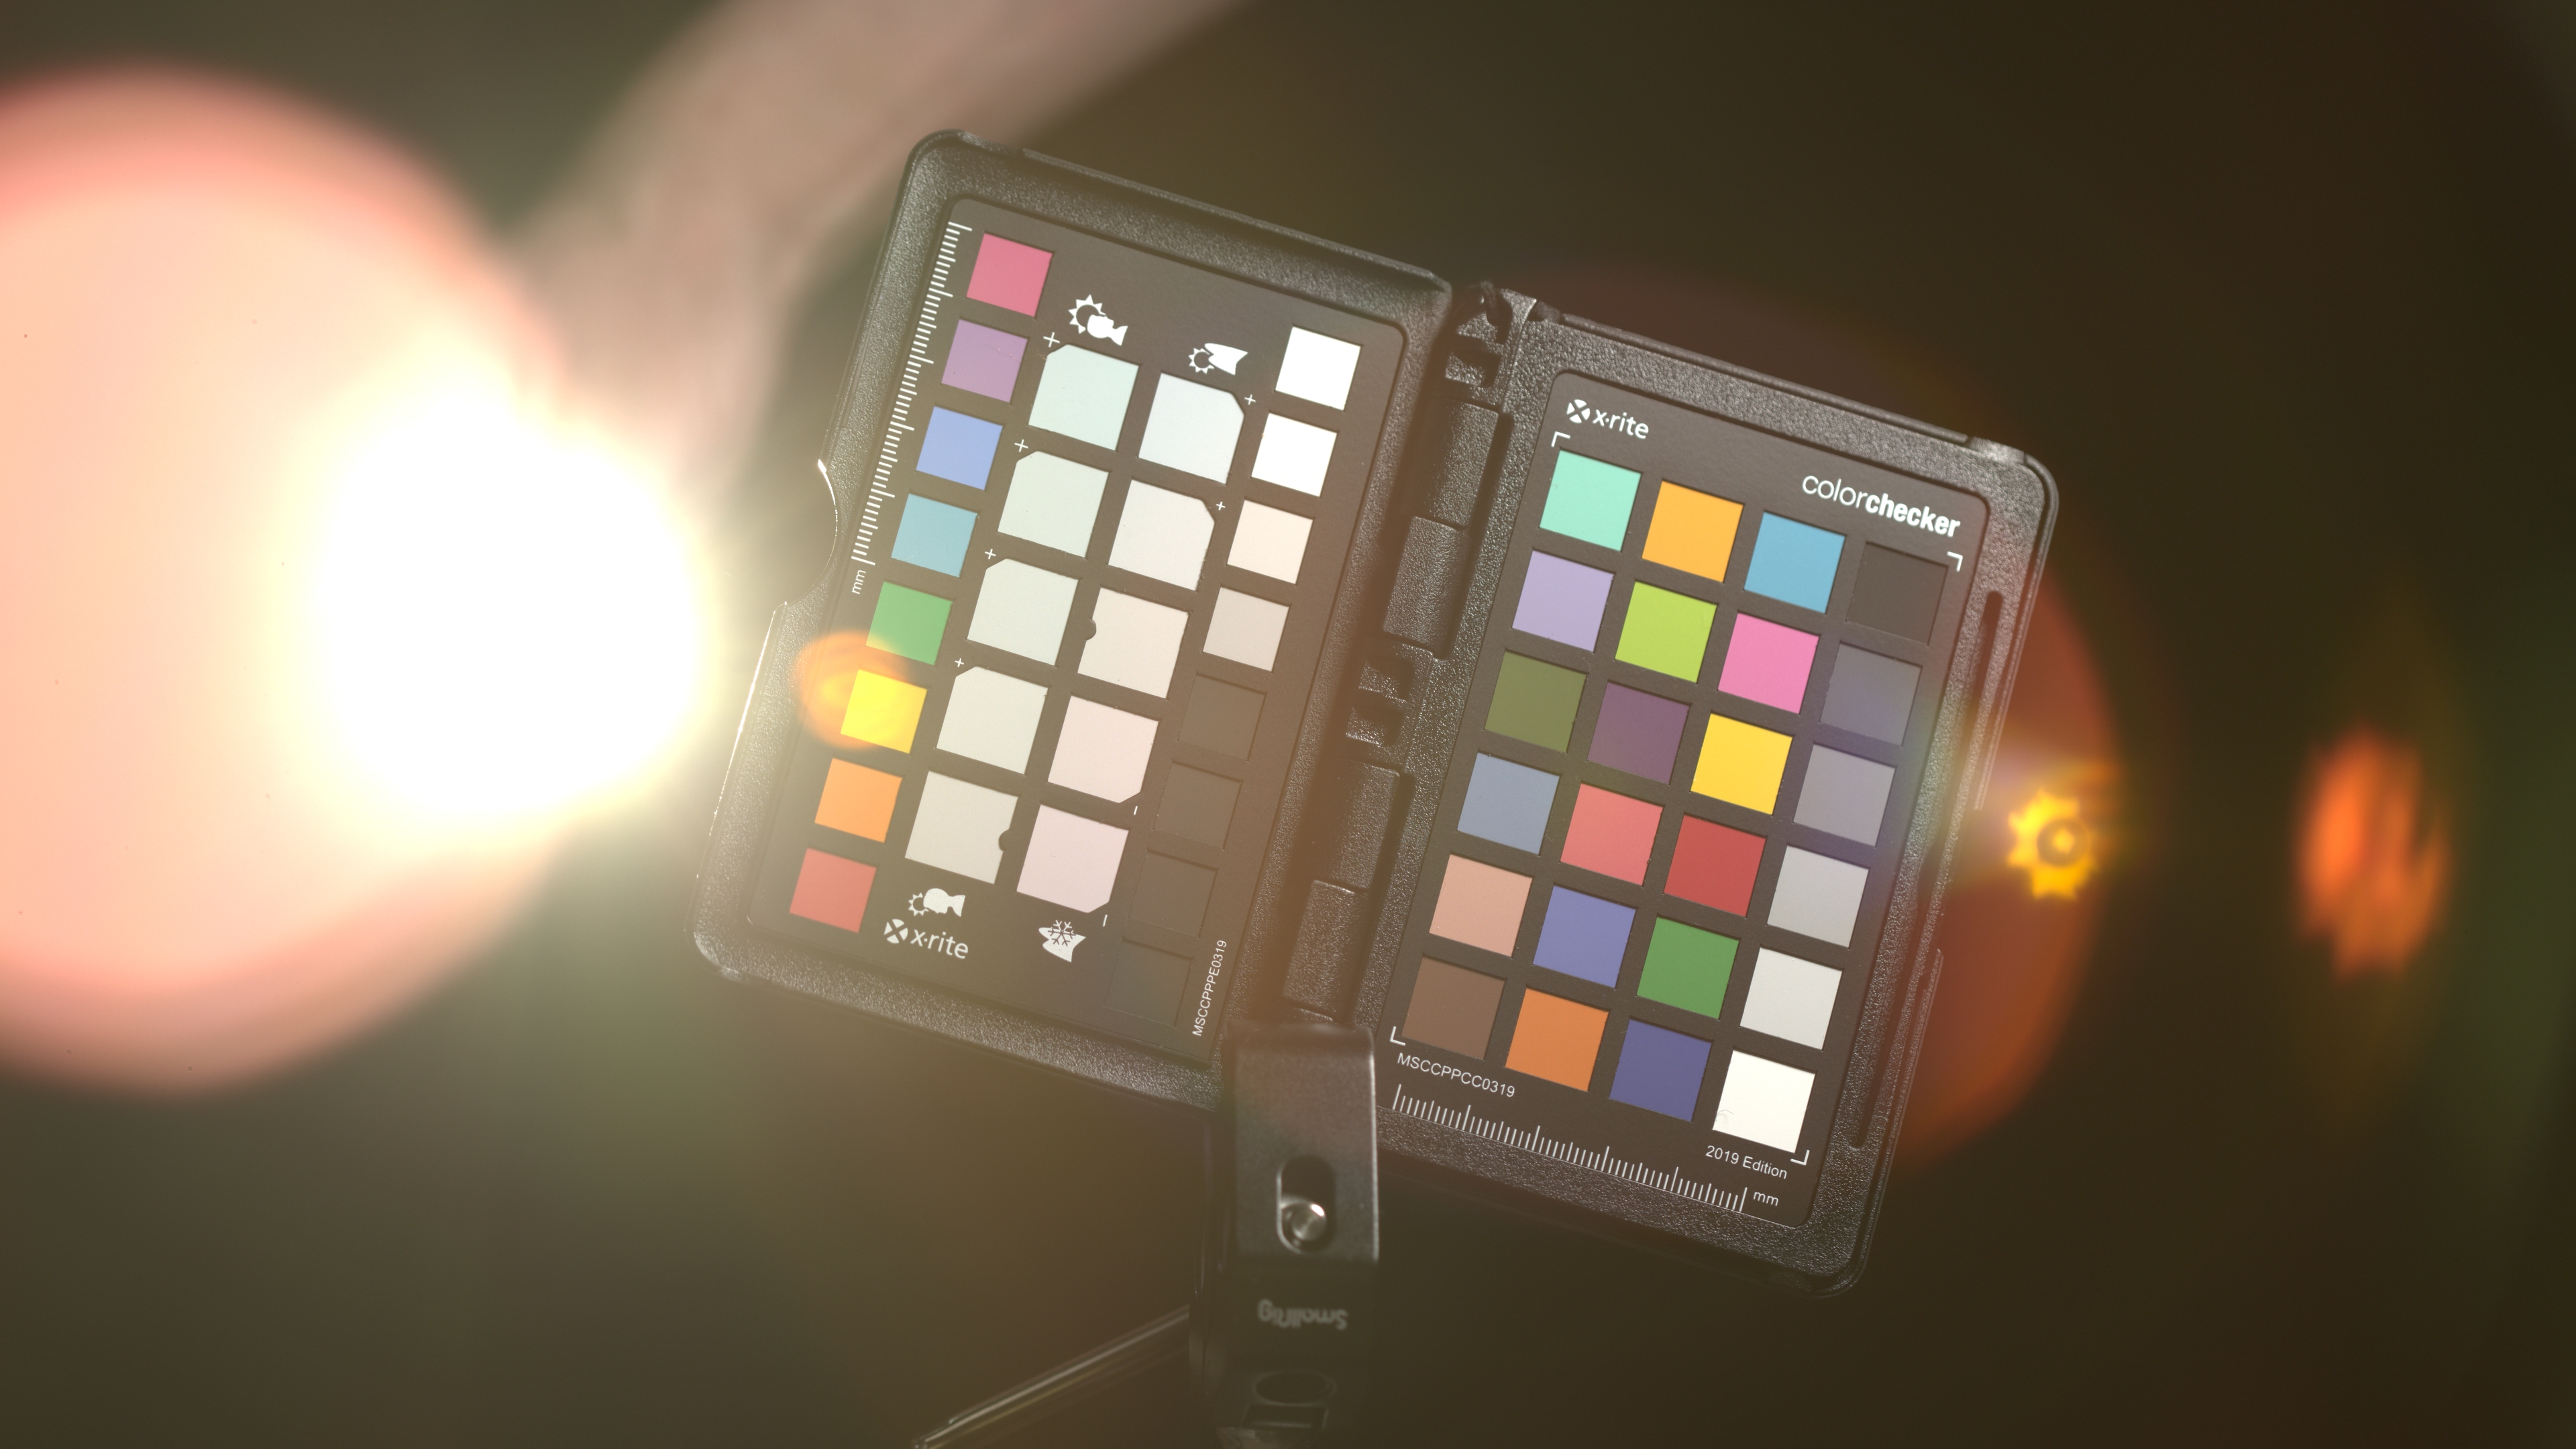
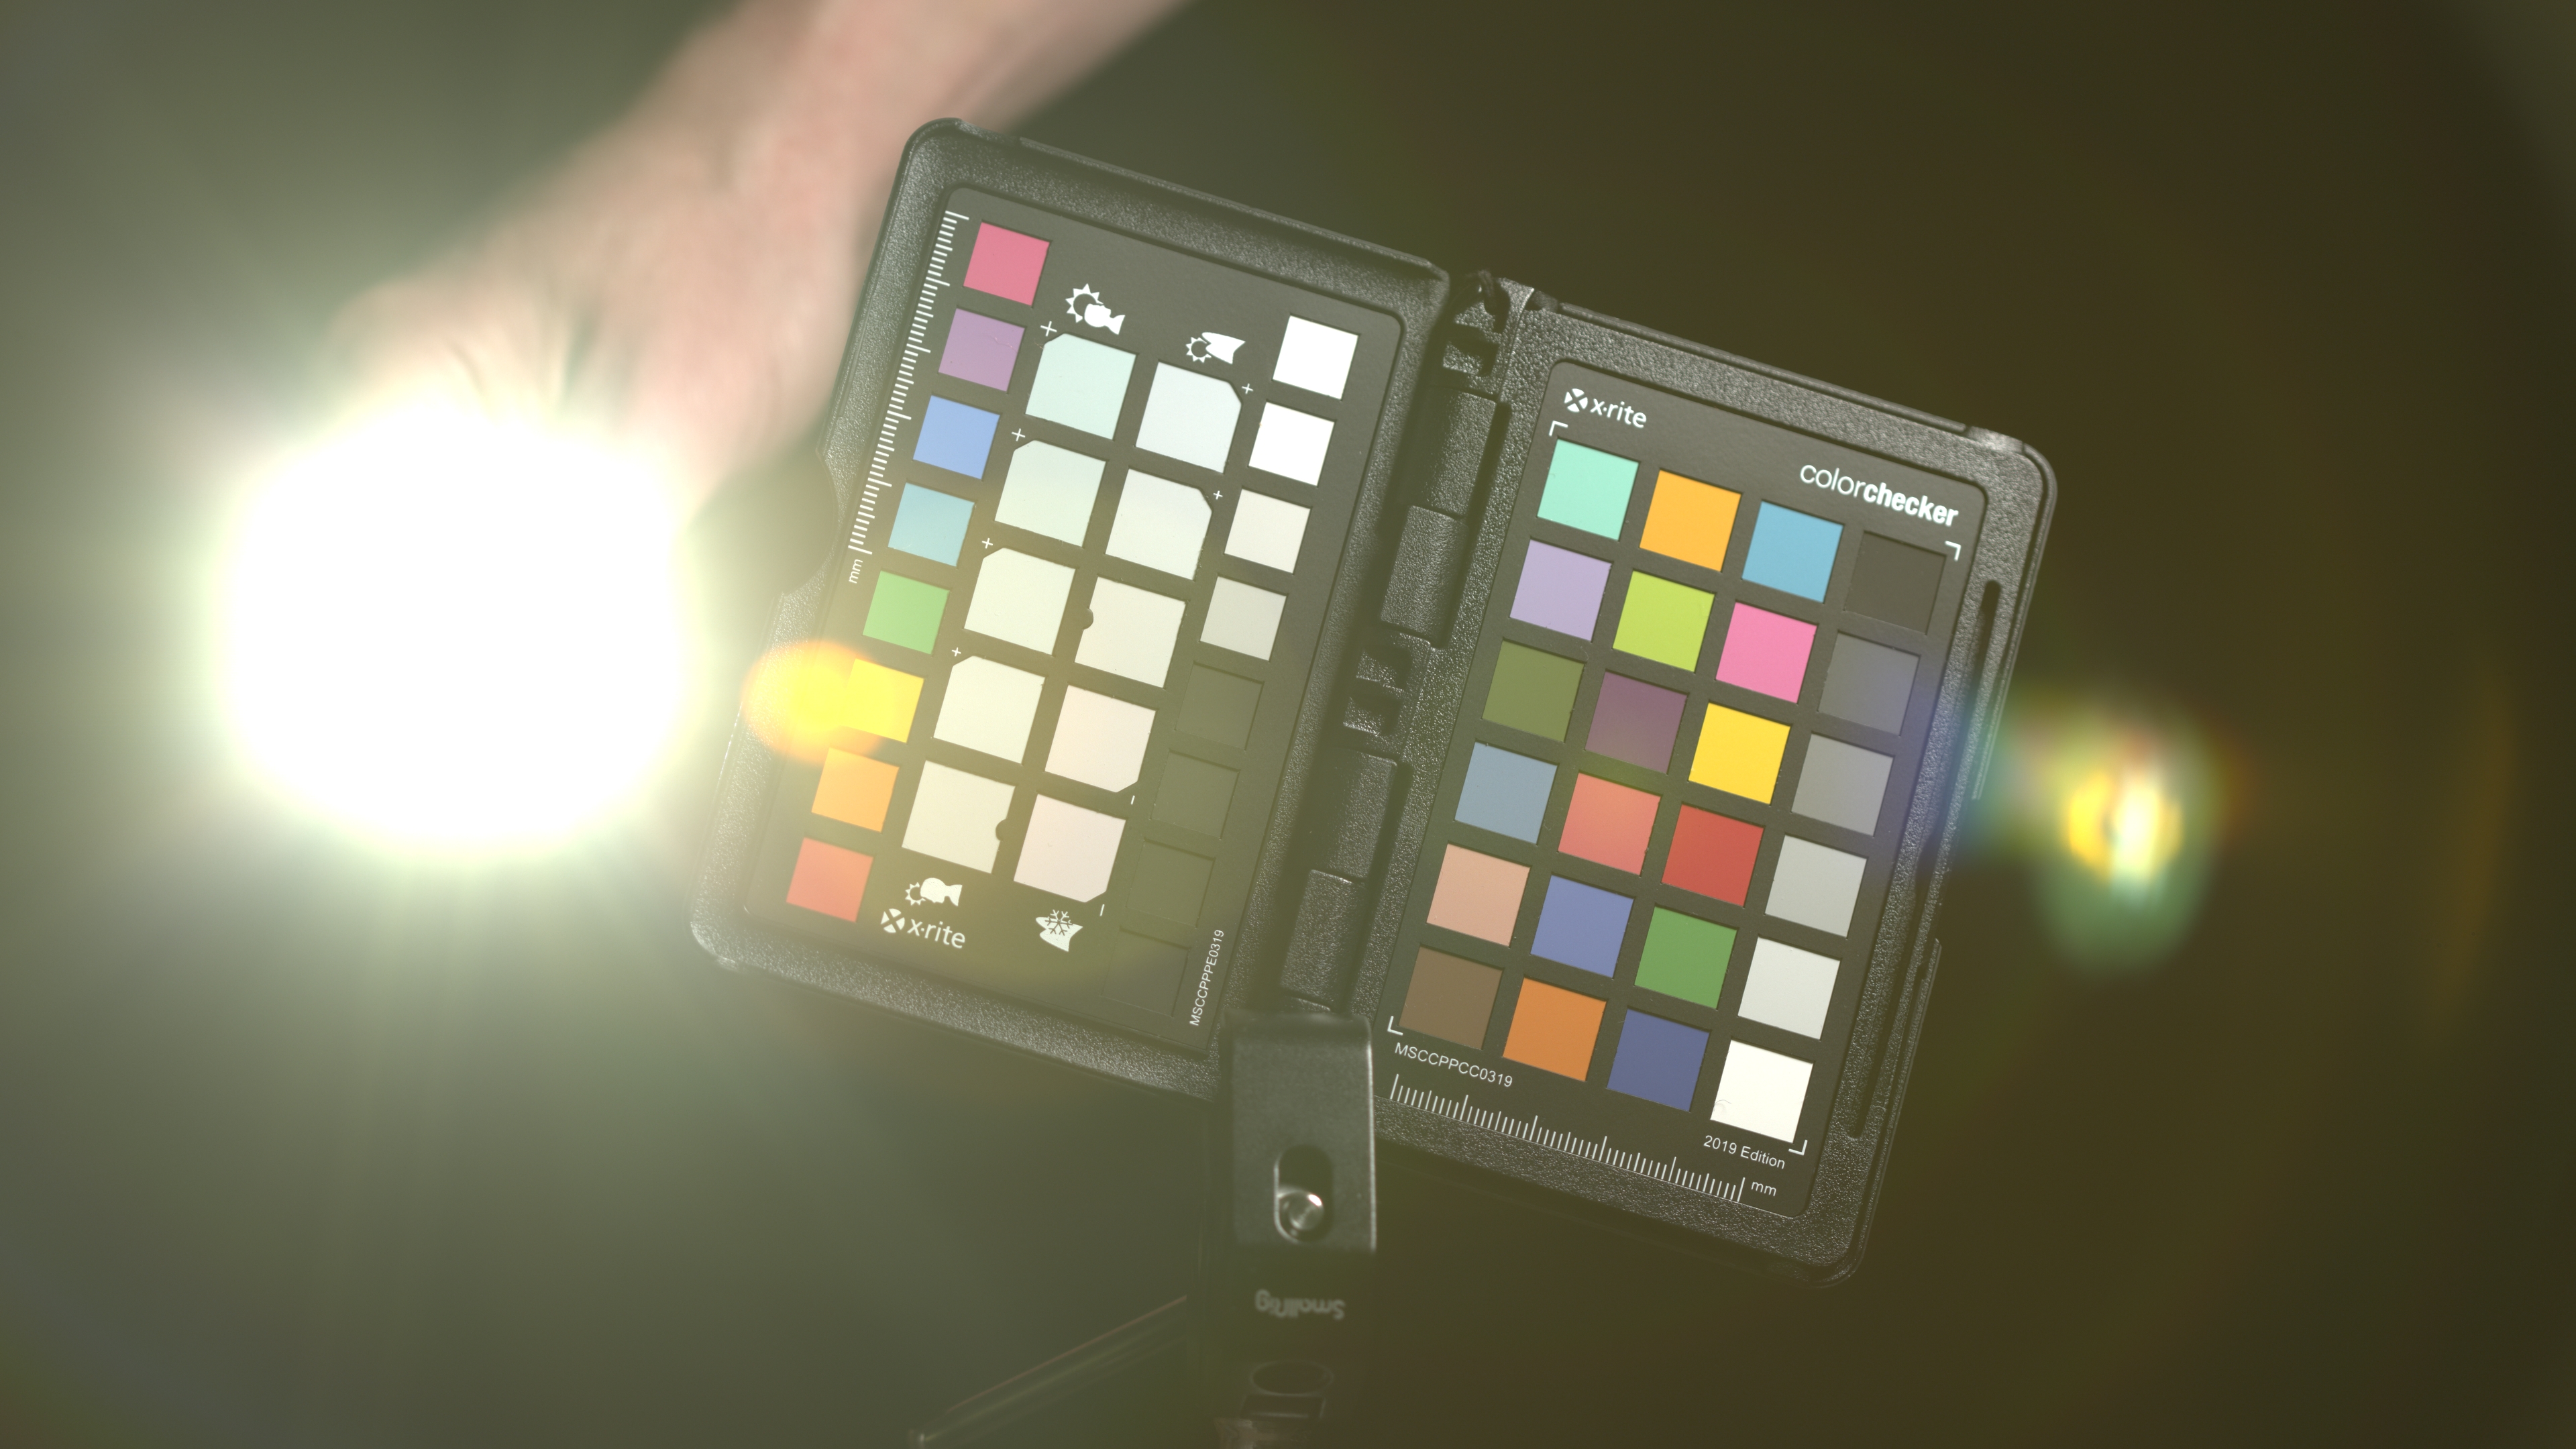
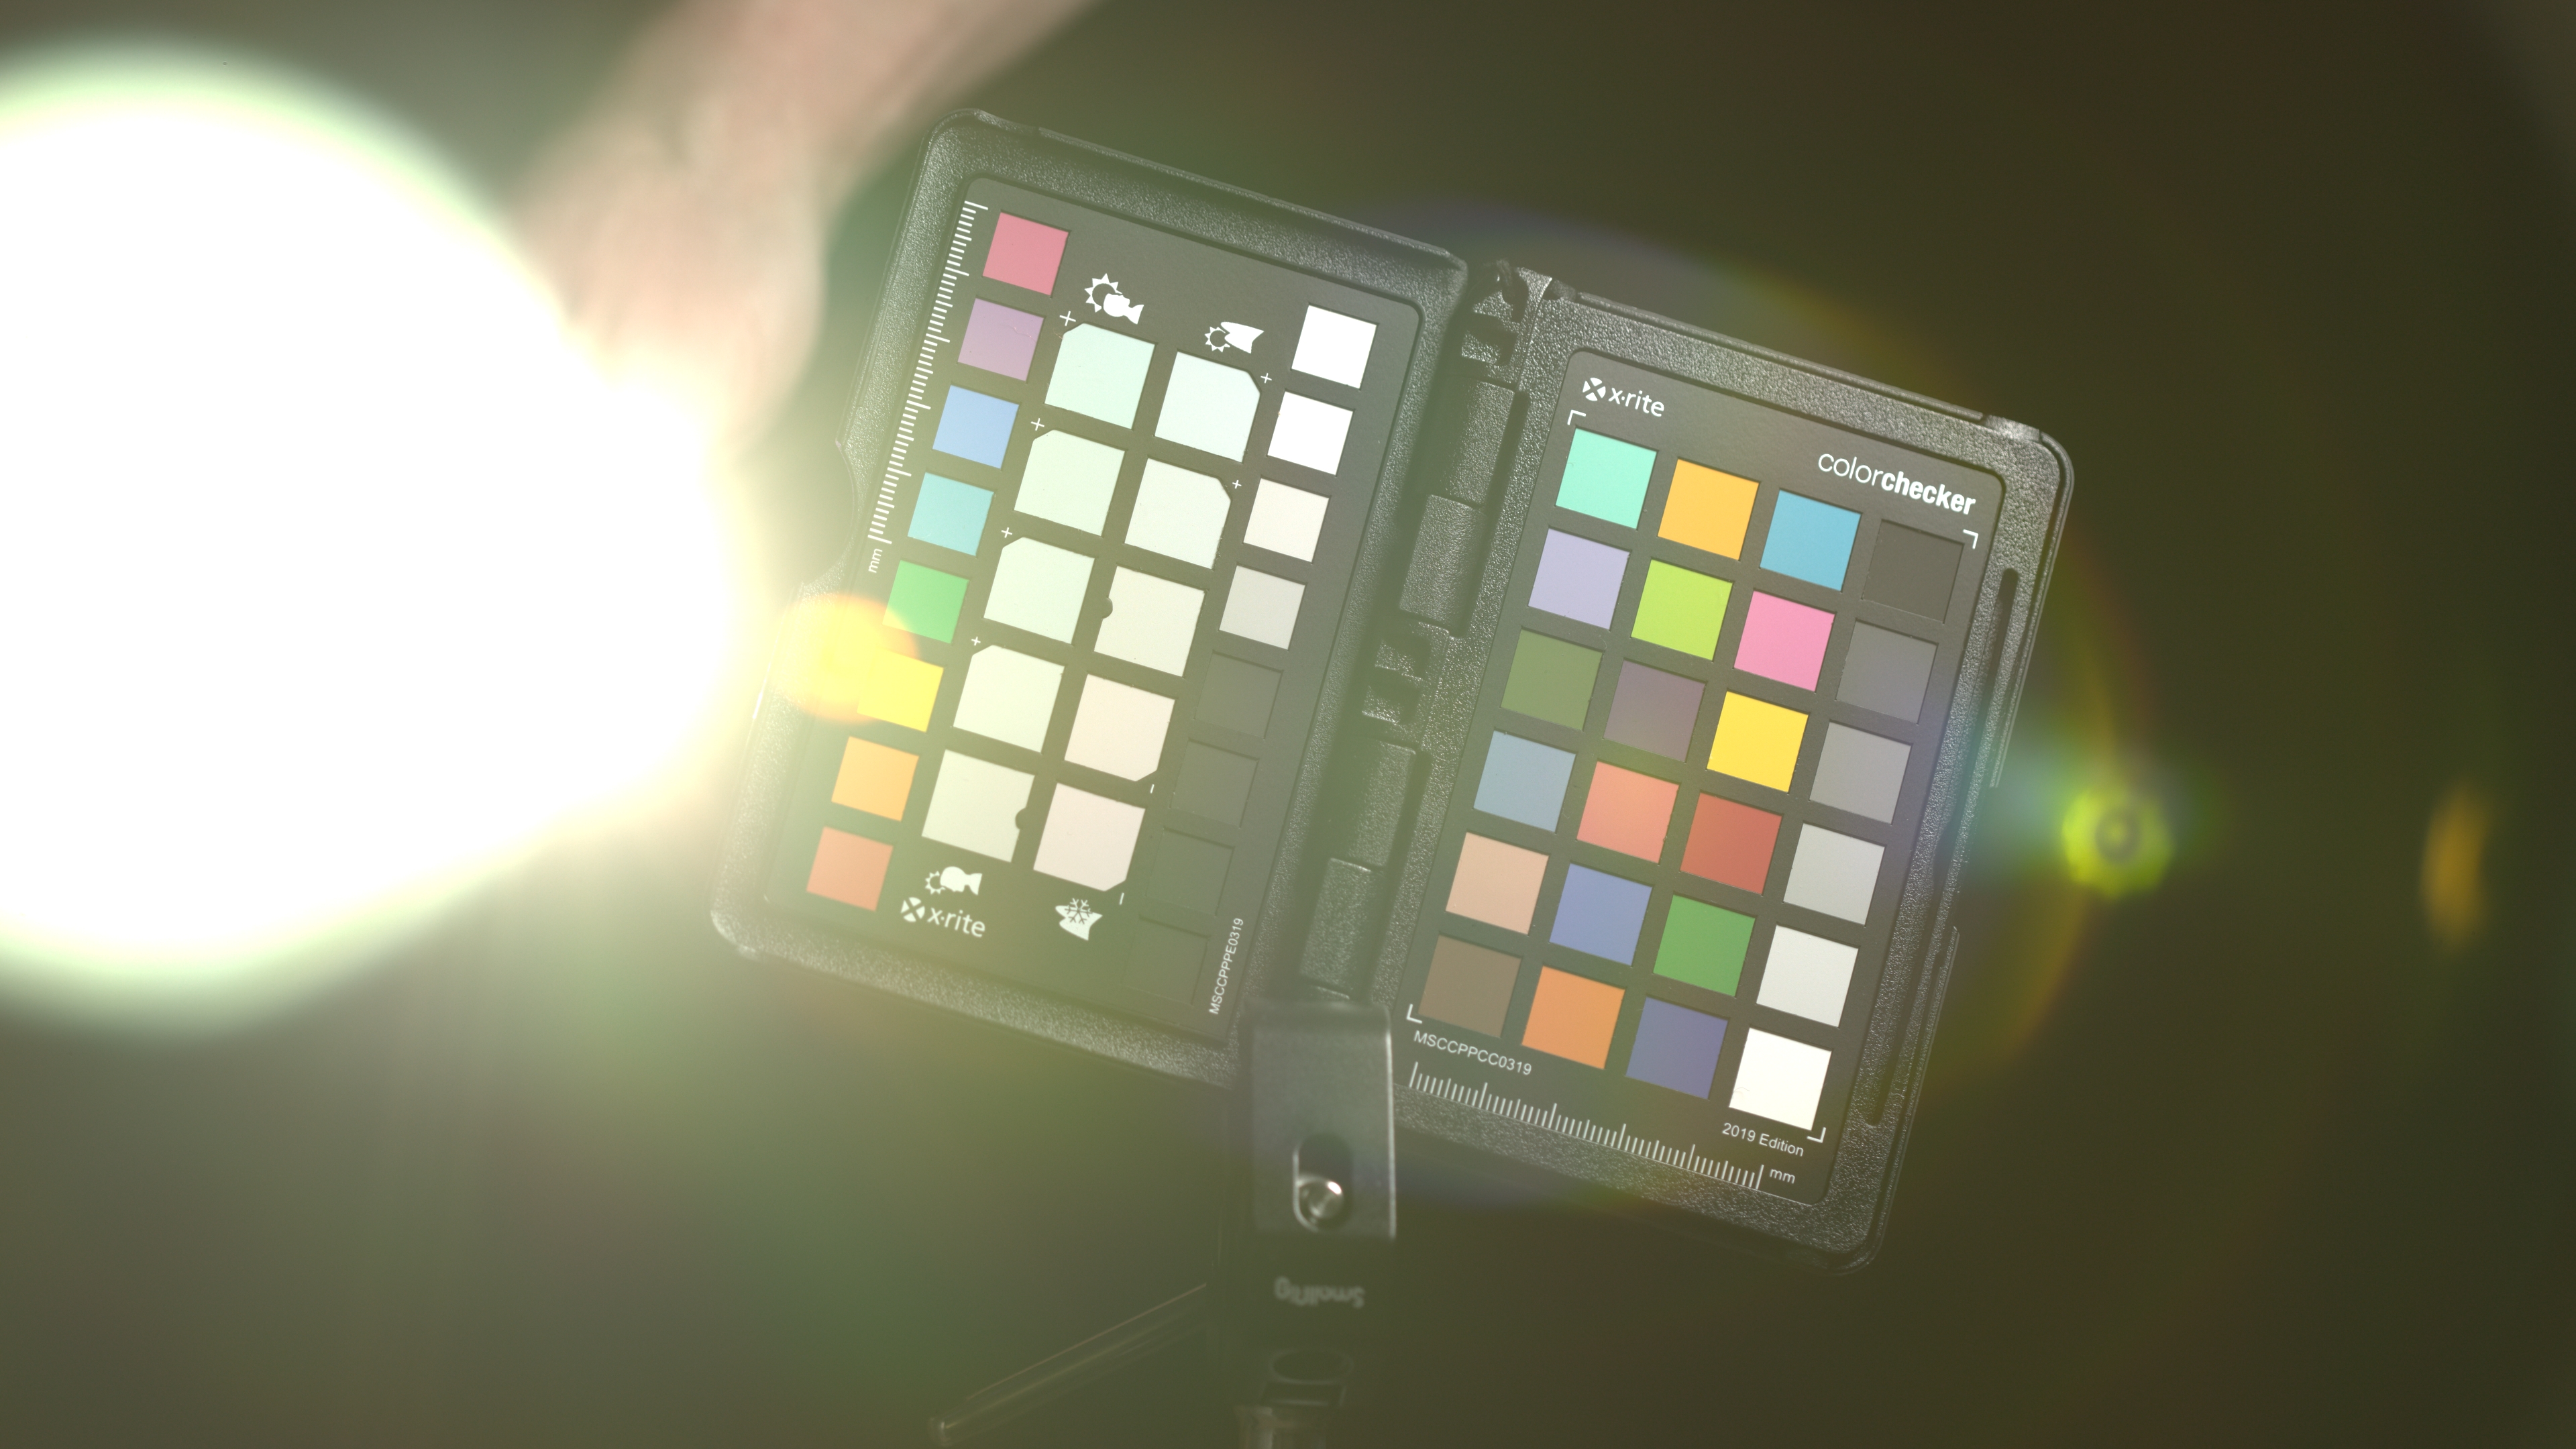
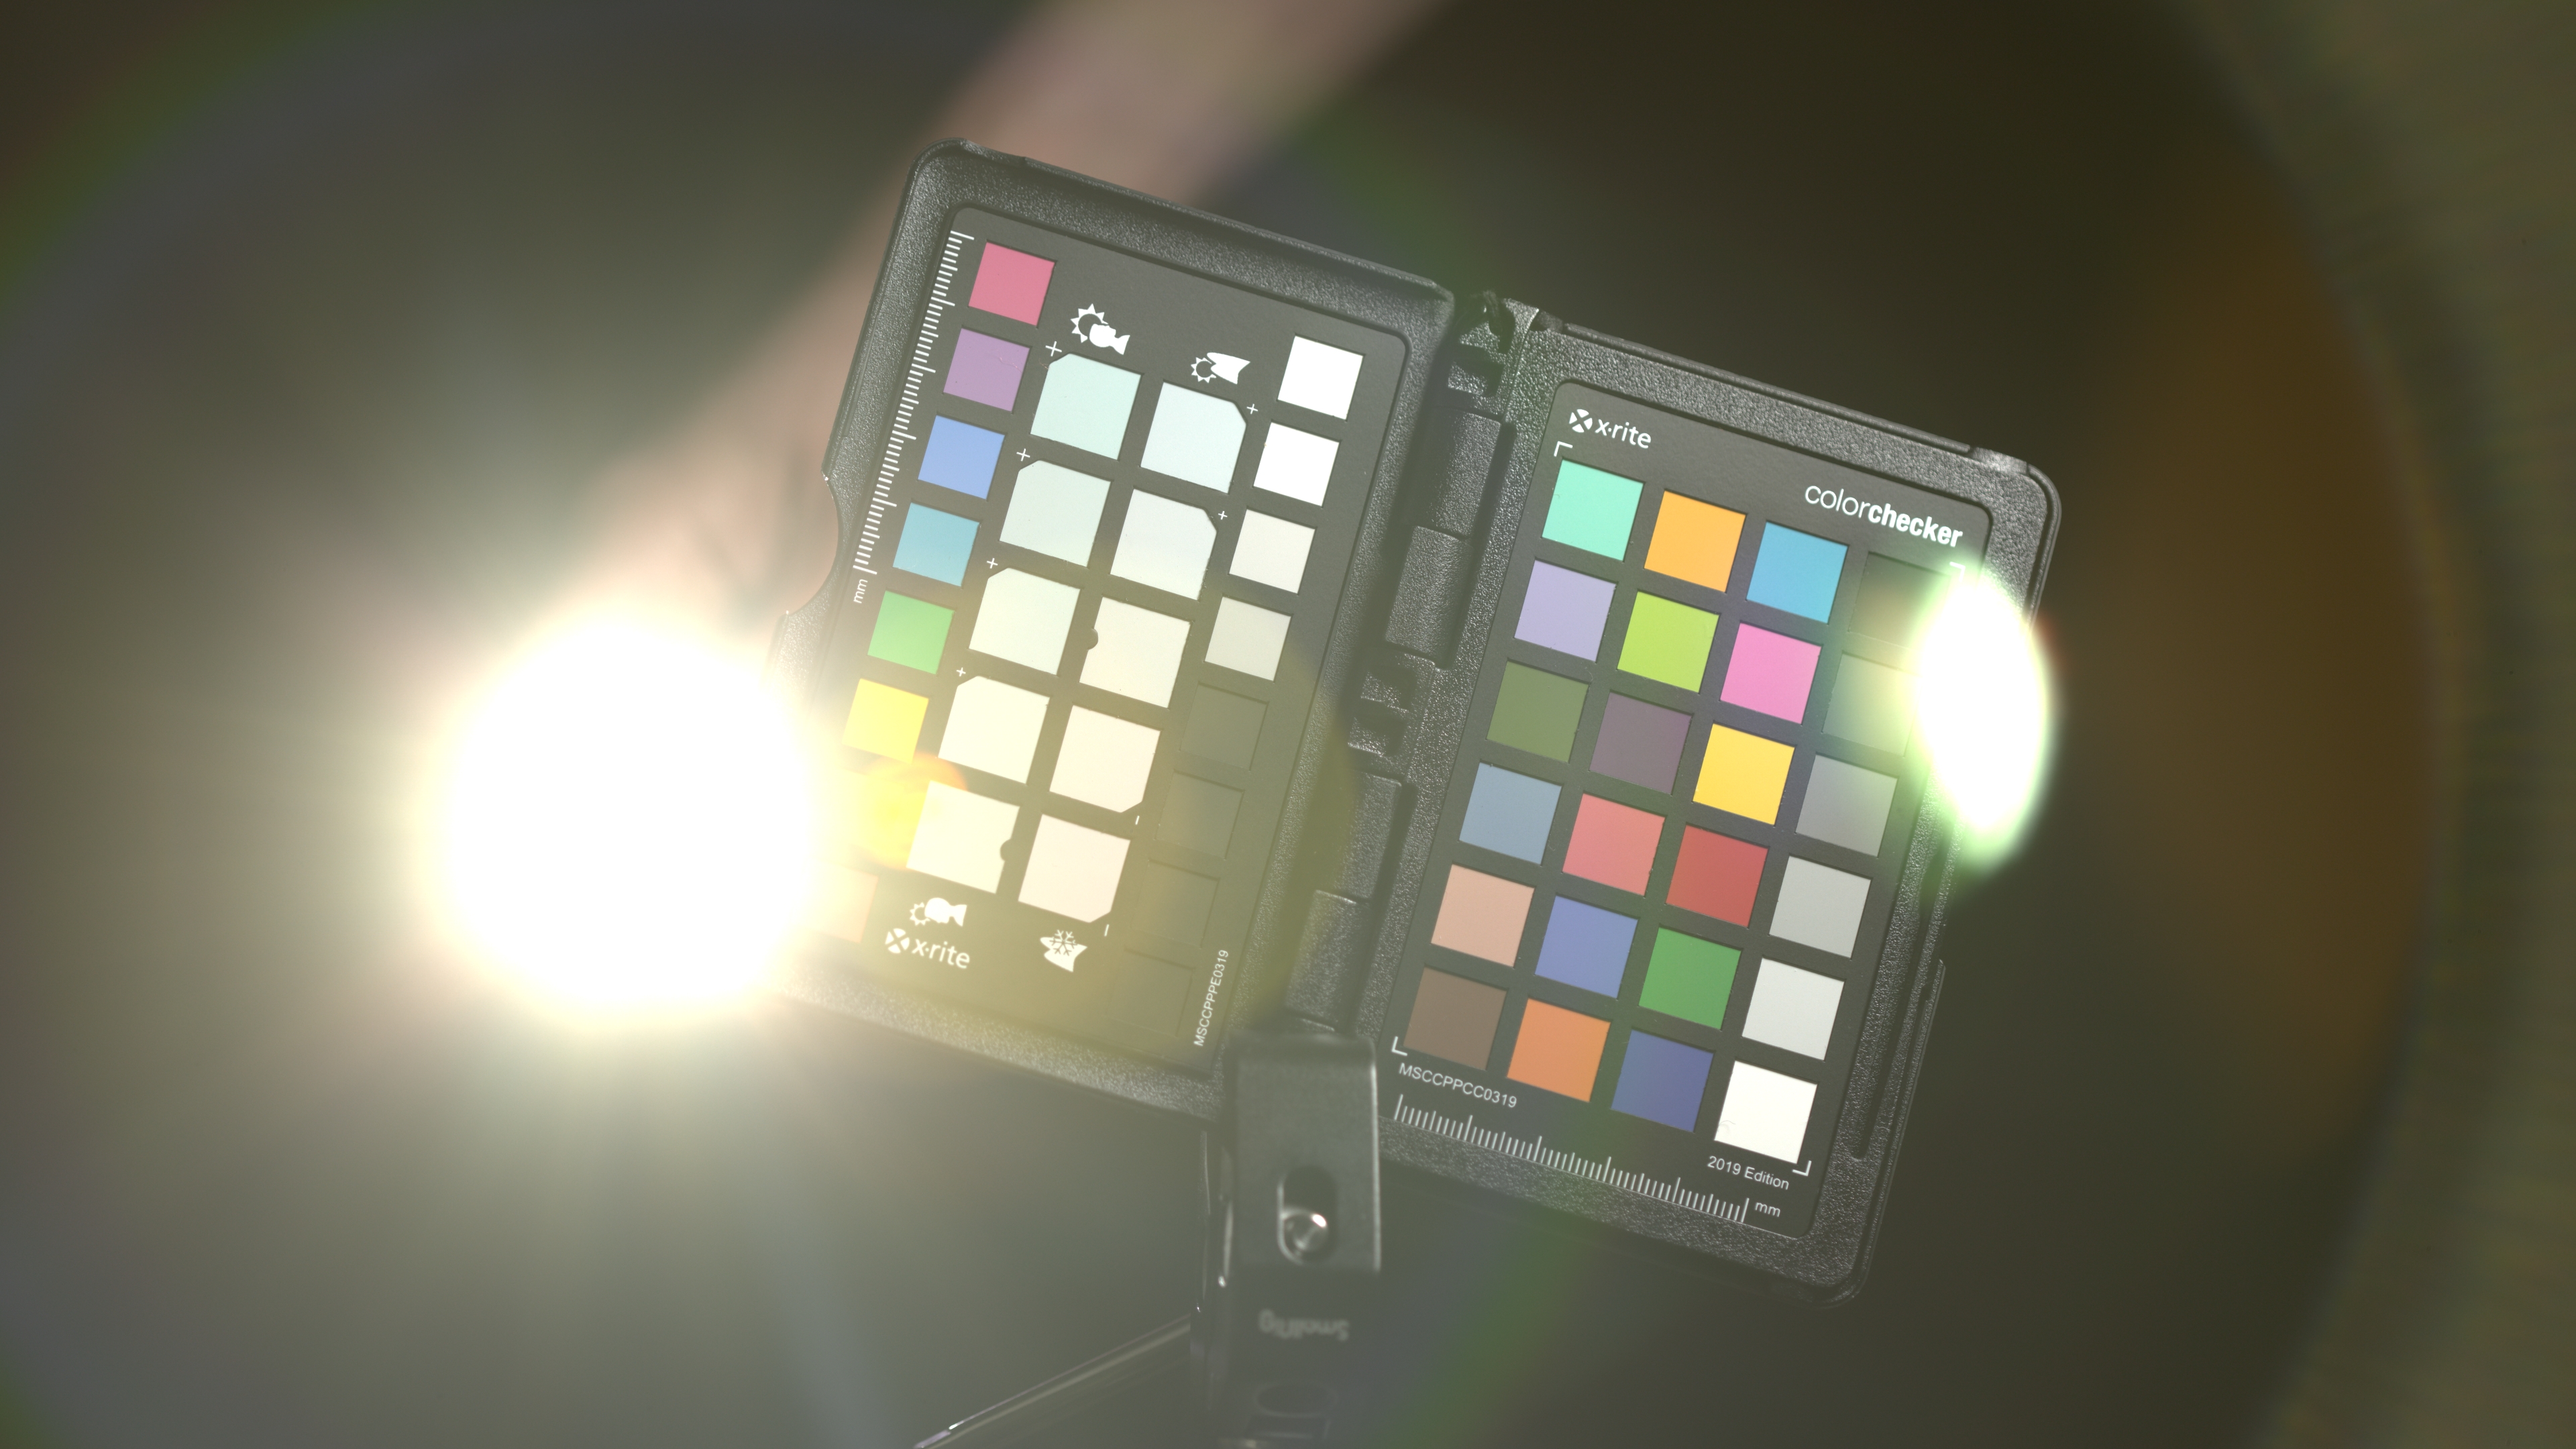
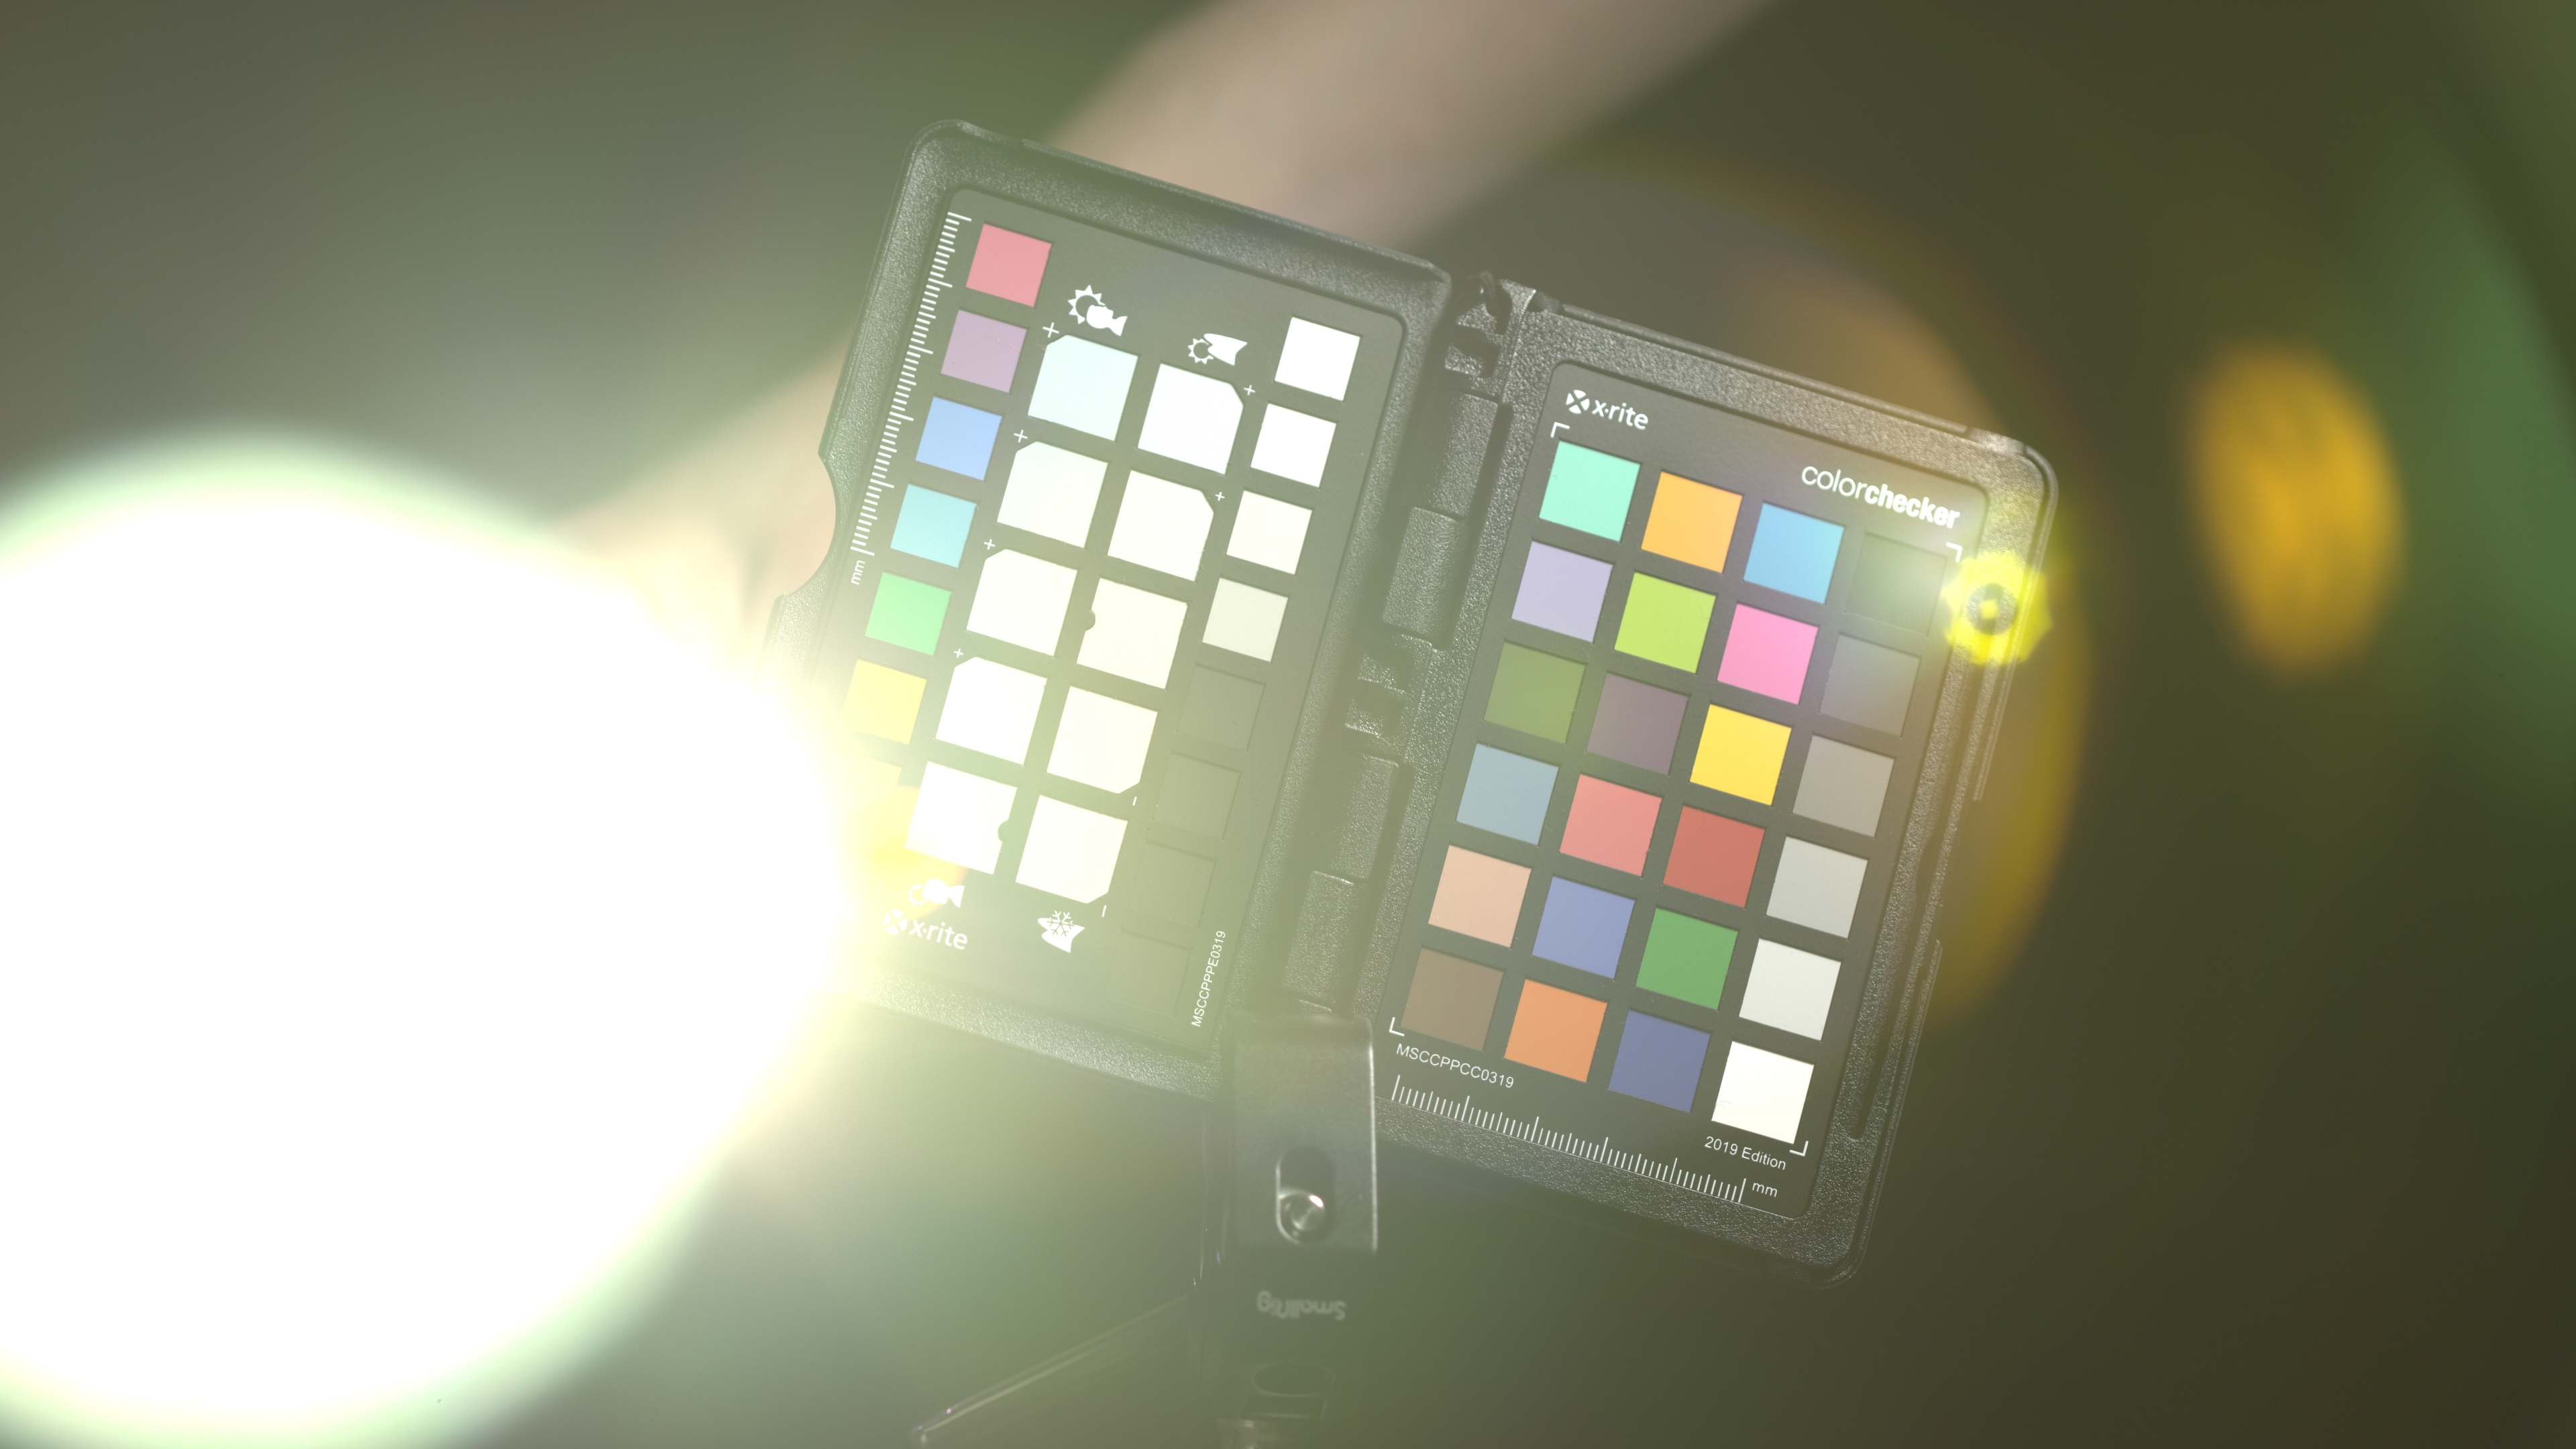
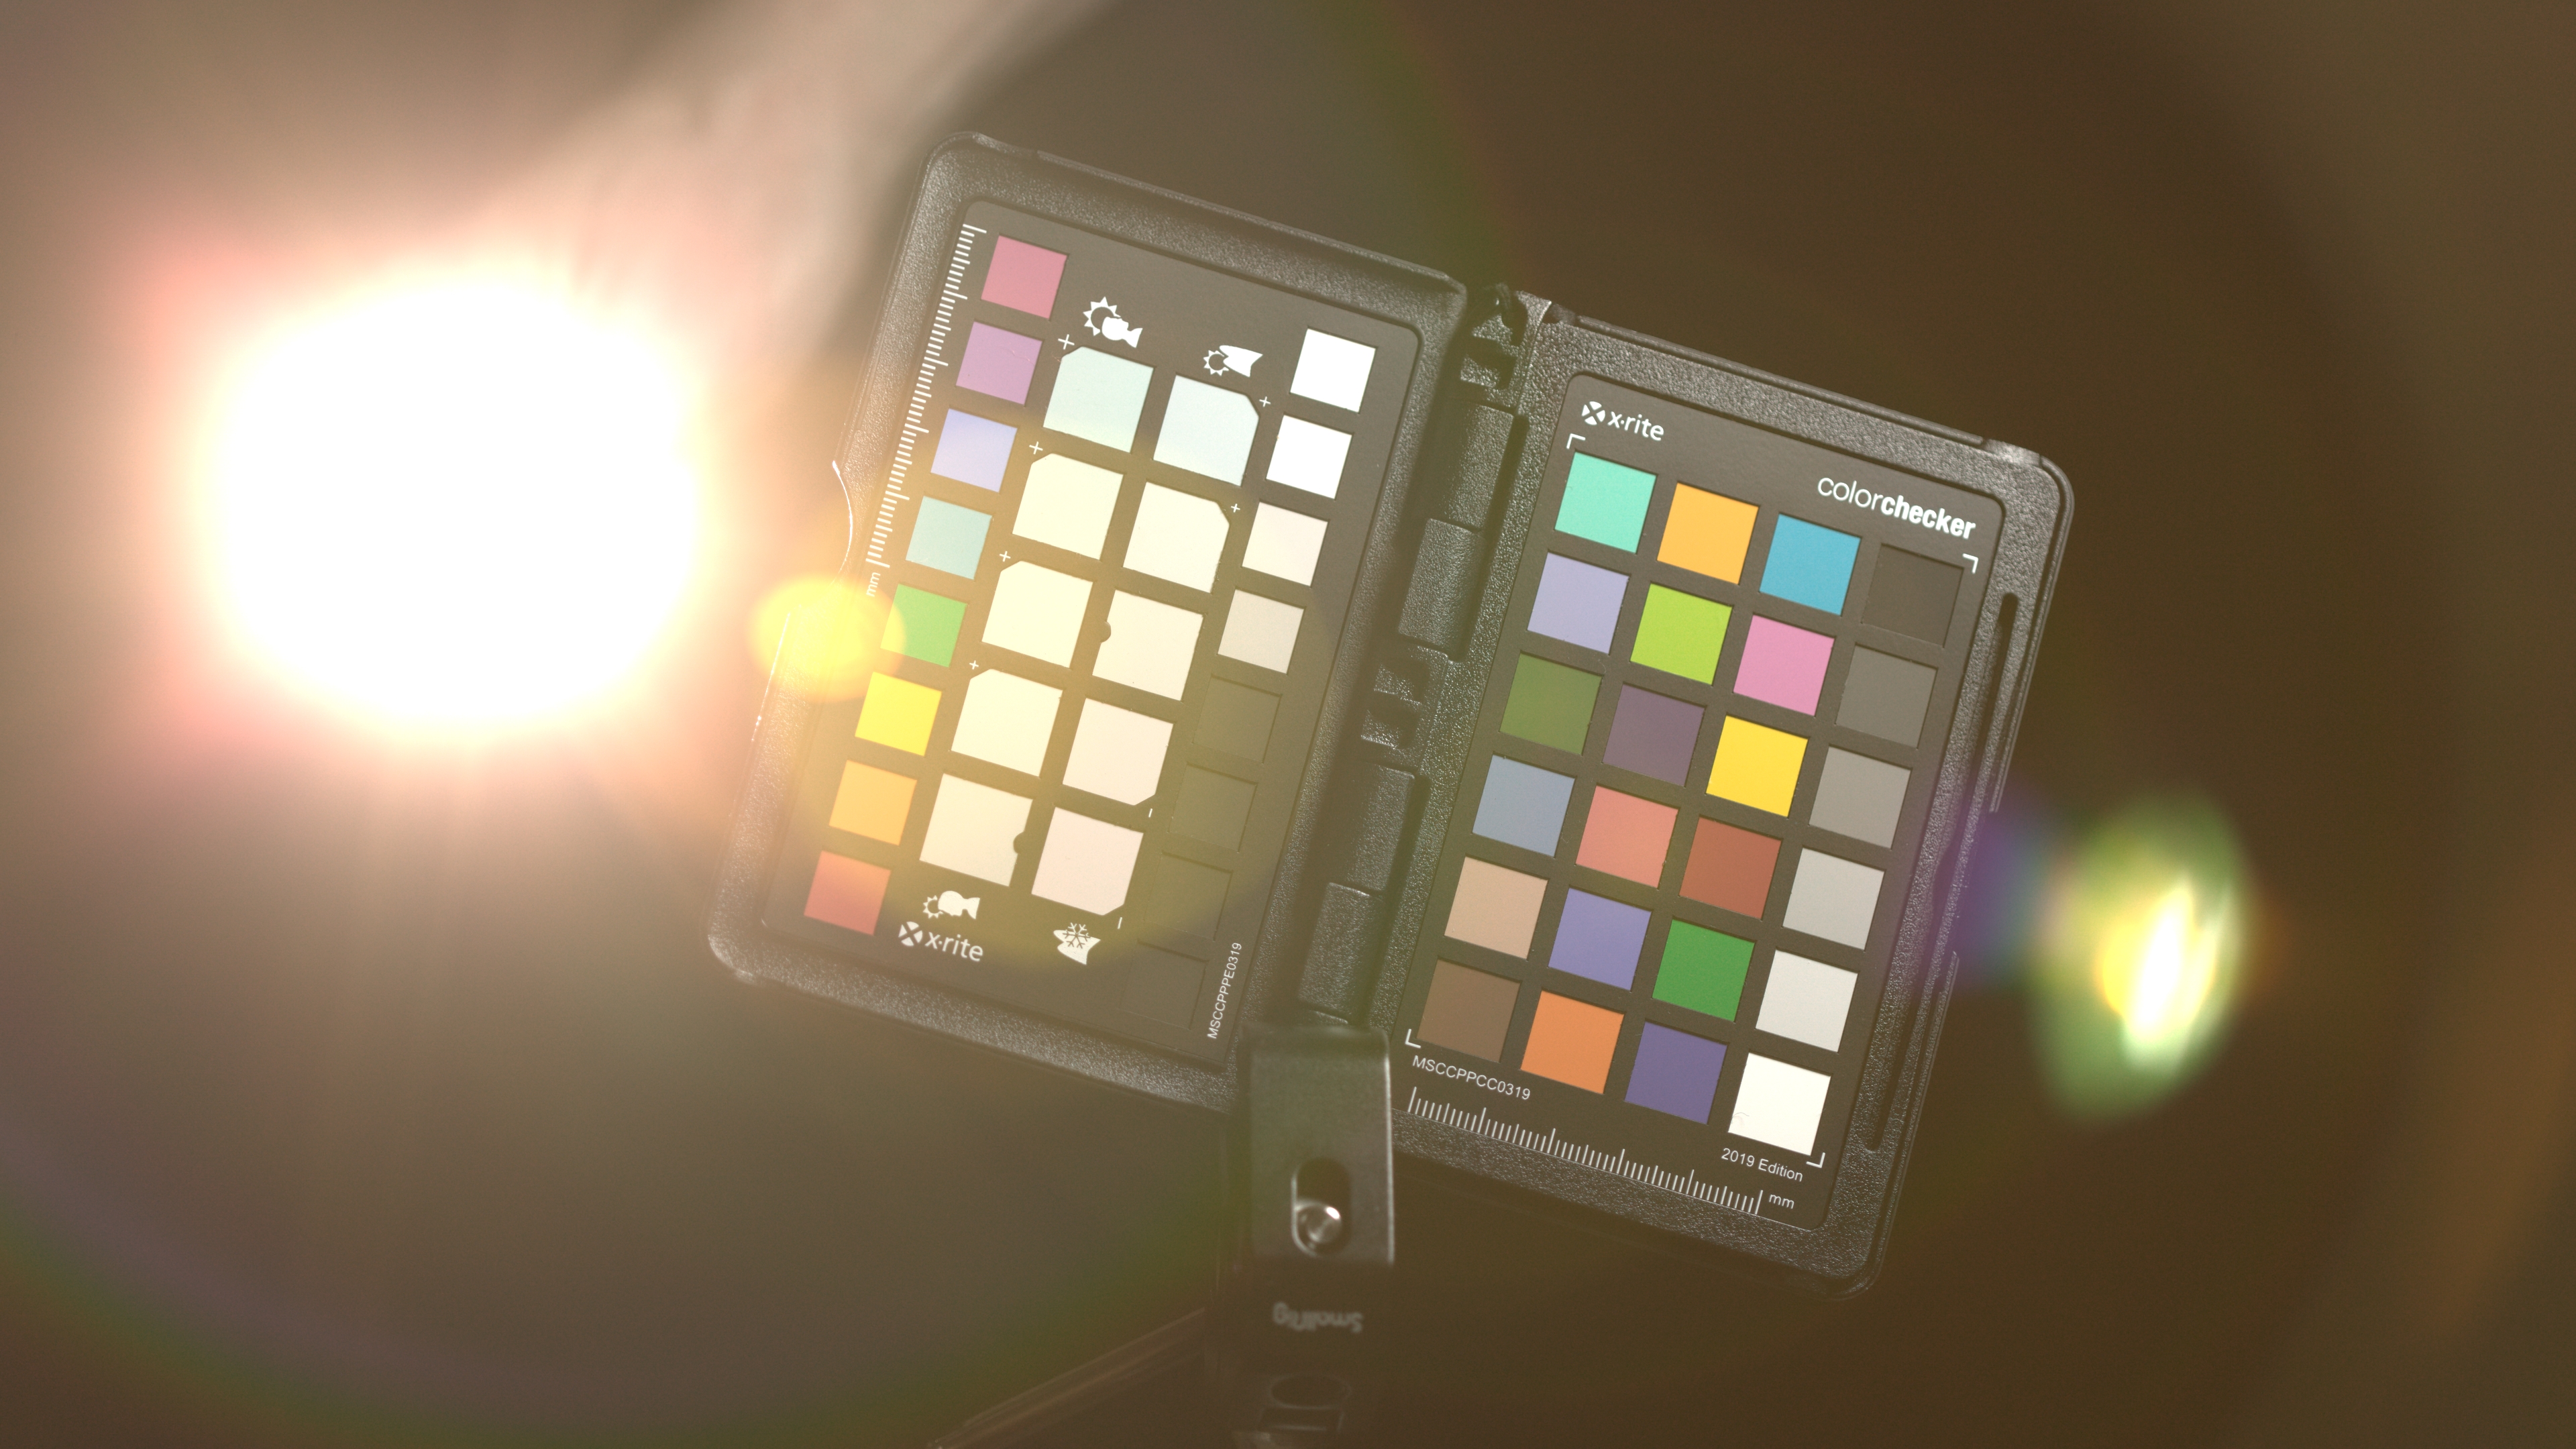
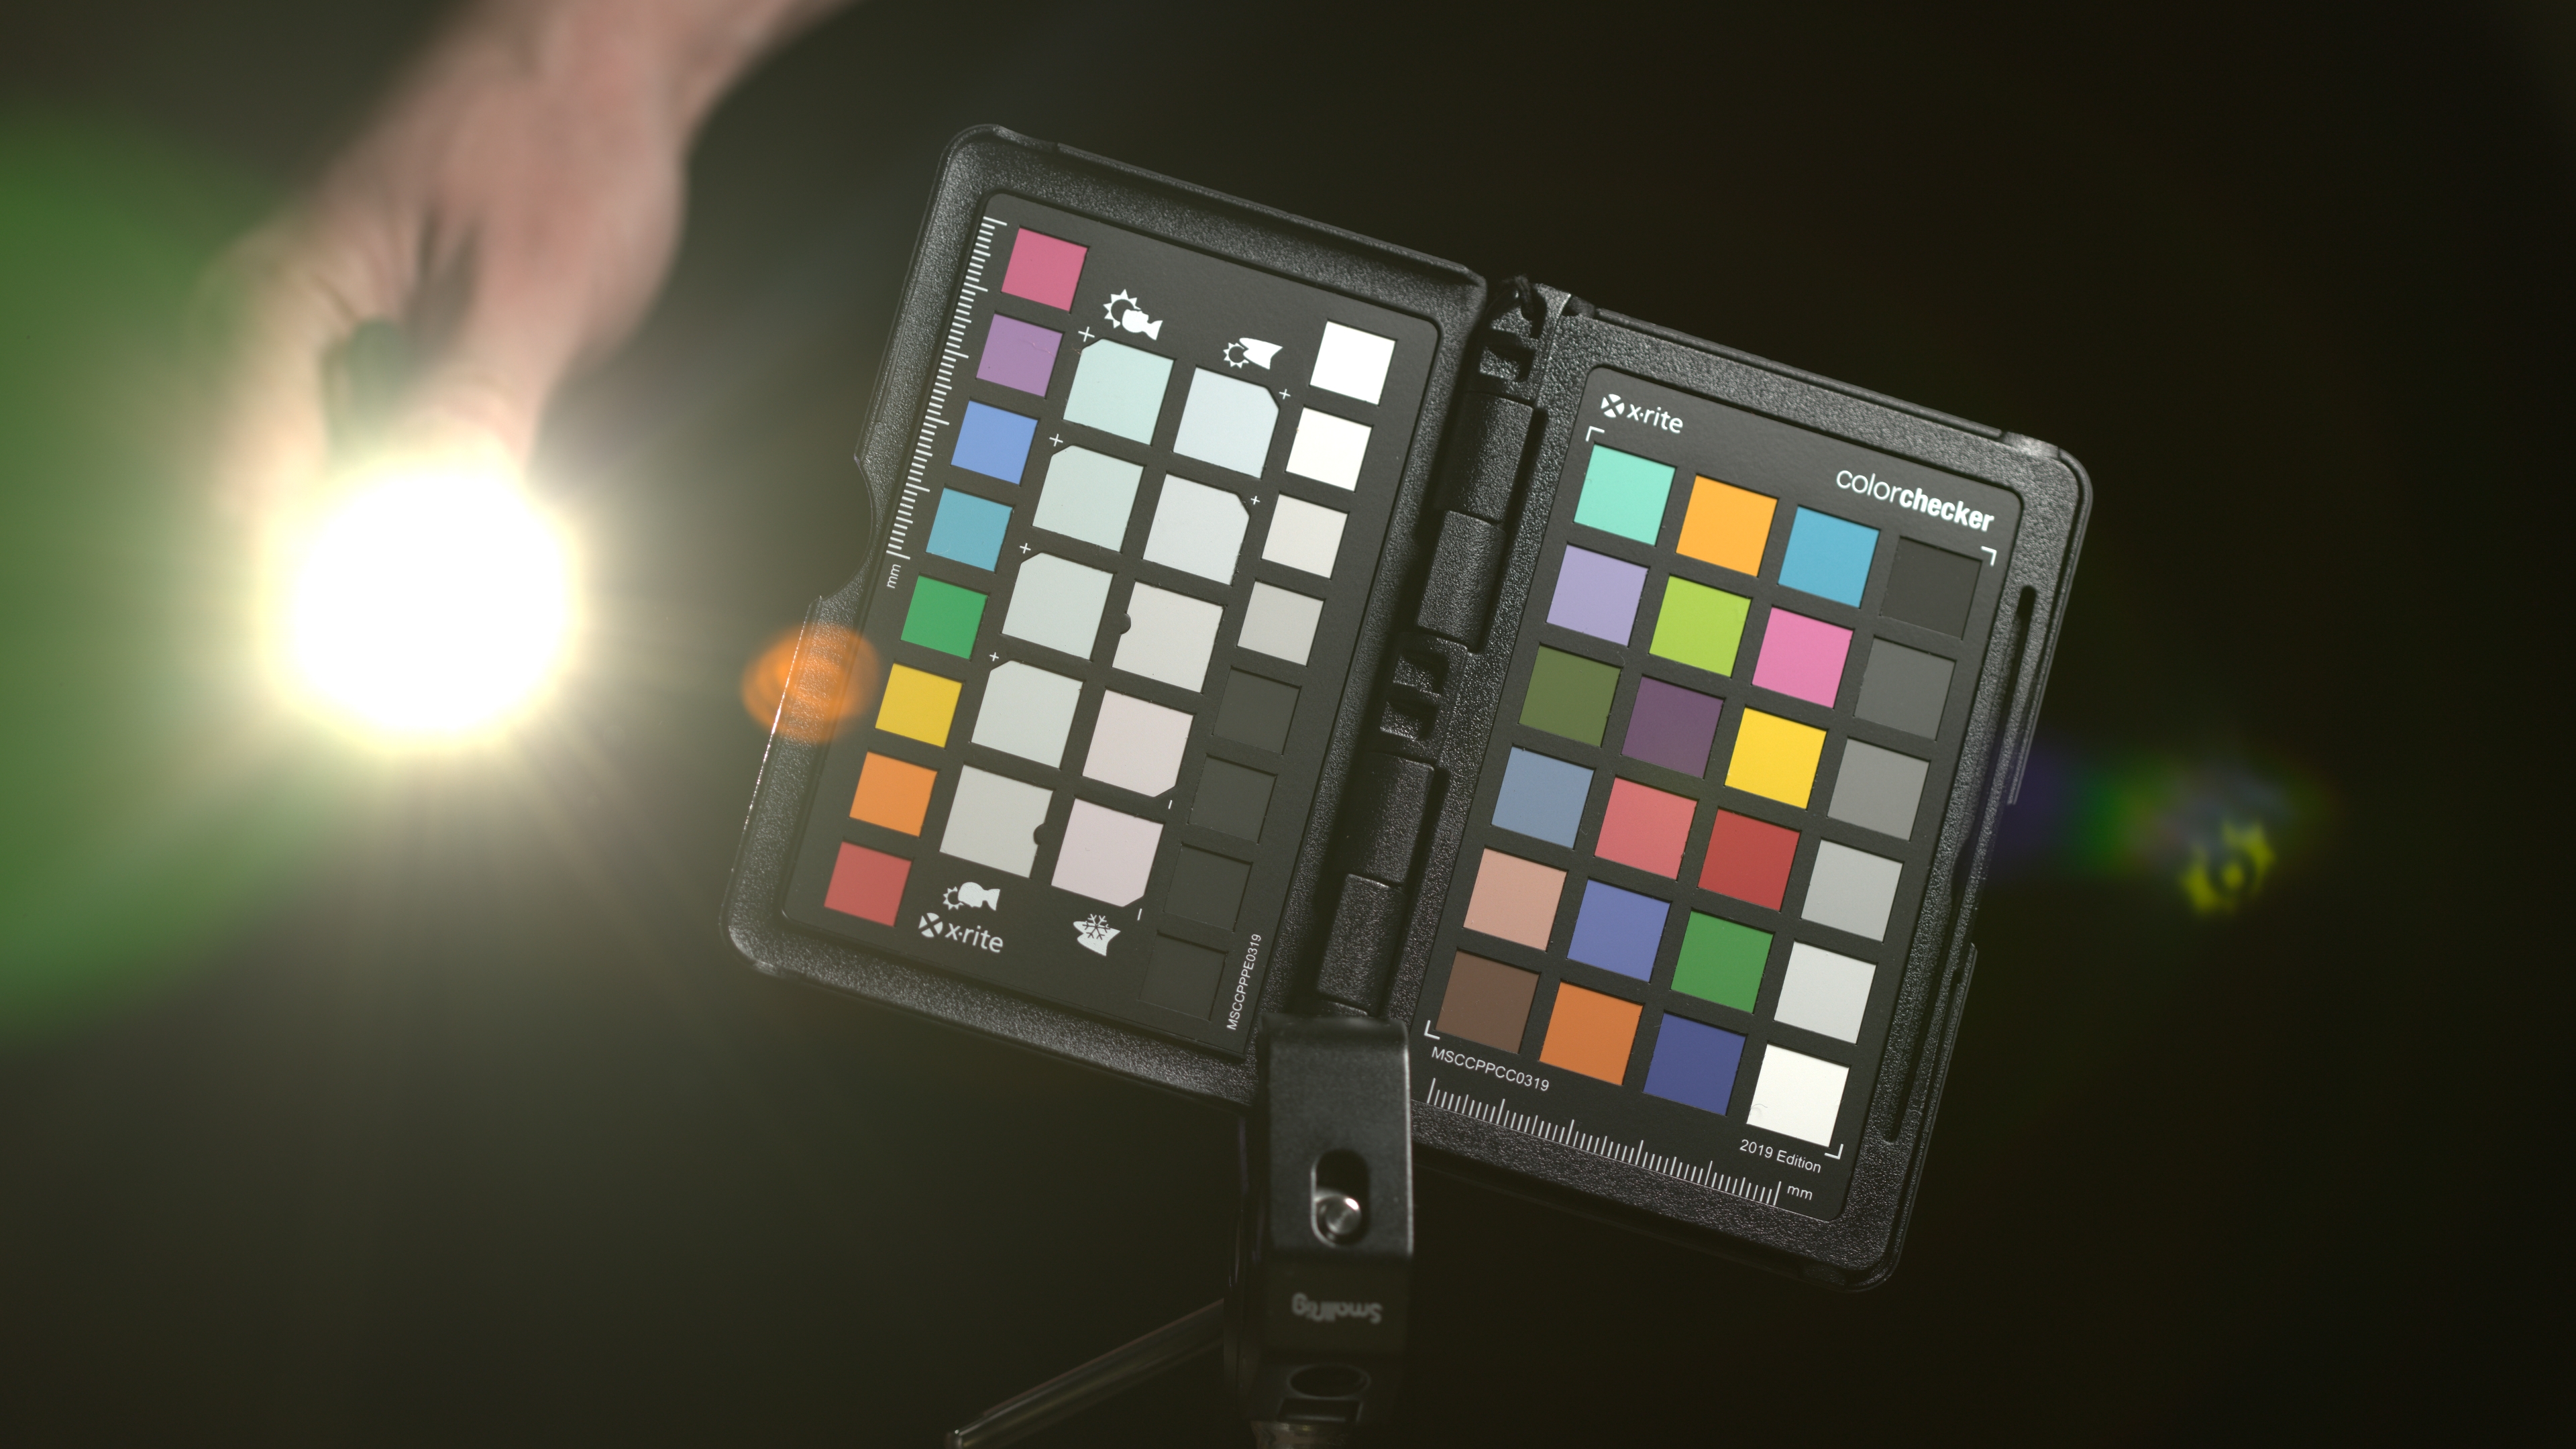
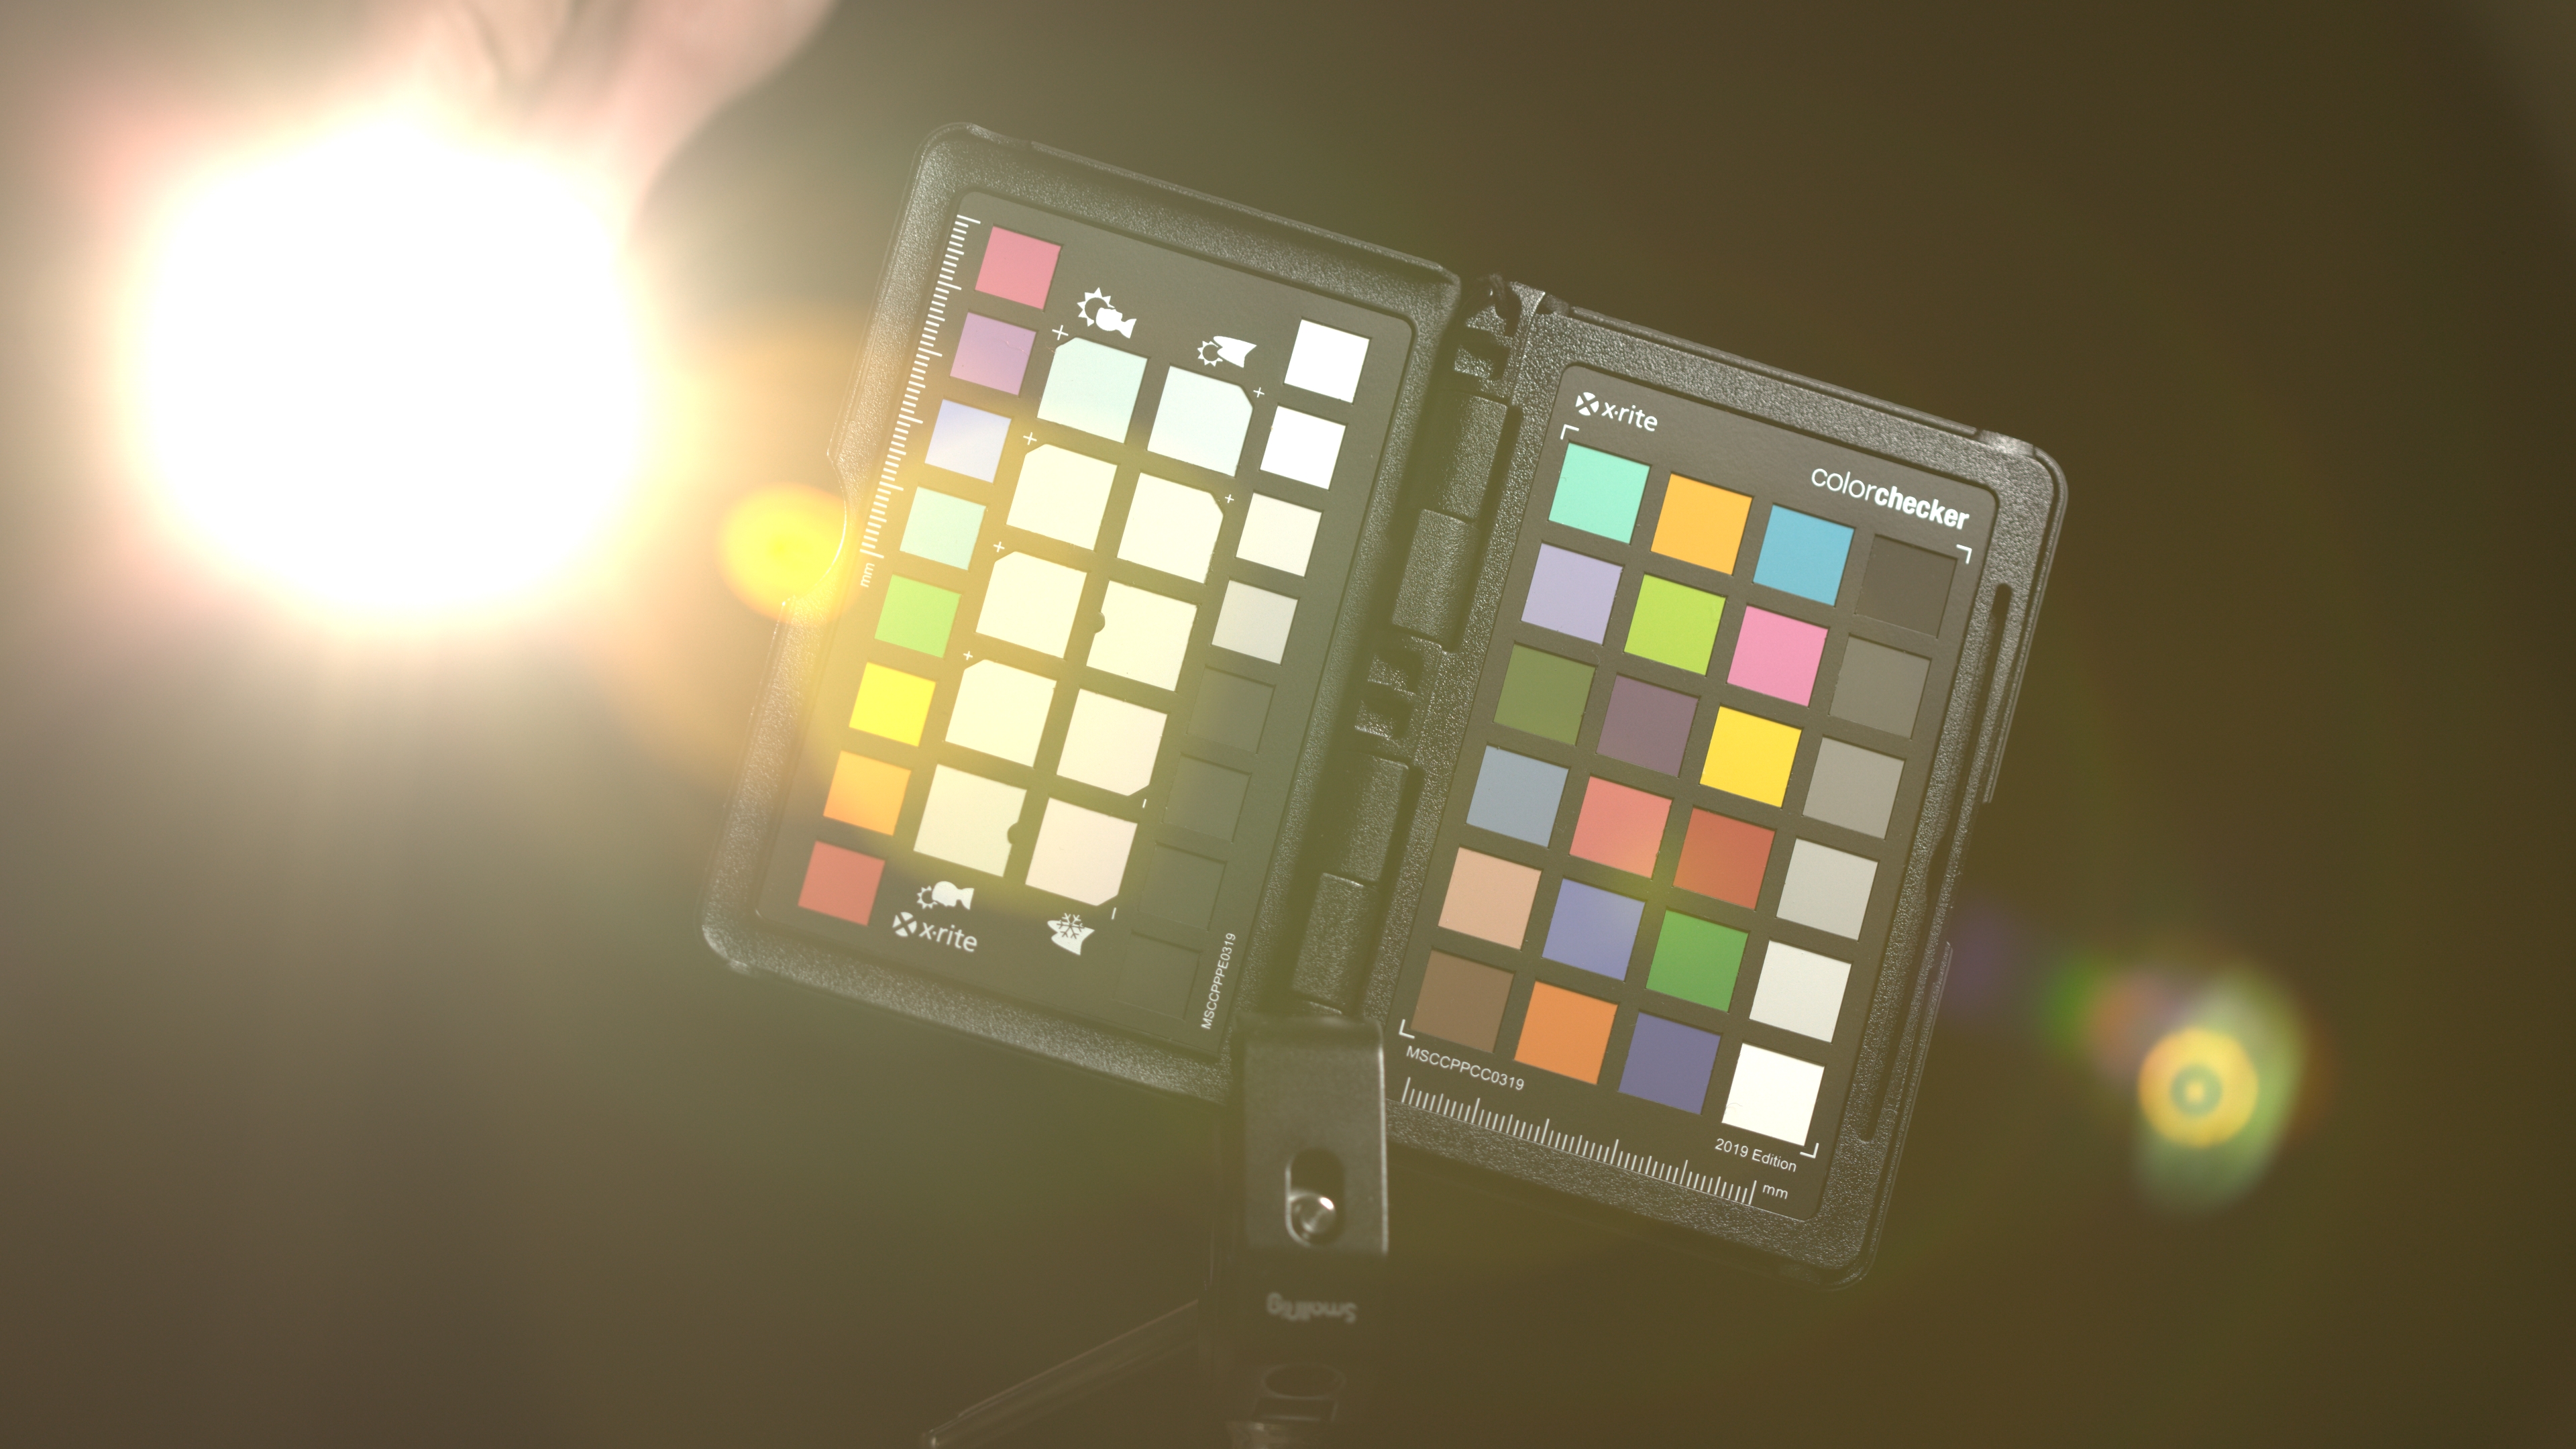
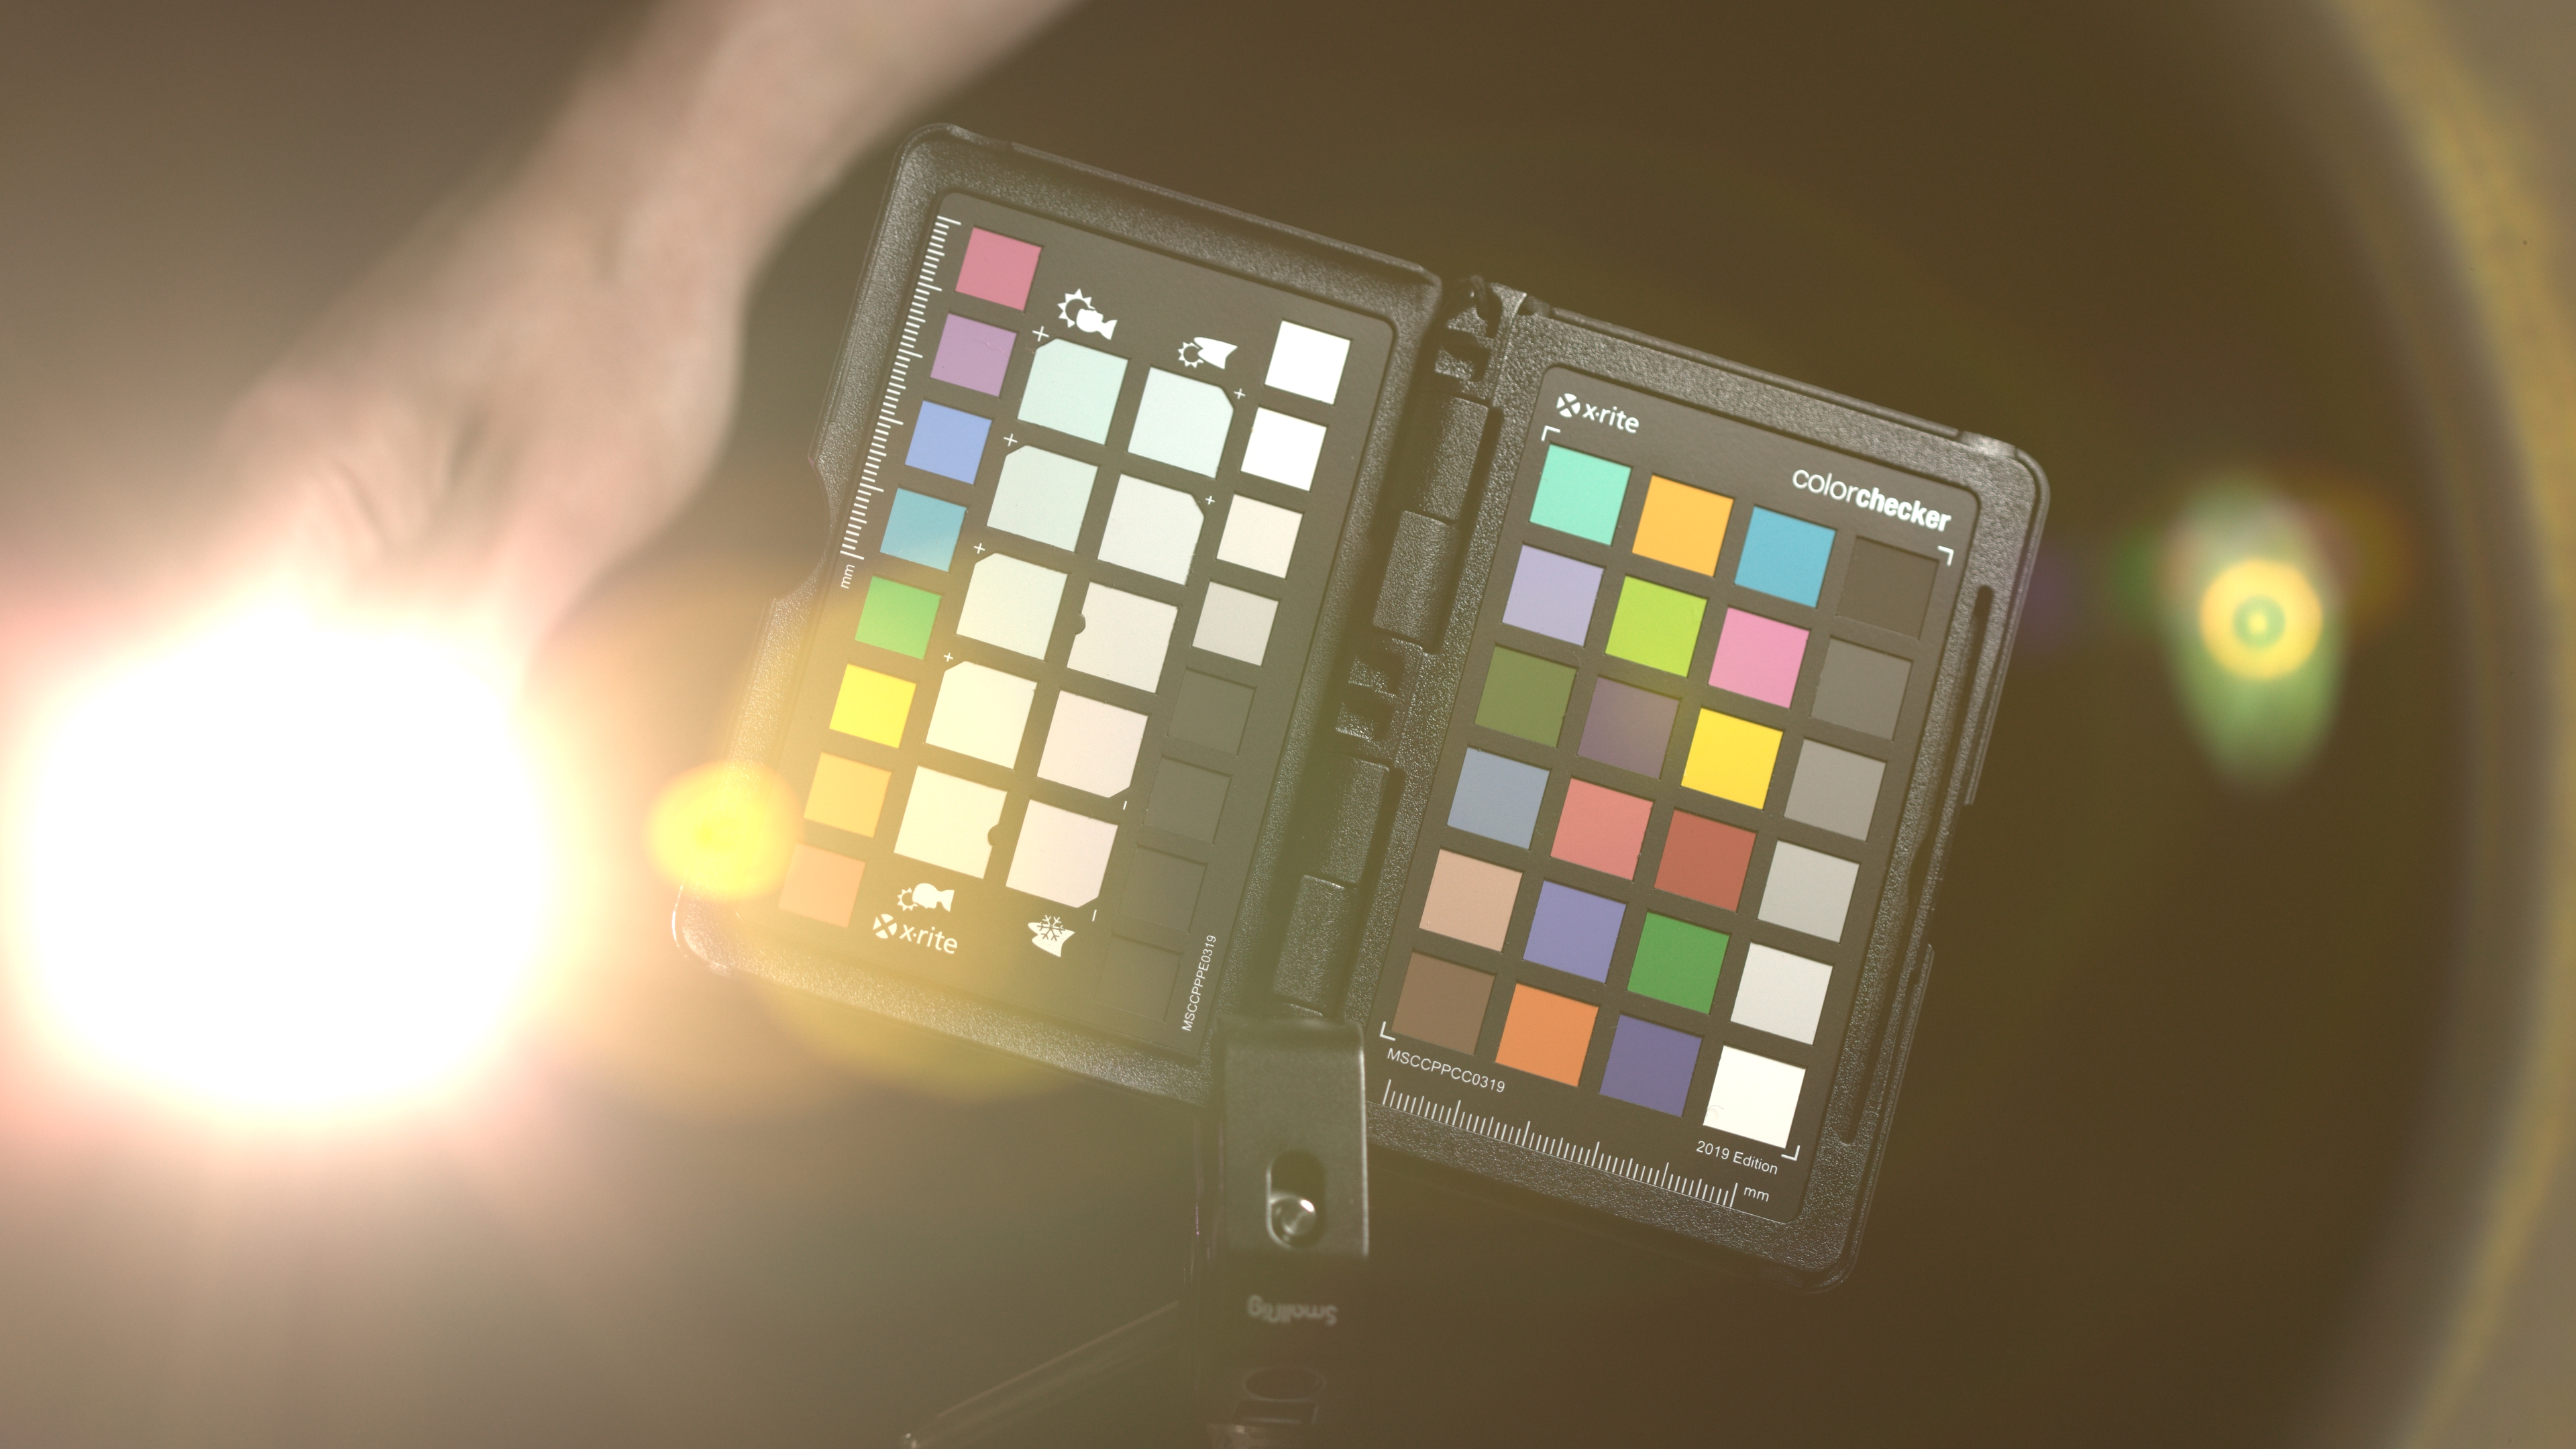
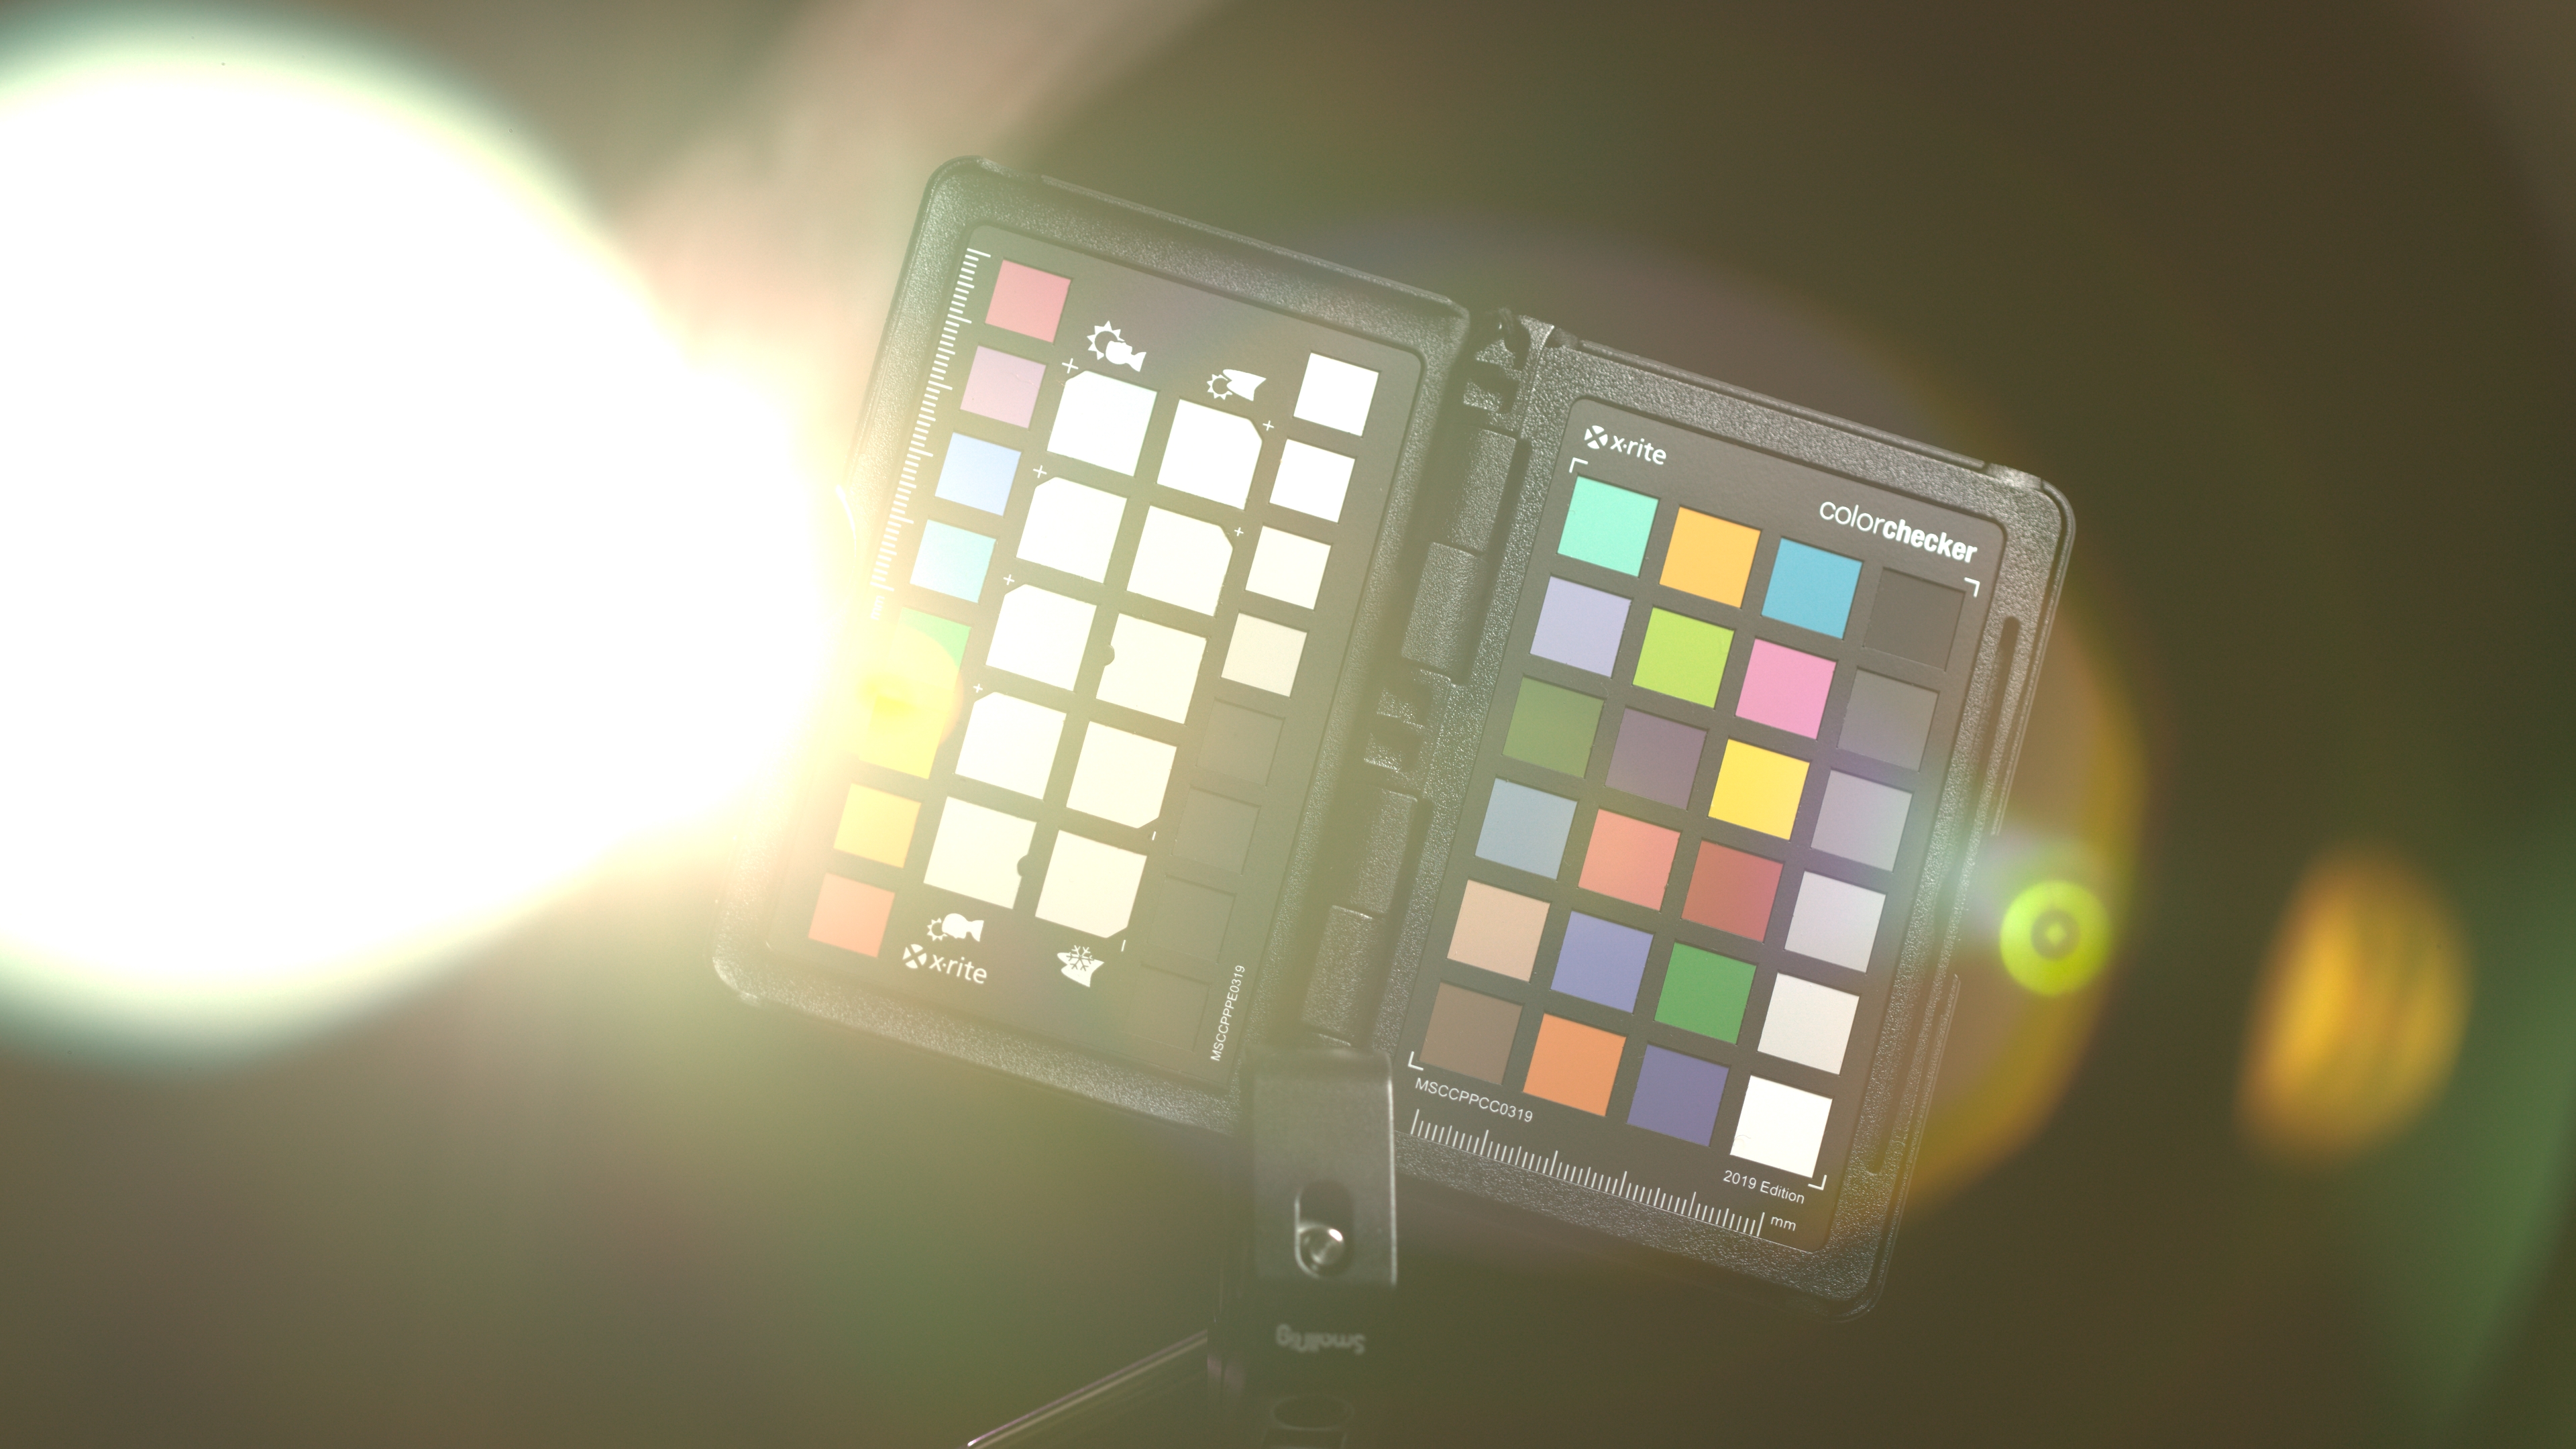
Flare tests
I wanted to test the filters to see if they introduced any lens flare. Unfortunately this test isn't actually that useful because the lens I'm testing with (the Canon 100mm/2.8 non-L macro) seems to flare quite easily without any filters. I did test a couple of other lenses as well, but they were even worse.
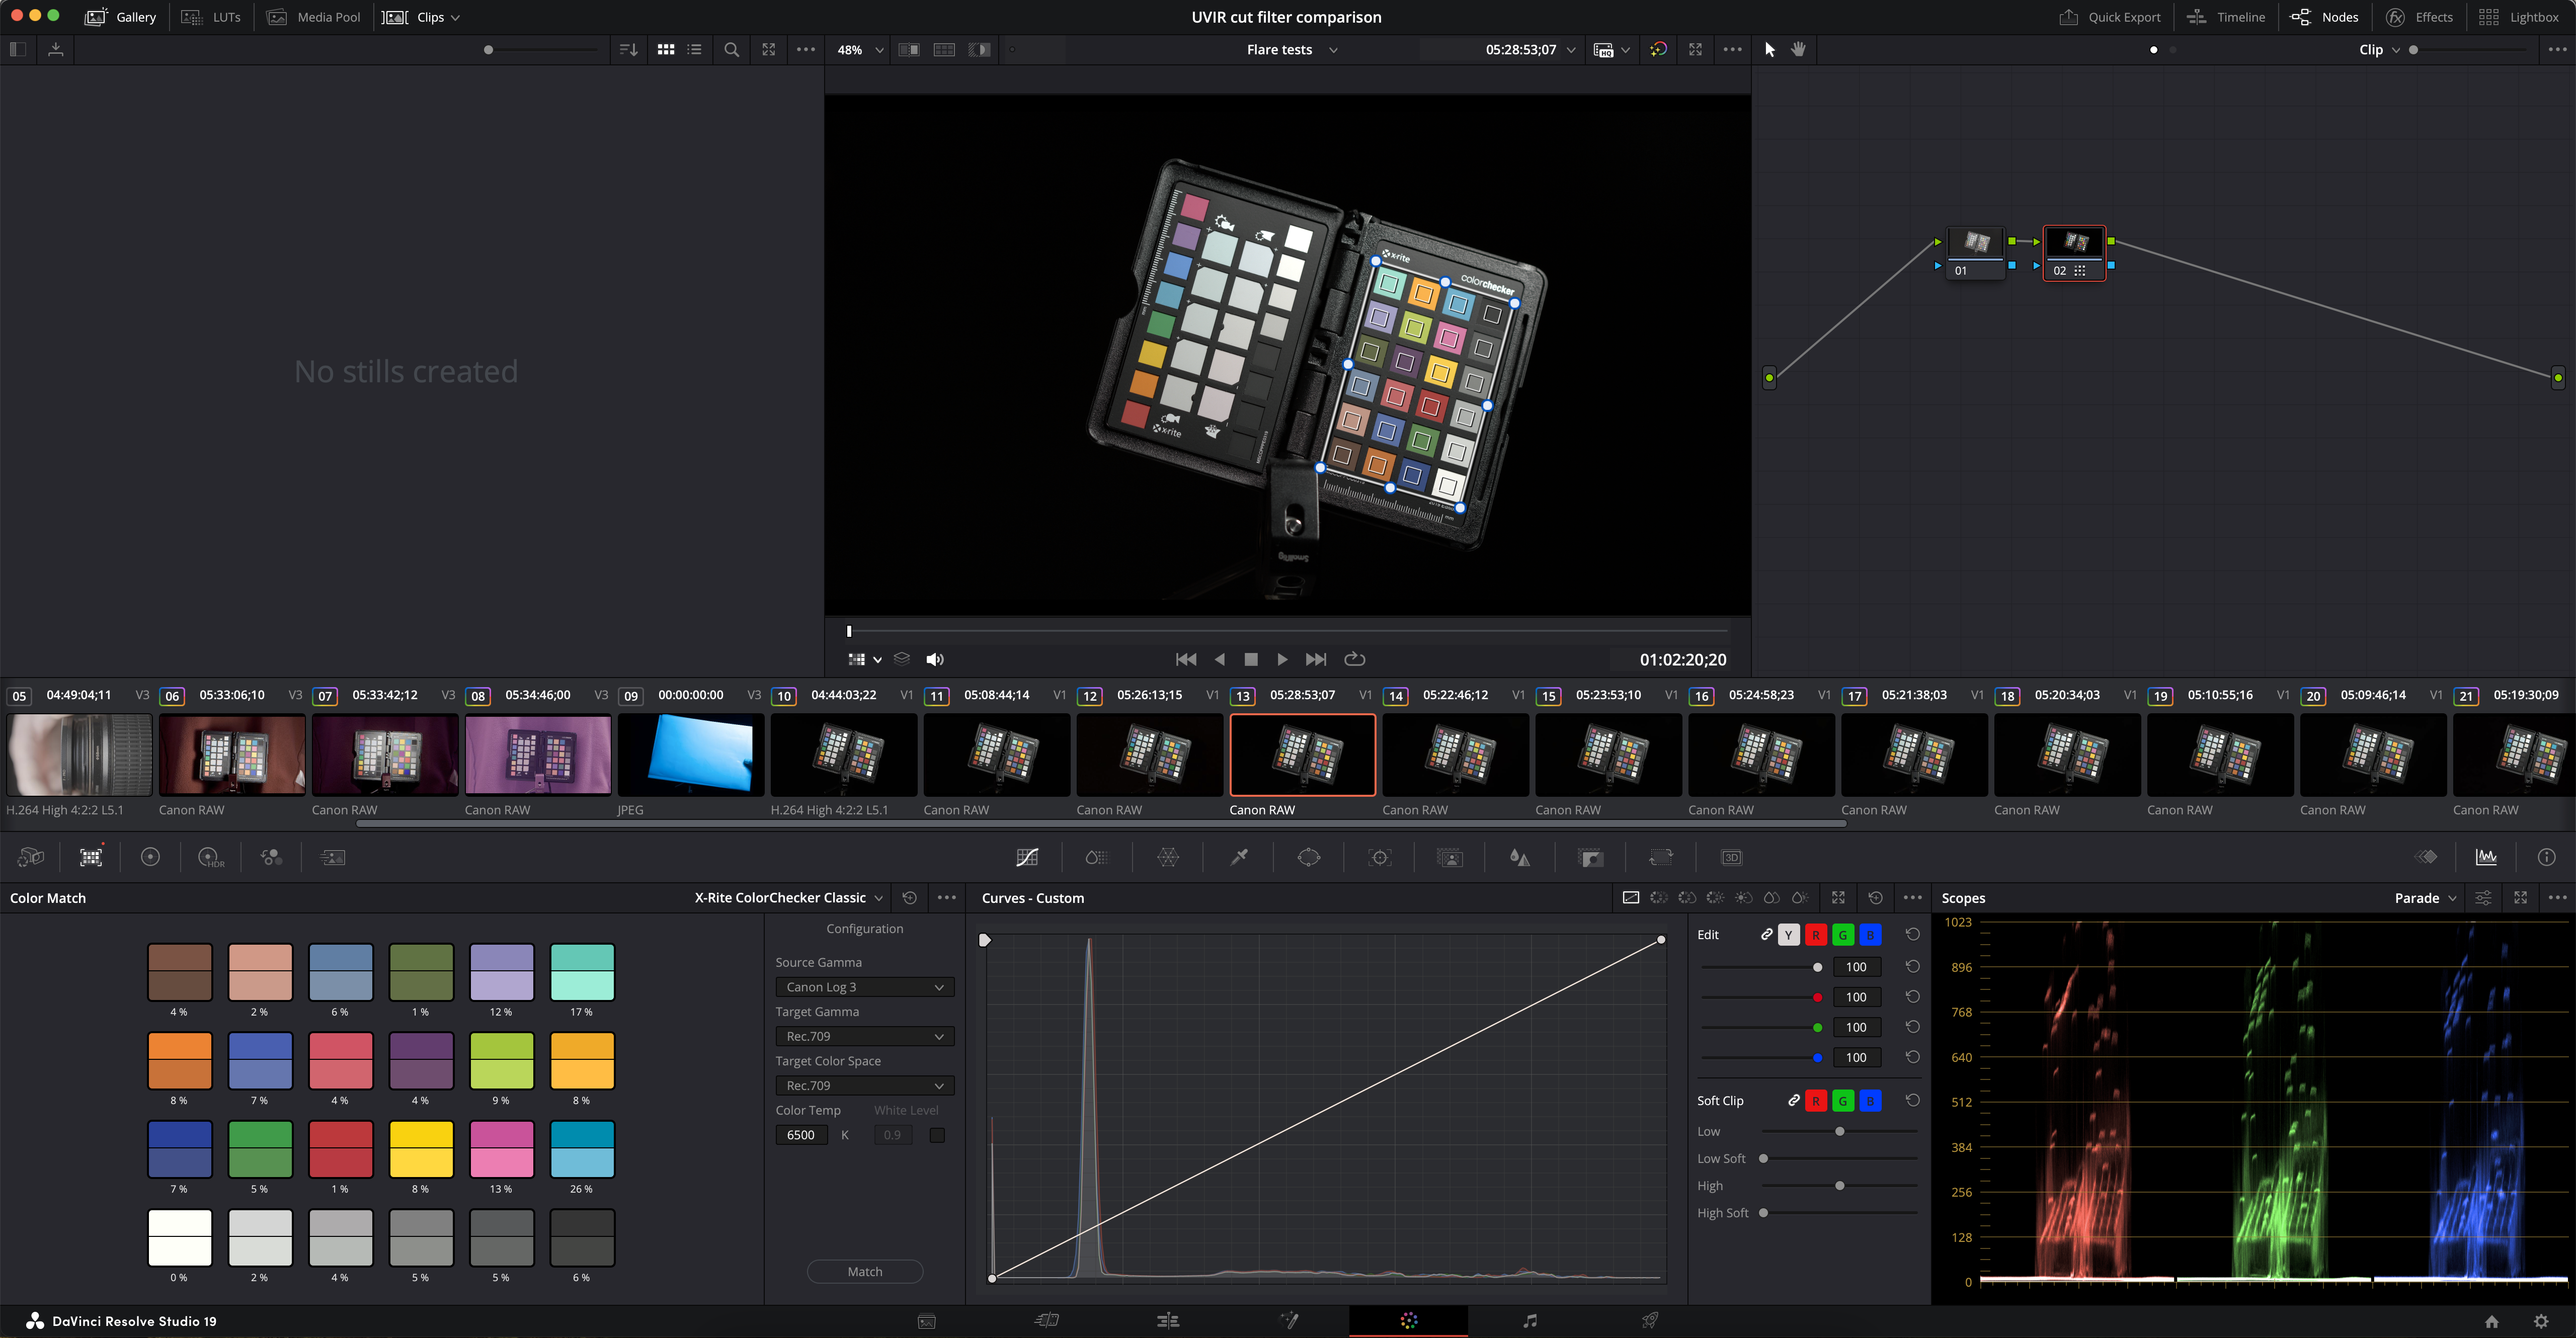
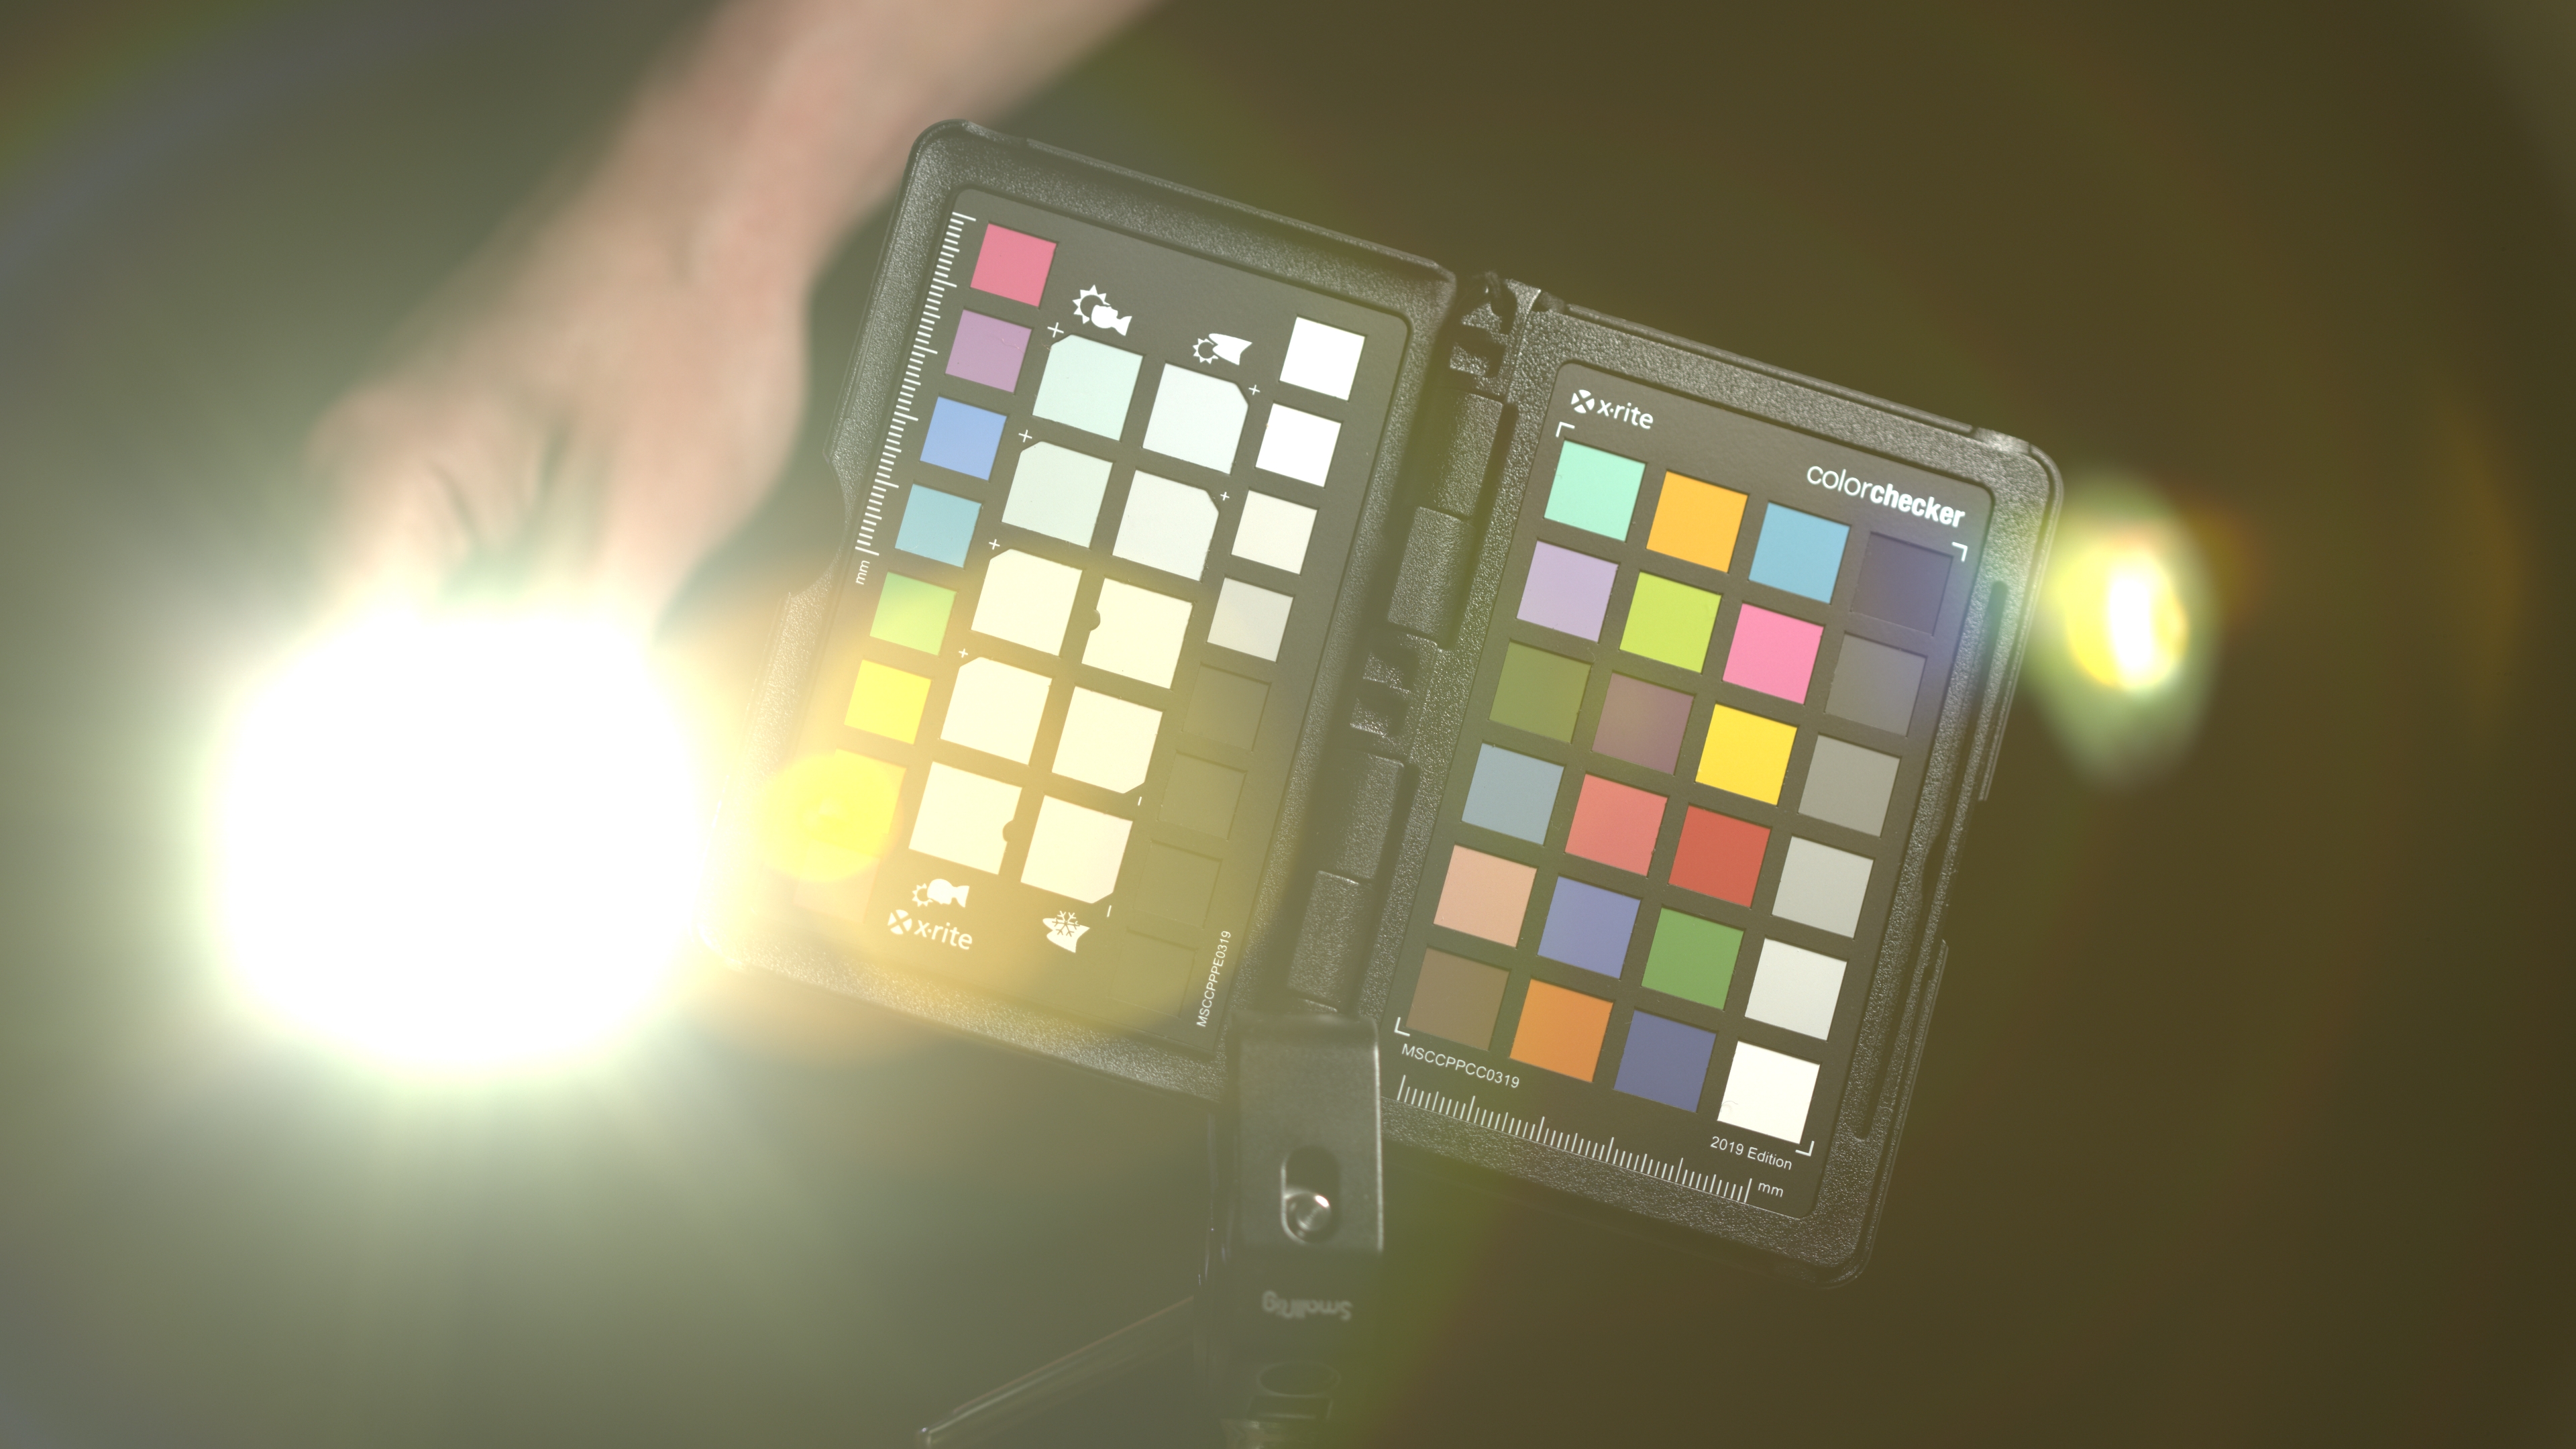
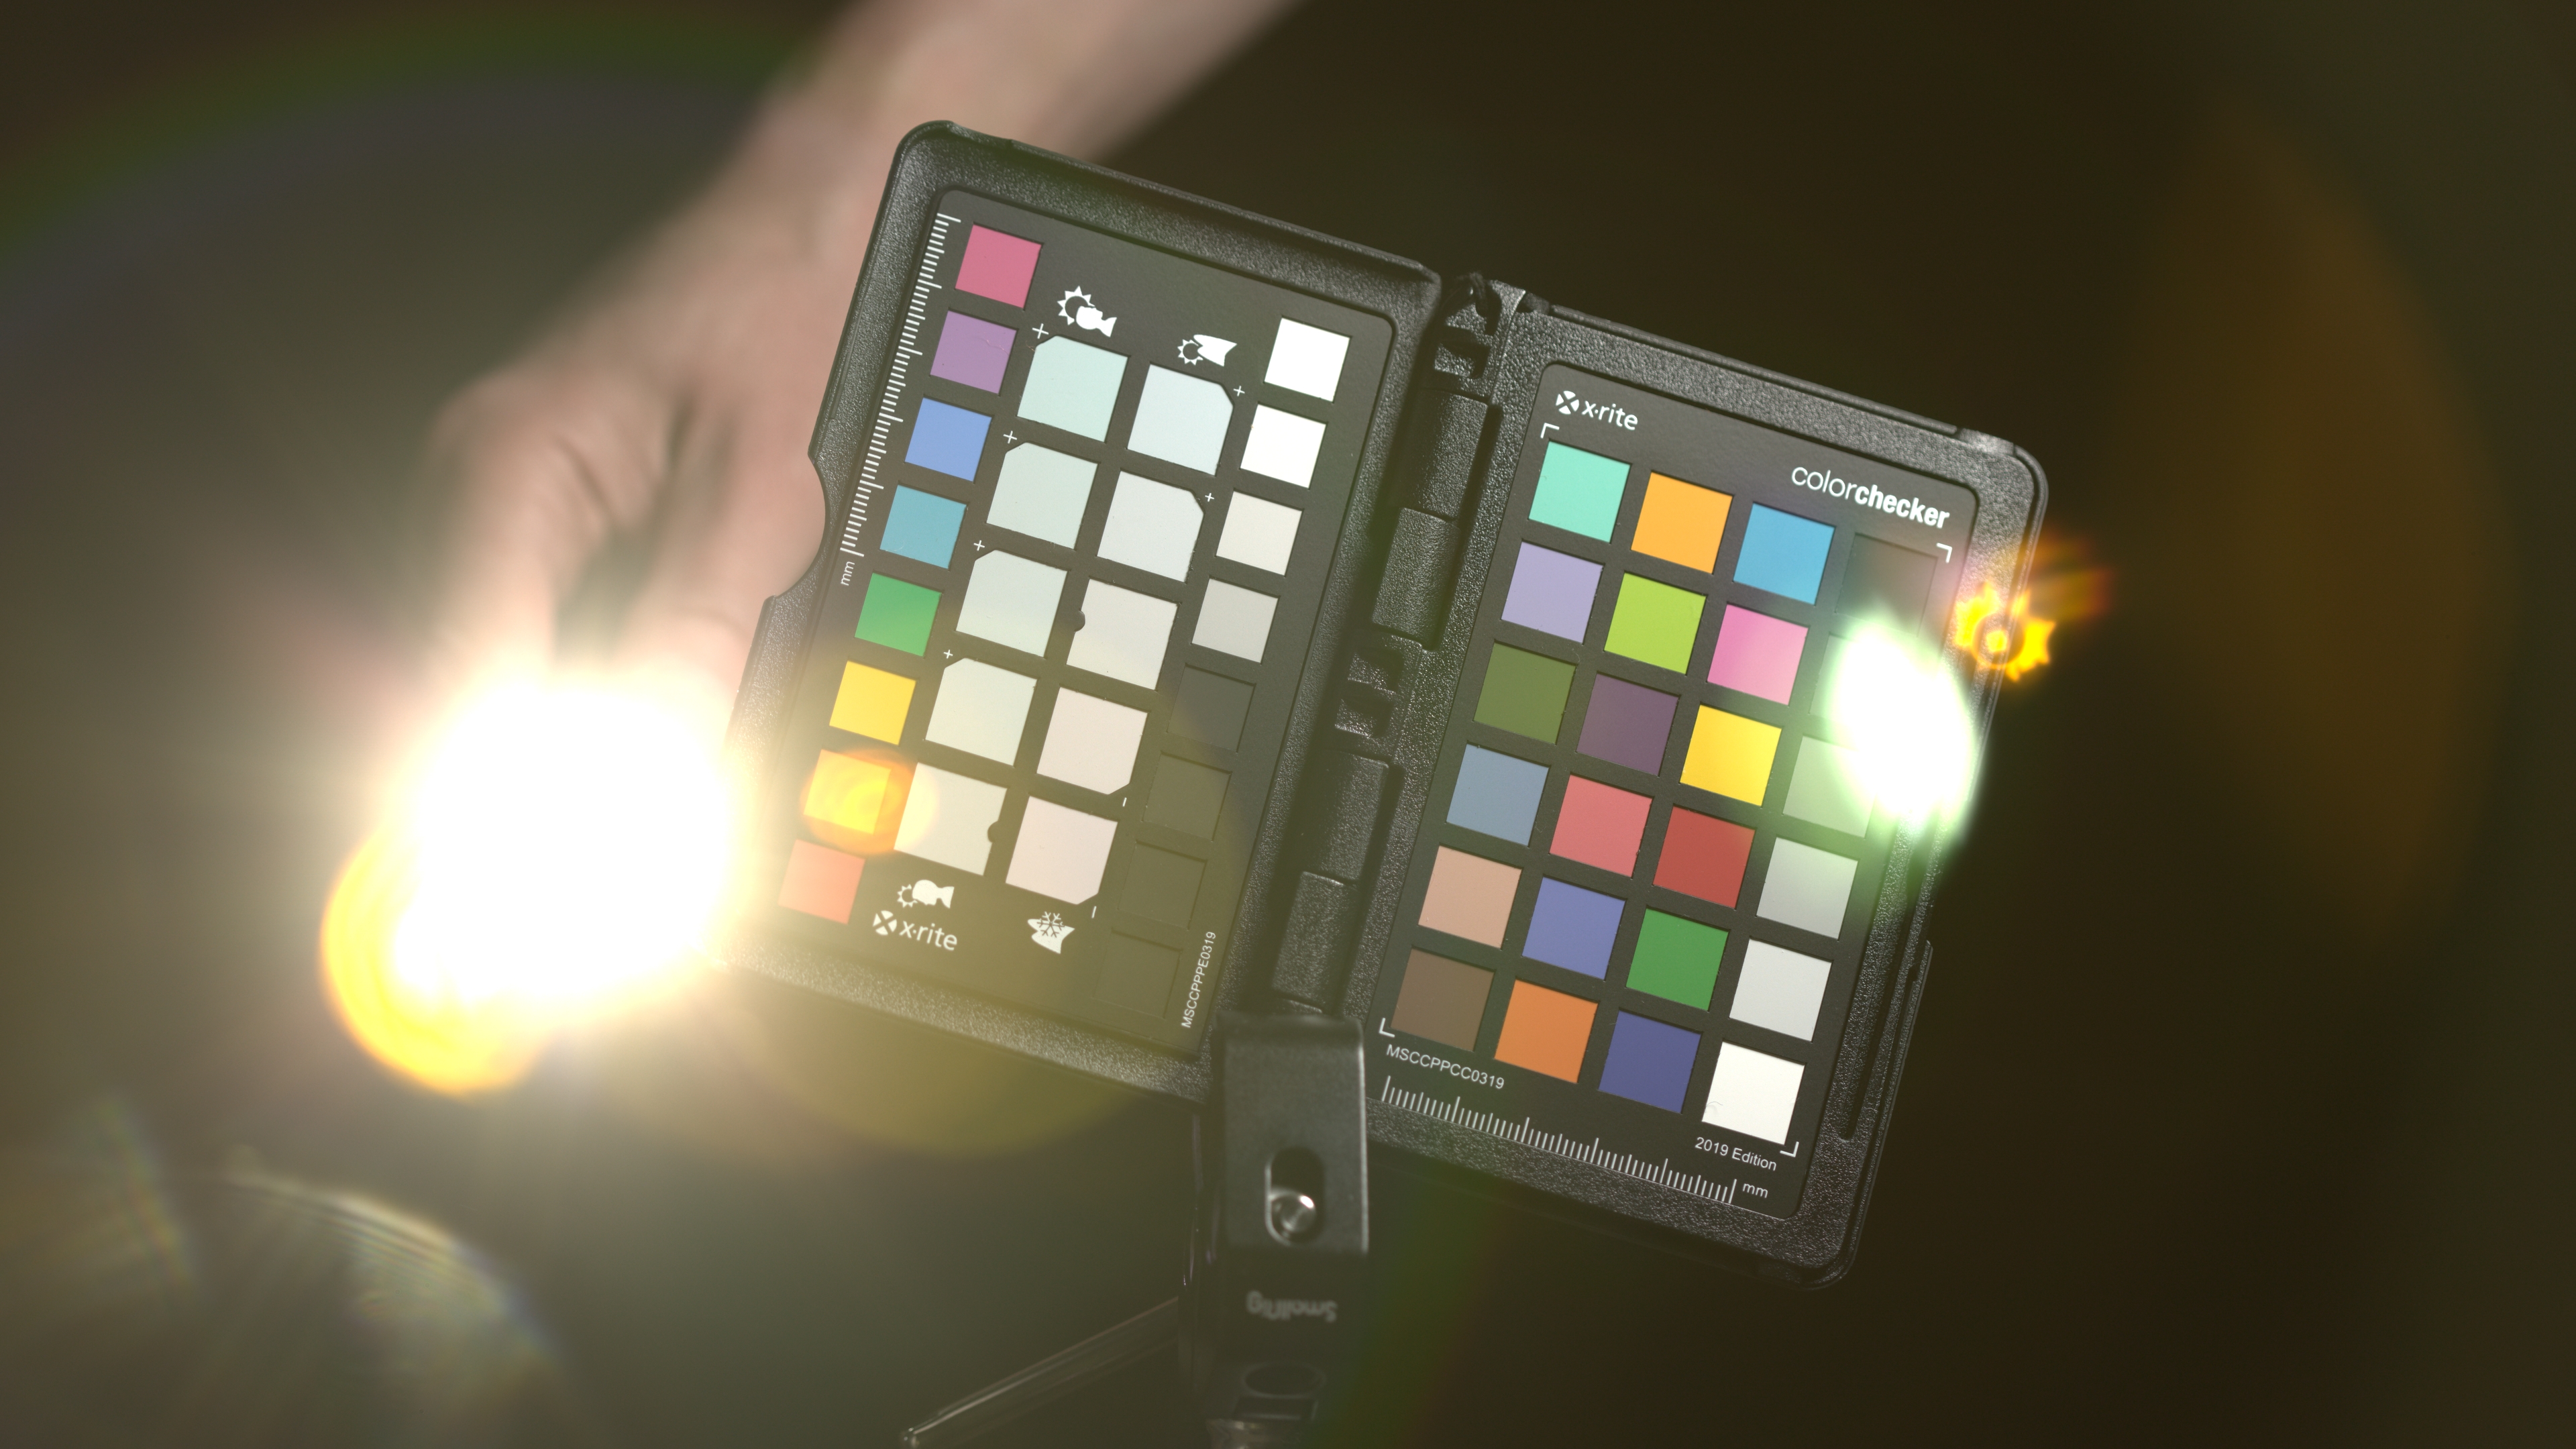
Anyway, I did the testing, so I'm including it here, but you might want to just skip this section. The flare was tested by moving a flashlight around the frame while recording video of a colour checker. I'm including stills below, but you'd be better off checking the video comparison.
The Canon 100mm non-L macro lens used for the test has a filter thread of 58mm. 49mm filters when used in front of lens were using a 58-49mm step down ring. Larger diameter filters used step-up rings.
The target was lit with an LED light that outputs some IR. The flashlight used to create the flare also seems to output IR, but less IR as a proportion of the total light output compared to sunlight.
White balance was set in camera using a sheet of white PTFE. Each clip was graded using the 'Color Match' tool in Davinci to try and match the Color Checker chips.
Unconverted Sony camera
With the unconverted Sony and no filters on the lens we see large amounts of veiling flare and some ghosting.
No filter / Full spectrum
With the converted Canon and no filters I would say the ghosting is a bit worse and more distracting.
TSN575
With the TSN575 the ghosting is worse. The red colour of the flare is caused by grading based on the color checker and Davinci's attempt to compensate for the lack of red light the TSN575 passes. It is not an actual trait of the filter itself.
Fotga UVIR Cut
The Fotga has similar style flare to no filter, but the flare is stronger.
If we use the 49mm size Fotga UVIR cut in a drop-in filter adapter behind the lens we get much worse ghosting.
B+W 486 UVIR Cut
The B+W 486 used in front of the lens I would say is pretty similar to the Fotga used in front of the lens. These are both dichroic filters, though B+W and Fotga will be using different coatings.
Tiffen Standard Hot Mirror
The Tiffen Hot Mirror I would say is similar to the B+W and Fotga, with a bit worse ghosting.
QB39 / BG39
The QB39 has even worse ghosting. It's important to note that my QB39 has a few chips around the edges and is housed in a 3D printed filter ring, both of which (especially the chipped glass) likely affect the flare.
Behind the lens the QB39 also gives bad results, and we see a large artifact around the light like we did with the Fotga when used as a drop-in filter.
QB40 / BG40
The QB40 has weird flare around the edges. Possibly the filter ring or retaining ring the glass is mounted in is causing this effect rather than the glass itself? Also note that my QB40 filter has corroded glass, which likely affects the flare.
When used in a drop in filter behind the lens, the flare is really terrible, like the other filters.
QB26 / BG18
QB26 is pretty similar to TSN575 in terms of the flare and the colour grading causing a red tint.
Again, behind the lens it is even worse.
Tangsinuo BCF
The Tangsinuo BCF seems quite good, relatively speaking. It appears this filter has some coatings that are helping it.
Behind the lens the BCF has the same issue as the others.
Tangsinuo ICF
The AR coated ICF filter does seem better than the uncoated filters, but still worse than no filter.
Behind the lens we get same problem of a large artifact around the light source.
QB21 / BG38 3mm thick
The 3mm thick QB21 is giving us especially bad flare around the edges of the image, just like we saw with the QB40. This glass is mounted in a similar way to the QB40 so it does appear this is caused by the filter ring or retaining ring rather than the actual filter glass.
Behind the lens we get the same problem as the other filters behind the lens. The odd flaring around the edges is much better than when used in front the lens. Probably because less angled light is going to be hitting the filter ring when it is behind the lens.
Corrosion
A brief note that uncoated filters are susceptible to corrosion, as has happened to my BG40.
I do use silica gel packs in with my filters, but they are not kept in a dry cabinet. I will probably try and clean it up with a soak in diluted hydrogen peroxide, but even if that does clear it, there's nothing to stop it coming back again, or the same problem occuring to the QB39 etc. filters.
Conclusion
The 1mm thick QB39 does indeed seem to be the best filter for getting standard visible light images from the full spectrum converted Canon R5.
I also like the Fotga UVIR cut and the deeper reds it gives even if it may not be technically as accurate. The Fotga is also unlikely to suffer from corrosion and is available fairly cheaply on Ali Express in a range of sizes. And importantly for me, with slim filter rings.
The QB39 is better for use on wide-angle lenses though. We saw the Fotga will work well in a drop-in filter adapter behind the lens on a wide-angle, but we also saw that lens flare can be really bad like this.
The QB40 and ICF are both decent as well.
The rest of the filters I would ignore in terms of visible light photography. As I mentioned previously, I used the B+W 486 myself for a long time and was happy with its performance. But based on these tests, there's no reason to buy or use that filter when there are several alternatives that perform better.
One last solution is simply to use a standard unconverted camera for visible light photography. In the past I have done this when on holiday, using an unconverted camera for normal photos and a converted one for infrared images with various filters. But for Vis-UV-IR flower comparison images I like to always just use the one full spectrum camera and the appropriate filters.
Leave a Reply