A color checker chart is often used in photography for critical colour applications like product photography. They are also useful in a more general sense just for white balance.
But for ultraviolet photography, using a color checker designed for visible light doesn't really work.

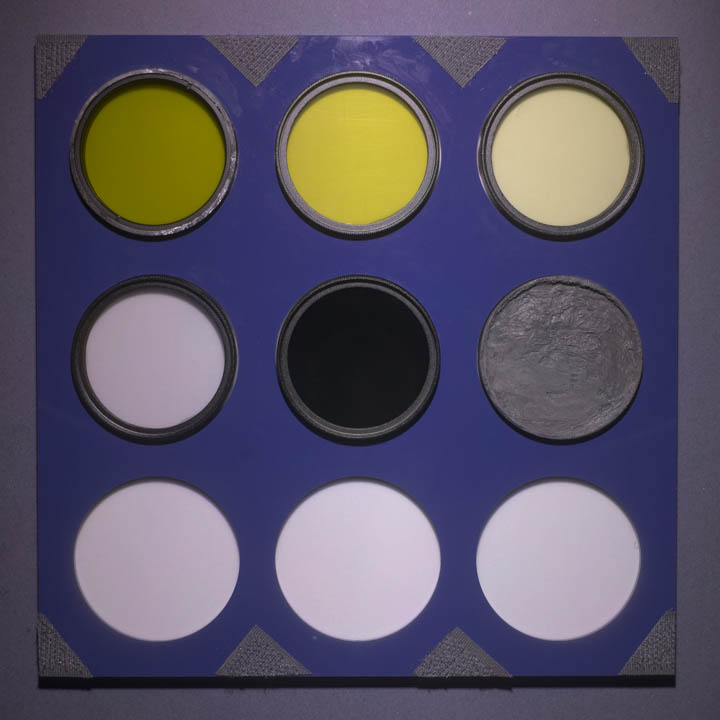
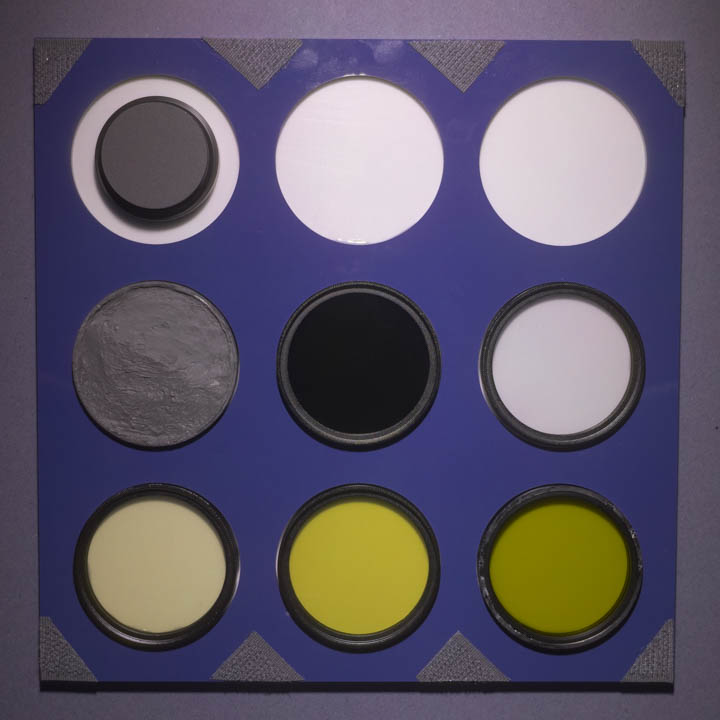
Comparison of a color checker in visible light (top) and ultraviolet (bottom).
So I decided to try and make a UV color checker that would be more suitable. I don't think this can be used for critical (false) colour like a real color checker. But it can be used as a simple way for comparing UV transmission of lenses, filters, etc.
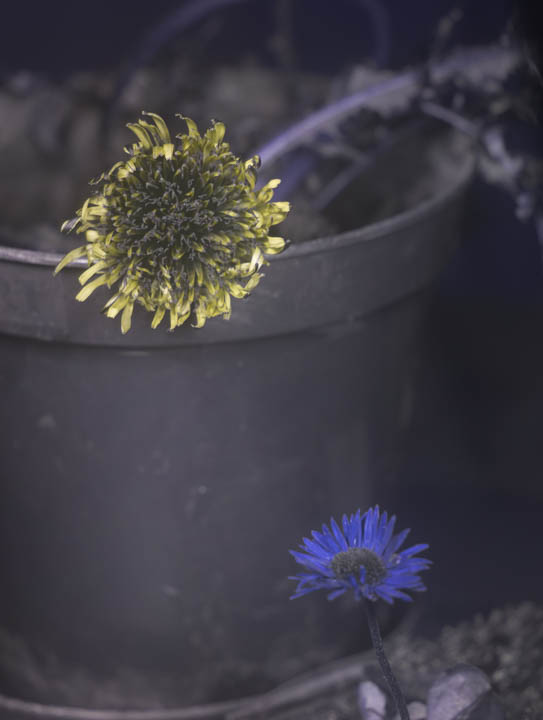
A good test for UV transmission is photographing a Common Dandelion (Taraxacum officinale) and a Common Daisy (Bellis perennis). When white balanced, the Dandelion should have yellow petals with a dark centre and the Daisy should have purple / blue petals with a dark centre. (Though the false colours may vary based on the camera being used, this is the case for most converted cameras).
So for a suitable UV test target we want to be able to have something that will match these colours. A lot of white plastics appear blue in UV, so that will work for a Daisy equivalent. And a UV pass filter when photographed in UV will appear yellow, so a cheap ZWB UV pass filter will work for our Dandelion equivalent.

A quick test shot of various UV pass filters (and a redhancer) to see how they showed up
A lot of UV pass filters also pass IR, and so we really need some way of checking for this. The simplest solution is using an IR pass filter as part of our UV color checker - if it does not appear black when photographed, then some IR is being passed.
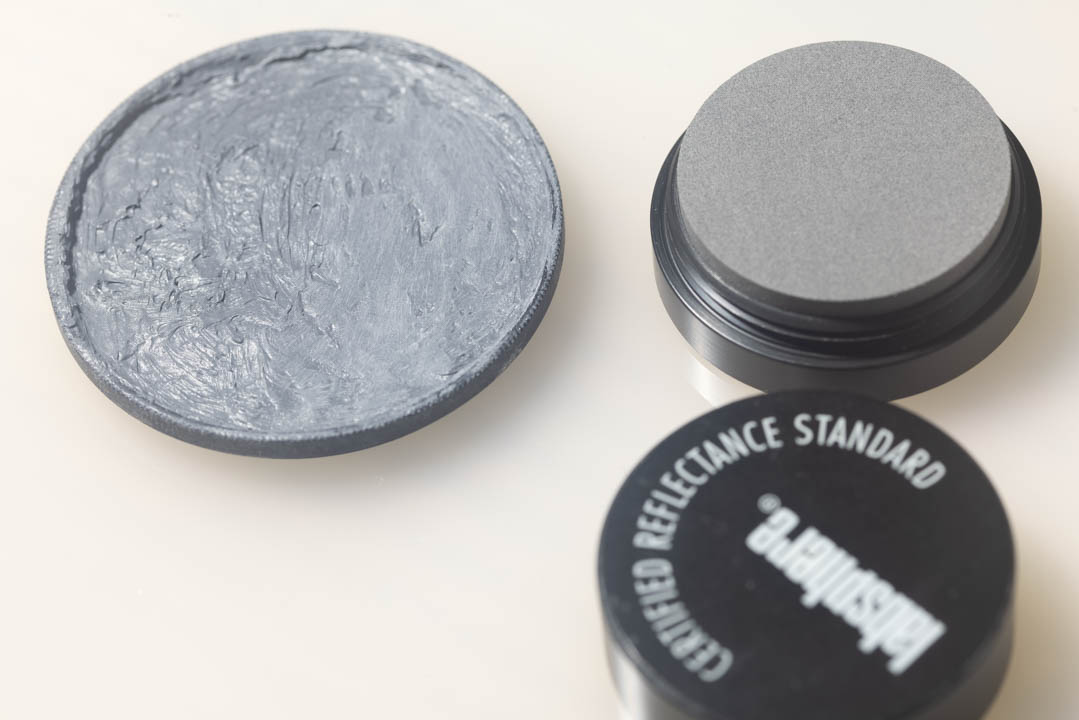
DIY Grey PTFE standard
Lastly we need some way of white balancing the image. PTFE is known for being neutral in UV, but we really need a grey PTFE standard. White PTFE will work for white balancing, but you need to be careful not to overexpose it to be able to obtain a white balance reading. A grey PTFE standard solves this issue as you'd need to severely over or under expose the image to make it not useable for white balance.
Unfortunately grey PTFE doesn't seem to be commercially available other than in the form of Labsphere Spectralon reflectance standards. While I do have a set of these, they are expensive (so I wouldn't want to lose or damage them) and don't really integrate with my 'vision' for a UV color checker due to their size.
My understanding was that the Labsphere standards are created using powdered PTFE and carbon, so I thought why not make a DIY standard using those materials. We also need some way of sticking the PTFE and carbon powder together that does not block UV. Canada balsam is an adhesive typically used to cement glass elements together in lenses (or at least it was), and is relatively UV transparent. Unfortunately I couldn't find anywhere that would sell this to me (in the UK), they all seemed to sell to educational / scientific instituions only. So how people are meant to repair old lenses with balsam separation in the UK, I don't know.
Anyway, you can get more modern alternatives to Canada Balsam that are designed as optical adhesives and pass UV. And sale of these is not restricted, just they are quite a bit more expensive. So I purchased Norland Optical Adhesive NOA 63 from Edmund Optics, which has good transmission from 320 - 3000 nm (according to Norland).
I also purchased 50 grams of 1 micron PTFE powder and 25 grams of activated charcoal powder.
PTFE powder

Carbon powder
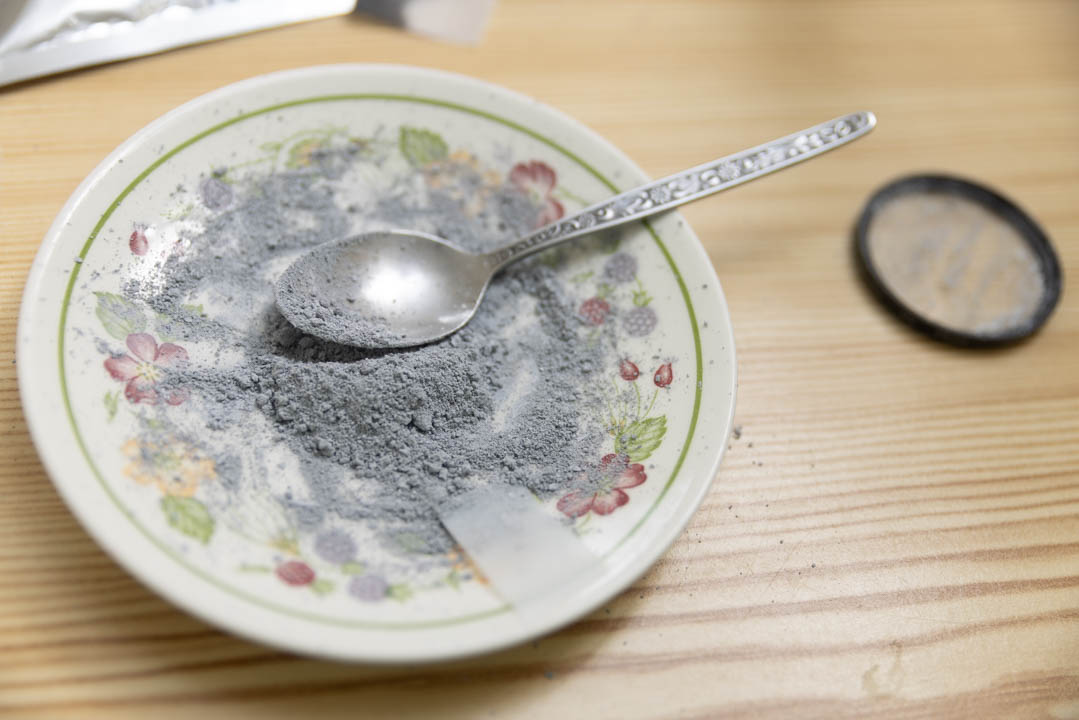
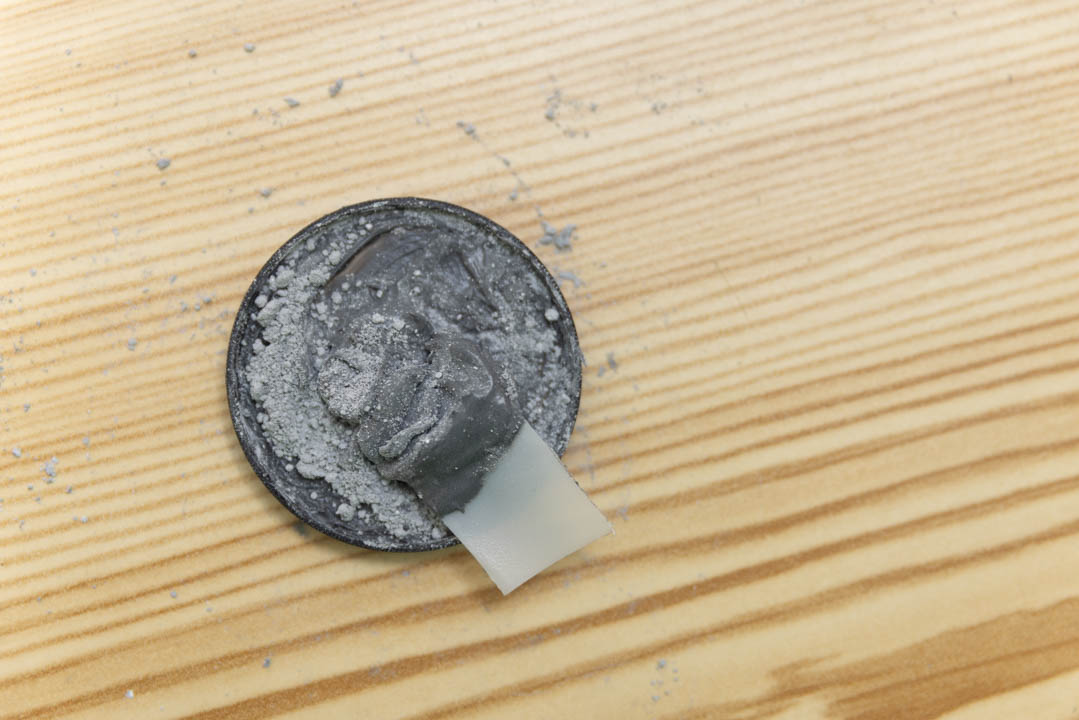
I put some of the PTFE powder and charcoal powder in a saucer and mixed them together to create a grey powder. I didn't measure the amounts, but it was probably something like a 5:1 ratio of PTFE to carbon powder. It is probably advisable to wear a mask when doing this (I didn't) as the powders are very fine.
Then I put some of this powder on a cheap 49mm UV filter and added the optical glue. I found I needed quite a bit of the glue and it took me quite a while to get the powder mixed in with the glue.
Once this was done I spread out the mix over the UV filter, though I couldn't find any way to create a smooth surface on the mix.
I shone a 365nm UV torch on the filter and tried to remove from the mix any bits of fluorescing dust or lint I could see.
It was then a case of leaving the filter in the sun for the UV to cure the adhesive. It did need several days to cure to a reasonable level. I assume this is mainly because the thickness was much greater than the extremely thin layer you would use when bonding lens elements together. And also because we didn't really have any bright sunny days, it was a mix of sun and clouds.
Once dried, as well as the surface not being smooth, I found it was quite reflective. So I sanded half of it to try and create a smoother and more matte surface. Possibly I may sand the whole thing down but half of it being smooth and matte is good enough for now.
Making the UV Color Checker
A color checker does not include just pure red, green, blue, and neutral patches, but a range. So I decided for my UV color checker to get a range of UV pass filters, that would hopefully have the same effect. So I purchased a ZWB1, ZWB2, ZWB3, and ZB2 filters in 49mm size. The idea in using 49mm size filters is that I can also use the filters for photography if I want, they aren't restricted to just being part of the color checker. For the IR 'patch' I purchased a 49mm size 700nm filter.
Ideally I would also have PTFE patches ranging from pure black to pure white. But I wasn't that happy with the cost, amount of work involved, and end result of my DIY grey standard, so I didn't venture any further in creating lighter or darker versions of it.
I purchased 3mm thick 20 cm square sheets of white perspex, translucent perspex, and PTFE. The white perspex sheet I had cut with 9 holes that would fit a 49mm filter. This was then glued to the PTFE sheet, so the PTFE was visible through the holes in the white perspex. The translucent perspex was to be attached to the front via velcro, to act as protection for the filters when not in use. And with the bonus that it can be removed and used as a shoot-through diffuser.
For mounting the filters in the Color Checker I needed a solution that would allow mounting the filters as close as possible to the PTFE backboard. If they stuck out too far, then my solution of attaching the front protective sheet via velcro wouldn't work.
Using a slim UV filter with the glass removed was too tall. Removing the rear threads of the filter was still too tall. Removing the rear of the filter until you started grinding away the central ring (that normally keeps the glass in place) was okay but still taller than ideal. Removing the middle part of the filter as well so you're left with just the front threads was best in terms of height but the resulting ring was very flimsy.
Cutting off the front threads of a 46 - 49 mm step up ring gave another ring that was great in terms of height, and also stronger than the slim filter front threads ring. However, the amount of time it took to cut this away with a dremel and the number of cutting disks I broke meant it was not worth it. So I ended up going with slim filter rings with the rear ground away until all the paint was removed from the back of the centre section. I used a bench grinder for this then finished off with quite a bit of filing.
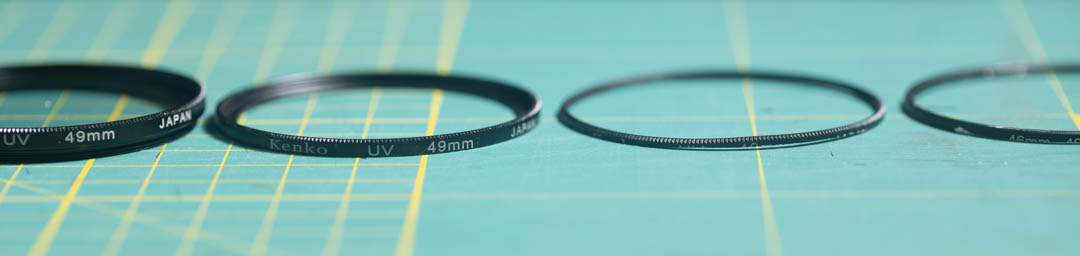
Left to right: Slim filter; Slim filter with rear shaved down to middle ring; Slim filter shaved down to front threads only; Front threads cut from 46-49mm step up ring
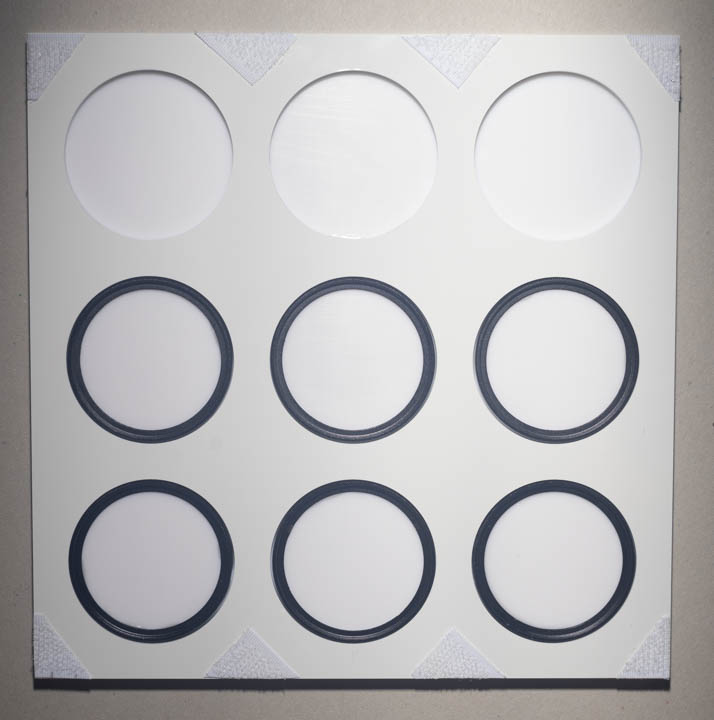
The filter mounting rings glued into the UV Color Checker

Filters screwed into the UV Color Checker
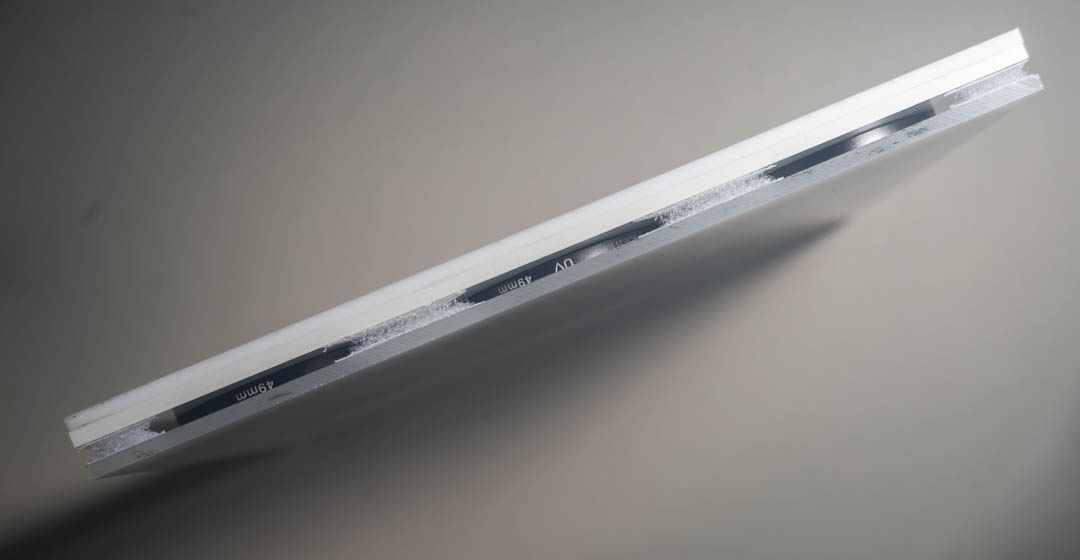
Side view of the UV Color Checker with the protective cover in place.
We do have three unused holes in the Color Checker. I don't have any plans for these currently, but at least I have the option of adding other filters or standards to the color checker in the future.
Testing the UV Color Checker
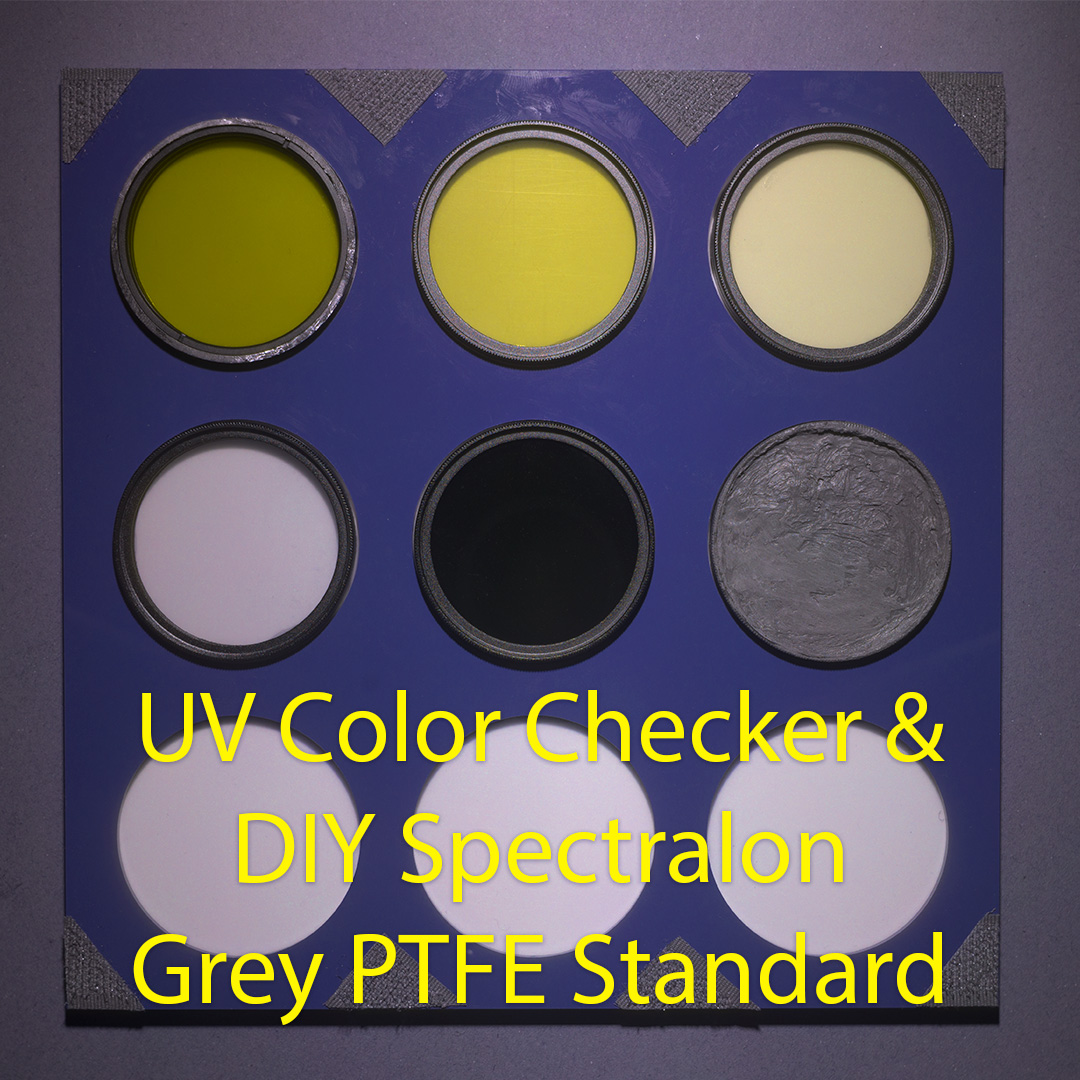
If we photograph the UV color checker with a good UV pass filter like the Baader U and a suitable lens (Noflexar 35mm/3.5), we can see (once white balanced) that the UV pass filters do appear yellow and the acrylic blue. We can also see the 700nm IR filter is black.
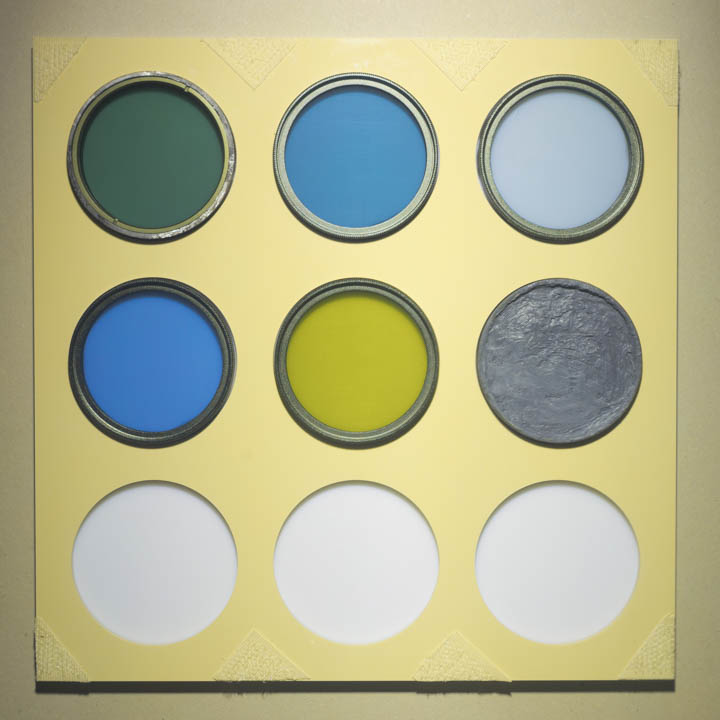
If we photograph it with a UV pass filter that also leaks IR, as well as the colours not being as expected, we can see the IR filter does not look black, indicating IR leakage.
Now, this is useful, but not perfect. Prior to having the UV Color Checker finished I had been testing a similar setup with a sheet of PTFE and the Baader U and an IR filter on it, and a sheet of acrylic plastic. When photographing this setup with the 2mm thick ZWB1 filter stacked with a 1mm QB39 filter on the lens, it showed an obvious IR leak. But when swapping the 1mm QB39 to a 2mm thick one, all looked good with no leak visible. But when I came to actually photograph flowers with this setup, I found that UV-dark flowers were appearing brown. Whether this was a visible light leak or IR leak I'm not sure, but it was not possible to see it in my UV Color Checker test photos, only in the actual flower photos.
Testing the Grey PTFE white balance standard
If we compare the DIY Spectralon standard against a real one we find that we don't get the same white balance values. Using the white balance tool on the real Spectralon gives us a different white balance value than setting the white balance on the DIY grey PTFE. And the sanded part of the DIY grey PTFE white balance standard gives a different white balance value than the unsanded part.
Testing with a UV photo (Baader U filter on the lens):
- Spectralon:
- 8000k -150 tint
- Sanded DIY:
- 8500k -150 tint
- Unsanded DIY:
- 8400k -150 tint
(Ideally should have below -150 tint but this is the minimum I can set in ACR even with a custom profile)
Testing with an IR photo (Zomei 720nm filter on the lens):
- Spectralon:
- 6700k -44 tint
- Sanded DIY:
- 6500k -44 tint
- Unsanded DIY:
- 6700k -43 tint
Testing with a visible light photo (QB39 filter on the lens):
- Spectralon:
- 7800k +14 tint
- Sanded DIY:
- 8300k +14 tint
- Unsanded DIY:
- 8600k +13 tint
I also found that when selecting different areas of the DIY standard you would see more variation in the white balance than you would when selecting different areas of the Labsphere Spectralon standard.
However, when we compare an image white balanced on the Spectralon against the same image white balanced on the DIY standard, I don't really see any noticeable difference.

White balanced on Labsphere Spectralon grey standard
White balanced on sanded part of DIY grey PTFE standard
The other thing to test was if the brightness of the DIY grey PTFE standard varied depending on the light wavelength in comparison to the Labsphere standard. My thought was that it should be relatively similar but maybe brighter in IR due to the carbon powder being made from organic material.
To test this I took three test images (one visible light, one IR, one UV) and white balanced on the Spectralon standard. I then used a 51x51 average color sampler to check the RGB values on the Spectralon and my DIY Grey PTFE standard.
Vis
- Spectralon:
- 108,108,108
- Sanded DIY:
- 114,116,119
- Unsanded DIY:
- 89,91,96
IR
- Spectralon:
- 71,71,71
- Sanded DIY:
- 71,70,69
- Unsanded DIY:
- 56,56,56
UV
- Spectralon:
- 60,56,59
- Sanded DIY:
- 69,65,69
- Unsanded DIY:
- 55,51,55
You can see from these that the DIY PTFE standard is actually darker in comparison to the Spectralon in IR than it is in visible and UV.
Conclusion
The DIY grey PTFE standard is not as good as a Labsphere Spectralon grey standard. The DIY solution is a lot cheaper, but still quite expensive to make, mainly down to the UV transparent adhesive. In my opinion making one of these is probably a waste of time and money. I would say you are better off just using white PTFE and reducing the expsoure on your white balance photos to avoid blowing out the PTFE (if it's too bright you won't be able to get an accurate white balance measurement).
It's a similar case for the UV color checker. I don't think you could really use it for making more accurate false colour UV images. It's useful for quickly testing lenses and filters for how well they transmit UV. But using some PTFE, white acrylic, a UV pass filter, and an IR pass filter (without sticking them together) would do the same job and be a lot cheaper and a lot less work.
Since I've gone to the effort and expense of making these tools, I will use them. But I wouldn't really suggest them as a good idea for others to copy.
Leave a Reply