Topaz Labs recently (December 2010) released version 3 of their masking program, Topaz Remask. I sometimes use Topaz Remask when merging together bracketed images to increase the dynamic range of an image, but Topaz Remask 2 wasn't very good at masking trees where the sky shows through gaps in the leaves. So I decided to test the new Topaz Remask 3, onOne Mask Pro, and Vertus Fluid Mask 3 to see how they compare at separating a tree from the sky.
All the plugins come with good documentation / online videos describing how to use them. However, I'm sure that a more experienced user could get much better results with each of the programs than I did in my test today. I also only tested each of the plugins on one image, so this is more of an initial quick look comparison than a proper test.
Topaz Remask 3
Topaz Remask 3 comes with new colour selection brushes that you can use to either add or remove from your mask based on the selected colour. This certainly helps in improving the mask compared to Remask 2, however the maximum brush size in Topaz Remask 3 is very small, and so brushing a large area takes a long time. And you need to re-brush each area for each colour that you want to keep or remove. So you can easily spend a very long time refining the mask.
And unfortunately, even with the new colour selection brush, I still found it very hard to get a good result with all the sky removed and all of the tree kept.
onOne Mask Pro
onOne Mask Pro features a colour selection technology similar to Topaz Remask 3, where you select what colour you want to keep and what colour you want to remove. The difference is that in onOne Mask Pro you can select multiple colours in one go. So you select all the colours you want to keep, and all the colours you want to remove, and then use the magic brush. This is much faster than having to brush each colour separately in Topaz Remask 3, and the brush can be made much larger in Mask Pro than in Topaz Remask as well.
The more colours you add to your keep and remove palettes in onOne Mask Pro, the more accurate the calculated mask will be. But it will also make the application much slower, so it is best to only select a few colours to keep and a few to remove unless your computer is particularly speedy.
I found that I could mask the tree much quicker and get a better result using onOne Mask Pro than I could using Topaz Remask 3.
Vertus Fluid Mask 3
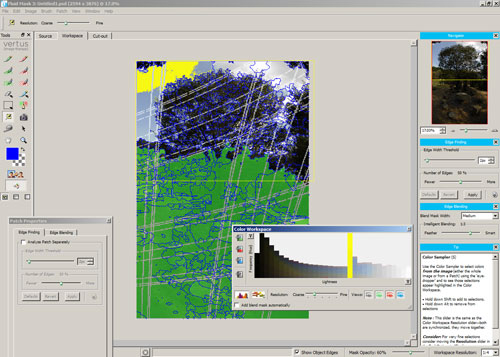
Vertus Fluid Mask 3 works quite differently to Topaz Remask and onOne Mask Pro. It automatically finds edges in the photo, splitting the photo into lots of little regions. You then paint (red to cut or green to keep) on a region to specify whether to keep it or not, and the whole of that region will automatically fill in.
It does also include a way of selecting colours to keep and cut, which can be done by either selecting colours from the colour workspace window, or by using a colour sampler on the image.
The main problem I had with Fluid Mask 3 is that it put large lines across the image that you couldn't paint in or out. I didn't manage to refine the mask as well as I did with onOne Mask Pro either.
Comparison photo
Here are the comparison photos of the photo I was working on. I have also included one using a photoshop luminosity mask (Ctrl+Alt+2 then create a layer mask). For this particular image I think the photoshop luminosity mask works best, or maybe no mask at all.
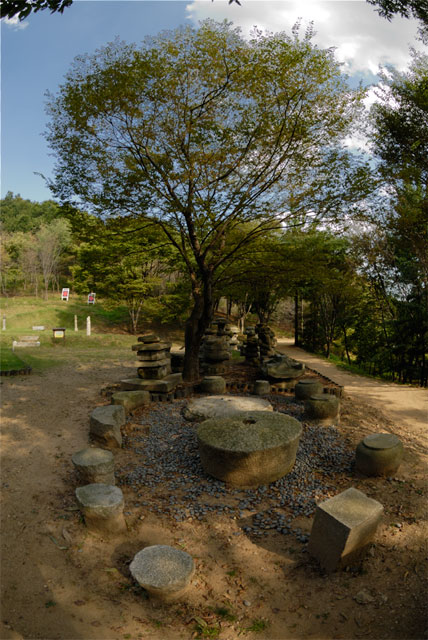
Topaz Remask 3
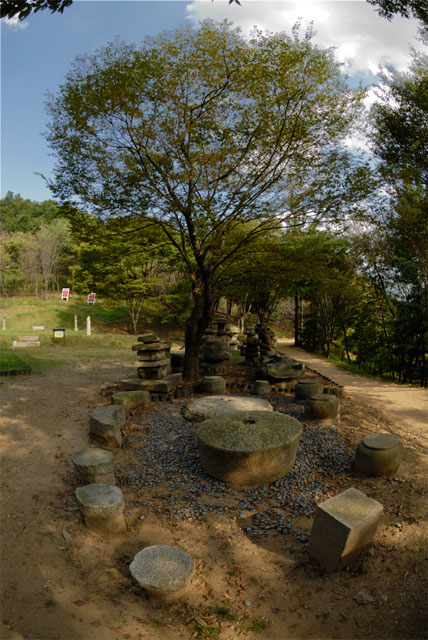
onOne Mask Pro
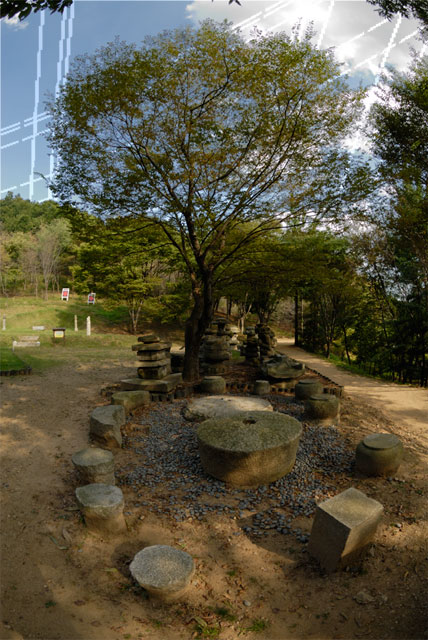
Vertus Fluid Mask 3
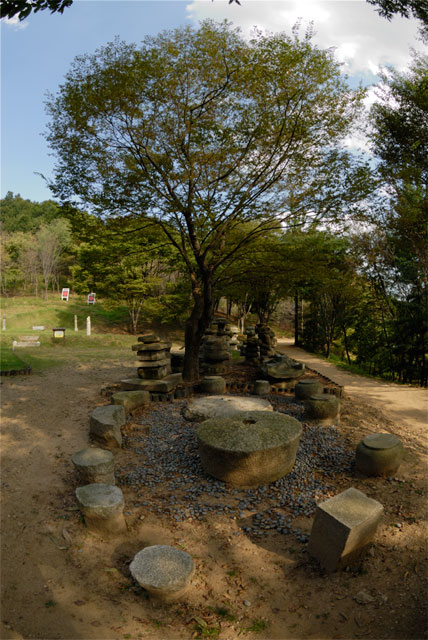
Photoshop Luminosity Mask
Crops:

Topaz Remask 3

onOne Mask Pro

Vertus Fluid Mask 3

Photoshop Luminosity Mask


Leave a Reply